
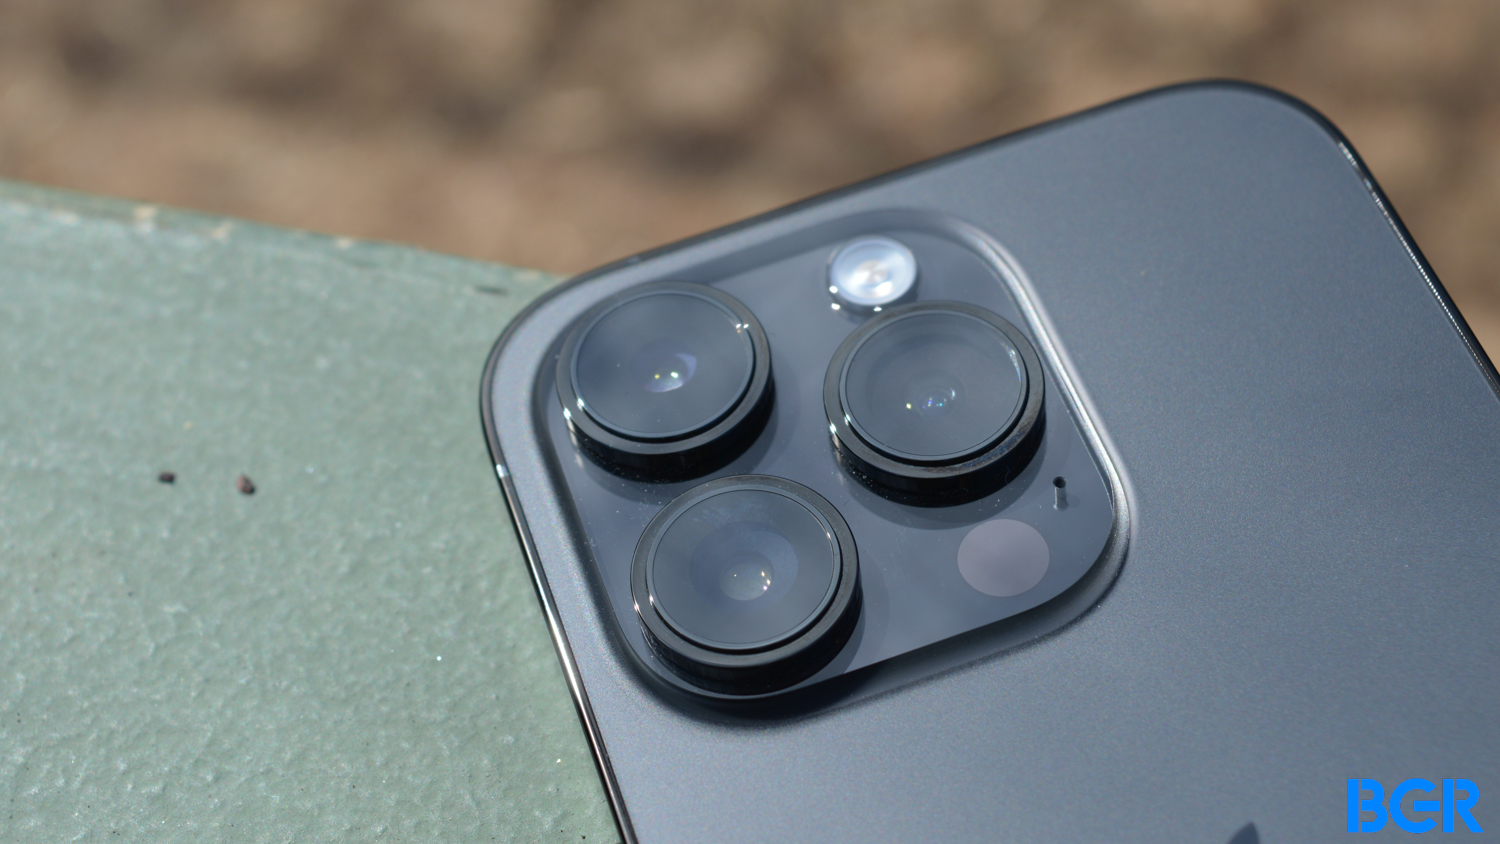
That iPhone in your pocket is also a powerful camera that lets you take amazing photos and videos. That’s especially true if the phone happens to be a flagship model. Camera performance is an increasingly important selling point for new smartphones, and that’s where Apple, Google, Samsung, and others battle each other for supremacy. In what follows, we’ll explore a few iPhone camera settings that should help you take better photos.
It’s not just the megapixels, the machine learning algorithms, and the newest sensors that will help you capture amazing content. The person who wields the camera must also know the best way to capture those special moments and make the most of the hardware. That’s where the camera settings will help.
The iPhone camera’s Grid is your friend
One of the most important things you need to do to capture great photos is to frame the subject correctly. Some people already know how to do this, but if you want to improve your game, then the iPhone’s Grid can help.
Head over to the Settings section, where you can find most of the iPhone camera settings we’ll mention in this post.
Scroll to the Camera menu, which is buried several screens down. That’s certainly a strange placement, considering how important the iPhone camera experience is for Apple. But you’ll need to locate the menu to enable the Grid in the Composition section.
The vertical and horizontal lines will help you line up your subjects and make the most of your photos.
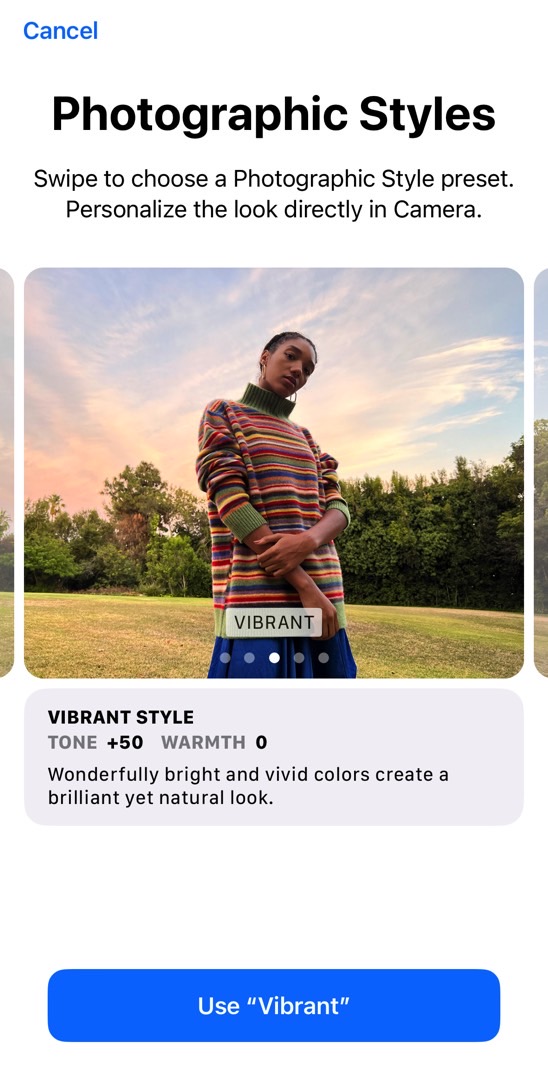
Check out the iPhone’s Photographic Styles
While in the camera settings section, look for the Photographic Styles menu. They will help you set different presets to make photos look the way you want. Rather than adding filters to photos and videos, you can set the styles ahead of time.
You can choose from different styles, and you can always return to the Standard mode.
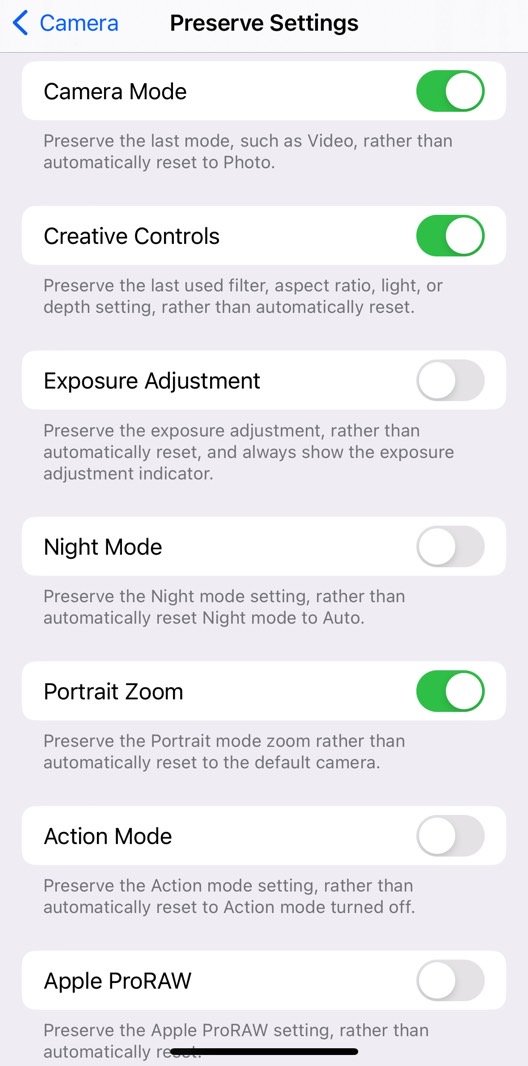
Preserve your iPhone camera settings
Another key iPhone camera setting you should be aware of is the phone’s ability to preserve your shooting settings. The menu is available in the Camera settings and contains several options.
You can set the Camera Mode to preserve the last mode you used. Maybe you shoot many videos, so you’ll want the camera to always open with the video recording mode ready.
This menu also lets you preserve settings for exposure adjustment, night mode, portrait zoom, action mode, Apple ProRaw, and Live Photos.
Swipe up for more options
You don’t have to go to the Settings app for all camera settings. When shooting, you can swipe up on the screen to reveal more iPhone camera options before you press the shutter button.
This useful shortcut gives you access to Photographic Styles, allowing you to change them on the fly. You can also apply filters, change the aspect ratio of the image or video, enable Live Photos, add the camera flash, and ProRaw mode.

Mirror the selfie cam
When you take a selfie, the iPhone camera will flip the photo so that any text in the image is shown correctly. But you can stop this behavior if you want. All you have to do is go back to the Settings app and turn off the Mirror Front Camera toggle.
Remember ProRAW mode, especially on iPhone 14 Pro
iPhone users who really want to make the most of the camera can turn on the ProRAW mode on the phones that support it. This will give you complete control over the resulting photo in post-processing, where you’ll have all the data you need to edit the image professionally.
The downside here is that ProRAW files will occupy more storage. Especially on the iPhone 14 Pro and Pro Max, which feature 48-megapixel cameras on the back.
To use ProRAW, you need to enable it in the camera Settings. After that, you’ll find an icon for it at the top of the Camera app. Or you can swipe up to enable it.
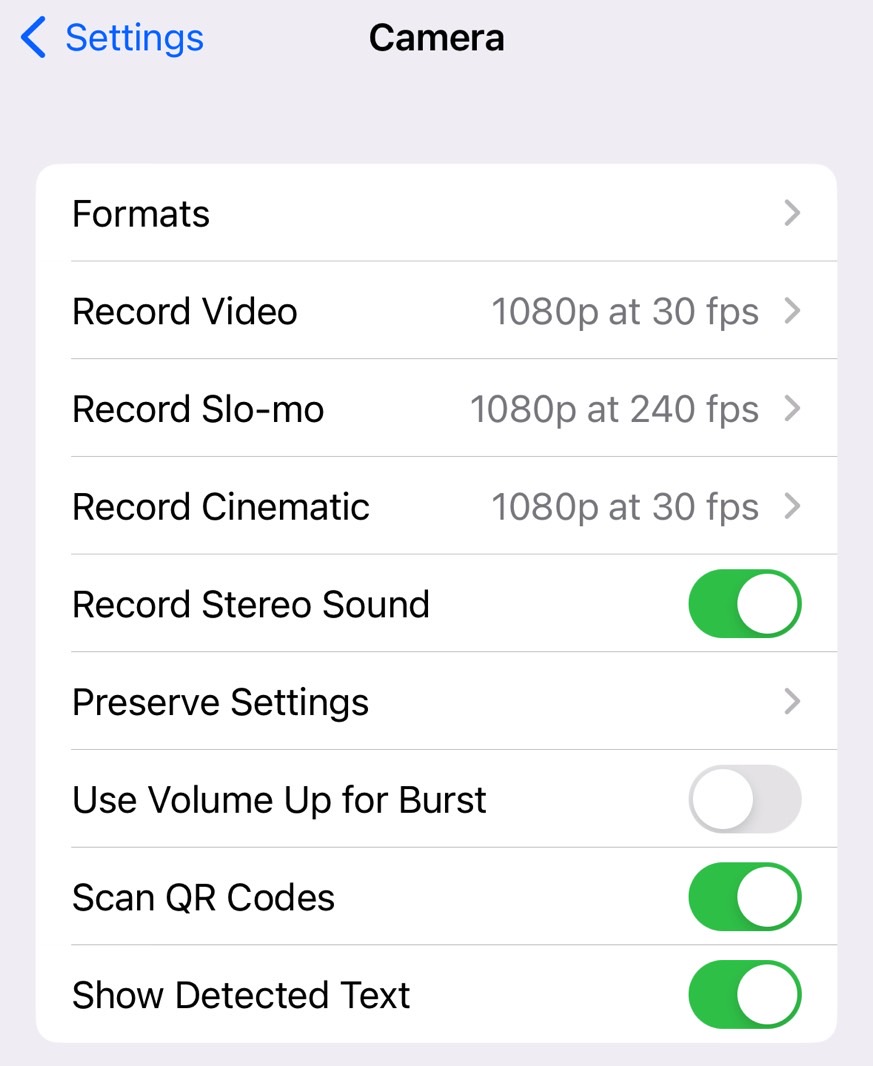
Similarly, you’ll want to enable ProRes for video recording. Like ProRAW, you need the Settings app before moving to the camera app.
Speaking of storage, you should also know that photos and videos can clog up your iPhone’s memory. Here’s what to do about it when it happens to you.
Use the side buttons to take burst photos
Rather than tapping the virtual shutter button on the iPhone screen to capture photos and record video, you’d be better off using the Volume Up and Volume Down. Press either one to capture photos or videos. This isn’t an iPhone camera setting, you’ll say. And yes, this is a shooting tip, one that will give you a better grip on the phone as you use the camera app.
But there is one important camera setting assigned to the iPhone’s hardware buttons. You can use the Volume Up key to take Burst shots. Just enable it in the Settings app. Then, press and hold the Volume Up for burst photos.
As a bonus tip, press and hold either Volume button to start recording when in photo mode. If the Burst mode is enabled for Volume Up, press and hold on Volume Down to record a video instead of taking a photo.
For all the latest Technology News Click Here
For the latest news and updates, follow us on Google News.