How to free up space in Windows 10
Knowing how to free up space in Windows 10 is useful information to have now that the operating system is closing in on six years of service. And for those that have been using Windows 10 since day-one, let’s face it, available hard drive space might be getting tight. We’ve all been in a situation where you’re about to download an application, video game or update when suddenly you’re hit with a storage limit warning.
While deleting a few random apps or files that are no longer of use can help, identifying and deleting the ones that actually take up most of your SSD/HDD storage space will make the biggest difference. So if you’ve found yourself on this page in need of guidance, no need to worry as we’ve got you covered.
Below, we’ve included a simple step-by-step guide on how to free up space on Windows 10.
How to free up space in Windows 10
1. Navigate to the left end of your taskbar (on the bottom of your screen) and press the ‘Start’ button. Alternatively, tap on the Windows key to trigger the main menu.
2. Select the settings icon on the left side of the menu, which should open the settings menu.
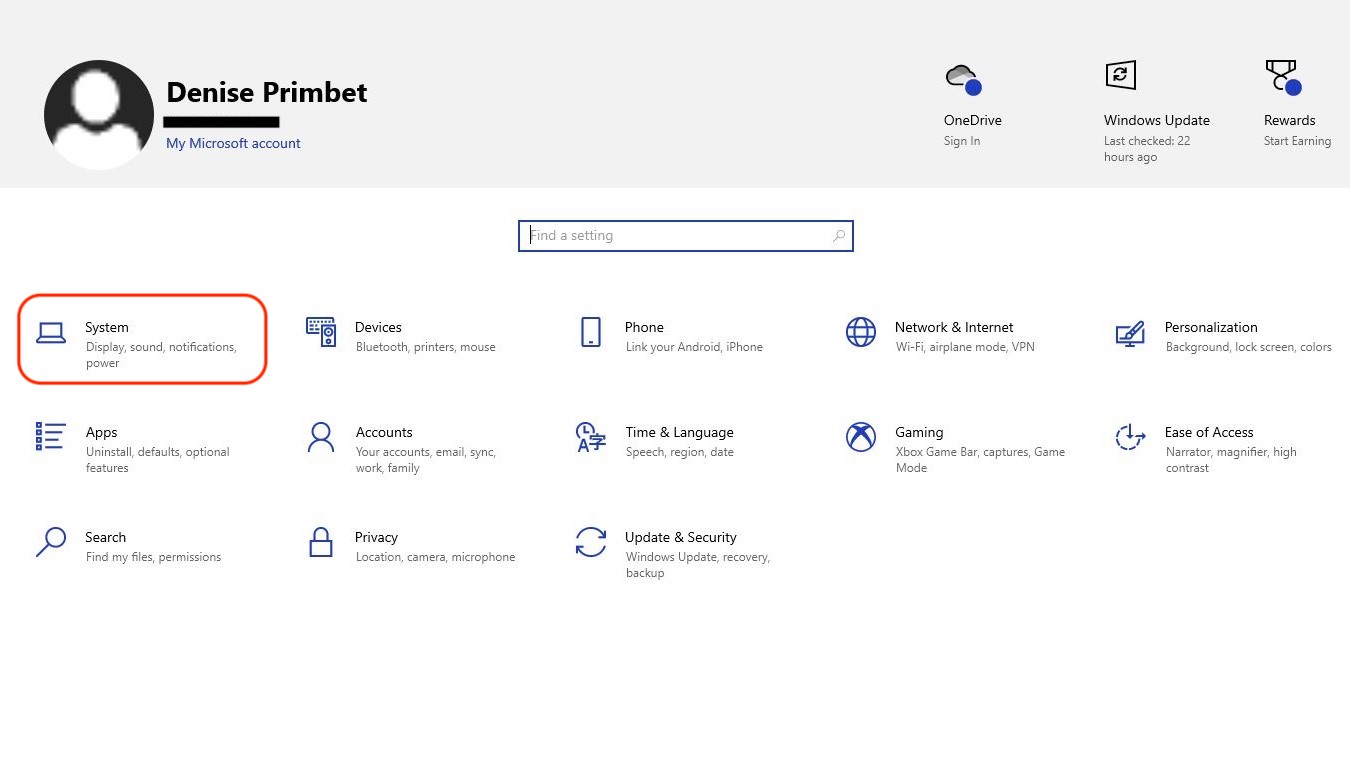
3. Click on the ‘System’ option located on the top left corner of the menu.
4. Go ahead and select the ‘Storage’ option, which should be located on the left menu.
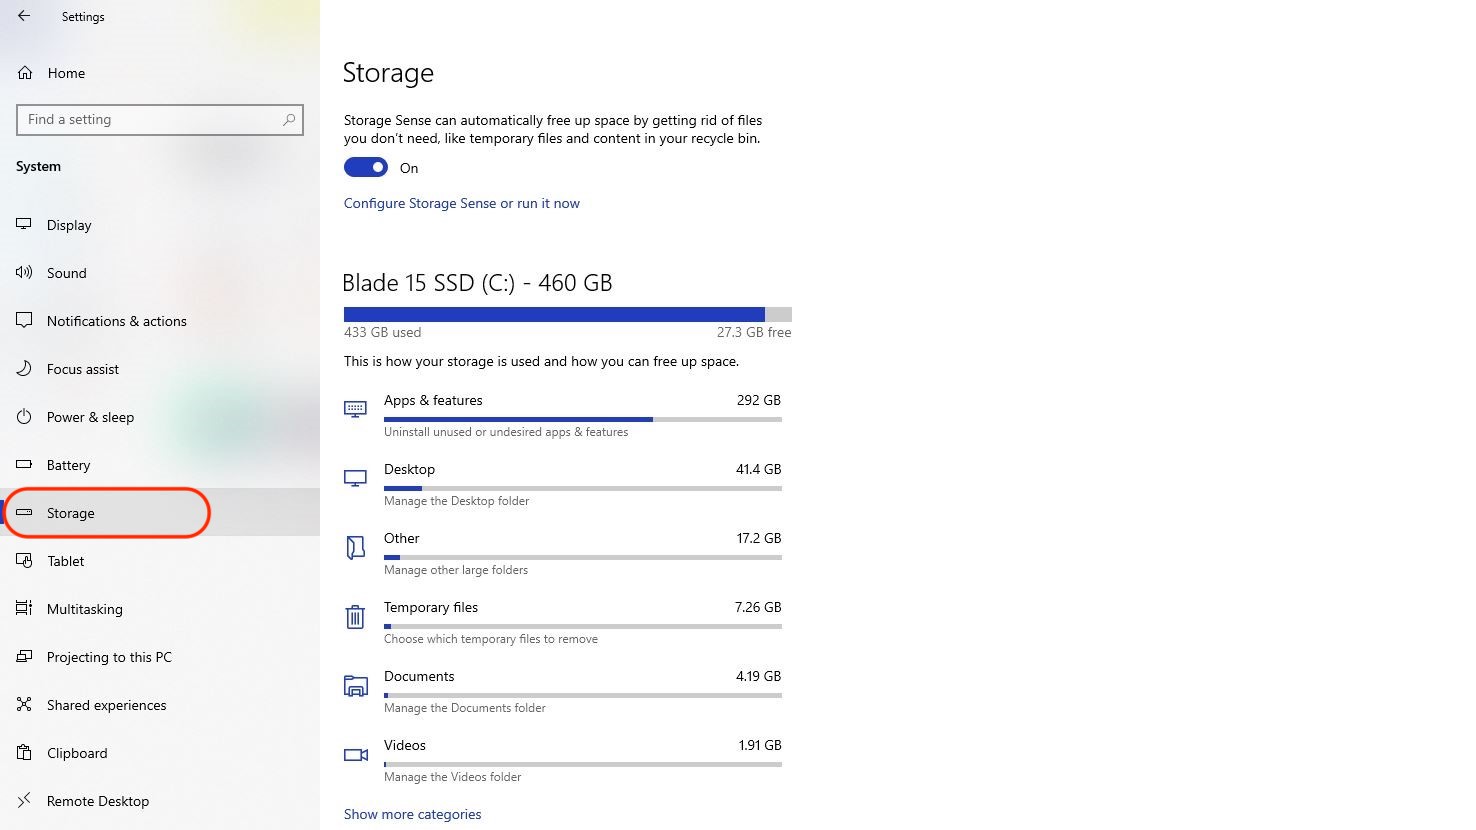
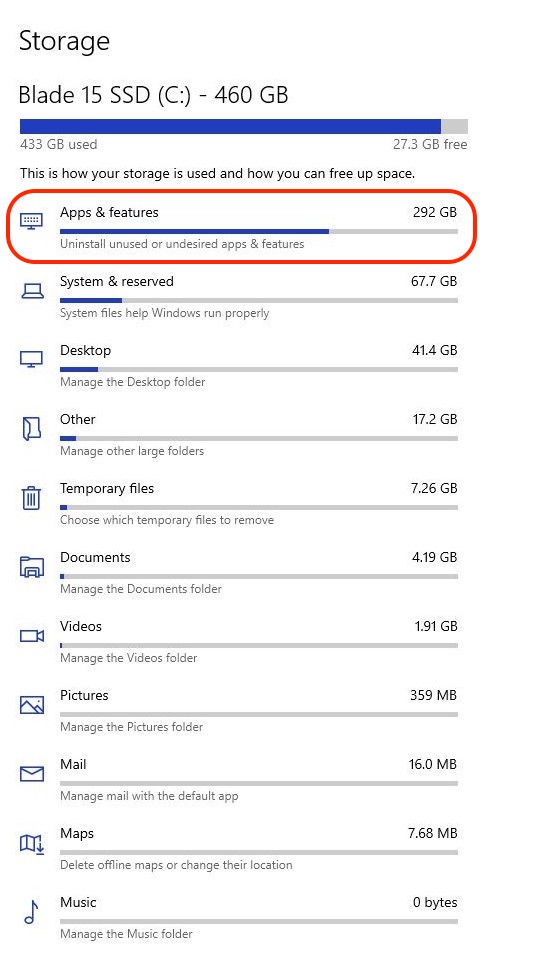
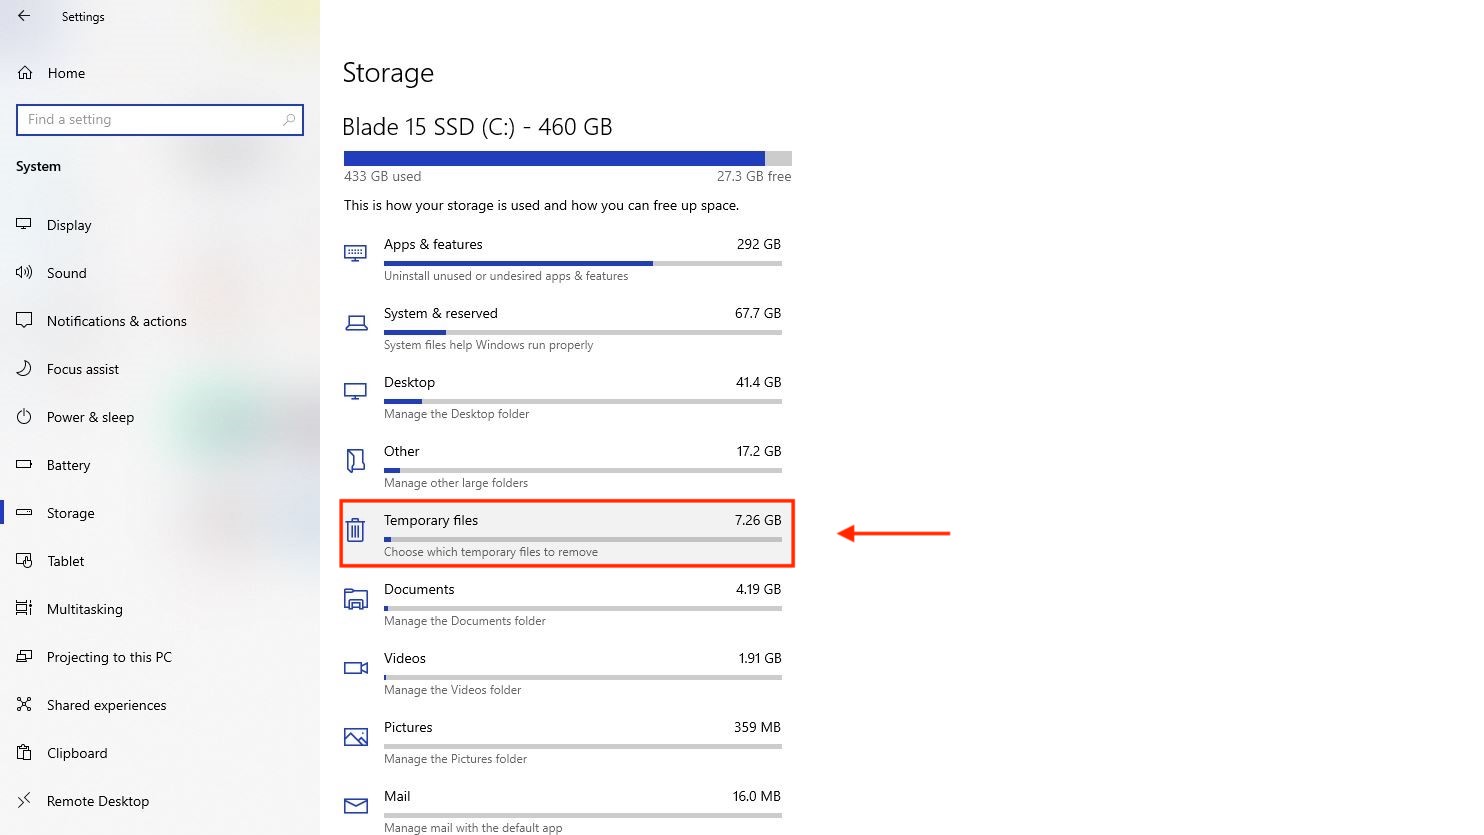
5. You should now be able to view your used and available storage space as indicated below. Have a scan through the categories and assess how much space you require for a new download/install. Usually, the ‘Apps & Features’ take up most of your space, so go ahead and click on it.
6. Locate the ‘sort by’ option and select ‘Size’ in the drop-down menu. This should rearrange the order in which your applications are shown to you, which should help you indicate which ones take up most of your storage.
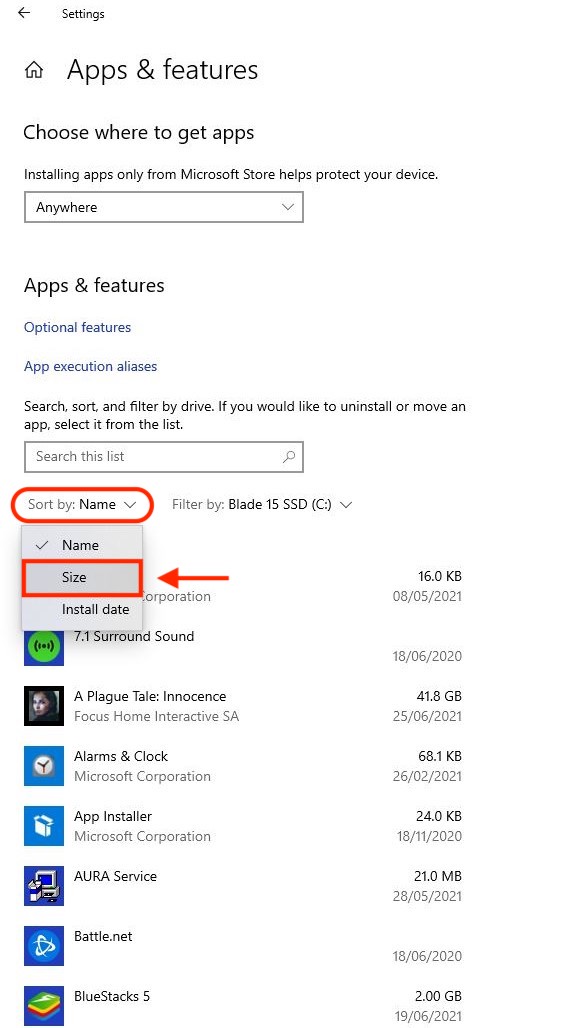
7. Have a look at the list and try to find the applications/video games that you don’t use as much/at all.
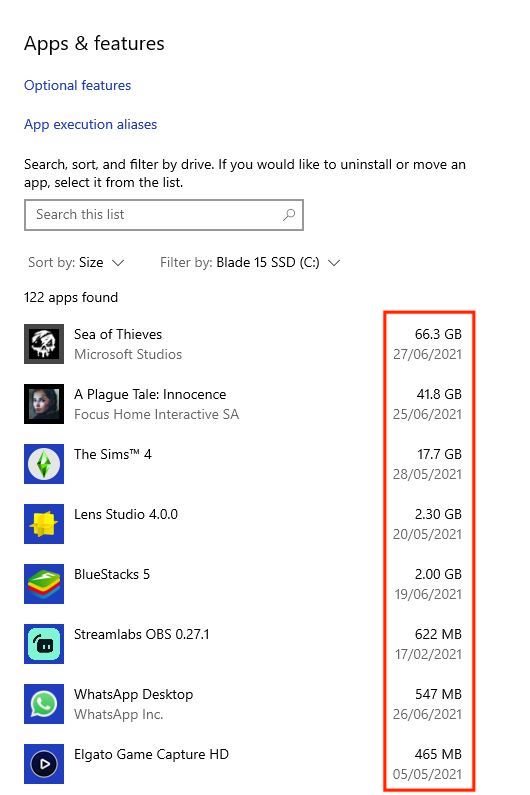
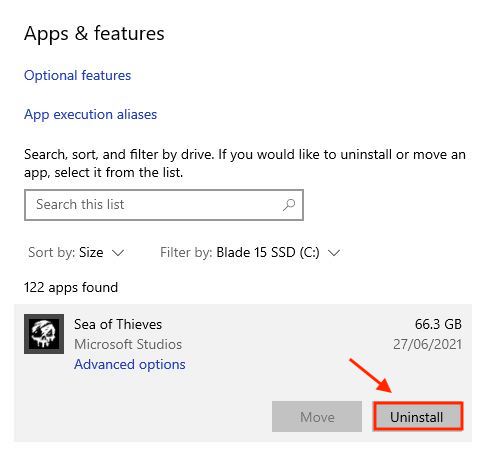
8. Once you’ve found one, go ahead and left-click on the application and click ‘Uninstall’ as shown in the image below.
9. You’re almost done, but in order to actually de-clutter your device, go back into the ‘Storage’ menu and select the ‘Temporary files’ tab.
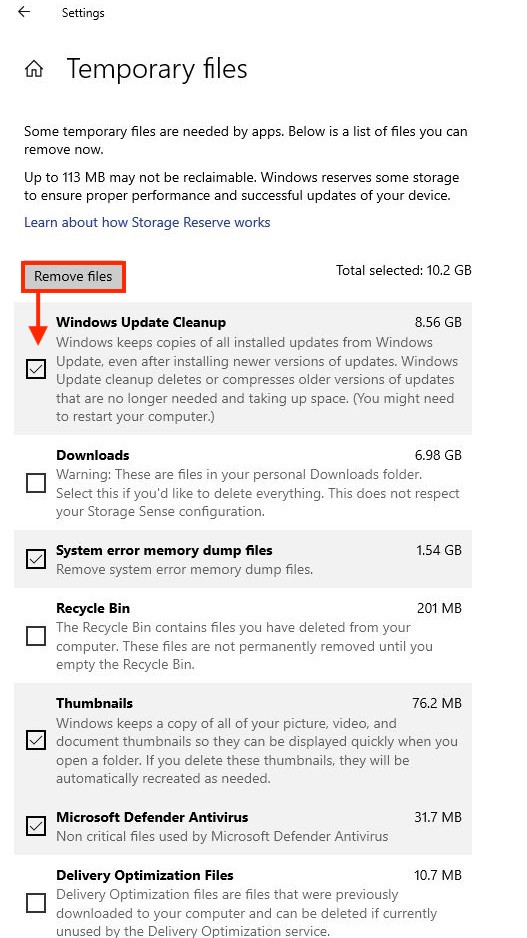
10. In the new menu, you should be able to select a few files and remove them instantly. But why would you need to do so? Well, temporary files are usually unneeded clutter that builds up in your storage, including download files, system error memory dump files, and more. All you need to do is tick those that you want to get rid of and select ‘Remove files’.
For all the latest Technology News Click Here
For the latest news and updates, follow us on Google News.
