How to create and manage multiple contact lists on your iPhone
In iOS 16, you can create and work with different contact lists for different people.
The Contacts app on your iPhone helps you keep track of friends, colleagues, contractors and other people you know. With iOS 16, you can now create and work with more than one contact list.
For example, you may want to have one list for family and friends, another list for co-workers and a third list for external contractors. You can then view and manage each list separately, email or text an entire list of contacts, and export a list to use elsewhere.
Jump to:
What you’ll need to create iPhone contact lists
First, make sure your iPhone is running iOS 16 or higher. Go to Settings and then General. Select the option for Software Update. You’ll be told that the OS is up to date or prompted to download and install the latest update.
SEE: BYOD Approval Form (TechRepublic Premium)
How to create a iPhone contact list
Open the Contacts app. If you’ve previously set up the app or are syncing it with iCloud, you likely already have contacts listed. If not, no problem.
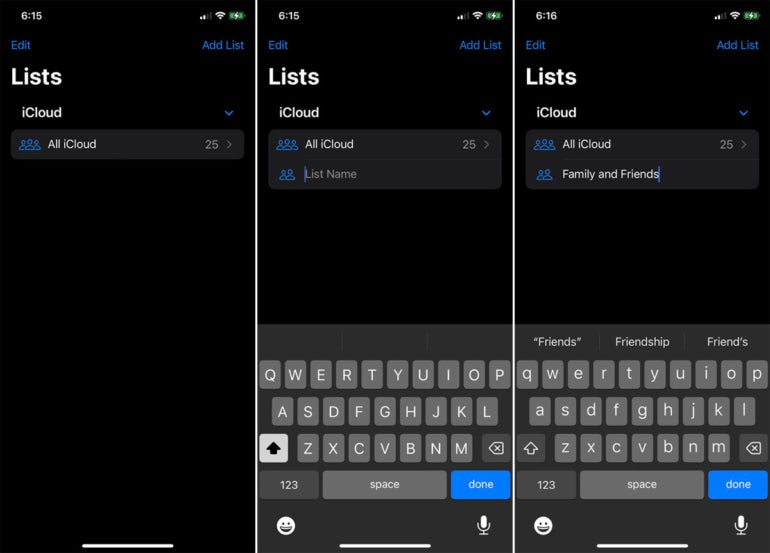
Tap Lists to go to the Lists screen and then tap Add List. Enter a name for the list and then tap anywhere outside the list name (Figure A).
Figure A
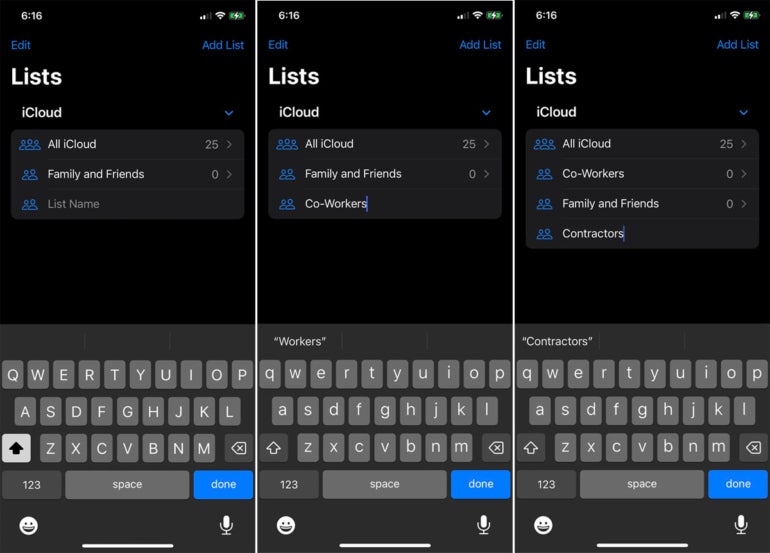
Repeat those steps for any additional lists you want to create (Figure B).
Figure B
How to populate your iPhone contact lists
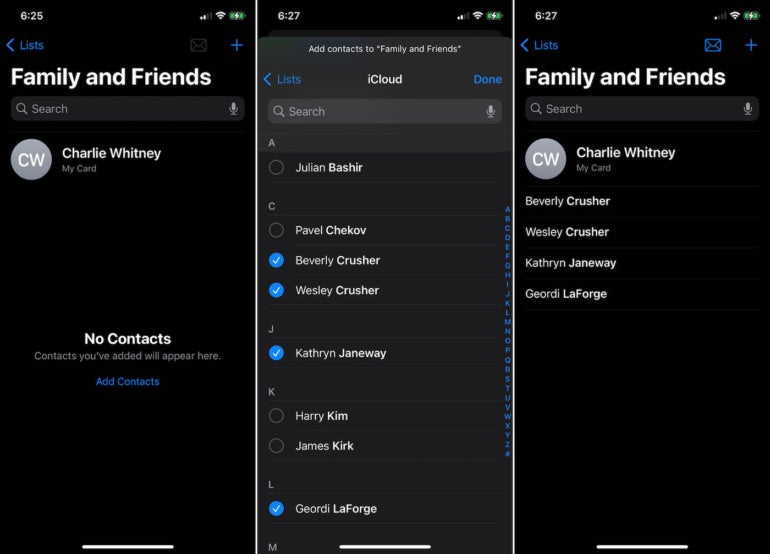
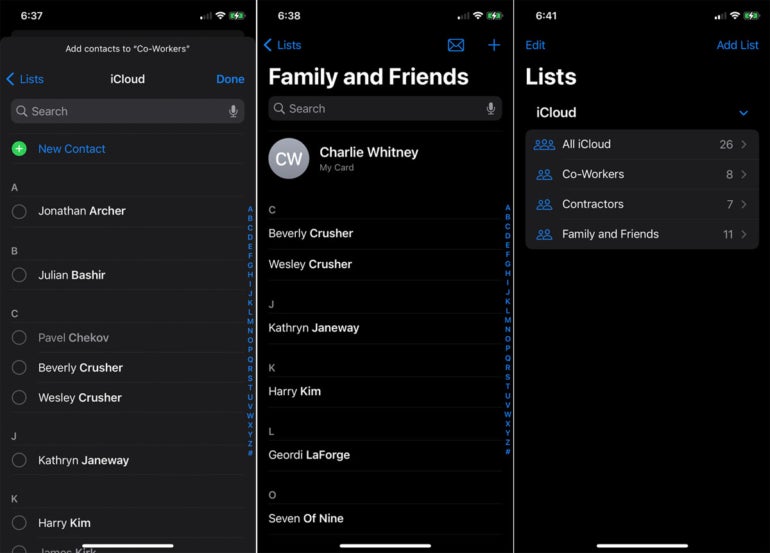
Now that your lists are set up, you want to populate them. Tap a specific list to which you want to add contacts. At the screen for the list, tap the + icon at the upper right or the link for Add Contacts.
To add one or more existing contacts to the list, tap the circle in front of their names and then tap Done. The list appears with the names of the people you added (Figure C).
Figure C
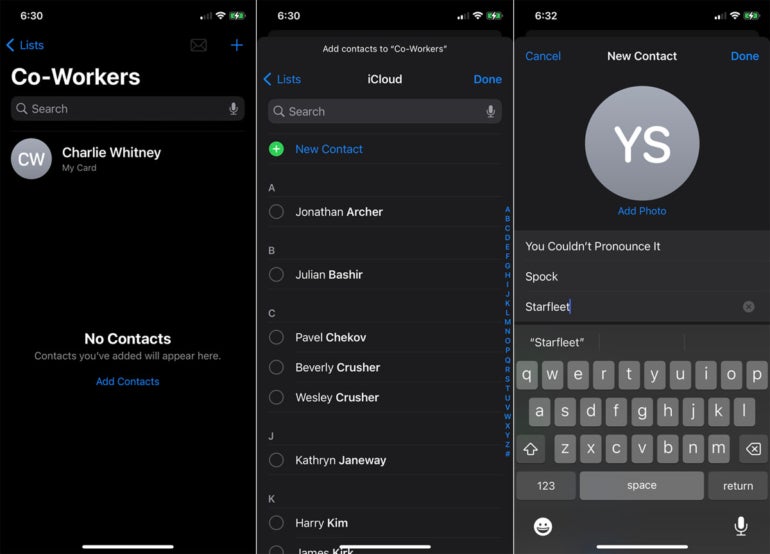
To add a new contact to a list, open the list and tap the plus icon. Tap the entry at the top for New Contact. Enter the details for the contact and then tap Done. The new contact card appears (Figure D).
Figure D
Continue the process until you’ve added all your contacts to their respective groups. To see all your contacts, tap the main list, such as the one for iCloud. To view the cards for specific contacts, tap their associated list (Figure E).
Figure E
How to edit your iPhone contact lists
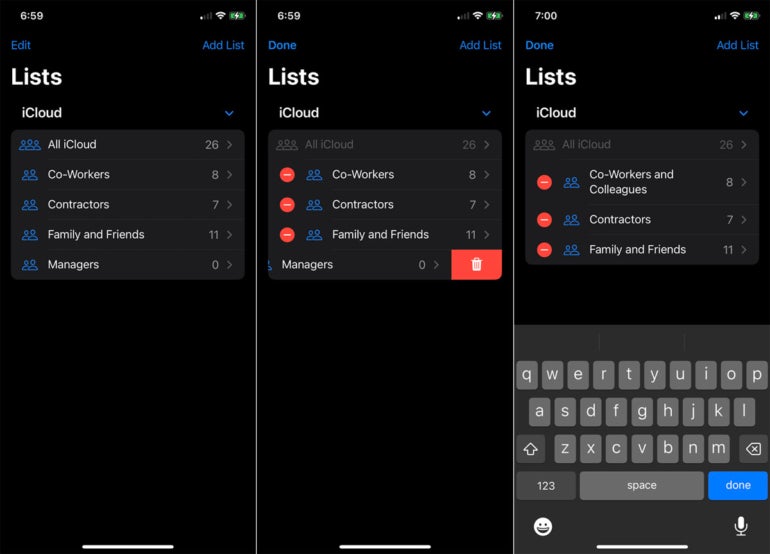
Next, you can make changes to your lists. At the Lists screen, tap the Edit link. To remove a list, tap its minus sign icon, or swipe it to the left and tap the trash can icon. To rename a list in Edit mode, tap its entry and enter the new name. When finished, tap Done (Figure F).
Figure F
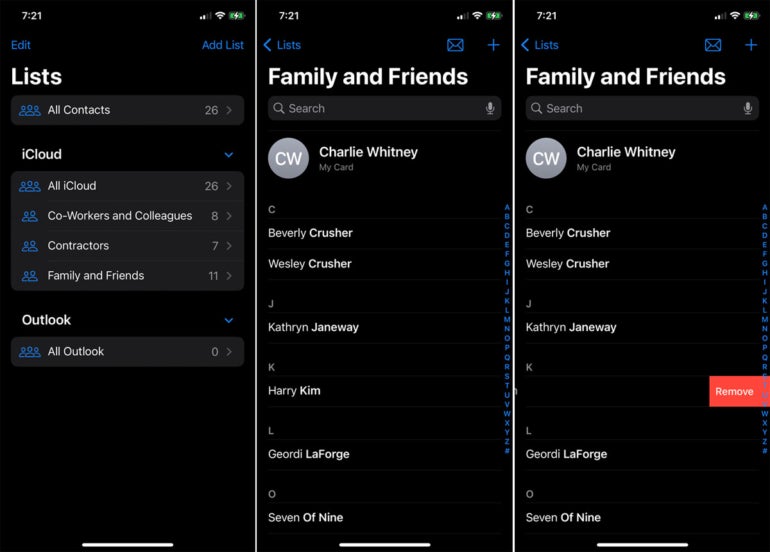
To remove a contact from a list, open the list. Swipe the contact’s name to the left and then tap Remove (Figure G).
Figure G
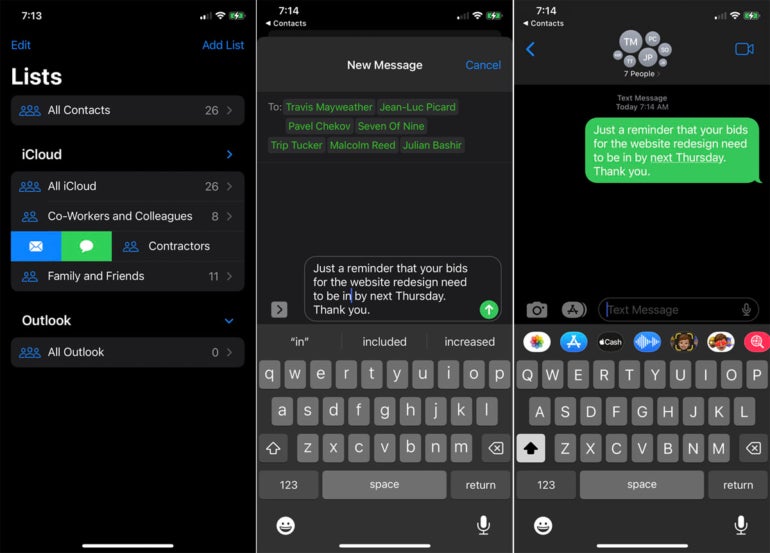
You can email or text an entire list of contacts in one shot. To send an email to the list at the Lists screen, swipe the name of the list to the right. Tap the icon for Mail. Compose your message. Tap the Send button and choose whether to send your mail now, at a specific time or later in the day (Figure H).
Figure H
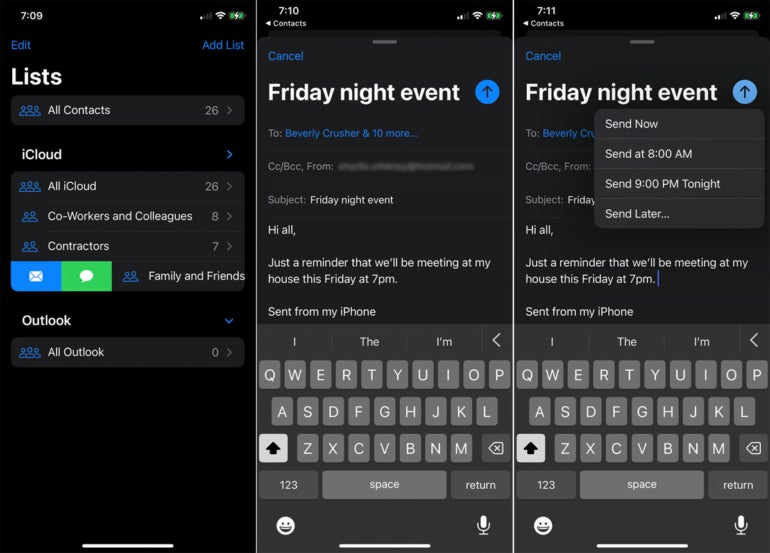
To text everyone on the list, swipe the name of the list to the right and tap the icon for Messages. Compose your text and then tap the Send button (Figure I).
Figure I
How to export your iPhone contact lists
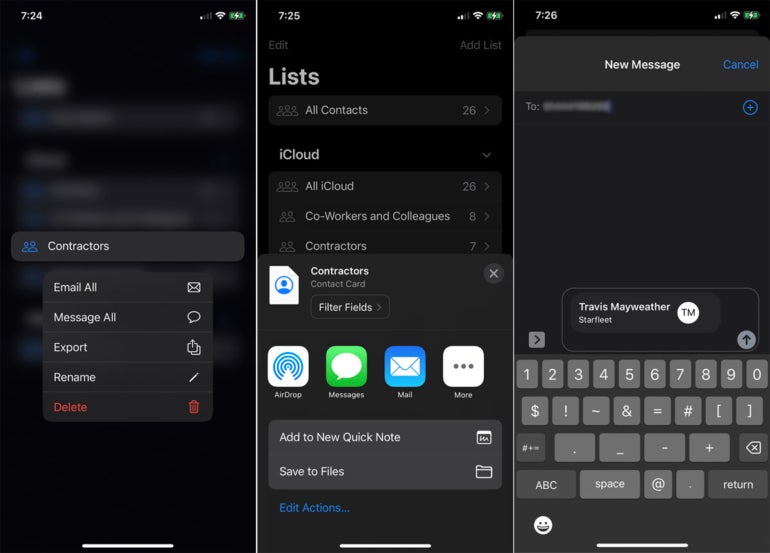
Finally, you can export a list as contact cards to import on another Apple device or share via a specific app or service. Press down on a specific list. From the pop-up menu, select Export. Select the app or service through which you wish to share the list and then complete the action (Figure J).
Figure J
Discover more iPhone tutorials from Lance Whitney here: How to use Spotlight to search for files, images and more, and how to edit photos.
For all the latest Technology News Click Here
For the latest news and updates, follow us on Google News.
