Everything you can add to the Apple Wallet App
You likely take three things with you when you leave your home: your wallet, your keys and your phone. Apple and Google are working to eliminate two of those items through the third. Both companies aim to replace your keys and physical wallet with a digital wallet stored on your phone.
Apple has long worked hard to evolve its Passbook app, which was once used for loyalty cards and tickets, to the modern Wallet app we have on iPhones today. The Apple Wallet app is the cornerstone of Apple’s strategy to eliminate our keys and physical wallets.
Apple previewed three new features coming to iOS 16 during its WWDC 2022 keynote. First, we have Apple Pay Order Tracking, which will offer real-time shipping notifications for orders sent by participating merchants. Millions of Shopify-powered vendors will be a part of Apple Pay Order Tracking at launch.
Second, Apple unveiled a new buy now pay later service called Apple Pay Later. Apple Pay Later joins Apple Card and Apple Cash as another US-only financial service the California tech giant offers. Lastly, Apple provided an update on their plan to add IDs to the Wallet app. Currently, two US states offer functionality, with eleven more coming soon.
Between driving a Tesla, installing a HomeKit door lock, and using the Wallet app, I’ve been able to reduce my physical wallet down to just three cards; my credit card (for purchases over the $250 contactless limit), my province’s health card and my drivers’ license. All three conveniently fit into the Magsafe Wallet attached to my iPhone 13 Pro.
With Apple revisiting the Wallet app, I wanted to take the opportunity to share all the things Canadians can add to their iPhone’s Wallet app, so hopefully, you too can start to eliminate your physical wallet.
Let’s get into it:
Apple Pay
Apple Pay is likely the first way iPhone users get exposed to the Wallet app. Despite Apple Pay being available in Canada for years, I still get joy from using my Apple Watch to pay for things. Apple Pay is a mobile payment solution for your Apple devices. Users can add a credit or debit card to their iPhone or Apple Watch and make contactless payments much like they would by “tapping” their physical card.
Many people have security concerns about using Apple Pay instead of their physical card. What’s interesting is that Apple Pay is more secure than using a physical card. First, because you’re using a smart device like an iPhone or Apple Watch, your device can verify if a payment terminal is legitimate. This is in contrast to a regular credit or debit card, which constantly offers up your card details to any device close enough to read it. Second, Apple Pay doesn’t actually hand over your card number, expiry date, or other information. Instead, Apple Pay transmits a device ID number to the merchant, which allows the bank to validate a transaction.
This process prevents merchants from accessing additional data that may be provided by your physical card. Additionally, it prevents your payment details from leaking if the merchant has a data breach.
To add a card to Apple Pay:
1. Open the Wallet app
2. Tap on the plus icon in the top right-hand corner
3. Tap Debit or Credit Card
4. Tap Continue
5. Align your card with the image viewer and your card details will automatically be entered
6. Tap Next
7. Enter your 3-digit CVV
8. Tap Next
9. Tap Agree
10. Complete your card verification if prompted
Passes

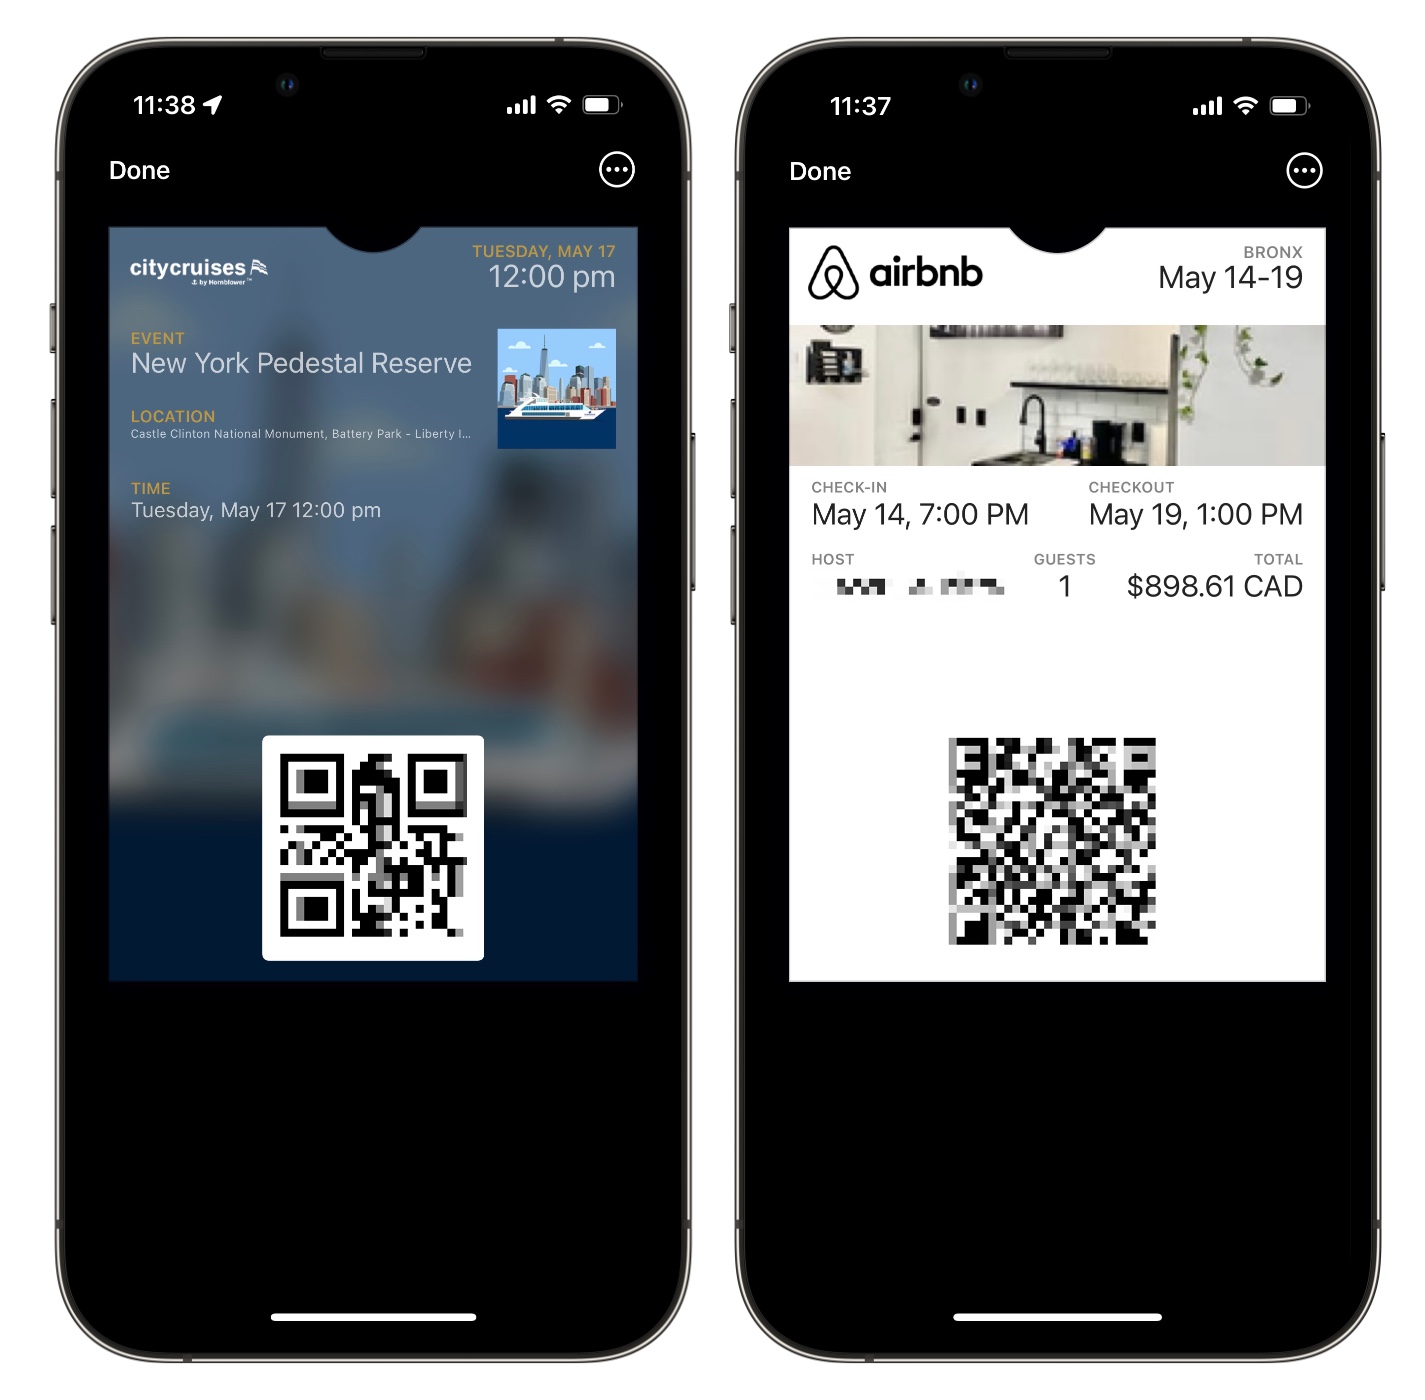
Passes include movie tickets, airline boarding passes, Genius Bar appointments, Apple Store online order pick-up confirmations, Airbnb reservations, and so much more. Passes are the catch-all for digital event confirmations that can be added to the Wallet app. In the before times, people had to print the boarding passes and movie tickets they purchased online. In 2022, people can store those confirmations digitally on their iPhone or Apple Watch.
Passes have QR codes, allowing event staff to quickly scan and validate the digital pass. Additionally, passes can have metadata like location and time-based prompts. For example, when you’ve arrived at an event venue or movie theatre, your ticket will be presented on your iPhone’s lock screen.
To add a pass to the Wallet app:
1. Look for the Add to Wallet icon on a confirmation email or within an app
2. Tap Add to Wallet
3. Tap Add
Loyalty Cards

So many of us have Wallets overflowing with loyalty cards. We all want to collect points to redeem gift cards or get money off a future purchase. However, there are so many loyalty programs that people forget which programs they’re a part of and lose their cards.
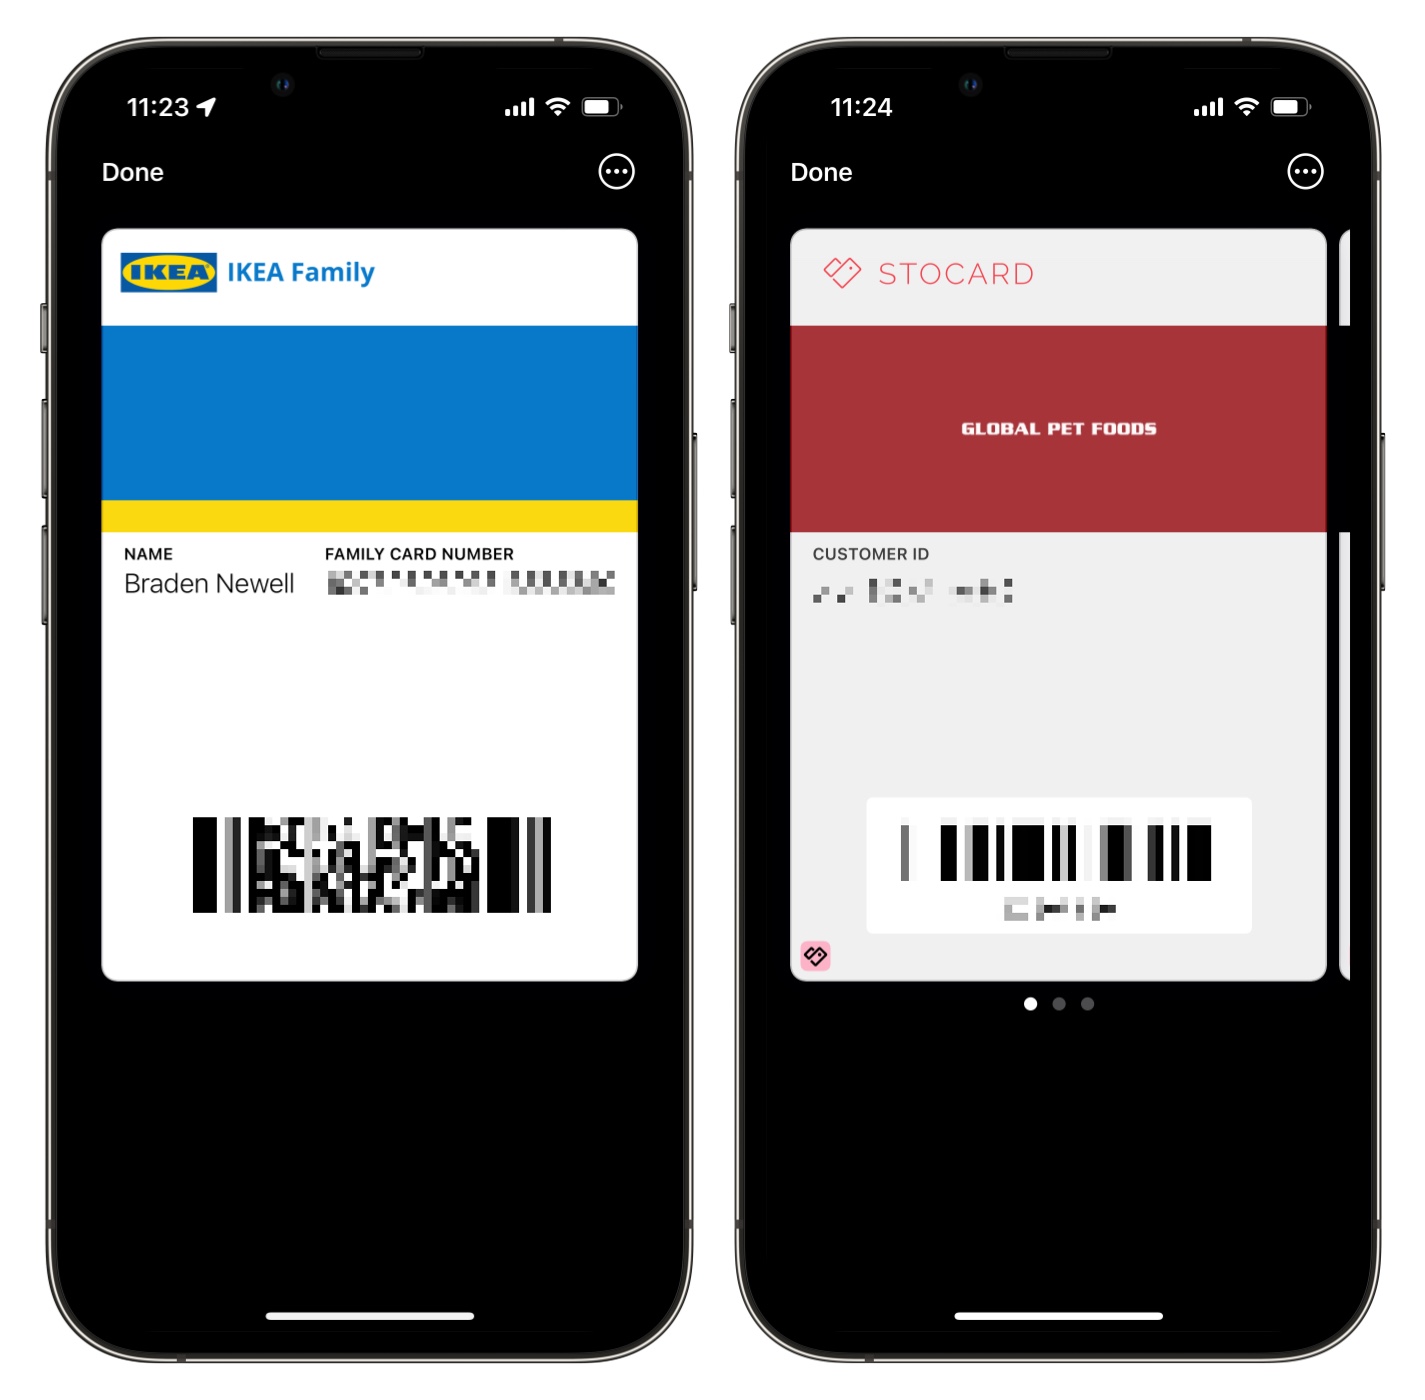
The Wallet app is a great way to reduce physical wallet clutter while keeping better track of your points cards. Some popular loyalty cards that can be stored in the Wallet app are Air Miles, Scene+, PC Optimum, and Ikea Family.
For the loyalty cards that can’t natively be added to the Wallet app, third-party apps like Stocard may be able to add them. I’ve used Stocard to add TJX, Moores, Global Pet Foods, and my local library card to the Wallet app.
To add a supported card to the Wallet app:
1. Download the loyalty programs iOS app (i.e. Scene+ or PC Optimum)
2. Locate the loyalty card within the app
3. Tap Add to Wallet
4. Tap Add
Insurance
Some auto insurance companies allow you to add your policy card to the Wallet app. I would never recommend handing your iPhone over to law enforcement. However, having your policy card in the Wallet app makes it easy to reference if you’re filling out paperwork or filing a claim with your insurance company. Different insurance companies may have you add their card to the Apple Wallet app differently. Zenith, for example, will send new customers an email with the “Add to Wallet” button at the bottom.
Meanwhile, Intact follows what loyalty card companies do and have you add it from their app. While not all auto insurance companies may support adding your policy card to the Wallet app, if you’re interested in adding it, check your insurance company’s app or look for your original confirmation email.
To add your insurance card to the Wallet app:
1. Tap Add to Wallet
2. Tap Add
Gift Cards
Some retailers like Starbucks and Apple support storing their gift cards to the Wallet app. Adding your gift cards to the Wallet app offers several benefits. First, you reduce clutter in your physical wallet. Second, you won’t forget to spend your gift card balance because, similar to passes, gift cards can use your location to show up on your lock screen when you’re near a related retail location.
Third, balances redeem in real-time, meaning you can stop questioning how much remains on that gift card. Lastly, you won’t lose your gift cards because they’re safely stored digitally in the Wallet app.
To add a supported gift card to the Wallet app:
1. Check the back of the gift card for a QR code
2. Open the camera app on your iPhone
3. Hover your iPhone’s camera over your gift card’s QR code
4. Tap on the Add to Wallet prompt
5. Tap Add
COVID-19 Vaccination

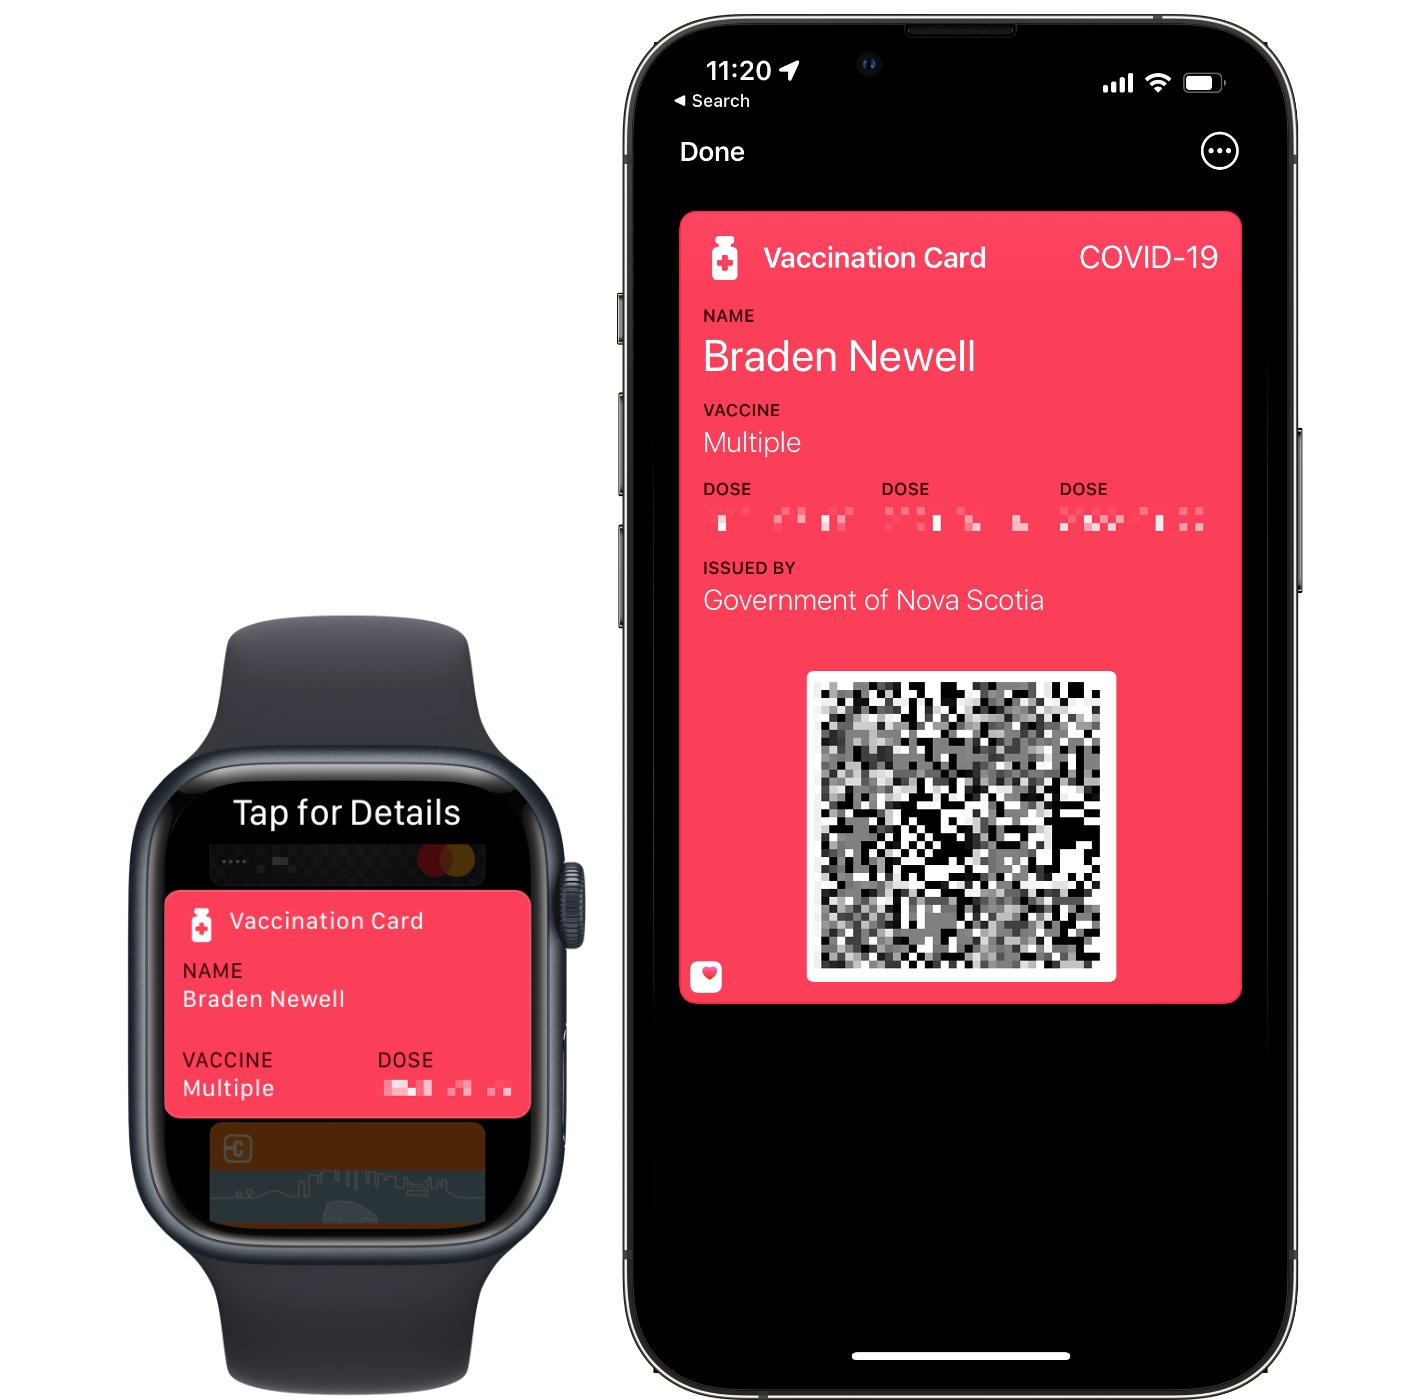
COVID-19 has been a challenge for everyone; for some communities, the struggle is still far from over. As a result, some shops and locations may not require proof of vaccination, while others may. However, Apple has made showing and validating your COVID-19 vaccination card really easy by adding support for it in the Wallet app. The COVID-19 vaccination card in the Wallet app shows the number of doses you’ve received, the dates the doses were received, your name, vaccine insurer, and the vaccine manufacturer. Additionally, there’s a QR code allowing for easy verification. I’ve found it handy to double-click my iPhone’s side button to expose my vaccination card over hunting for it in the Photos app.
If you have a physical QR code, you can add your COVID-19 vaccination card to the Apple Wallet app by:
Pull up your vaccination QR code on a piece of paper or another device
1. Open the camera app on your iPhone
2. Hover your iPhone’s camera over your vaccine QR code
3. Tap on the yellow Health app prompt
4. You’ll be taken to the Apple Health app
5. Tap Add to Wallet & Health
If you have an already saved photo of your COVID-19 vaccination QR code, you can add it to the Apple Wallet app by:
Select the photo in the photos app
1. Tap and hold on the QR code until the Health app prompt appears
2. Tap the Health app prompt
3. You’ll be taken to the Apple Health app
4. Tap Add to Wallet & Health
Keys
Some chuckled when keys were first announced as an addition to the Wallet app. Keys don’t go into our wallets, people laughed. While that’s true in the physical world, keys fit nicely next to our credit, debit, and loyalty cards in the digital world. Keys work similarly to Apple Pay by using the iPhone or Apple Watch’s NFC chip to communicate with a terminal device to grant you access.
You can add four different types of Keys to the Wallet app: Student IDs, Employee Badges, Car Keys, and Home Keys. Each of these keys has its own set of minimum device requirements, but all need the latest versions of iOS or watchOS.
Unlike third-party apps, Keys within the Wallet app can access Express Mode and Power Reserve Express Mode. Express Mode allows users to access their school, office, car, or home without further authentication. They simply need to wave their iPhone or Apple Watch. Power Reserve Express Mode allows users to still use their Wallet keys while their iPhone or Apple Watch is dead. A small amount of battery is reserved so that a person can reliably get home.
Student IDs launched in the Wallet app with the idea that students could access their dorms and pay for meals using their digital ID on their iPhone or Apple Watch. University of New Brunswick and Sheridan College were the first two Canadian universities to deploy this option to their students. While you must check that your institution supports student IDs in the wallet app, you can read more about adding them here.
Employee badges are similar to student IDs, with their purpose being to digitize the employee access experience. However, employees can use their iPhone or Apple Watch instead of having to wave a physical badge to access an office. You’ll need to chat with your employer to see if they support this feature. You can read more about Employee badges with this Apple Support article.
Car Key is Apple’s attempt to simplify the car key experience that your car manufacturer provides. Car Keys grant the ability to unlock your car as your approach and lock your vehicle as you walk away. Car Key is available on eighteen cars as of March 2022. Most of which are from BMW, with Kia and Genesis offering some alternative models. To use Car Key, you need at least an iPhone XS, iPhone SE (2nd generation), Apple Watch Series 5, or Apple Watch SE, all running the latest versions of iOS or watchOS. In addition, you can read this support article from Apple to learn how to set up Car Key.
Home Key is the latest addition to the keys in the Wallet app family. Home Key allows iPhone and Apple Watch users to unlock their doors as quickly as making a purchase as Apple Pay. Simply wave your iPhone or Apple Watch near the door lock. As of March 2022, only two locks are being released with Apple Home Key support.
The Schlage Encode Plus is available at Home Depots in the United States and will hopefully come to Canada soon. Aqara’s A100 lock will likely only be released in China soon. Car Keys and Home Keys can also be shared digitally via a text message or email. They can also be revoked remotely if ever needed. Of course, Apple has a support article for you to learn more.
For all the latest Technology News Click Here
For the latest news and updates, follow us on Google News.
