How to activate TPM 2.0 and Secure Boot in Windows 10
Running your Windows 10 PC with TPM and Secure Boot active is a prerequisite for Windows 11. You can activate the security protocols now with a few settings changes.
Image: Virgiliu Obada/Shutterstock
While the most obvious changes coming with the release of Microsoft Windows 11 involve new graphics and an updated user interface, the more important changes and the driving force behind Microsoft’s strategy, involve operating system security. Malware, particularly ransomware and the associated criminal activity, are a scourge to computer users everywhere and it must be stopped. Windows 11 will attempt to turn the tide with new hardware and virtualization-based security features.
However, it is noteworthy that many of the default features being deployed in Windows 11 are available as options in Windows 10. In some cases, getting these more advanced levels of security is just a matter of turning them on. In other cases, your PC’s hardware may be too old to handle the new security requirements. In some cases, especially if your PC was purchased in the past few years, these advanced security settings may be installed and active in the background right now.
SEE: Strategies for improving enterprise network management and security (TechRepublic Premium)
Activate TPM 2.0 and Secure Boot in Windows 10
Trusted Platform Module 2.0 (TPM 2.0) and Secure Boot have both been around for a few years and most new Windows 10 computers will be running the security protocols by default. The technology combines special motherboard hardware in the form of chipsets with cryptographic security protocols to prevent malware from running before the Windows 10 operating system starts to boot.
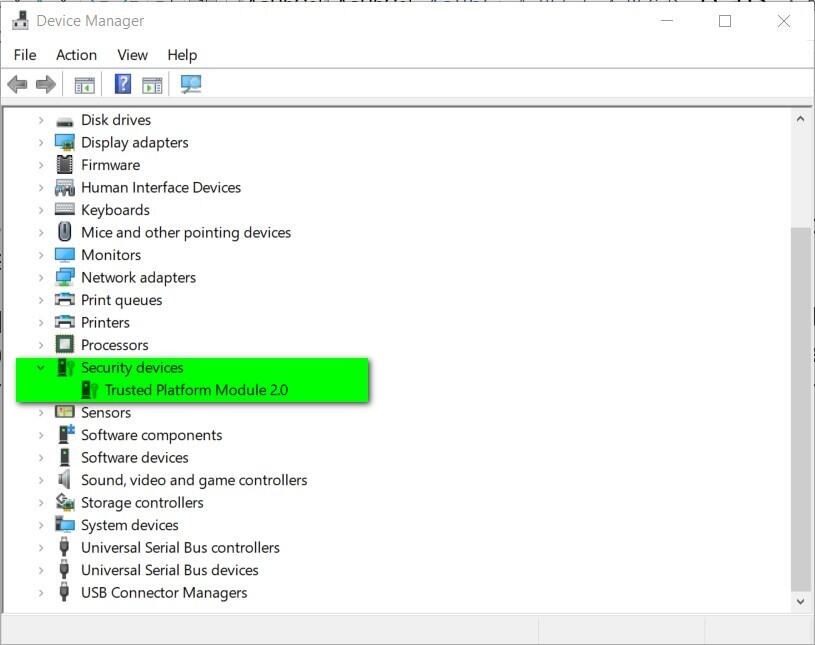
To see if your PC is operating under TPM 2.0 security protocols, right-click the Start Menu button on the Windows 10 desktop and select Device Manager from the context menu. Scroll down to the Security devices item in the list and expand it, as shown in Figure A.
Figure A

The example PC is new so, TPM 2.0 and Secure Boot is installed and active by default. There are two possibilities for an older computer that does not list the protocols in Device Manager: 1) TPM is turned off or 2) TPM is not supported.
Unfortunately, in a case where TPM 2.0 is not supported, there is little recourse. The only real solution is the purchase of a new computer, which is what Microsoft is trying to accomplish with the development of Windows 11. Older PCs are inherently less secure and need to be replaced if security is a priority—which it should be.
If TPM 2.0 is merely inactive, we can fix that by making some configuration changes. However, the first step is a little more complicated than typical.
SEE: Checklist: Securing Windows 10 systems (TechRepublic Premium)
Because TPM 2.0 and the Secure Boot protocols are hardware based and reside on the motherboard, the settings are buried deep in the Unified Extensible Firmware Interface BIOS menus. That means you will have to access UEFI before Windows 10 boots. Each motherboard has its own way of doing this and its own set of menus, so we cannot be specific about where the settings are located other than to suggest under a tab or section labeled “security.”
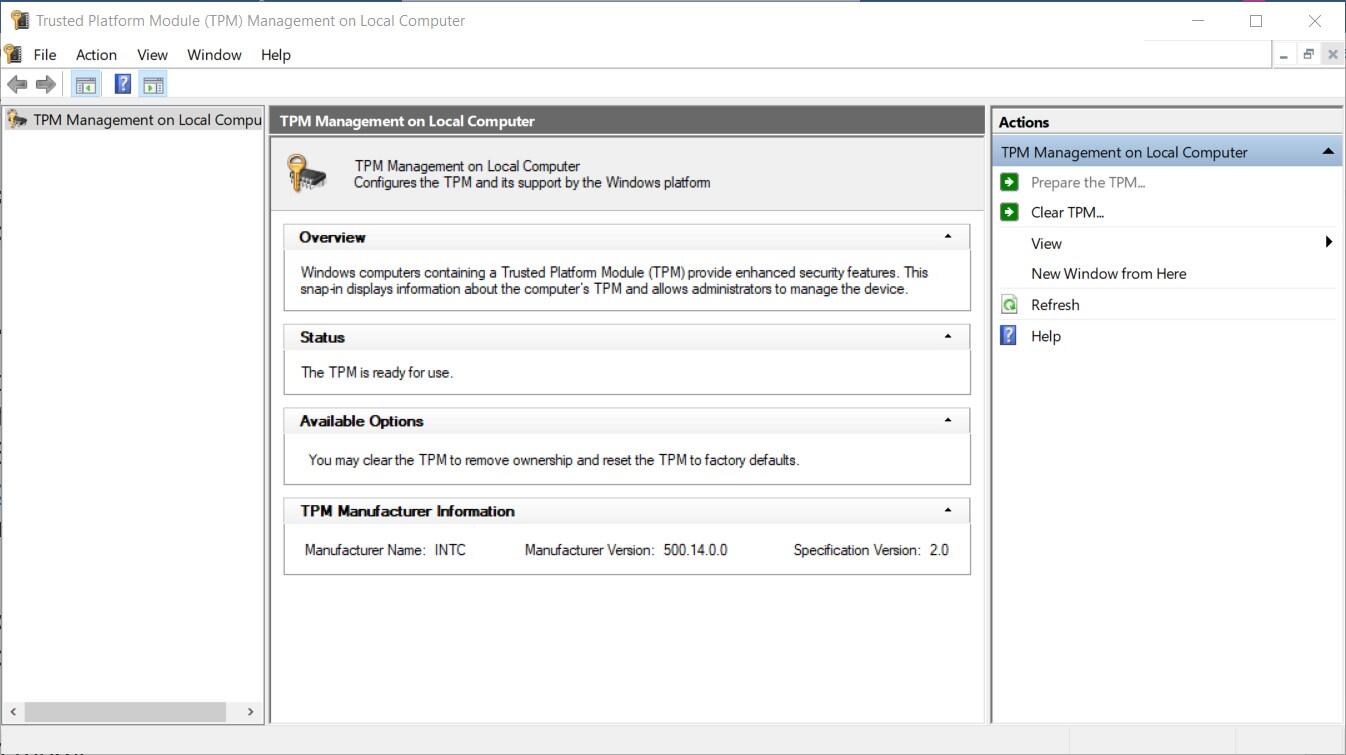
Once the hardware is activated through the UEFI and Windows 10 has completed its boot process, open a command prompt (Windows Key + R) and type this command into the dialog box:
tpm.msc
This utility application, shown in Figure B, will allow you to activate TPM 2.0 and Secure Boot for your Windows 10 personal computer.
Figure B

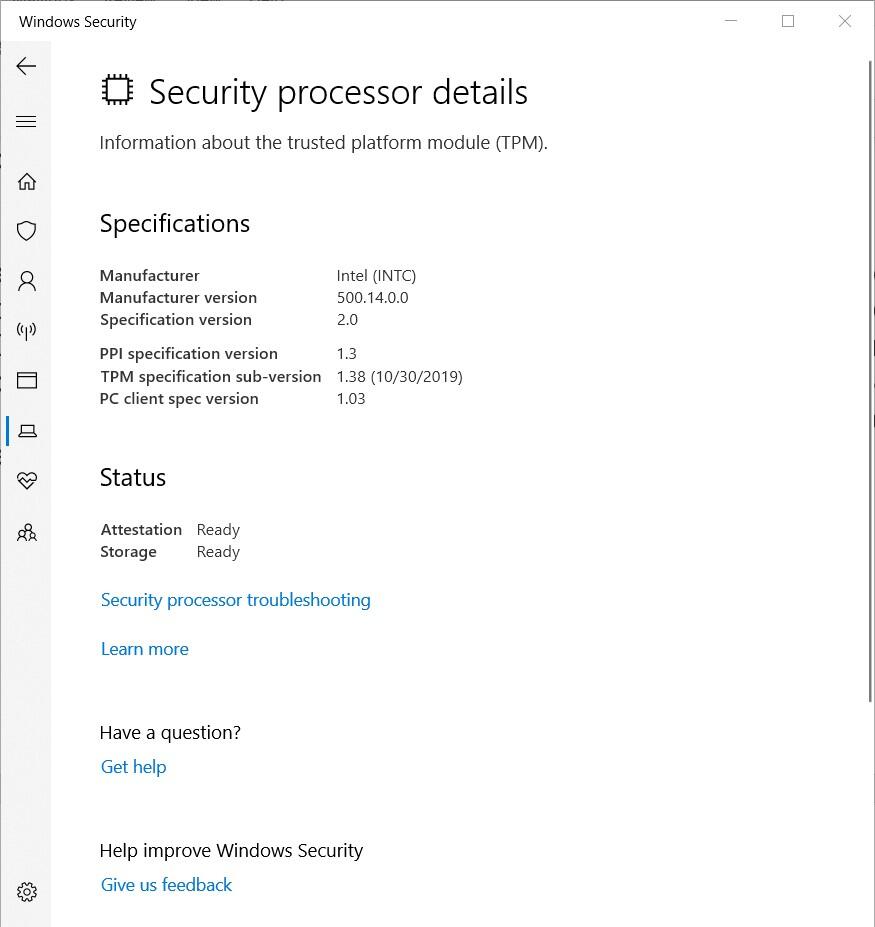
To see the specific details regarding your implementation of TPM 2.0 and Secure Boot, you will have to navigate to the Security processor details screen, which is buried deep in Windows 10 Settings. Click the Start Menu, select the Settings item (Gear icon), and then select Update & Security. In the left-hand navigation bar, select Windows Security and then click Device security from the list in the right-hand screen. Finally, select the Security processor details link to reveal the screen shown in Figure C.
Figure C

From this screen you can see your chip specifications and check TPM version and status. There is a link to troubleshoot problems, but the only solution offered is to clear TPM back to factory settings.
Just like the upcoming Windows 11, TPM 2.0 and Secure Boot are now on by default for your Windows 10 personal computer. Your PC is now more secure than it was before. The ability to run your PC with TPM active is also one of the major specifications of Windows 11. If your PC cannot run TPM in Windows 10, Microsoft will not update your computer to Windows 11—at least not automatically.
Also see
For all the latest Technology News Click Here
For the latest news and updates, follow us on Google News.

