How to backup Windows 10, and restore it
Windows 10 has a pretty great backup system built right in. You can backup the OS and settings and restore them at your convenience. Called System Image Recovery, this tool is easy to use, provided you know what you’re doing. Here’s how to backup Windows 10 and restore it.
Read more: The best external hard drives you can buy
QUICK ANSWER
To backup Windows 10, head over to Control Panel -> System and Security ->Backup and Restore (Windows 7) -> Create a system image and follow the process. You can boot into a Windows 10 installation DVD or USB and use the System Image Recovery under Troubleshoot options to restore the Windows 10 backup.
JUMP TO KEY SECTIONS
How to create a backup in Windows 10
Windows 10 has a backup system built right into the operating system. Called System Image, it works rather well. The restore process can be tricky, but the backup is relatively easy. Before you begin, make sure you have an external drive with sufficient space to store the backup.
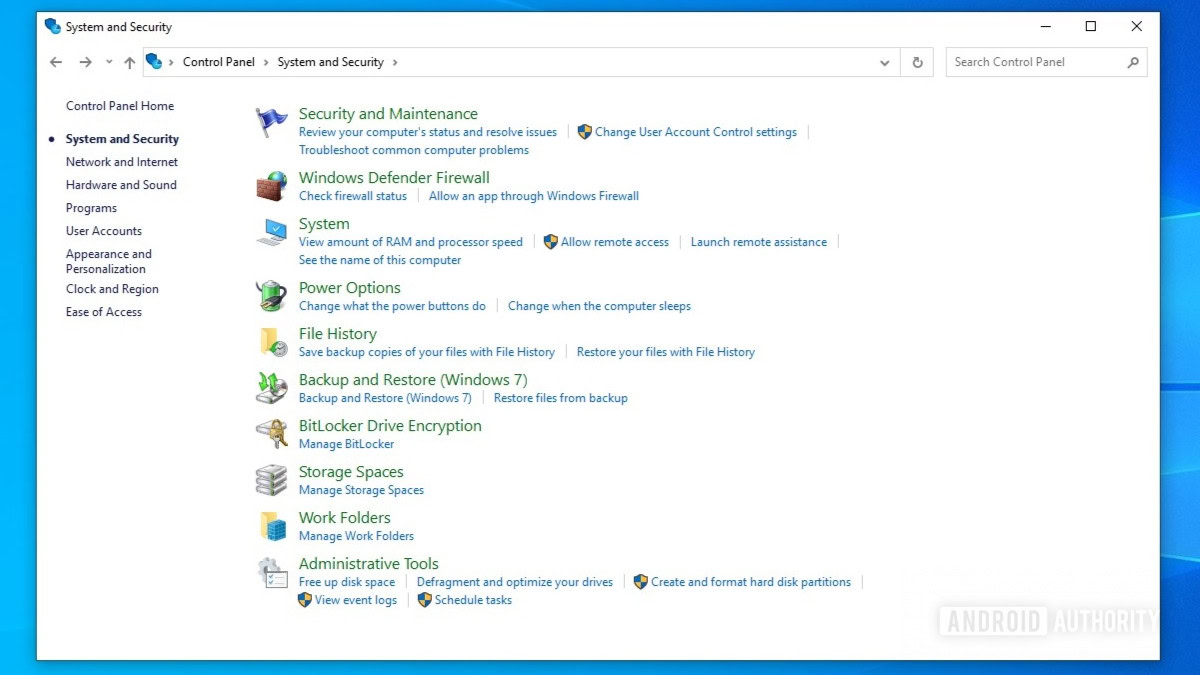
Open Control Panel via Windows search. Click System and Security.
Palash Volvoikar / Android Authority
Click Backup and Restore (Windows 7).
Palash Volvoikar / Android Authority
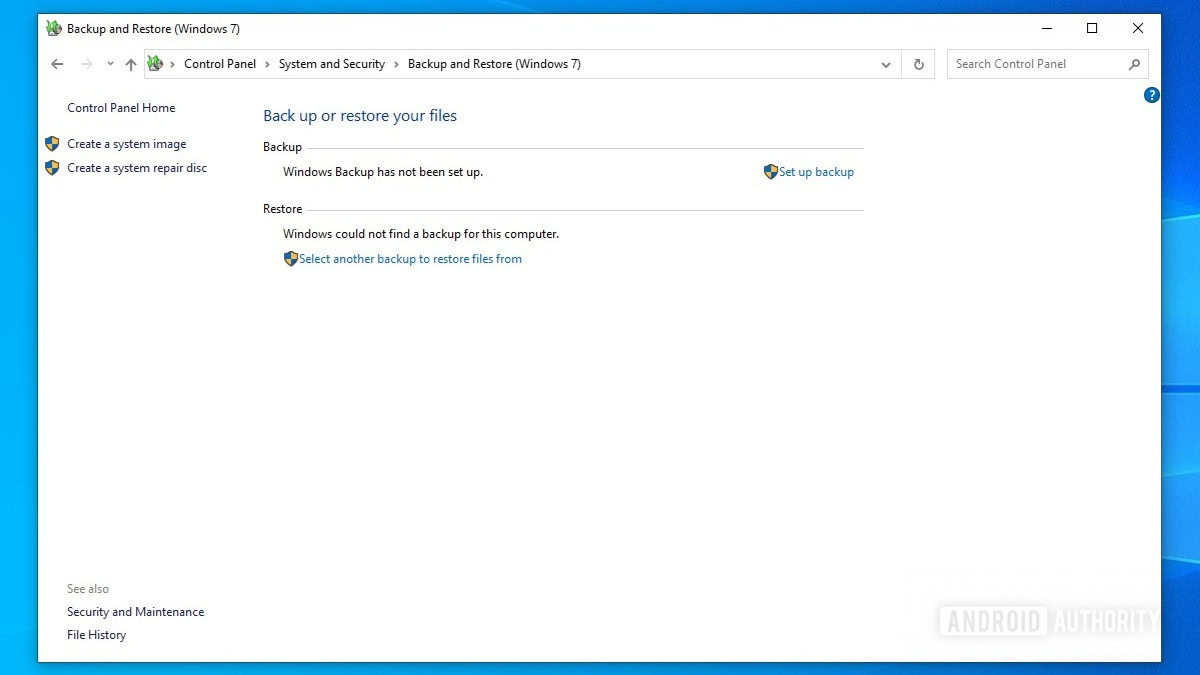
In the left pane, click the Create a system image button.
Palash Volvoikar / Android Authority
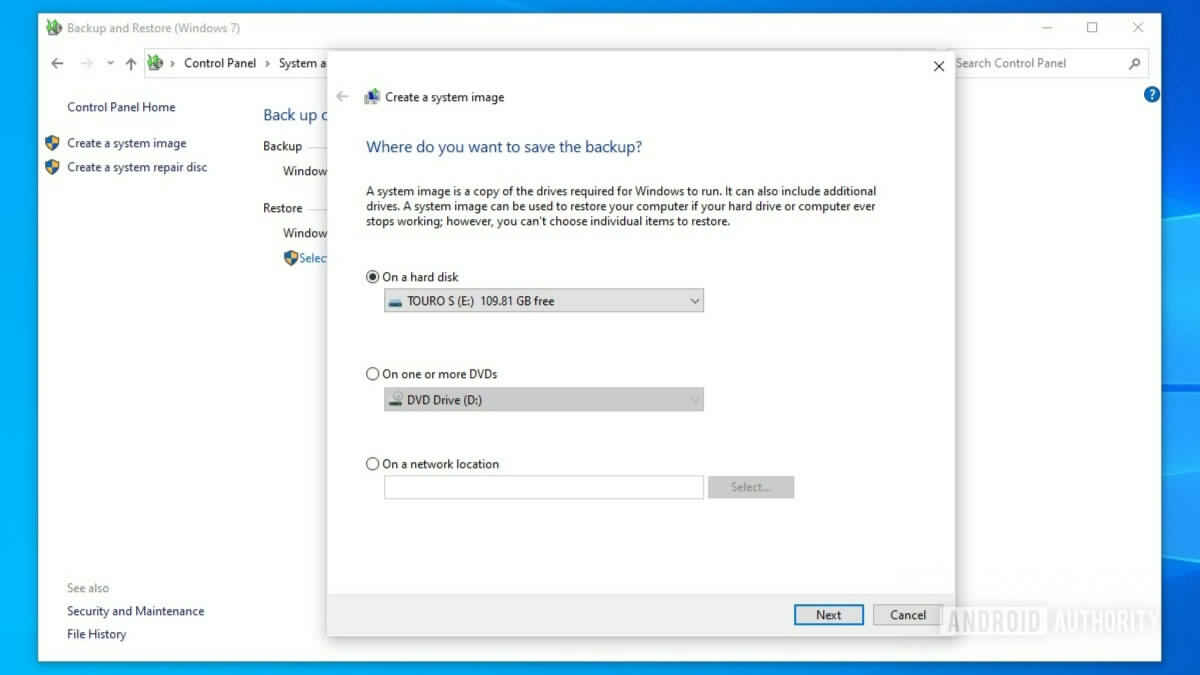
The System image creator will start. Pick the disk you want to use to save the backup. Your external drive should be connected by now and will be auto-detected. If it hasn’t, click the radio button next to On a hard disk. Click the drop-down menu and select your drive. Click Next.
Palash Volvoikar / Android Authority
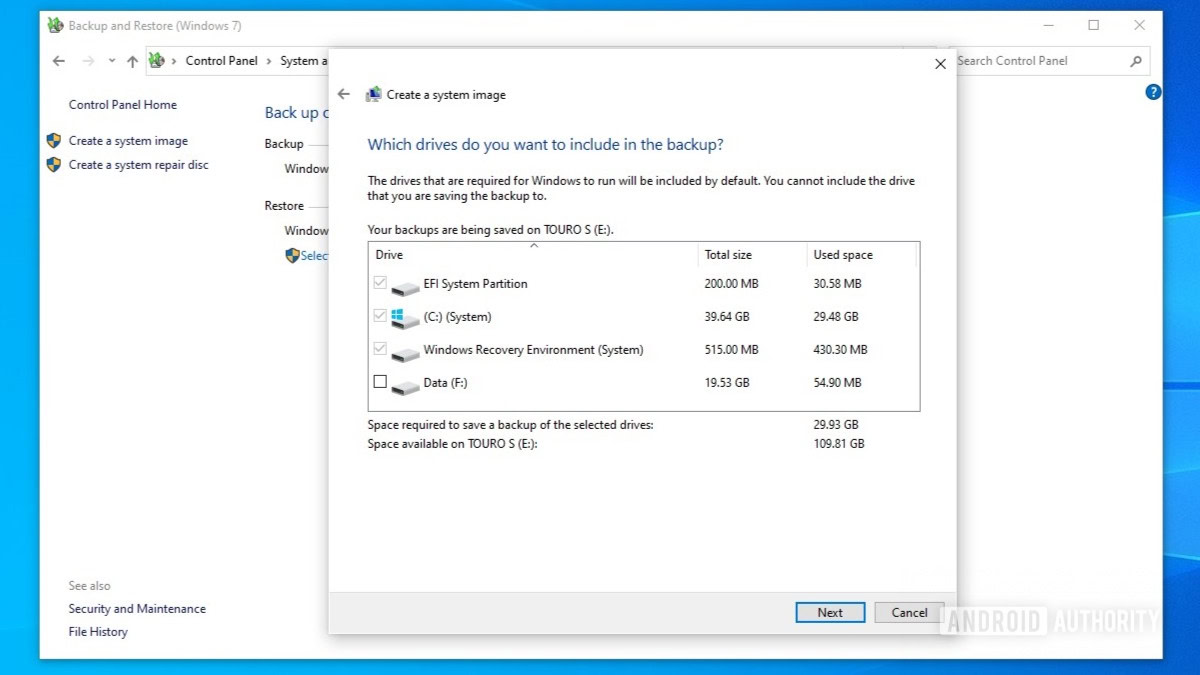
Next up, you’ll see a list of the remaining disks and partitions you can back up. If you wish to, select the required ones by clicking the checkbox next to each. Click Next.
Palash Volvoikar / Android Authority
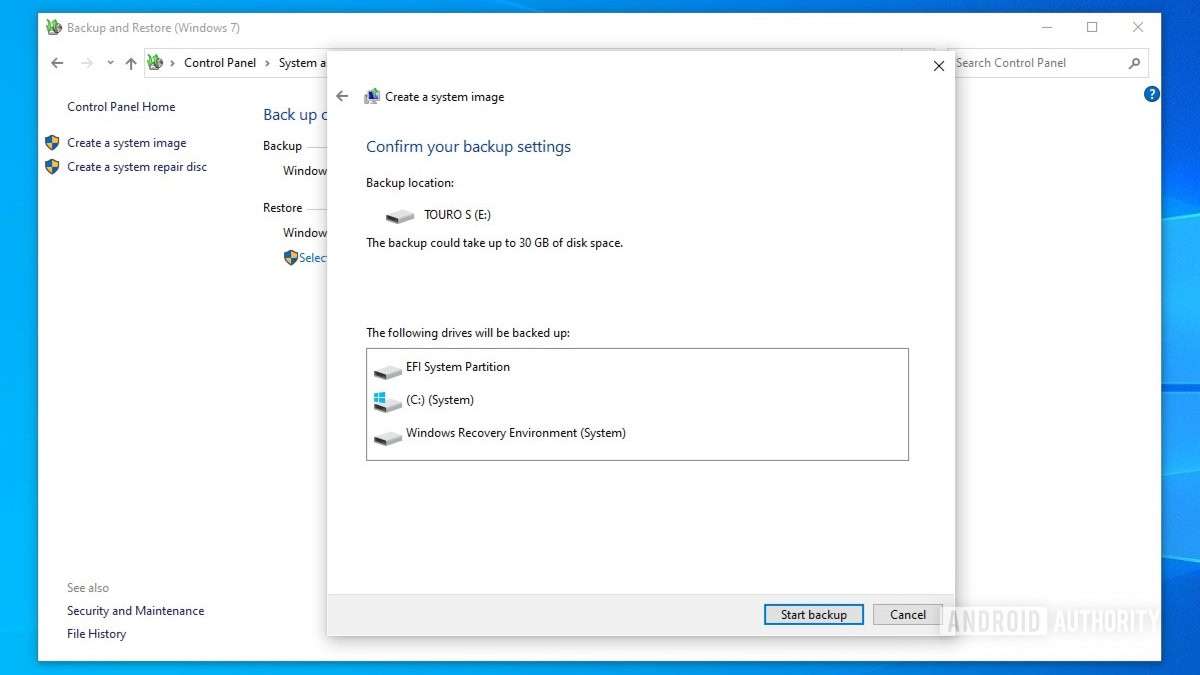
The final screen will show you your disk selections. Check that everything looks correct, and click Start backup.
Palash Volvoikar / Android Authority
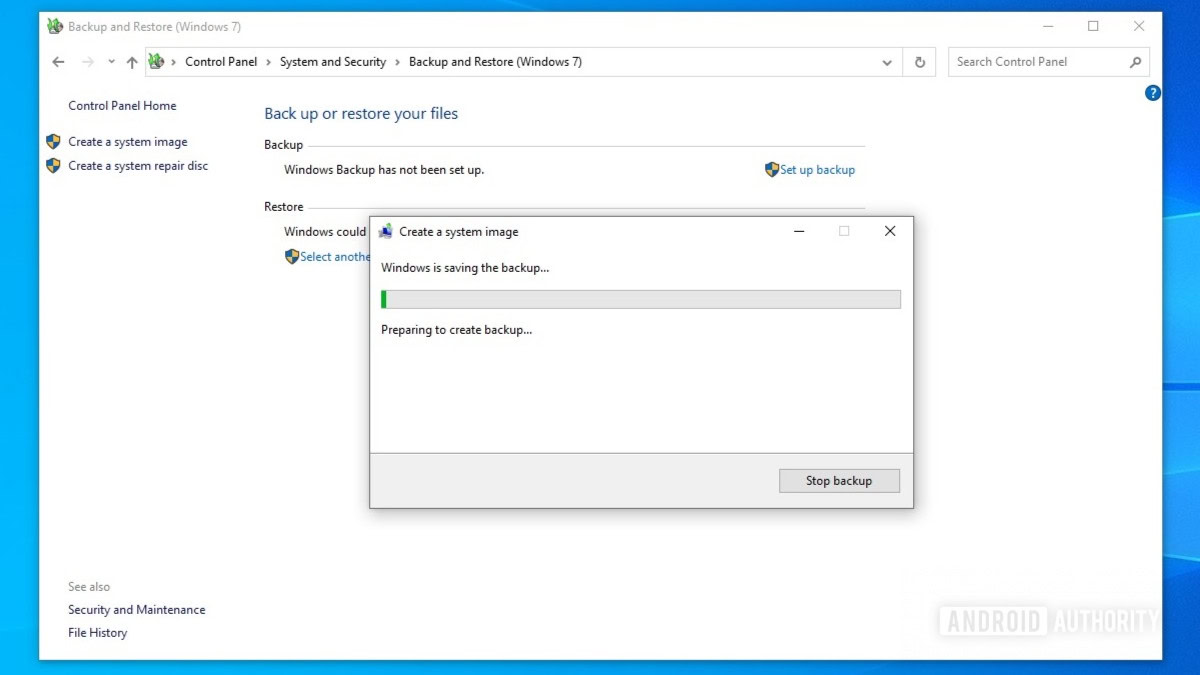
The backup will begin. It will take some time to finish, depending upon the size of the backup. Wait until the progress bar completes.
Palash Volvoikar / Android Authority
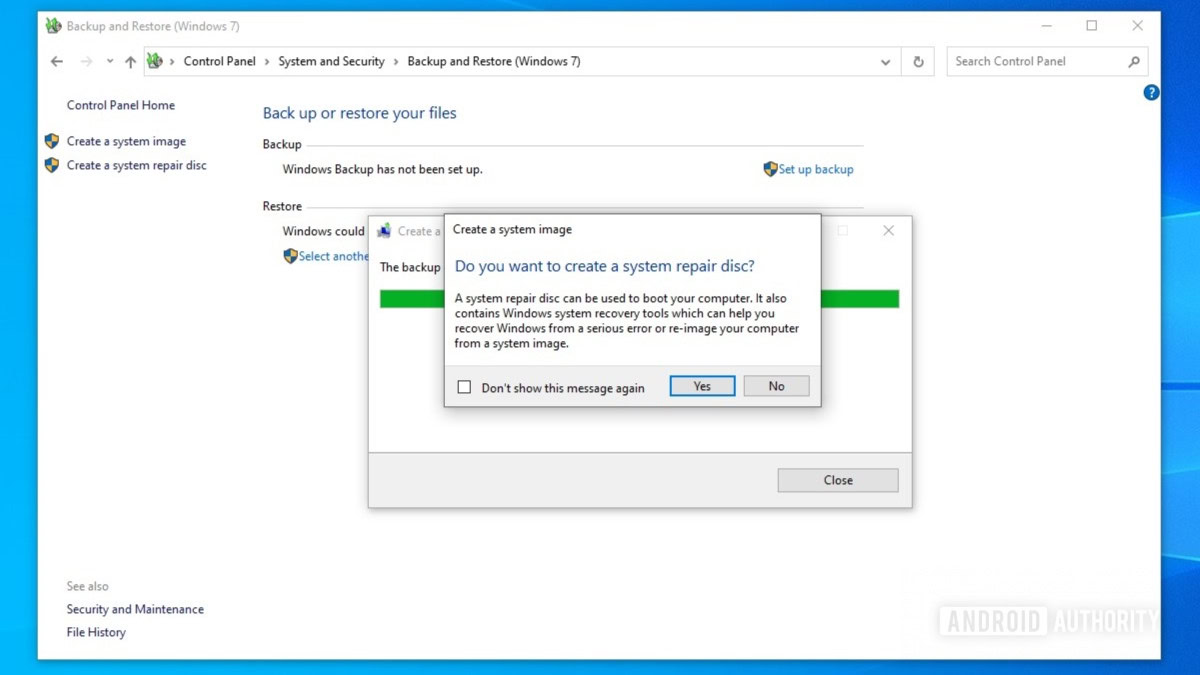
Once the progress is complete, you will get a prompt asking if you want to create a System repair disc. You can click No here.
Palash Volvoikar / Android Authority
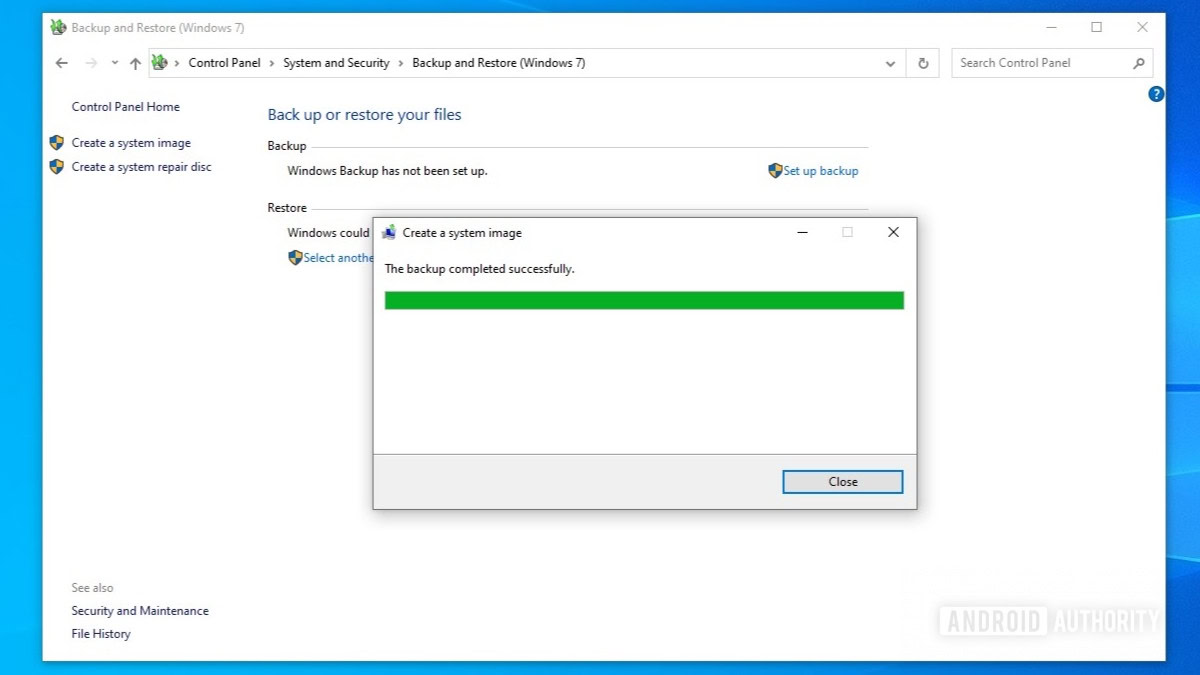
Click Close to close the system image creator. Your backup is complete.
Palash Volvoikar / Android Authority
Read more: How to install Windows 11
How to restore a backup on Windows 10
To restore a Windows 10 backup, you’ll need a Windows 10 installation disk or a bootable USB installer. Boot into the DVD or USB. If you need help getting into the boot menu, you can check the manufacturer’s site according to the brand of your motherboard/laptop. The Windows 10 installer will start.
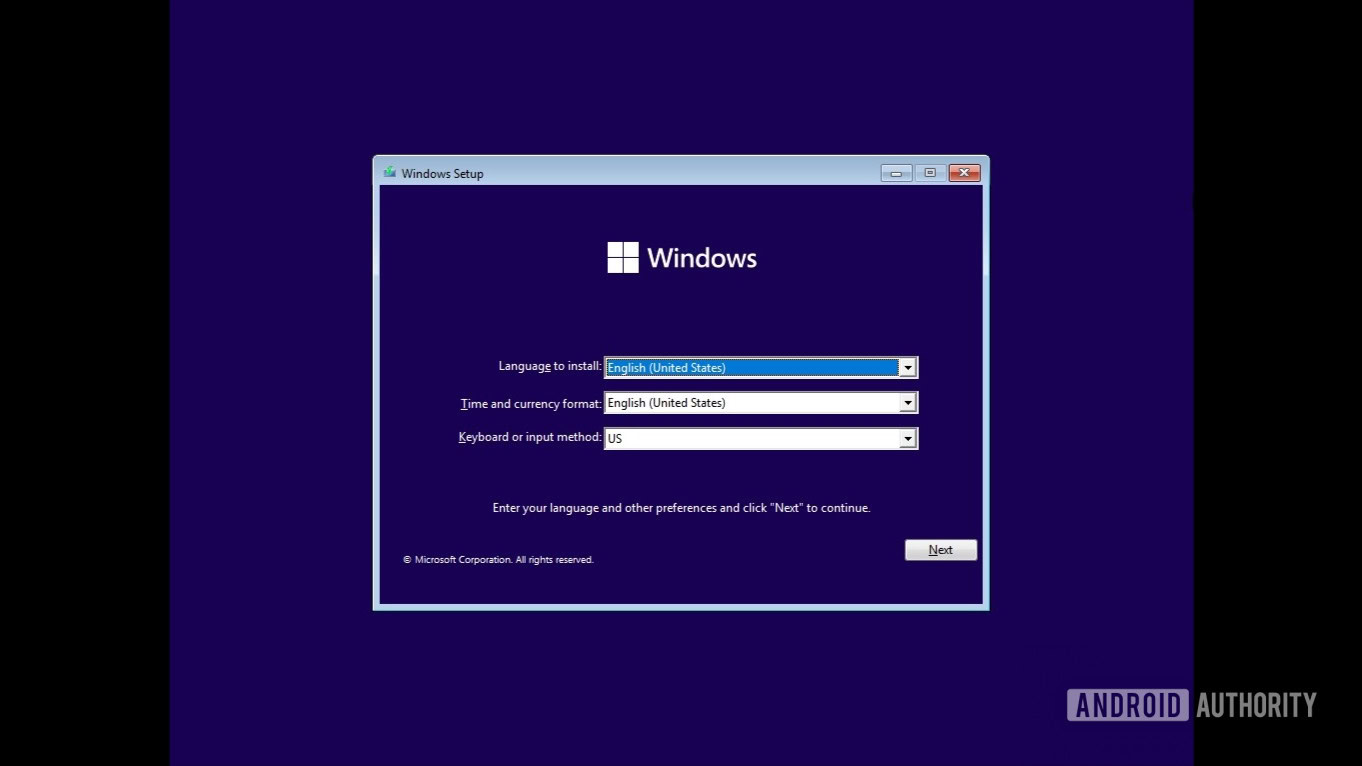
Configure the language, time, currency, and keyboard layout settings, and click Next.
Palash Volvoikar / Android Authority
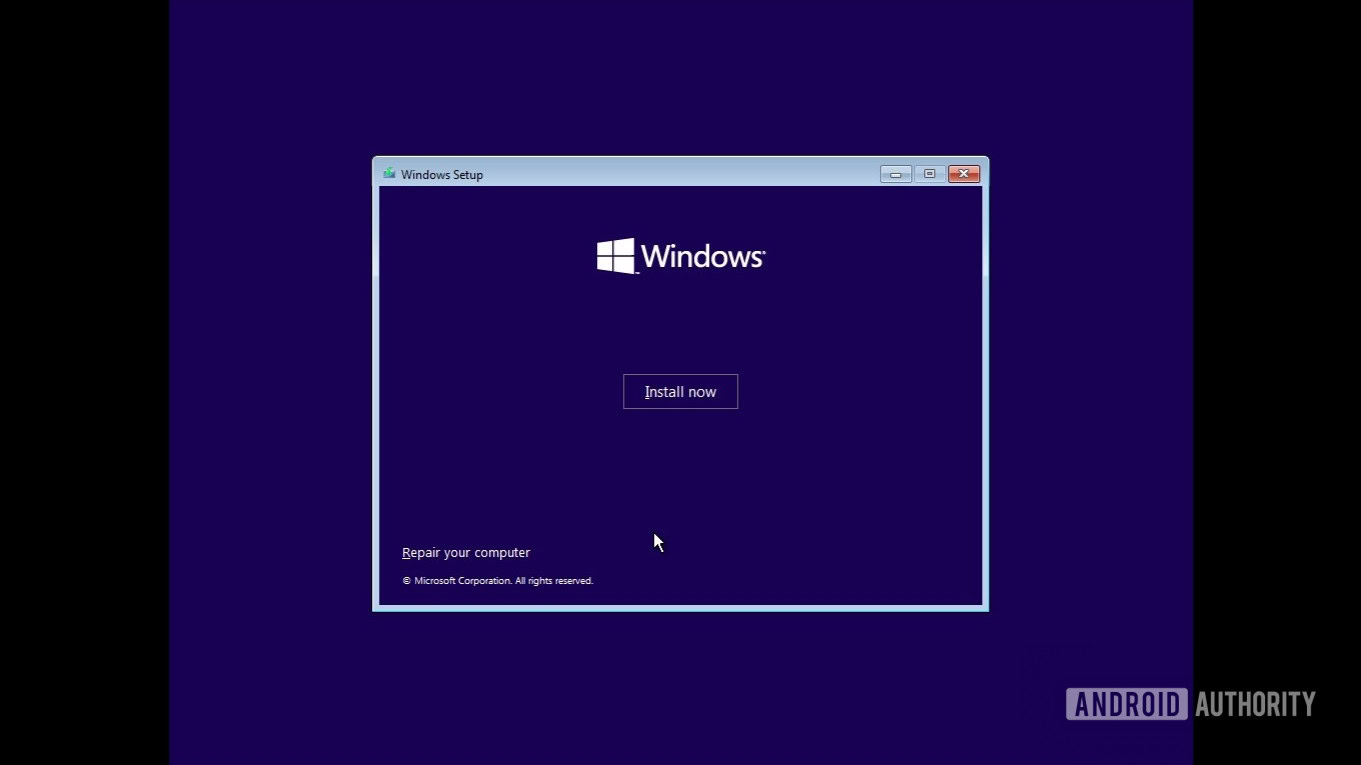
Click Repair your computer.
Palash Volvoikar / Android Authority
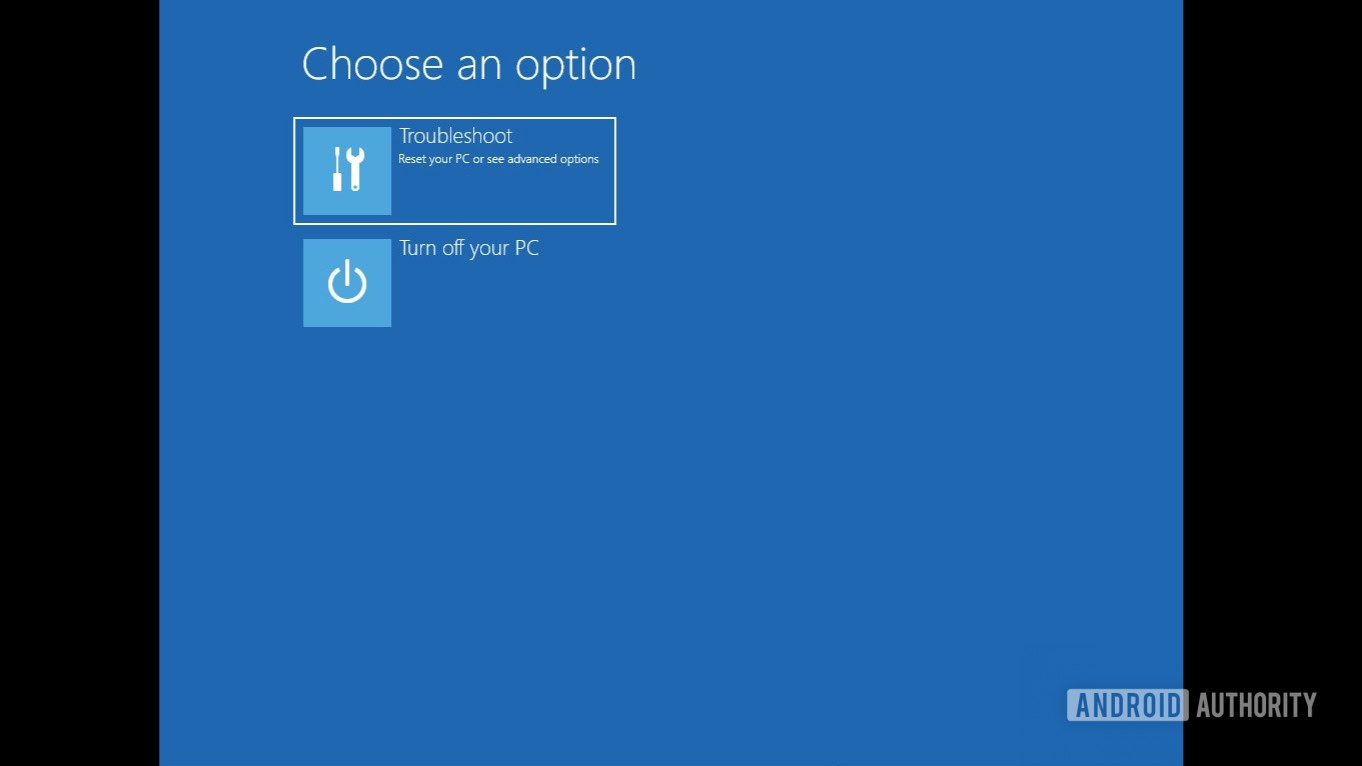
Click the Troubleshoot option.
Palash Volvoikar / Android Authority
We need the System Image Recovery tool moving forward. Click that option.
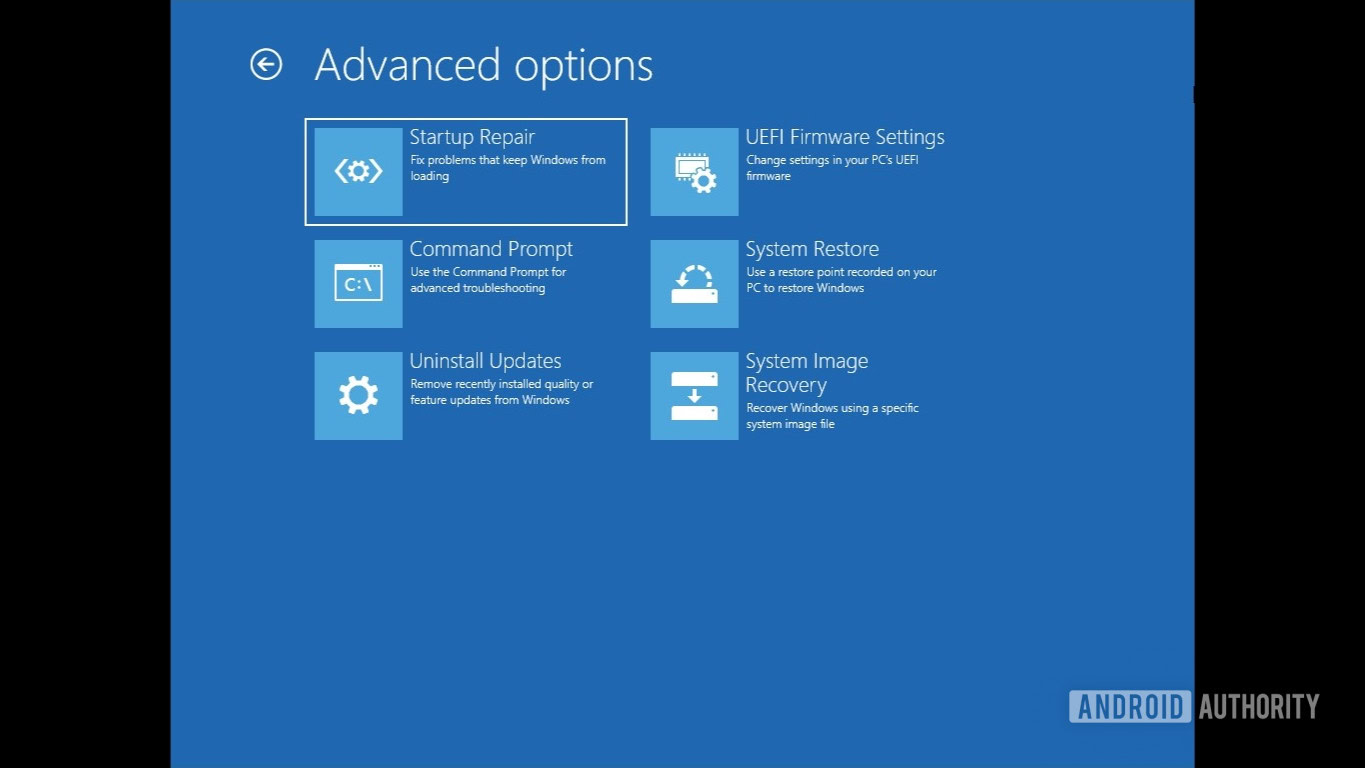
Palash Volvoikar / Android Authority
The system image restore tool will ask you which operating system you want as the target. Click Windows 10.
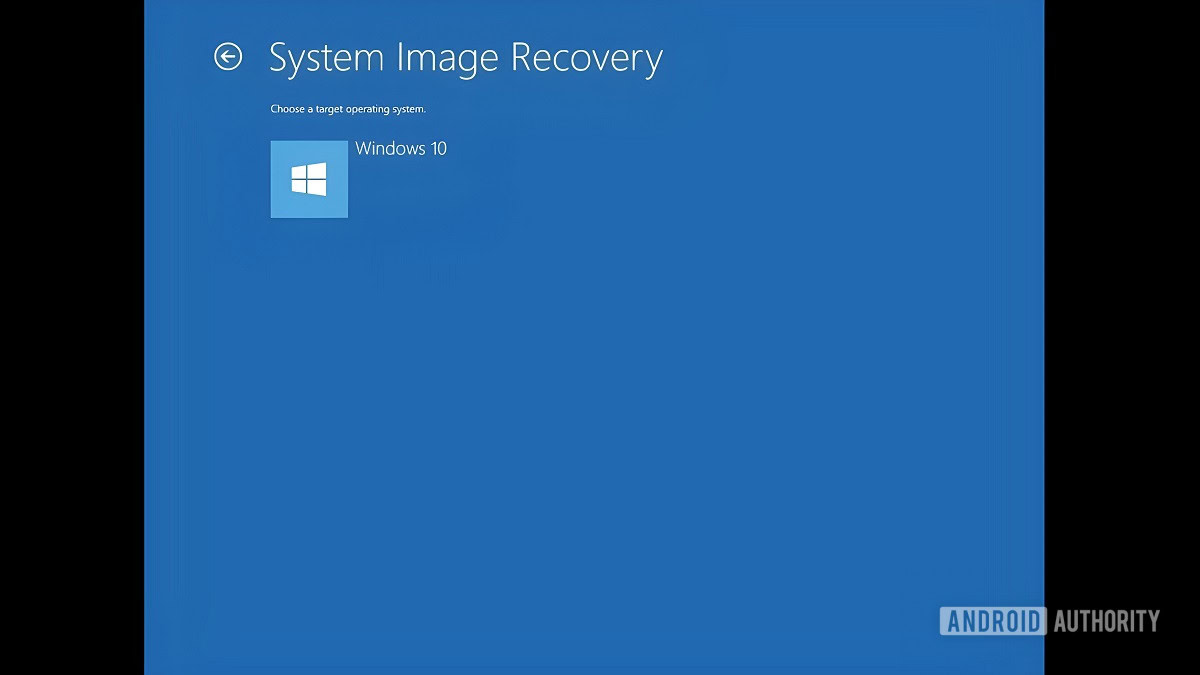
Palash Volvoikar / Android Authority
The backup folder will be automatically detected. Click Next to proceed.
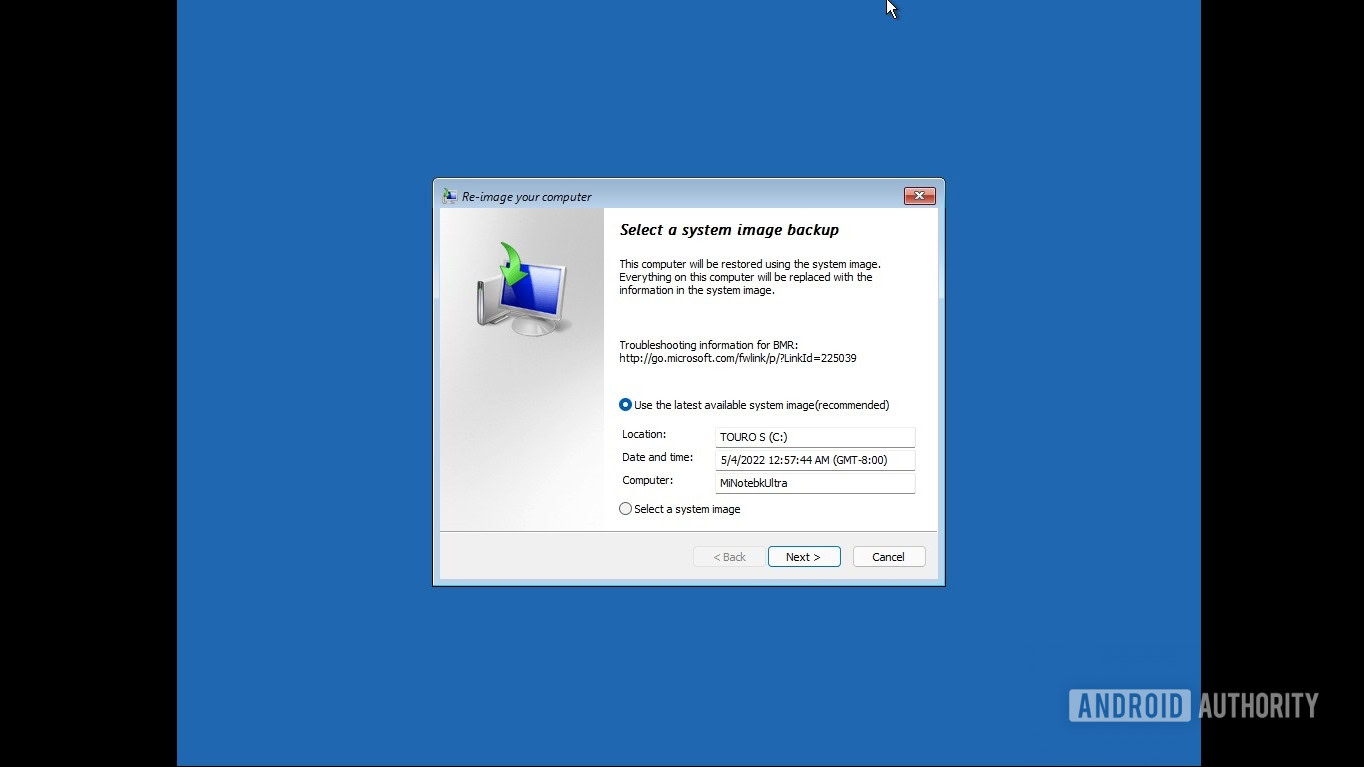
Palash Volvoikar / Android Authority
The next screen will show all available backups. Pick the right one by the date and time stamp. Click Next.
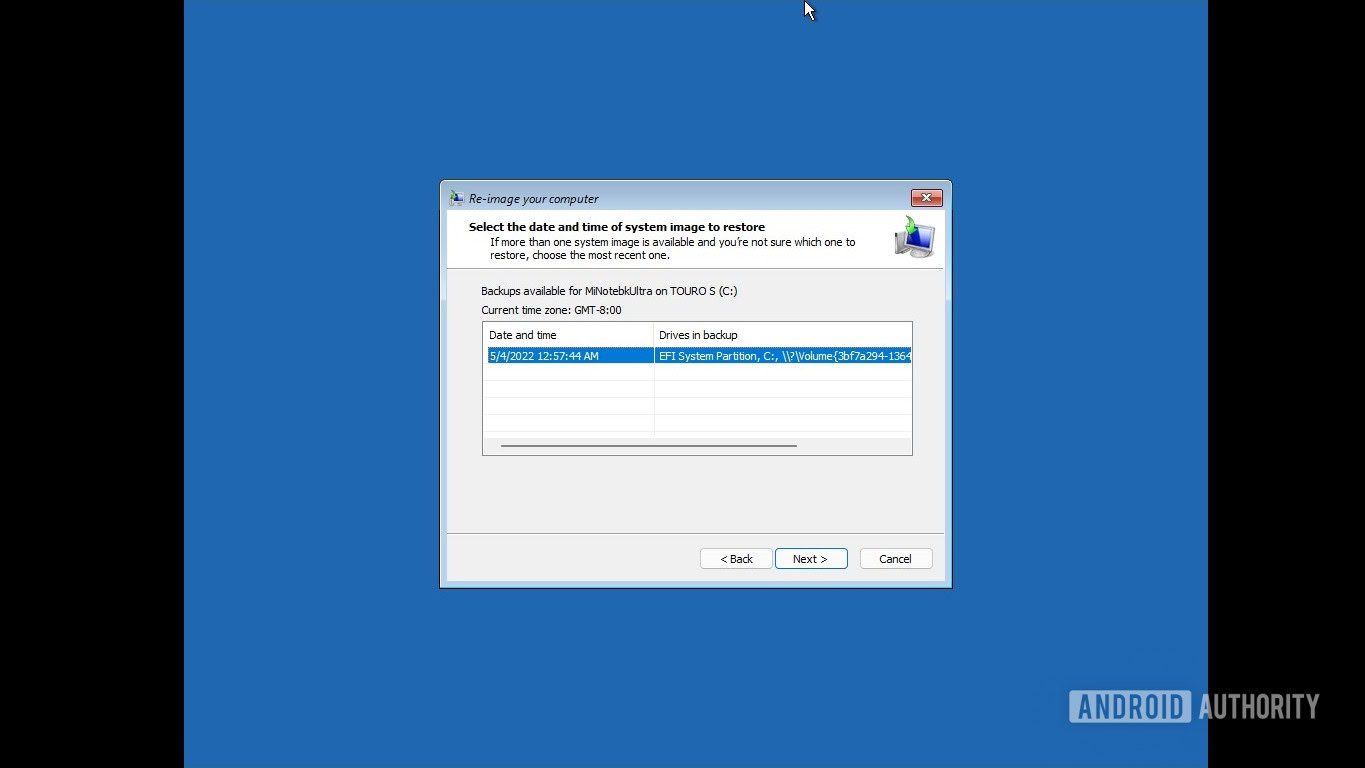
Palash Volvoikar / Android Authority
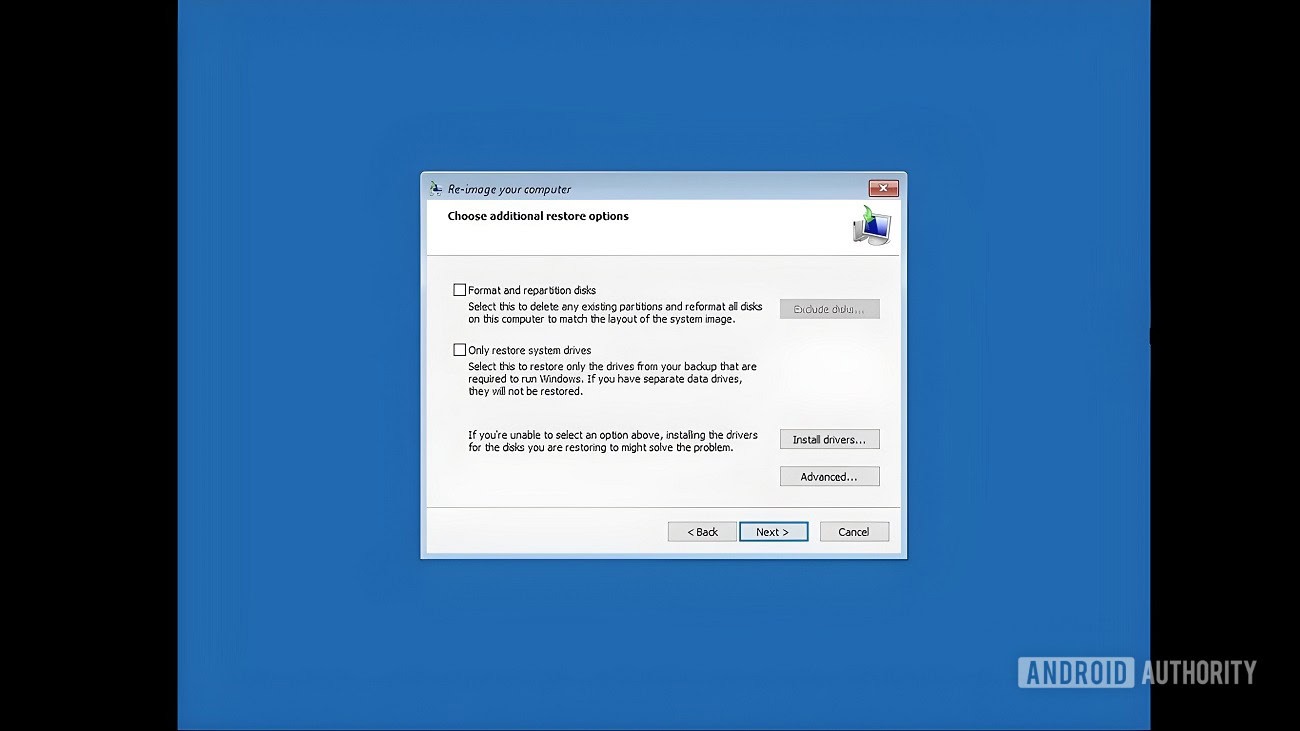
The restore will ask you to pick any additional restore options. Tick the boxes next to the ones you want to select, and click Next.
Palash Volvoikar / Android Authority
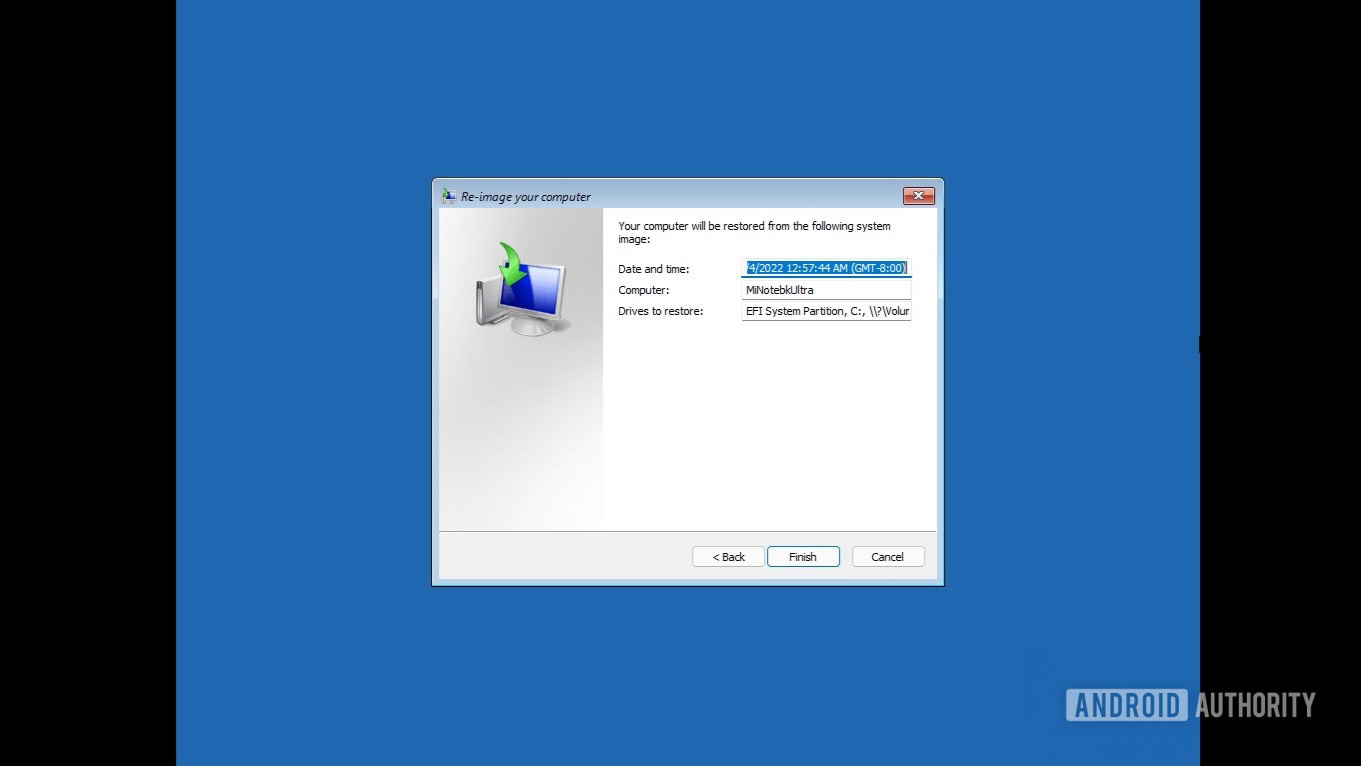
Check to ensure you have the right settings on the final confirmation screen, and click Finish.
Palash Volvoikar / Android Authority
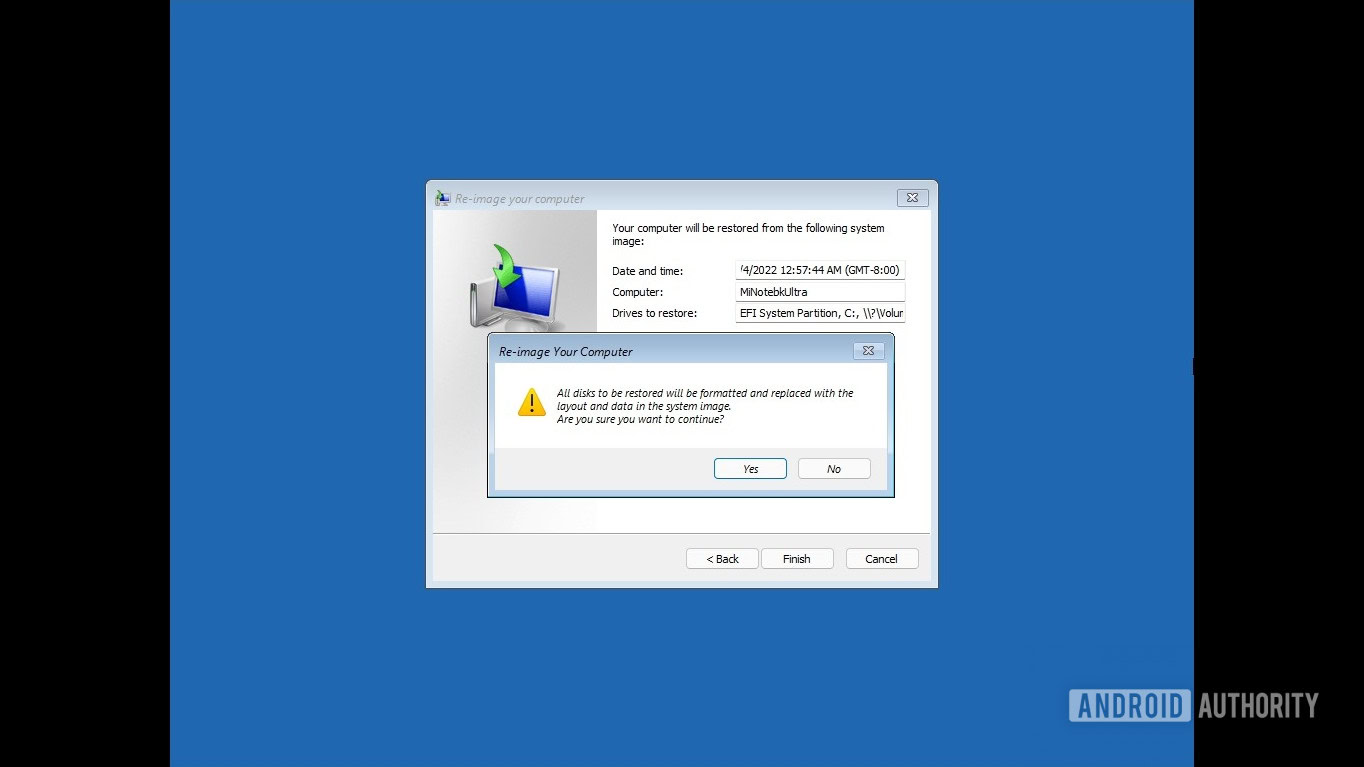
A final warning will pop up. Click Yes to start the restore.
Palash Volvoikar / Android Authority
For all the latest Technology News Click Here
For the latest news and updates, follow us on Google News.

