How to connect an Xbox wireless controller to a PC
Knowing how to connect an Xbox wireless controller to your PC gives you the best of both worlds. You get the unmatched power of a gaming PC alongside the more accessible control scheme that a console controller offers. It’s a win-win situation.
Playing with a keyboard and mouse can be enjoyable, but sometimes the more simplified button layout you find on an Xbox wireless controller is the preferred option. Thankfully, Microsoft has made its console pad fully compatible with PC, and the setup process isn’t too tricky either.
There are several ways to connect an Xbox wireless controller to a PC. You can pair the two via Bluetooth or you can use a Micro-USB/USB-C cable for a more streamlined setup. There is also a third option, connecting the controller to your PC using an Xbox Wireless adapter, but this requires an additional accessory.
It also should be noted that not all PC games are compatible with an Xbox wireless pad. You can check if a title offers controller support on the publisher’s website or on the storefront you buy games from. With those points out of the way, follow the instructions below to learn how to connect an Xbox wireless controller to a PC.
How to connect an Xbox wireless controller to a PC: Use a cable
Before we get into the steps, it’s important to note that this method of connecting an Xbox wireless controller to a PC is slightly different depending on what Xbox controller you are using. Xbox Series X, Xbox Elite Series 2 and Xbox Adaptive controllers require a USB-C cable, whereas the older Xbox One pad uses a Micro-USB cable.
1. Plug a cable into your Xbox controller and PC. Whether you’re using a USB-C or Micro-USB cable plug one end into your controller and the other into your PC.
2. With your controller and PC now tethered, press the Xbox button on the controller to switch the pad on.
3. Now that your controller is connected and switched on, allow Windows to install the necessary drivers. This shouldn’t take very long and is a one-and-done process. Next time you connect your controller to your PC you won’t need to go through this step. Your controller is now connected.
How to connect Xbox wireless controller to PC: Connect via Bluetooth
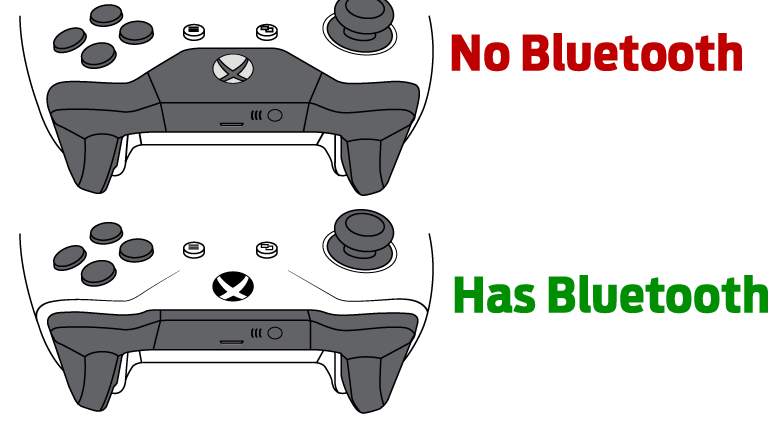
Before attempting to connect your Xbox wireless controller via Bluetooth, it’s important to check your controller actually supports the feature.
If you’re using an Xbox Series X controller, then you’re good to go. If you’re using an older Xbox One controller, things are a little trickier.

The refreshed controller that launched with the Xbox Series S does offer Bluetooth, while the original Xbox One controller doesn’t. If you’re unsure which you have, the easiest way to tell the two apart is by the plastic moulding at the top or by the fact that the newer controllers have a 3.5mm headphone jack on the bottom.
If you’re missing that port, then unfortunately you have an Xbox One pad that doesn’t include Bluetooth.
1. Open the Bluetooth & other devices menu on your PC. Just type Bluetooth into the Windows search bar located in the left-hand corner of your screen and you’ll get the option to go to the Bluetooth & other devices menu. Ensure that Bluetooth is turned on here.
2. Turn on your Xbox controller by pressing the Xbox button. Once your controller is switched on, hold the sync button on top of the controller (the one with three dashes next to it) until the Xbox logo begins to flash rapidly.
3. In the Bluetooth settings menu click Add Bluetooth or other device and then select Bluetooth from the popup menu. After a few seconds of searching your Xbox controller should appear on the device list. Click on your Xbox controller in the device list to pair it with your PC.
How to connect Xbox wireless controller to PC: Connect via Xbox Wireless adapter

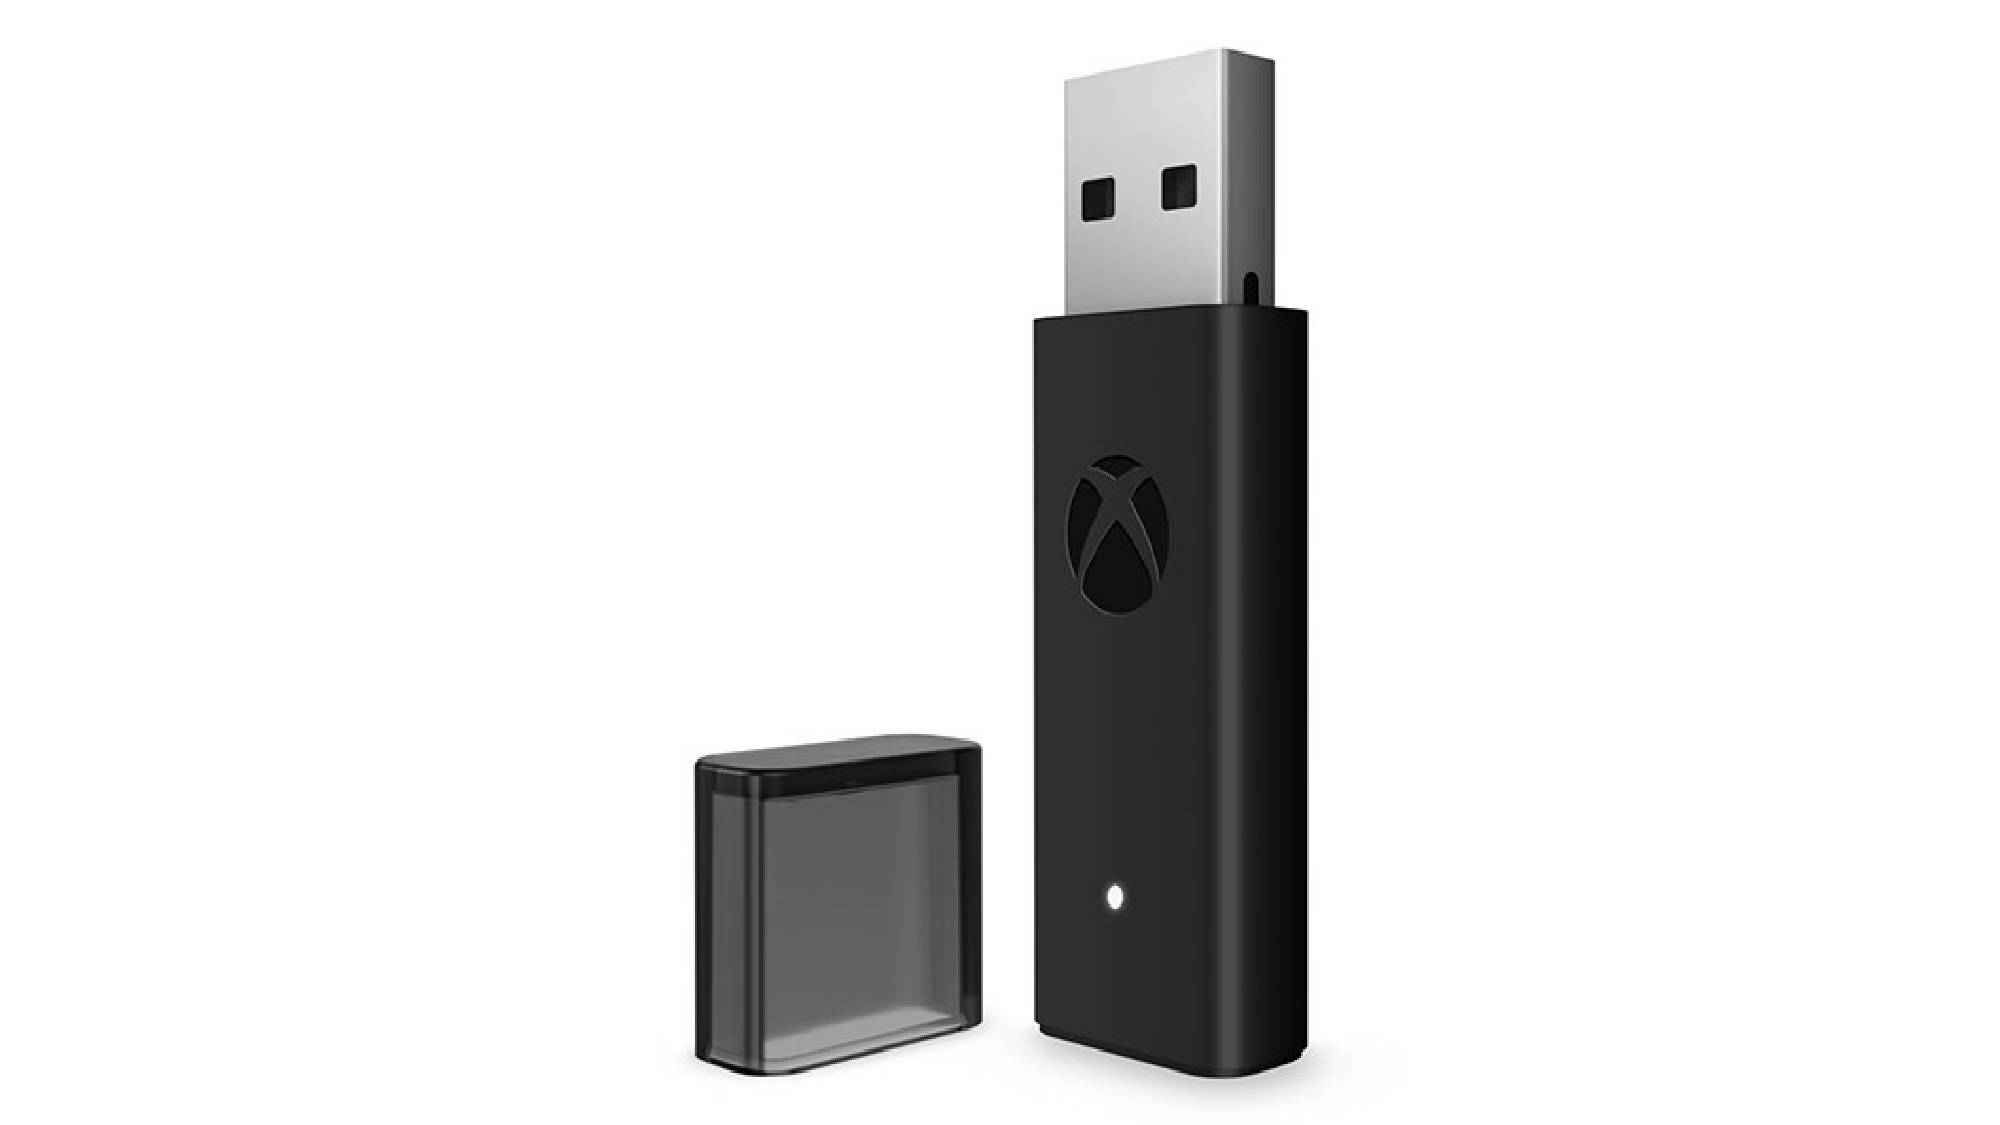
While you will need to purchase an Xbox Wireless adapter separately, connecting your Xbox wireless controller to your PC is extremely simple using this accessory. It’s the easiest way to set up your pad on a PC with a wireless connection.
1. Plug the Xbox Wireless adapter into a USB port. The adapter comes with a standard USB-A connector, so you’ll need a laptop that has one of these ports.
2. Turn on your Xbox controller by holding the Xbox button. Once your controller is switched on, hold the sync button. This is located on top of the controller (it’s the button with three dashes next to it) until the Xbox logo begins flashing.
3. Hold the sync button on the Xbox Wireless adapter for a few seconds. This button is located on either the side of the adapter or the base depending on which model you have. When the Xbox logo on your controller stops flashing and is lit up solid, then your controller is connected.
For all the latest Technology News Click Here
For the latest news and updates, follow us on Google News.
