

If you’re missing the mark when creating 3D shapes in Microsoft PowerPoint, you might be skipping a step. Learn how to apply simple 3D effects by creating a few arrows.
Image: monticello/Shutterstock
When you want to visually imply growth, steps, directions, output or even a process, you might choose an arrow shape. Arrows are one of the most commonly used shapes in PowerPoint, and fortunately there are many possibilities. However, I’ve found that many users don’t understand PowerPoint’s 3D formats and are often frustrated when they try to create a 3D shape and aren’t successful. In this article, I’ll discuss a frequently missed property, Depth, and how to apply it. First, we’ll look at a simple example and then we’ll try a more enhanced 3D arrow.
SEE: 83 Excel tips every user should master (TechRepublic)
I’m using Microsoft 365 on a Windows 10 64-bit system, but you can use earlier versions. For your convenience, download the demonstration .pptx and .ppt files. This article isn’t appropriate for the web. This article assumes you have basic skills such as inserting shapes and setting properties, but even a beginner should be able to follow the instructions to success.
What you might try when creating a 3D shape in PowerPoint
When applying a 3D format to an arrow shape, it’s easy to miss a step. When that happens, the results aren’t what you might expect. So, let’s see what happens when we miss this important step. To insert an arrow shape and apply 3D formatting, do the following:
- On the Home tab, click Shapes in the Drawing group.
- In the resulting gallery dropdown, choose the right block arrow; it’s the first arrow in that section.
- Click and drag to size the arrow.
- With the shape still selected, click Shape Effects in the Shape Styles group on the contextual Shape Format tab.
- Choose 3-D Rotation from the dropdown list.
- From the resulting list, choose a perspective (Figure A).
Figure A
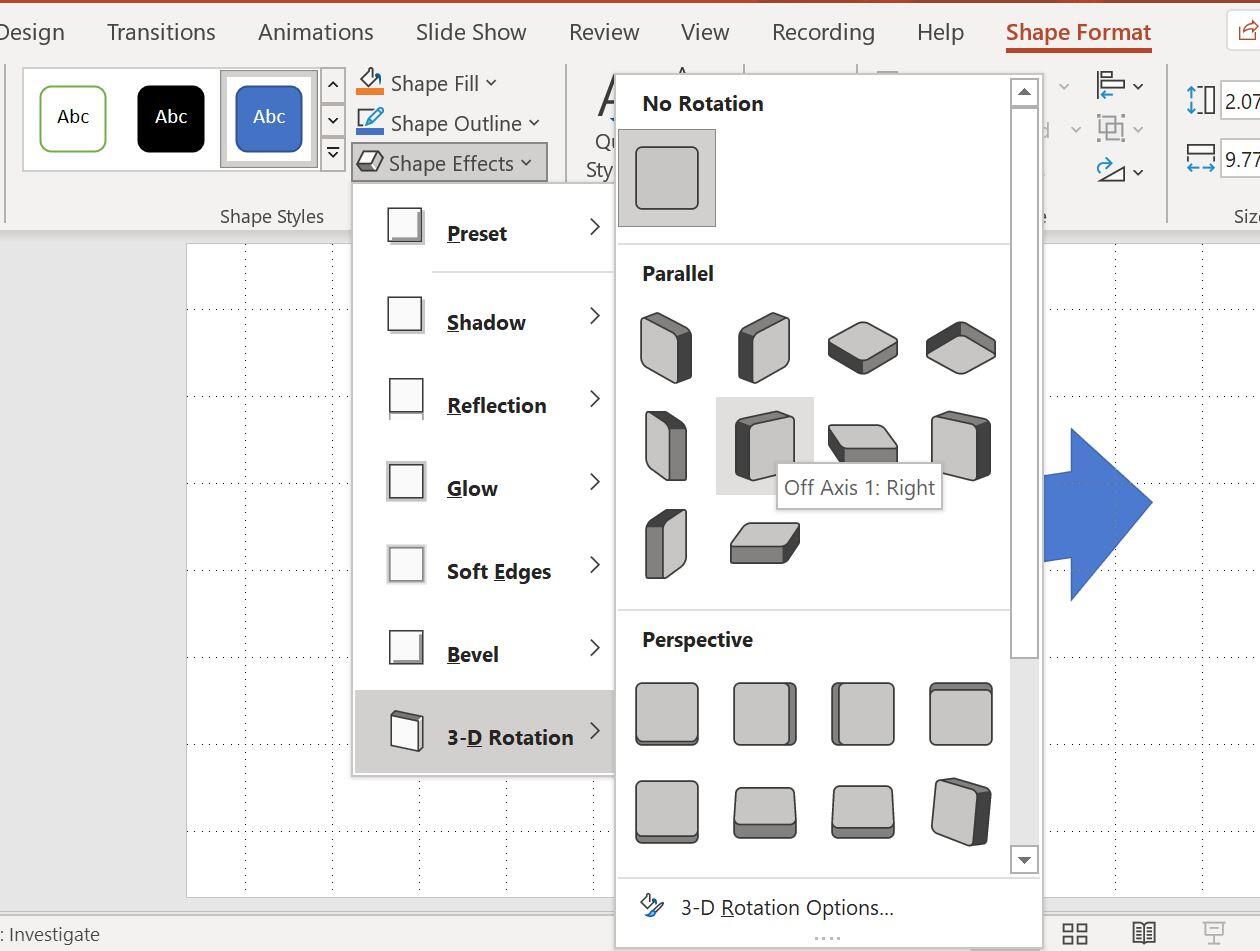
Choose a 3D perspective.
The resulting arrow in Figure B doesn’t look 3D at all. The perspective rotated the shape, but it didn’t add depth, and 3D needs depth. Users are often surprised when they don’t get the effect they’re expecting.
Figure B

If you expected that quick route to work, you’re probably surprised.
If depth is so important, why doesn’t PowerPoint apply it automatically? PowerPoint allows you to determine how deep you want a 3D shape to be. Right-click the shape and choose Format Shape from the resulting submenu and do the following:
- Click the Effects icon to display 3D options.
- In the Format Shape pane, click 3D Format.
- Thumb down to the Depth setting and enter 20 (Figure C) in the Size control.
Figure C
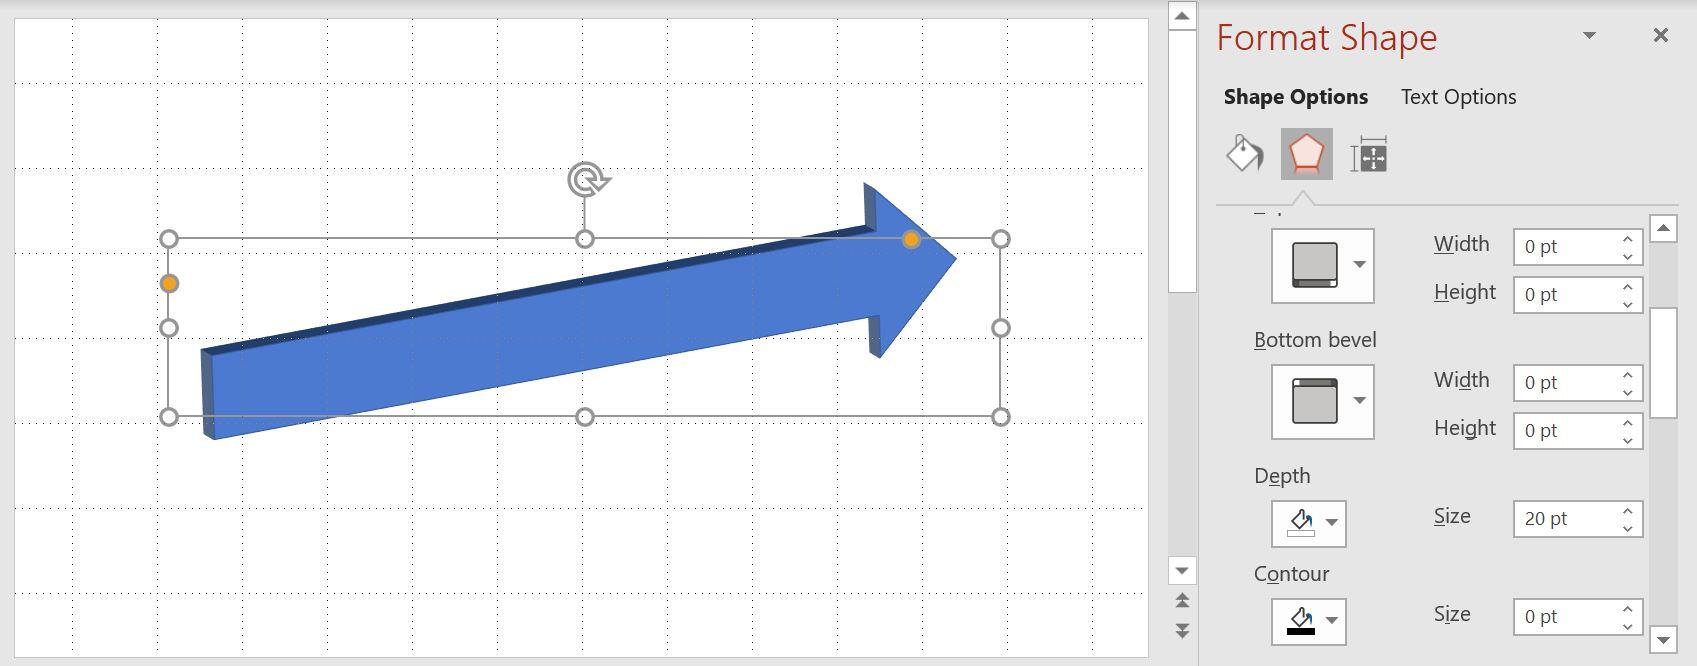
Now the shape has depth.
By adding depth, the shape takes on a 3D look. The Contour, Material and Lighting settings offer even more ways to enhance the 3D effect. These are settings you’ll want to explore later on your own. If you already know about the Depth setting, you might be surprised at how many users don’t. Now that you know how to quickly get that 3D look, let’s create a cool 3D arrow that’s made of text boxes and an arrow shape.
SEE: Windows 10: Lists of vocal commands for speech recognition and dictation (free PDF) (TechRepublic)
How to create cool but simple 3D arrow in PowerPoint
Knowing how to apply depth to create a 3D effect is important, but don’t stop experimenting. In this section, we’ll create the same arrow—sort of—but with a bit more pop. To start, add a rectangle to a blank slide and then copy it two times; we want three rectangles. (To quickly copy a shape, hold down the Ctrl key and drag the shape.) Then, add a right arrow, using Figure D as a guide. You’ll probably need to resize the arrow a bit. Use the Arrange option in the Drawing group to align the shapes and to adjust the spacing between the shapes horizontally.
Figure D
We’ll use these shapes to create an interesting 3D arrow.
Next, select each shape individually and set a fill color—you can set any colors you like or follow my lead. (Use the Shape Fill option in the Drawing group.) After setting the colors, you’ll want to add text to each shape, if appropriate. Simply double-click the shape and enter text. Change the font and font size if necessary. Next, group all the shapes: To create a multi-shape selection hold down the Ctrl key while clicking each shape. Then, choose Group (Figure E) from the Arrange dropdown in the Drawing group.
Figure E
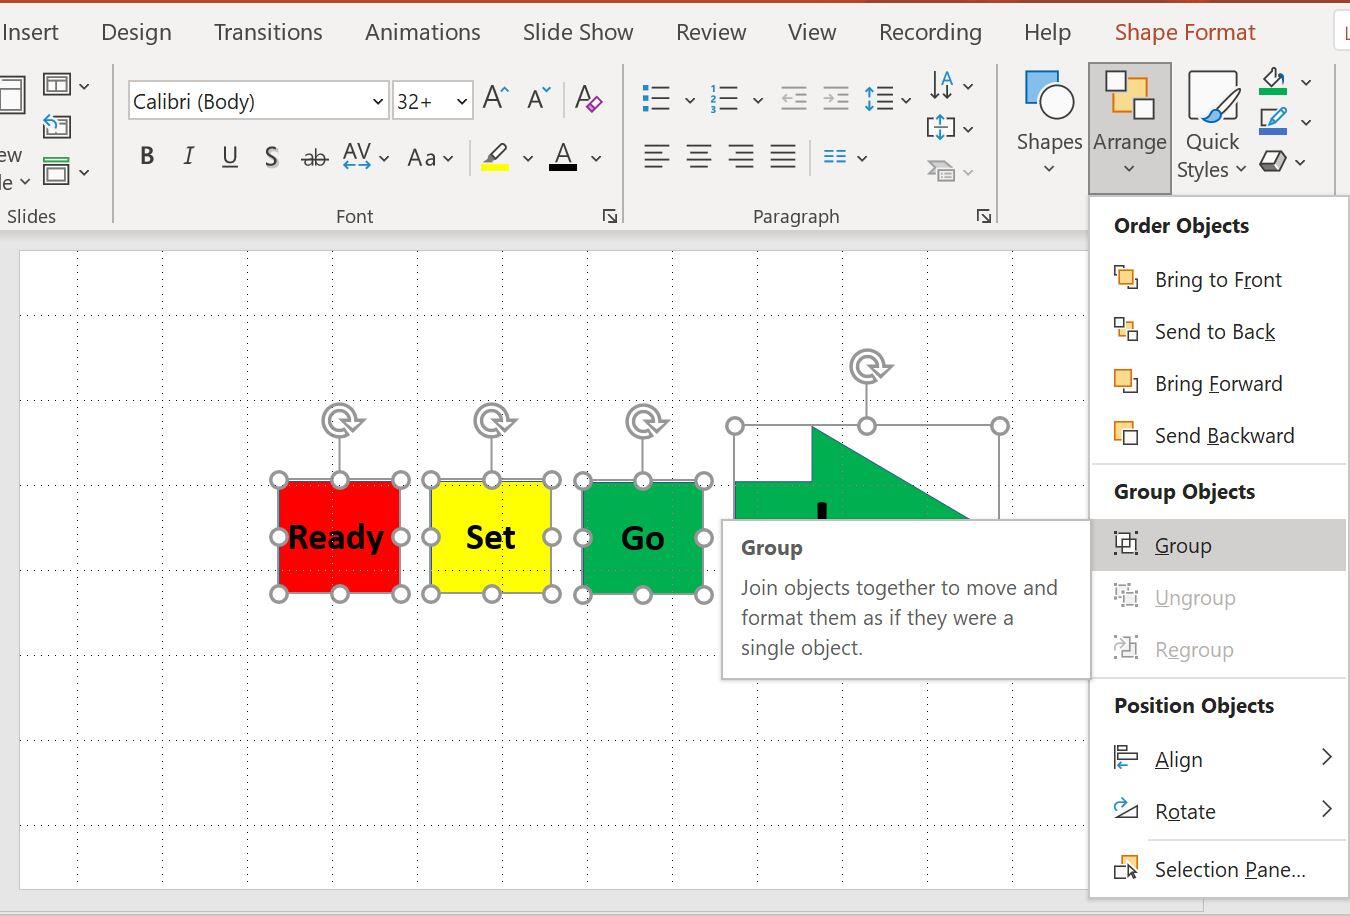
Group the shapes so you can work with them all as one.
With all the shapes grouped, we can set the 3D formatting to all of them as a group. Right-click the grouped shapes and choose Format Shape. If the Format Shape pane is still open, click the Effects icon. If you closed the pane, right-click the grouped select and choose Format Shape from the resulting submenu, and then click the Effects icon. Thumb down to the Depth setting and choose 20. Nothing will seem to happen, but it will.
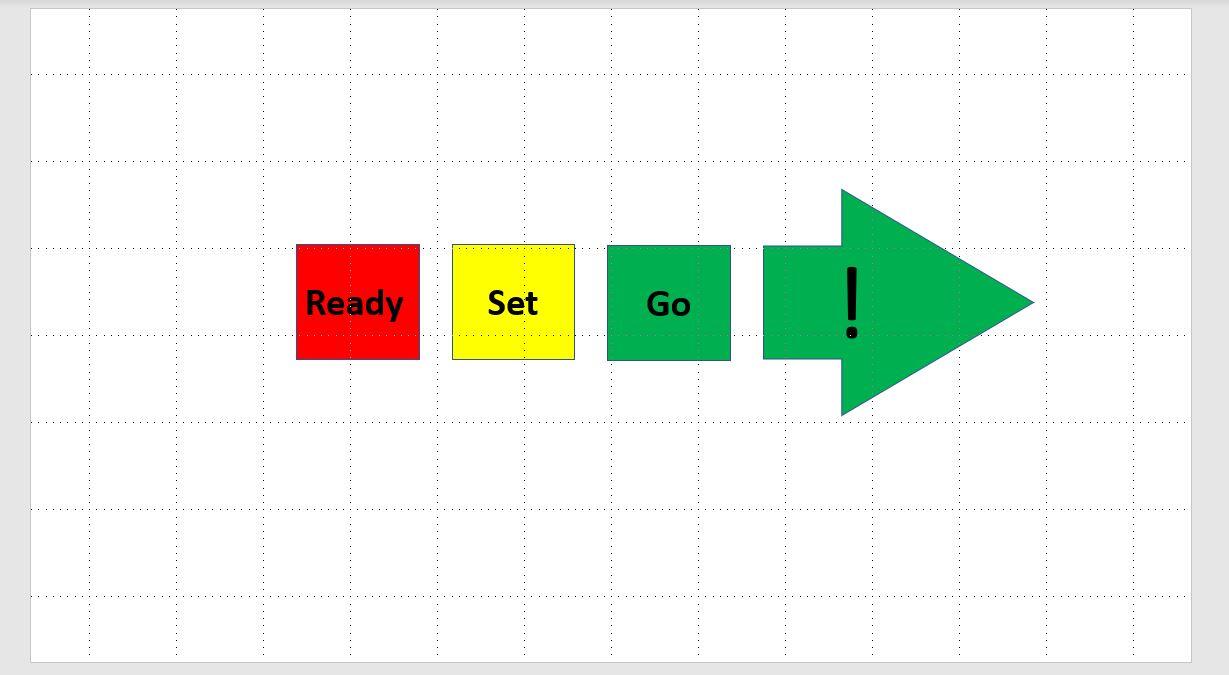
Next, on the contextual Format Shape menu, click 3-D Rotation from the Shape Effects dropdown and choose the same perspective you did with the first arrow we made. Figure F shows the results. Treating the shapes as a group allowed us to apply the same 3D perspective and depth to all the shapes to create an interesting and cohesive 3D arrow.
Figure F
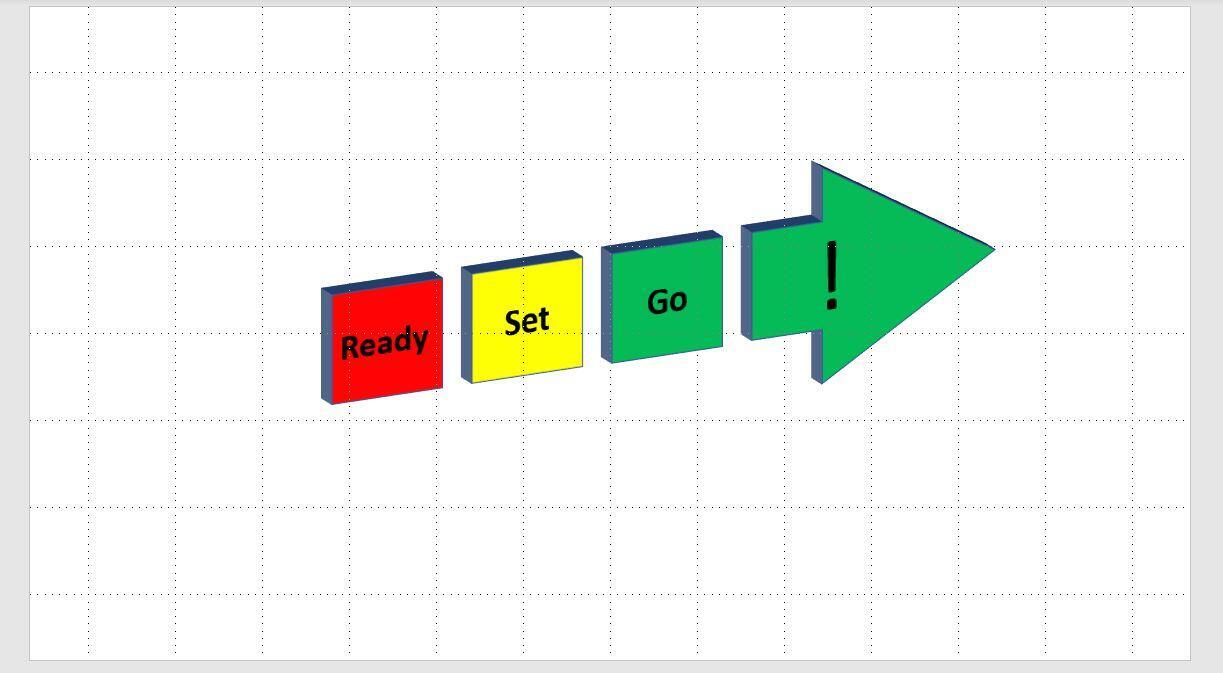
This arrow is made of rectangles and an arrow.
Once you understand the importance of depth when creating a 3D effect with any shape, you can explore other properties and creative possibilities, such as the combined rectangles and arrow we just created.
Publisher is similar, but you can’t apply the 3D perspective to the shapes as a group. You must apply it to the individual shapes after you group them.

Microsoft Weekly Newsletter
Be your company’s Microsoft insider by reading these Windows and Office tips, tricks, and cheat sheets.
Delivered Mondays and Wednesdays
Also see
For all the latest Technology News Click Here
For the latest news and updates, follow us on Google News.