How to create a Kill Switch in Windows
Knowing how to create a kill switch in Windows could (ironically) prove to be a lifesaver, if something suspicious starts happening on your internet connected computer.
“Kill switch” isn’t an official Windows term, but many VPN services offer a feature of that name. This automatically takes you offline when you lose your encrypted connection to a VPN server, so that you’re not left unprotected.
On a Windows PC, triggering a custom kill switch can cut your connection instantly if you think your machine is under attack. Perhaps it’s started downloading malware, displaying pop-up ads, or is even being used as part of a botnet.
A kill switch also has more innocuous uses: you could use it, for example, to prevent a large file from being uploaded or an embarrassing email being sent, or to cancel an inconvenient update.
Think of it as a panic button that saves you having to pull out network cables or switch off your router to disconnect from the net.
In our guide below, we’ll explain how to create a kill switch in Windows using a special shortcut. This can be activated with a single mouse click or by pressing a keyboard shortcut, to take you offline immediately should the need arise. You can also create a shortcut to reconnect to get back online once the panic is over.
How to create a Kill Switch in Windows: Create a shortcut
There’s no in-built Windows option to create a kill switch. However, you can get around this by creating a shortcut that disables your network adapter and disconnects your PC from the internet. Here’s how to do it.
1. Open the Windows 10 Settings app, either by clicking the Start button and clicking the Settings gear icon, or by pressing the Windows key + I on your keyboard.
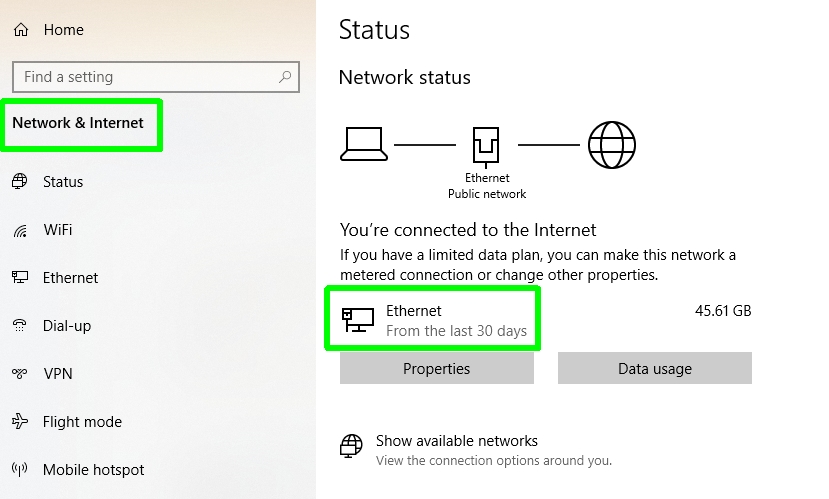
2. When the Settings window opens, click “Network & Internet.” In the “Network status” section on the right, note the name of the network adapter that’s currently connecting your PC to the internet.
For wired connections, this should be “Ethernet,” and for wireless ones “WiFi,” though your exact adapter name may differ.
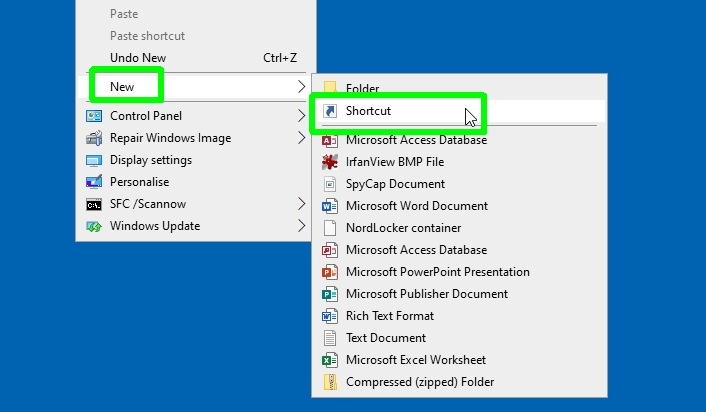
3. Close or minimize the Settings box and right-click a blank area of your desktop. Select New, then Shortcut.
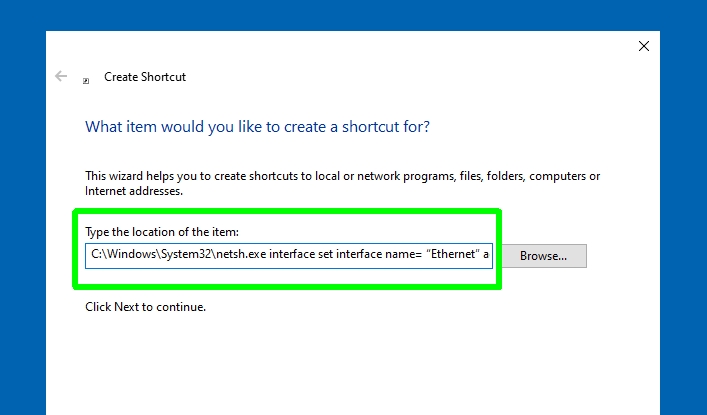
4. When the “Create Shortcut” box opens, copy and paste the following into the location box next to the Browse button. However, replace the “XXXX” with your network adapter name from step 2:
C:WindowsSystem32netsh.exe interface set interface name=“XXXX” admin = disabled
For example, for an Ethernet connection, type:
C:WindowsSystem32netsh.exe interface set interface name=”Ethernet” admin = disabled
If Windows isn’t installed on your “C” drive, you’ll need to change that drive letter, too.
5. Click Next and change the name of the kill switch shortcut to something more recognizable, such as “Internet Off”, “Disconnect” or just plain old “Kill Switch.”
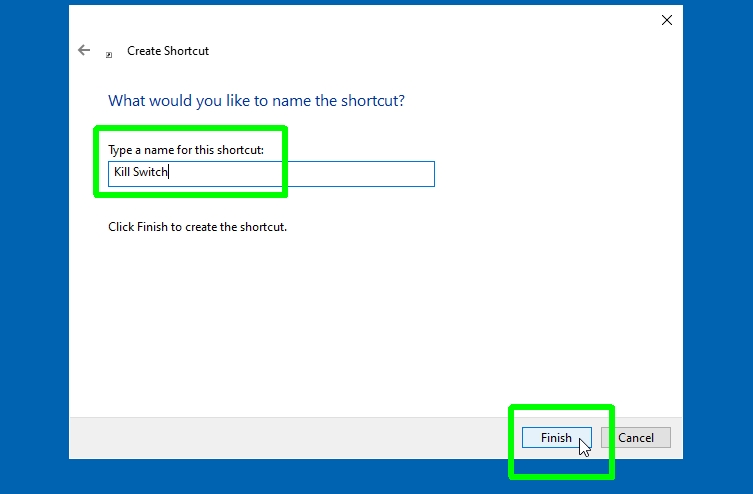
Click Finish to confirm and create the shortcut, which will appear on your desktop. Don’t click it yet though!
How to set up a Kill Switch in Windows: Customize the shortcut
Once you’ve created your kill switch shortcut, you can customize it to look and work the way you want. This will make it easier to find and trigger when disaster strikes, and prevent you from activating it accidentally. Here’s what to do.
1. Right-click your new shortcut and choose Properties from the context menu. When the Properties box opens, click “Change Icon.”
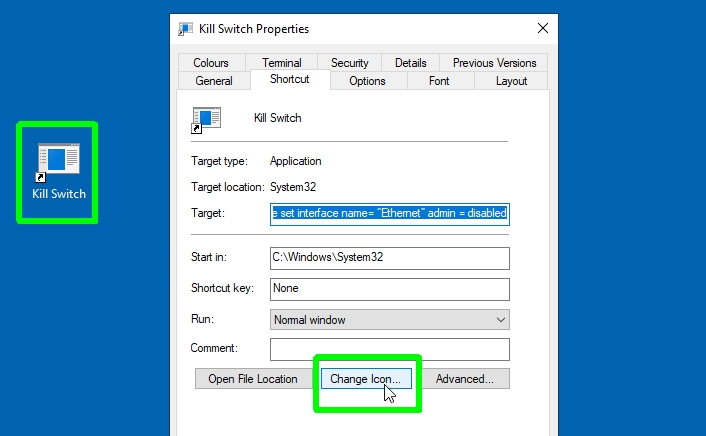
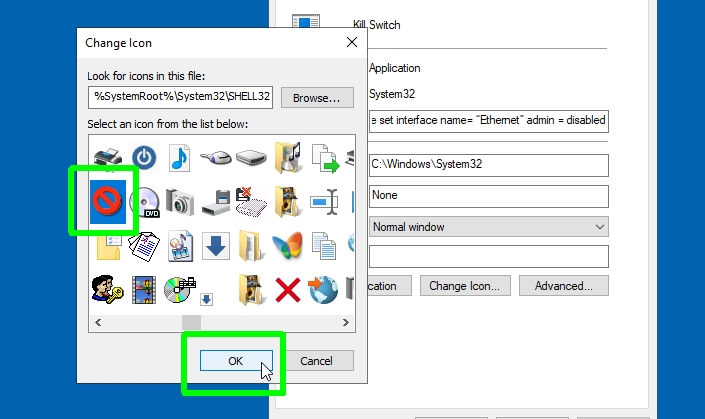
2. You’ll now see a message saying that the file contains no icons. Click OK to dismiss this and a “Change Icon” box will open.
Select a suitable icon to use for your Kill Switch shortcut, such as an off button or no-entry sign, then click OK.
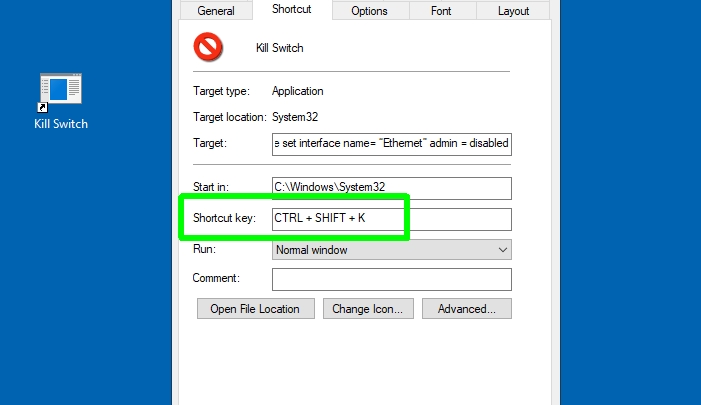
3. Back in the Properties box, you can create a keyboard shortcut for your kill switch, in case you’re unable to click its icon when panic strikes.
Click within the “Shortcut key” box and press the keys you want to use. Note that Windows may try to complete the shortcut for you. Click Apply to save your chosen key combo.
4. Finally, because turning off a network adapter requires administrator privileges, you’ll need to tweak your kill switch accordingly. Click the Advanced button and check the box to “Run as administrator,” then click OK.
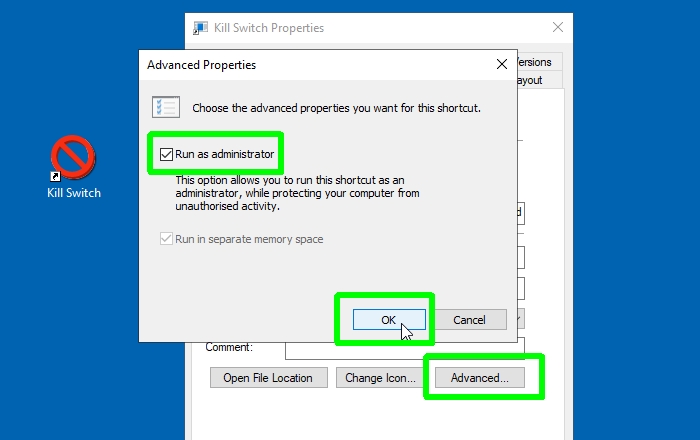
5. Click OK to save the changes to your kill switch. You can now drag and pin the shortcut to your taskbar for easy, one-click access.
However, refrain from clicking it yet — you’ll first need to create a “reconnect” switch.
How to set up a Kill Switch in Windows: Create a reconnect switch
Once you’ve used your kill switch to disconnect from the internet, you’ll next need to know how to reconnect after the emergency is over. Prepare for this by creating another shortcut that gets you back online. We’ll explain how below.
1. Repeat steps 1 to 3 in the first section above. When you get to the “Create shortcut” stage in step 4, copy and paste the following into the location box:
C:WindowsSystem32netsh.exe interface set interface name=”XXXX” admin = enabled
Again, replace the “XXXX” with the name of your network adapter, along with the letter of your hard drive if necessary.
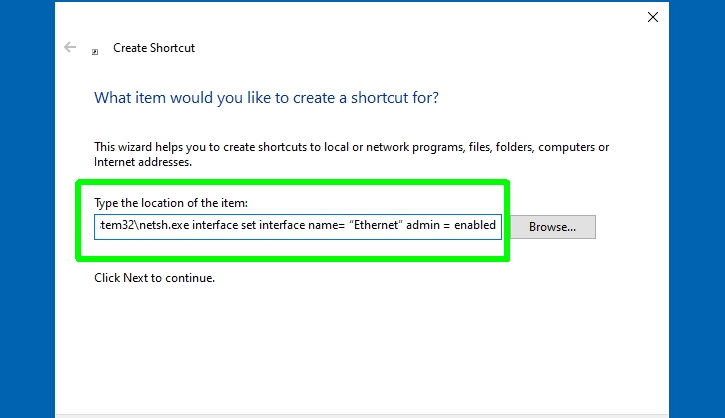
2. Name the shortcut “Reconnect,” “Internet On,” or something similarly recognizable, then click Finish to create it.
3. As explained in the previous section, you can customize the shortcut’s icon by right-clicking it and choosing Properties, then “Change Icon.” Choose a suitable icon such as a power-on button or a green check mark.
You can also set up a keyboard shortcut for the reconnect switch, in the same way as before. Don’t forget to grant administrator access, too, by clicking Advanced and selecting that option.
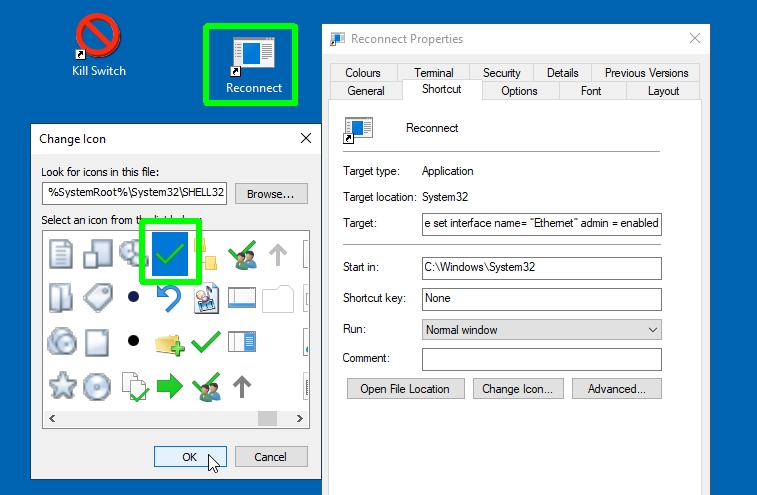
Click OK to save your settings and exit the Properties box, then optionally pin the new shortcut to your taskbar.
How to set up a Kill Switch in Windows: Test your kill switch
Finally, you should make sure your kill switch works properly, so you can disconnect from the internet immediately when disaster strikes. Here’s how to test the shortcut, as well as how to quickly get back online if your “reconnect” shortcut fails.
1. To test that your kill switch works, either double-click its icon on your desktop, click its icon on the taskbar (if you pinned it there) or use your chosen keyboard shortcut.
2. A User Account Control prompt will open, asking if you’re sure you “want to allow this app to make changes to your device.”
This warning adds an extra step to your kill switch, but it also prevents you from triggering it accidentally. Click Yes to continue.
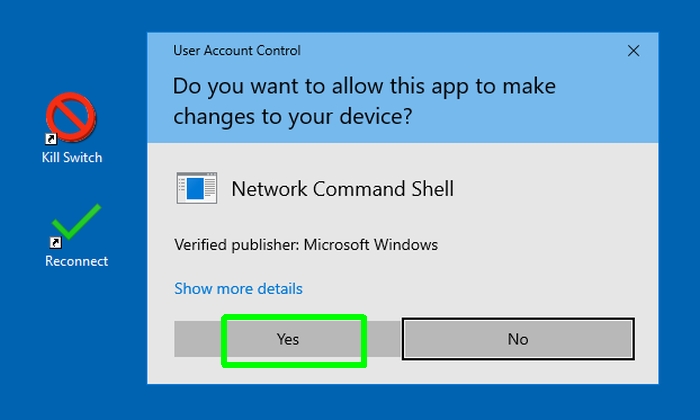
3. Your Kill Switch will now disable your network adapter and terminate your internet connection.
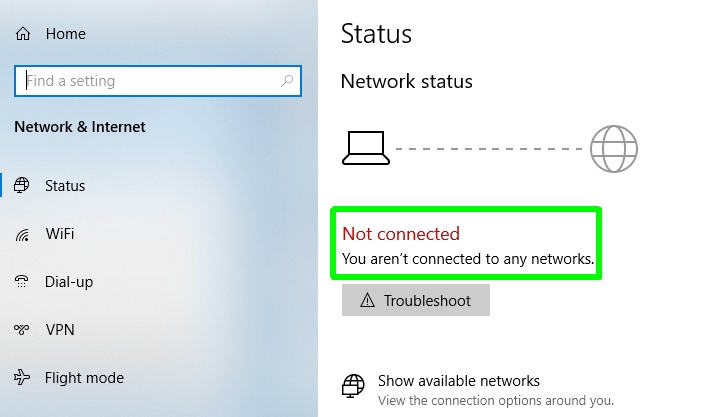
To enable the adapter again, just click or double-click your reconnect icon, or use its keyboard shortcut.
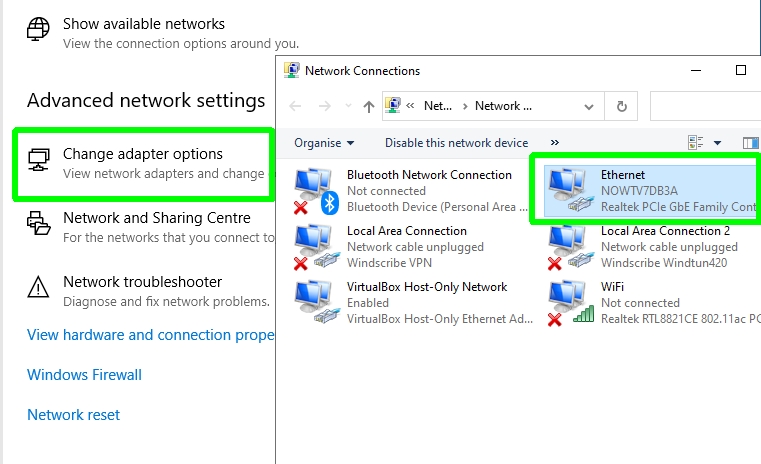
4. If something goes wrong and you can’t get back online using your shortcut, don’t panic. Just go to Settings, “Network & Internet,” and select “Change adapter options.”
Double-click your network adapter to re-enable it and reconnect to the internet.
Now you’re all prepared to quickly cut your internet connection when something worrying occurs on your PC.
For all the latest Technology News Click Here
For the latest news and updates, follow us on Google News.
