How to create a project board in Taskade
Taskade makes it very easy to manage a list of tasks for small and mid-sized projects. Find out how to add a kanban-like board to your Workspace to make things even easier.
From my experience, kanban is the easiest tool for project management. The at-a-glance card system makes the task management workflow efficient and effective, but not every task manager defaults to kanban. Instead, many task management apps — especially smaller ones — default to lists.
Although lists are great, they really don’t make it easy to work in a project management-like fashion. Even if you’re working on a smaller project, you want things to go as smoothly as possible. That’s one of the many reasons why you should consider the kanban board as your default layout.
Taskade is quickly becoming one of my favorite desktop project management tools. With the addition of a kanban-like board, I can easily manage most of my projects from within this user-friendly application.
Given not every project I work with needs a platform as large as an Asana, Trello, ClickUp or monday.com, Taskade makes for a great addition for the smaller ventures. Let me show you how to add a new Workspace to Taskade and then how to create a kanban view.
Jump to:
What you’ll need to create a project board in Taskade
The only thing you’ll need to make this work is a valid Taskade account. I’ll be demonstrating on the desktop app, but you can also do this in the web-based GUI. You can use either a free or paid account, as the feature is available to both.
SEE: Hiring kit: Project manager (TechRepublic Premium)
How to add a new Workspace in Taskade
You can always add the project board to your current Workspace, but I tend to prefer experimenting with new Workspaces.
With that in mind, log in to your Taskade account. From the main window, click + in the left sidebar (Figure A).
Figure A

In the resulting pop-up, click Create A Workspace. In the next pop-up (Figure B), give the Workspace a name, select an icon, choose a color and click Create Workspace.
Figure B

With your new Workspace created, it’s time to add a project board.
How to add a project board
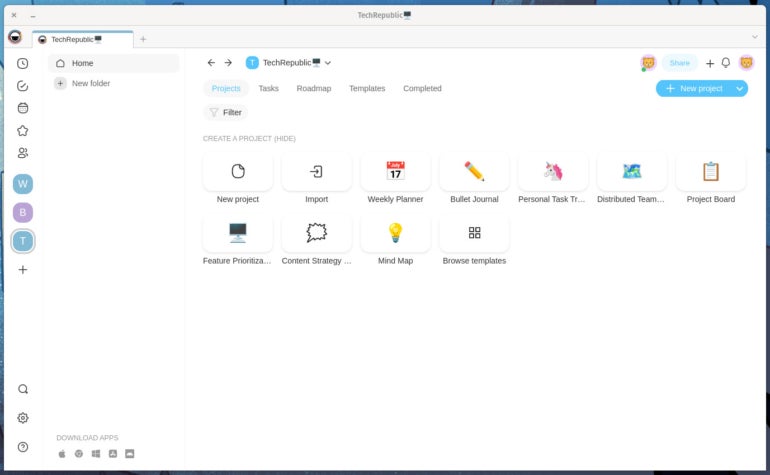
In the new project tab, you’ll see a number of icons, where you can create things like projects, weekly planners, bullet journals, personal task trackers, content strategies, mind maps and project boards (Figure C).
Figure C

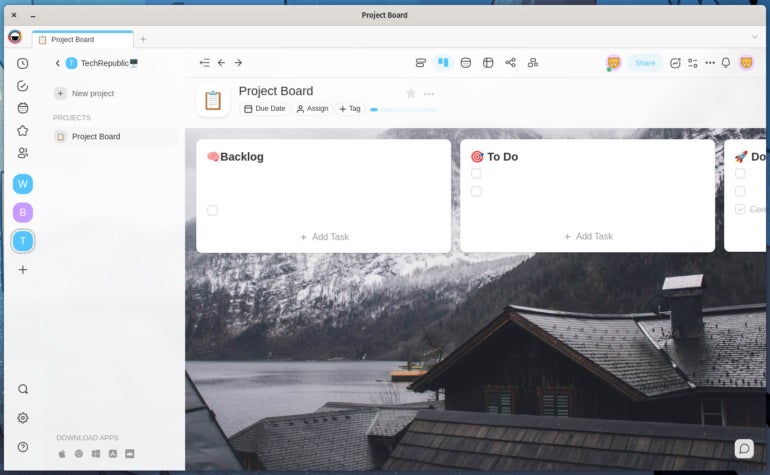
As soon as you click Project Board, you’ll be taken to the board (Figure D) where you can start to configure it as needed.
Figure D

Each column — which Taskade calls “Blocks” — can be renamed to suit your needs, and you can start adding tasks to each.
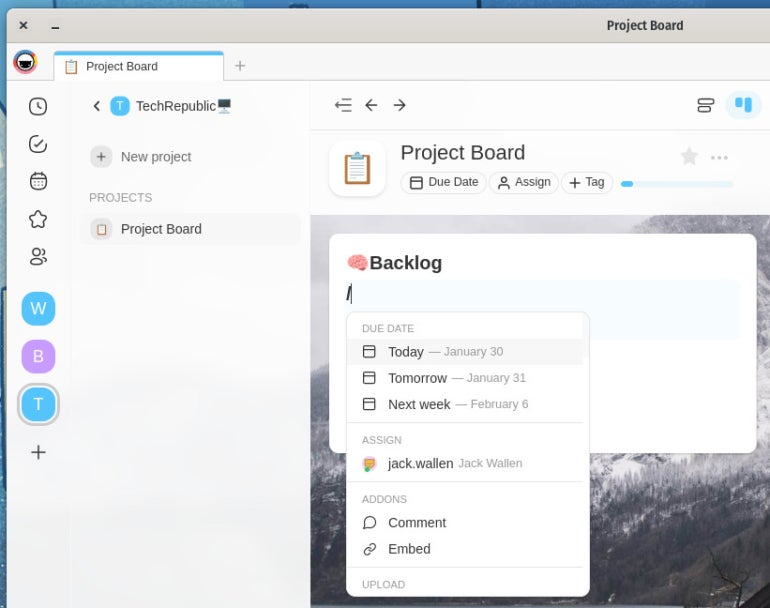
One very nice feature I like about Taskade is that it uses / and @ commands in cards (Figure E).
Figure E

If you type /, you can then type something like today. For example, /today adds today’s date as a due date. You could also type /, select Comment and then add a comment to the card. Type /, select Embed and then add a link to embed to the card (Figure F).
Figure F

You can also type /upload and then select where you want to upload the file from.
One thing I wish the developers would implement is true / commands, such that you could type something like this:
/comment This is my comment./embed www.techrepublic.com
Unfortunately, that is not the case. Instead, you type / and then select what you want to add. The only exception is due dates, where you can type something like /february 4 to add a due date.
Easy task management
If you’re looking for one of the easiest task management tools for smaller projects, Taskade is about as good as it gets. With apps for Linux, macOS, Windows, Android, iOS and the web, you can manage your tasks and projects no matter where you are.
Subscribe to TechRepublic’s How To Make Tech Work on YouTube for all the latest tech advice for business pros from Jack Wallen.
For all the latest Technology News Click Here
For the latest news and updates, follow us on Google News.
