

The latest version of VMware Workstation Player includes the features needed to install Windows 11 as a virtual machine.
Windows 11 is a tricky operating system to run as a virtual machine. That’s because it has a few strict requirements, such as a TPM chip and a Secure Boot option. But, one product now up to the challenge is VMware Workstation Player. The latest version of this free VM tool offers built-in virtual support for the necessary TPM chip, so you can more easily set up a Windows 11 VM. Let’s see how this works.
What you’ll need to set up a Windows 11 VM
If you don’t already have VM Workstation Player, download and install it from the VMware website. The software is free for non-commercial, personal and home use and costs $149 for commercial use.
SEE: Windows, Linux and Mac commands everyone needs to know (free PDF) (TechRepublic)
If you do already have it, make sure you’re running the latest version. Open the program, click the Player menu, move to Help and select Software Updates. Click the Check for Updates button, and you’ll either be told there are no pending updates or prompted to install the latest update.
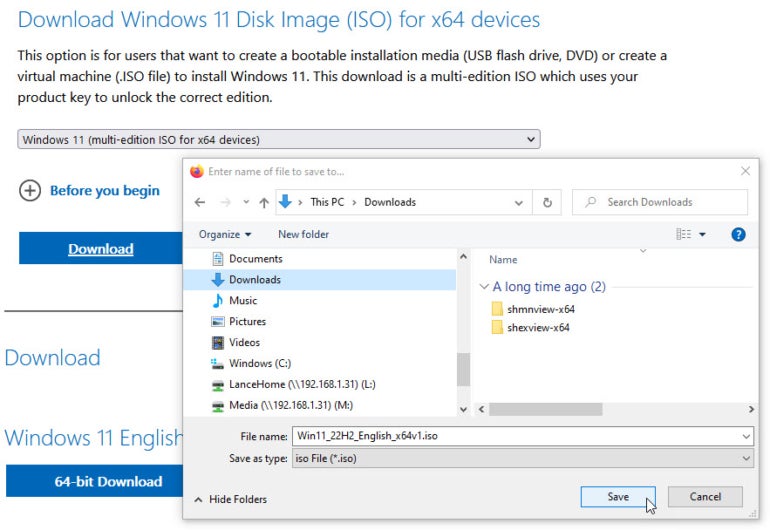
Next, you’ll need the ISO file for Windows 11. Browse to Microsoft’s Download Windows 11 website. Scroll down to the section for Download Windows 11 Disk Image (ISO) for x64 devices. Click the dropdown menu, and select Windows 11 (multi-edition ISO for x64 devices), and then, click the Download button.
Choose your product language and region, such as English (United States). Click Confirm, and then, click the button for 64-bit Download. Save the ISO file to your hard drive (Figure A).
Figure A
Setting up a Windows 11 VM
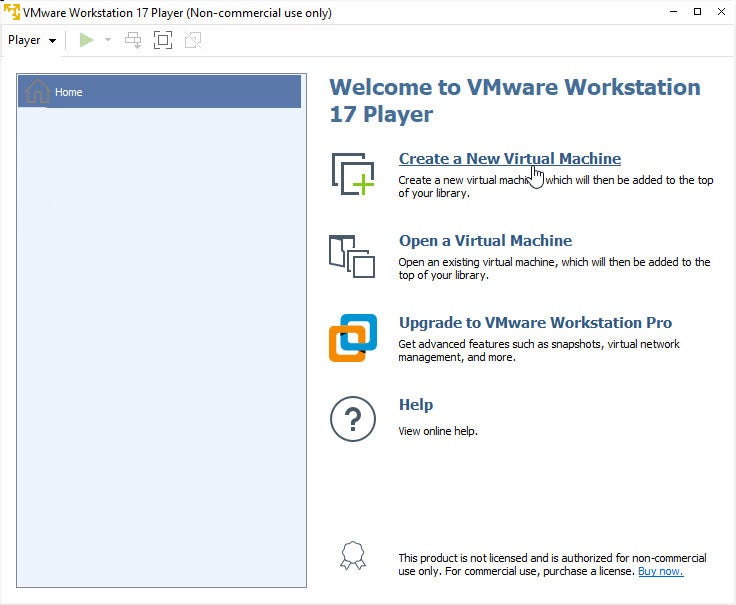
Open VMware Workstation Player, and click the option in the right pane to Create a New Virtual Machine (Figure B).
Figure B
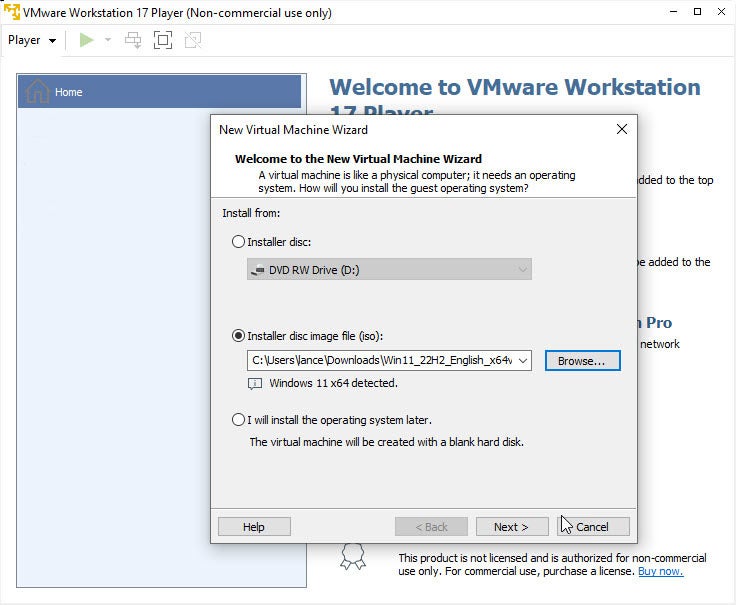
At the first window of the New Virtual Machine wizard, click the Browse button next to Installer disc image file (ISO). Browse to and select the Windows 11 ISO file you downloaded. Click Next (Figure C).
Figure C
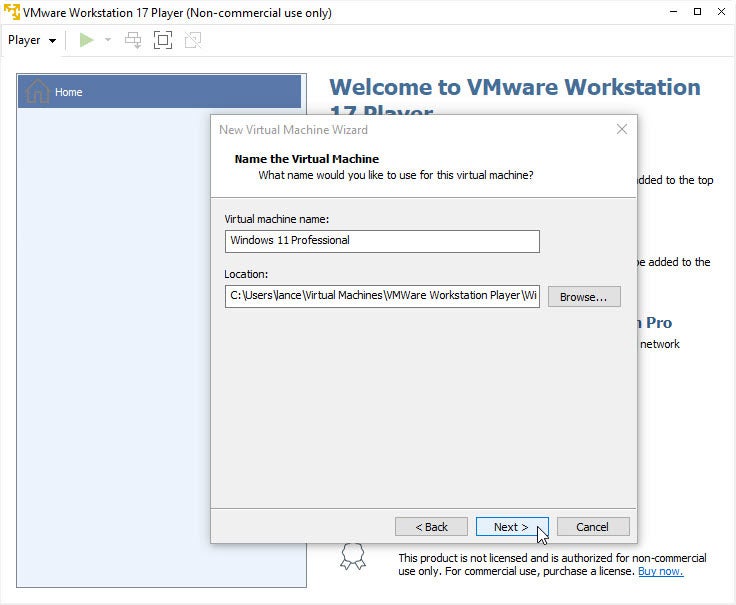
At the next screen, enter the name you want to give your Windows 11 VM, and then, confirm the location in which the virtual machine files will be stored. Click Next (Figure D).
Figure D
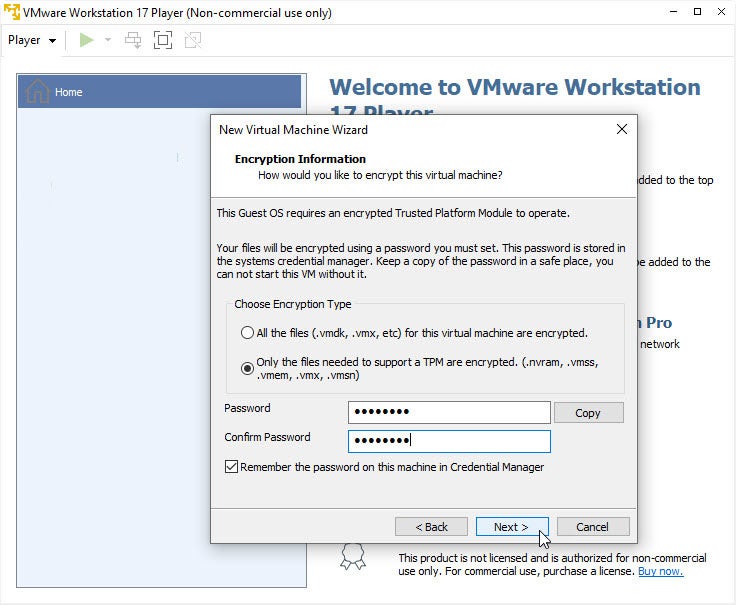
The next screen tells you that this guest OS will require an encrypted Trusted Platform Module to operate. Choose the encryption type you wish to use — either one will suffice. Then, create or generate and enter a password for the encryption. Leave the option checked to remember the password in Credential Manager. Click Next (Figure E).
Figure E
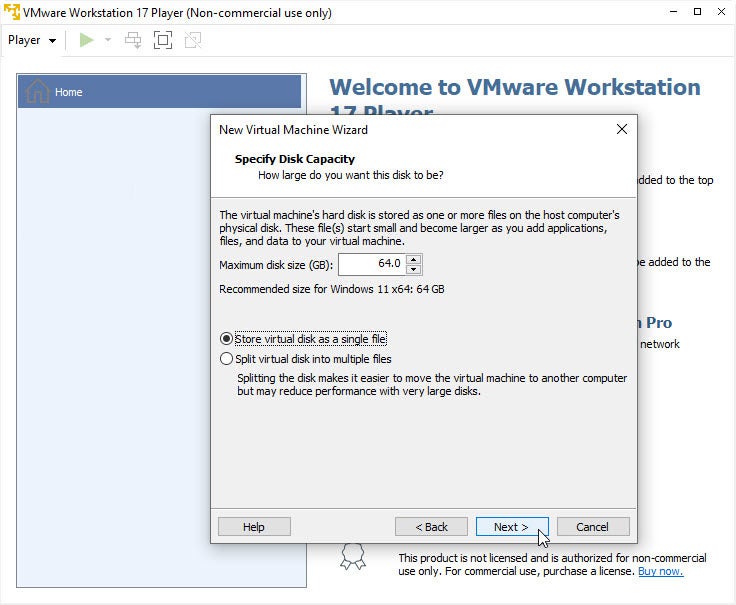
At the next screen, choose the amount of space you want to devote to the Windows 11 VM, or leave the size at the recommended number. Decide whether you want to store the virtual disk as a single file or multiple files. A single file typically delivers a faster performance. Click Next (Figure F).
Figure F
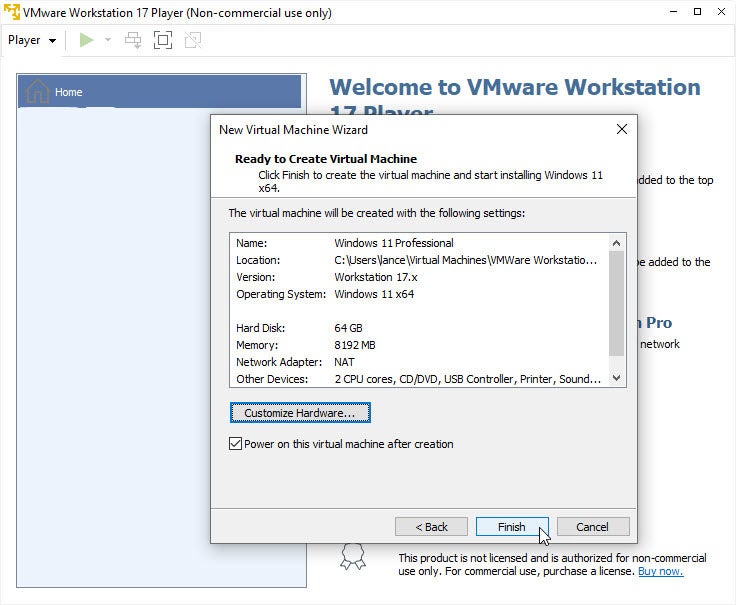
The next screen displays the hardware settings for the VM. Click the Customize button to change any settings. For example, you may want to devote more memory to the VM if you can spare it. When done, close the Customize Hardware window, and then, click Finish (Figure G).
Figure G
Click or press a keyboard key anywhere in the VM window when you see the message to boot from CD or DVD. You’re taken to the first Windows 11 setup screen that asks you to confirm your language, currency and keyboard input method. Click Next (Figure H).
Figure H

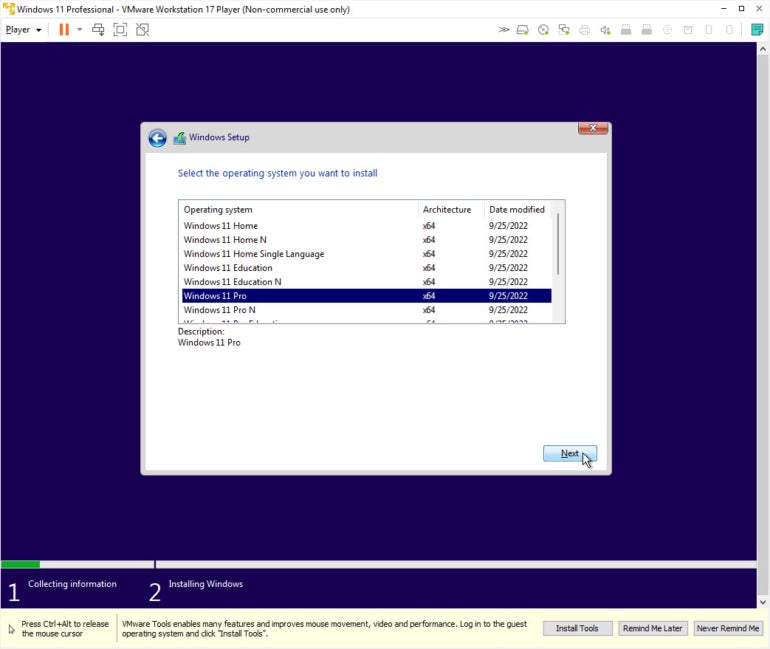
The installation then kicks off. If necessary, enter your product key for Windows 11. If you don’t currently have it, click the link for “I don’t have a product key.” Next, select the version of Windows 11 you want to install, such as Windows 11 Pro. Click Next (Figure I).
Figure I
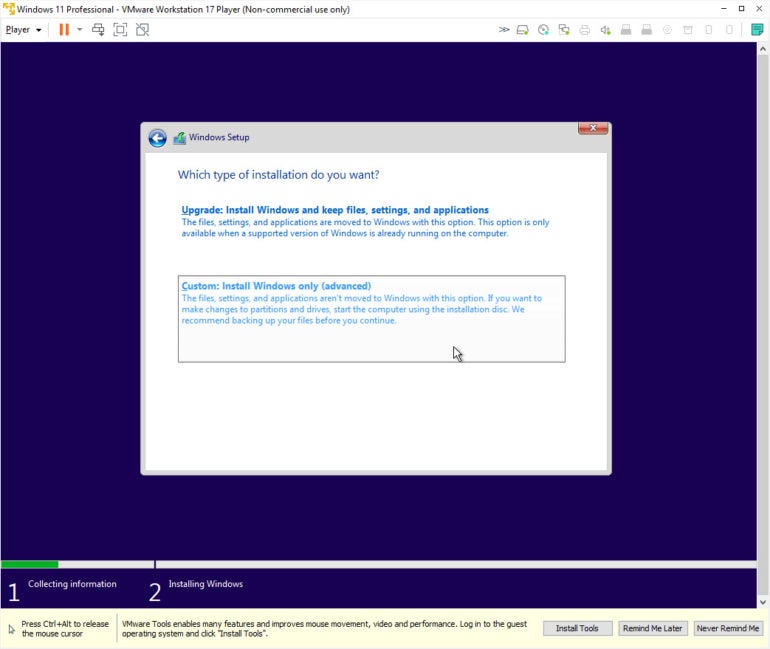
Accept the license terms, and click Next. At the screen asking for the type of installation, click the second option for Custom: Install Windows only (Advanced) (Figure J).
Figure J
Confirm the amount of space the VM will use, and click Next. Windows then starts installing. You’re taken to the first setup screen asking to confirm your country or region. Select the right region, and click Yes (Figure K).
Figure K

After the setup process finishes, you’ll be deposited at the Windows 11 desktop. There’s just one more task to perform with VMware Workstation Player.
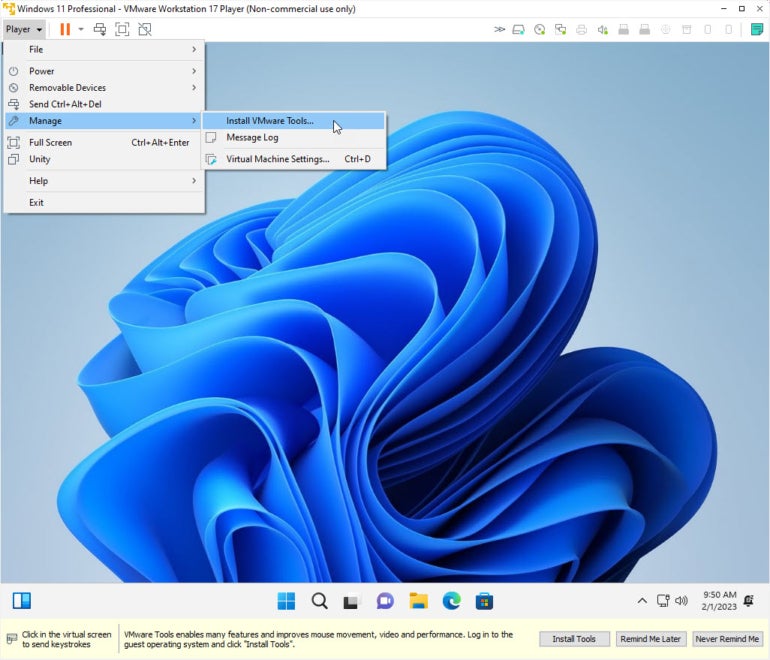
The program uses an add-on called VMware Tools to improve the way you interact with a VM. If you see the message at the bottom of the screen prompting you to install this add-on, click the Install Tools button. If not, click the Player menu, go to Manage, and select Install VMware Tools (Figure L).
Figure L
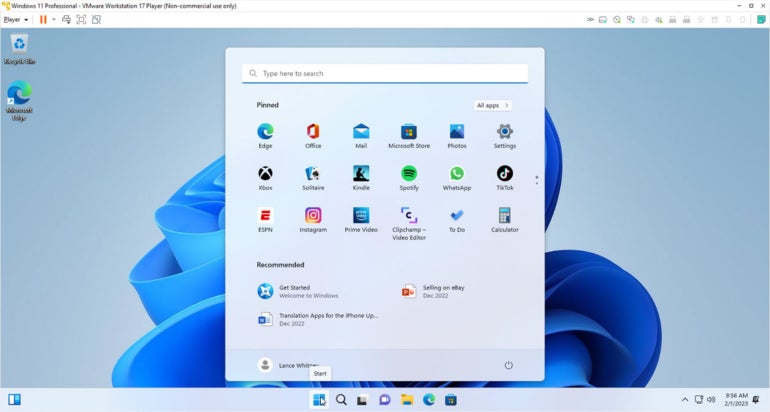
Follow the prompts to install VMware Tools. When the installation finishes, you’ll be prompted to restart the VM. Sign back into Windows 11, and you can now use the operating system as a fully functional virtual machine (Figure M).
Figure M
There are more Windows 11 tutorials available: how to enable hidden personalization themes and how to enable restartable applications.
For all the latest Technology News Click Here
For the latest news and updates, follow us on Google News.