How to disable the Windows key
Many gamers want to know how to disable the Windows key on their keyboard. Pressing it accidentally while playing a game on your PC can open the Start menu or trigger a “hotkey” keyboard shortcut that snaps you right out of what you’re doing.
These hotkeys include “Windows key + R” for opening the Run box, “Windows key + D” for showing (and hiding) the desktop, and “Windows key + L” for locking your screen. Sometimes these shortcuts can be very useful, but when you’re involved in something important, be it a game, video call, or intensive work, they can prove very annoying. Worst of all, there are two Windows keys on your keyboard, which doubles your chance of hitting one at an inconvenient moment.
Dedicated gaming keyboards solve this problem by automatically disabling the Windows key when you switch to “Gaming mode,” but on standard keyboards, the key can be a real nuisance.
Fortunately, there are several ways to tweak the Windows key so that it doesn’t interrupt your gaming and other activities. You can either toggle it on or off as required, deactivate hotkeys but keep the Start menu-opening function, or disable it altogether.
In our guide below, we’ll explain three ways to disable the Windows key, so you can use the one that best suits your needs,
How to disable the Windows key using WinKill
The easiest way to disable the Windows key in Windows 10 is to use a tiny free program called WinKill. This has the advantage over other methods of letting you toggle the Windows key on and off as required. Here’s how to use it.
1. Download WinKill from Major Geeks. The program hasn’t been updated for several years, and was originally designed for Windows XP, Vista, and 7, but it works just fine in Windows 10.
Extract the contents of the zip file, then double-click the WinKill executable file to run the program.
2. WinKill doesn’t require installation and you might think nothing has happened, but you should see its icon appear in the system tray on your taskbar.
If not, click the up arrow in the system tray and look for a Windows logo with a red cross through it. Drag this icon onto your taskbar for easy access.
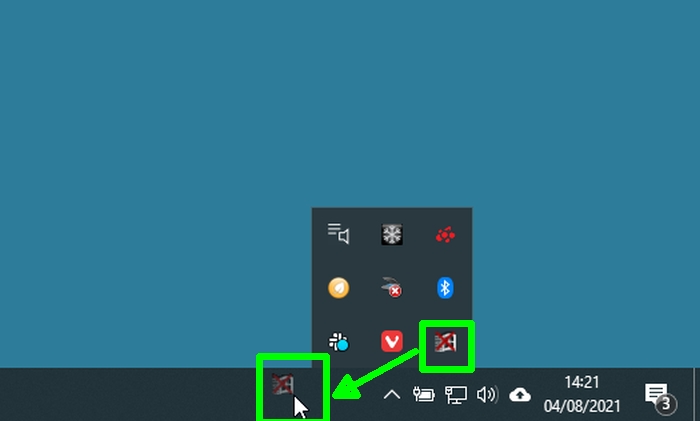
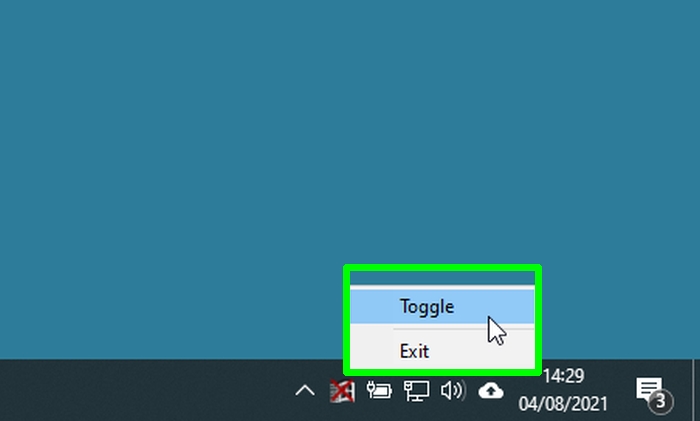
3. Press your Window key and you’ll now find that it doesn’t respond because WinKill has disabled it. To activate the key again, either click the WinKill icon to remove the red cross, or right-click it and choose “Toggle.”
Alternatively, you can close WinKill and restore the Windows key by selecting “Exit.” The program doesn’t run on Windows startup, so you’ll need to run it manually each time you need it.
How to disable the Windows key by editing the Registry
If you never use any Windows key hotkeys, you can tweak the key so you don’t have to worry about triggering them accidentally. You can do this in Windows 10 by editing the registry. This will still let you press the Windows key to open the Start menu.
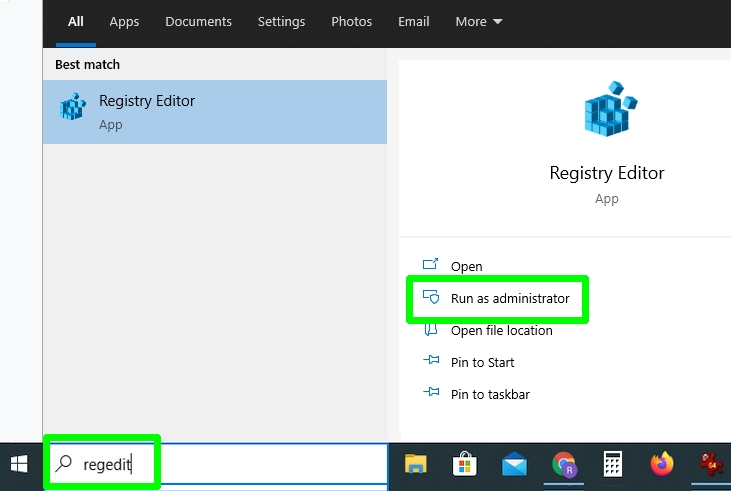
1. Type “regedit” in the Windows search box and click “Run as administrator” next to the Registry Editor result.
2. When the Registry Editor opens, navigate to the following key, or just copy and paste it into the Registry Editor address bar and press Enter:
HKEY_CURRENT_USERSoftwareMicrosoftWindowsCurrentVersionPoliciesExplorer
3. You should see a value in the right-hand pane of the window called “NoWinkeys.” If not, right-click an empty space in that pane and choose “New,” then “DWORD (32-bit) Value.” Call the value “NoWinkeys.”
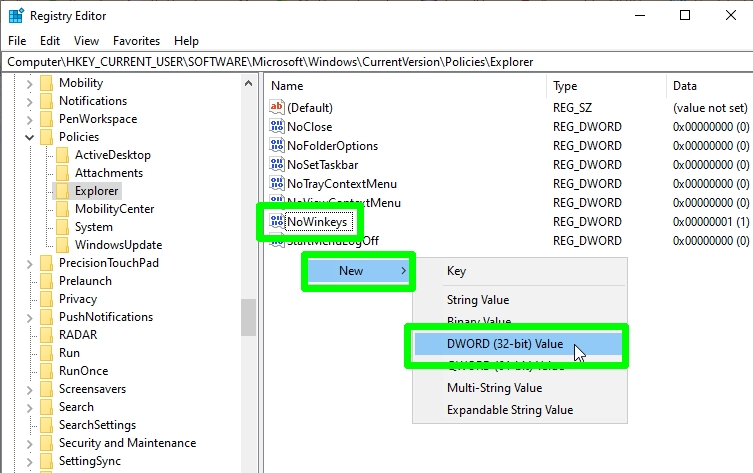
4. Double-click the NoWinkeys value and change its value data from “0” to “1.” Click OK to confirm.
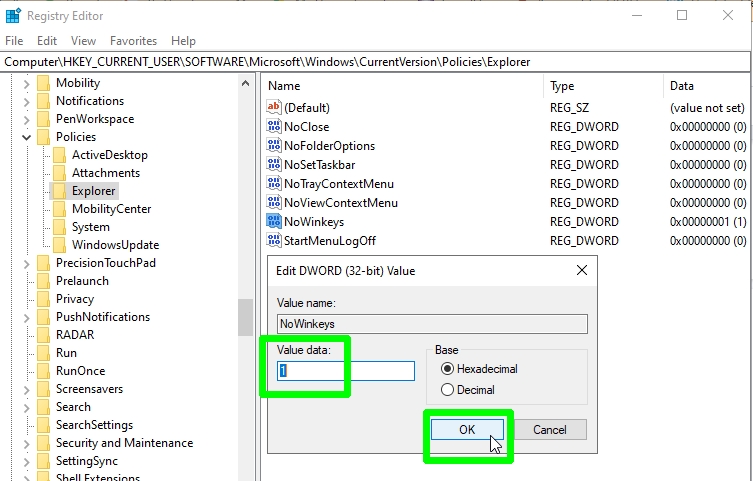
5. Restart your PC and press the Windows key. This will still open the Start menu, but it won’t trigger any hotkeys that interrupt your gameplay and other activities.
To re-enable hotkeys, go back to the same registry key and either change the NoWinkeys value data back to “0” or delete that value.
How to disable the Windows key using PowerToys
If you’d prefer to disable the Windows key completely, so that it doesn’t do anything when pressed, you can “remap” it using Microsoft PowerToys. This set of tools for tweaking Windows 10 is free to download and packed with useful options. Here’s how to use its Keyboard Manager.
1. Visit the GitHub page for Microsoft PowerToys and download the PowerToysSetup executable file. You’ll find the link at the bottom of the page.
Install the program on your PC and launch it from the Start menu.
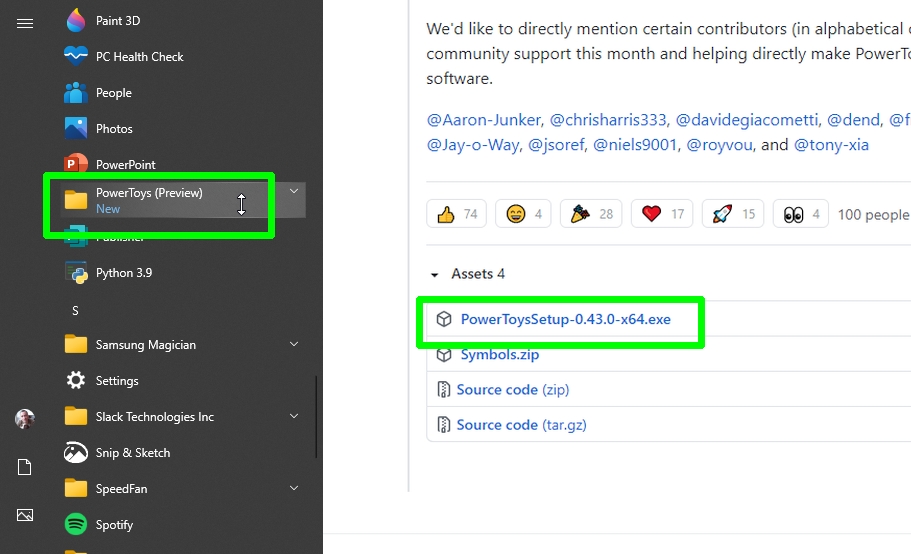
2. When PowerToys opens, click the “Keyboard Manager” option in the left-hand menu and choose Settings.
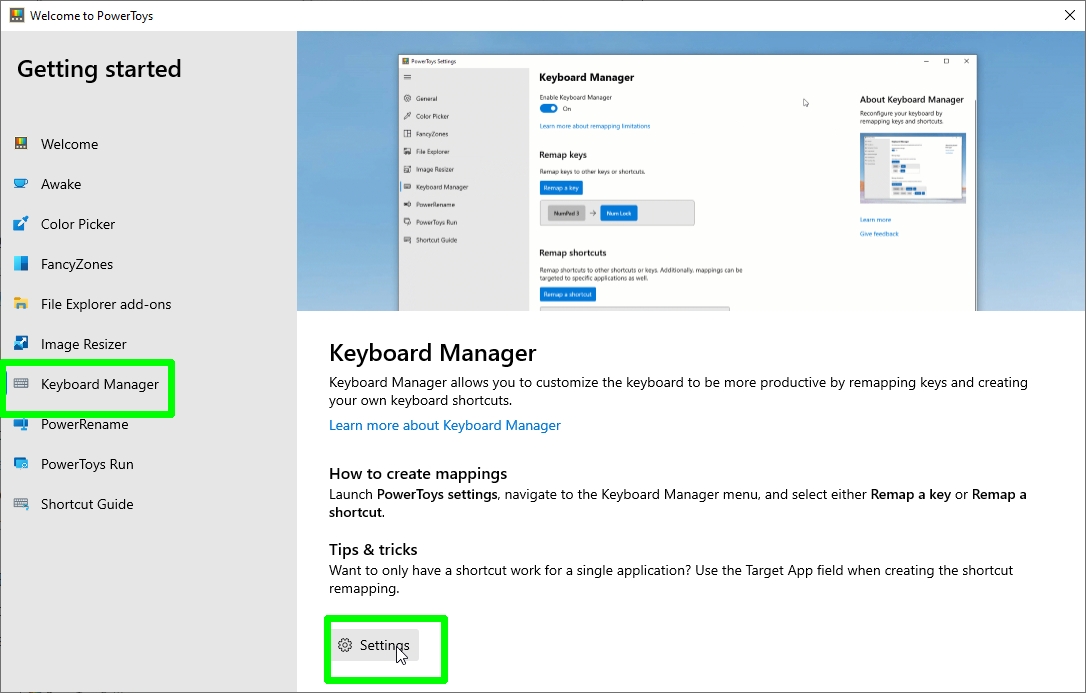
3. Ensure that “Enable Keyboard Manager” is switched on and click the “Remap a key” button to open the “Remap keys” window.
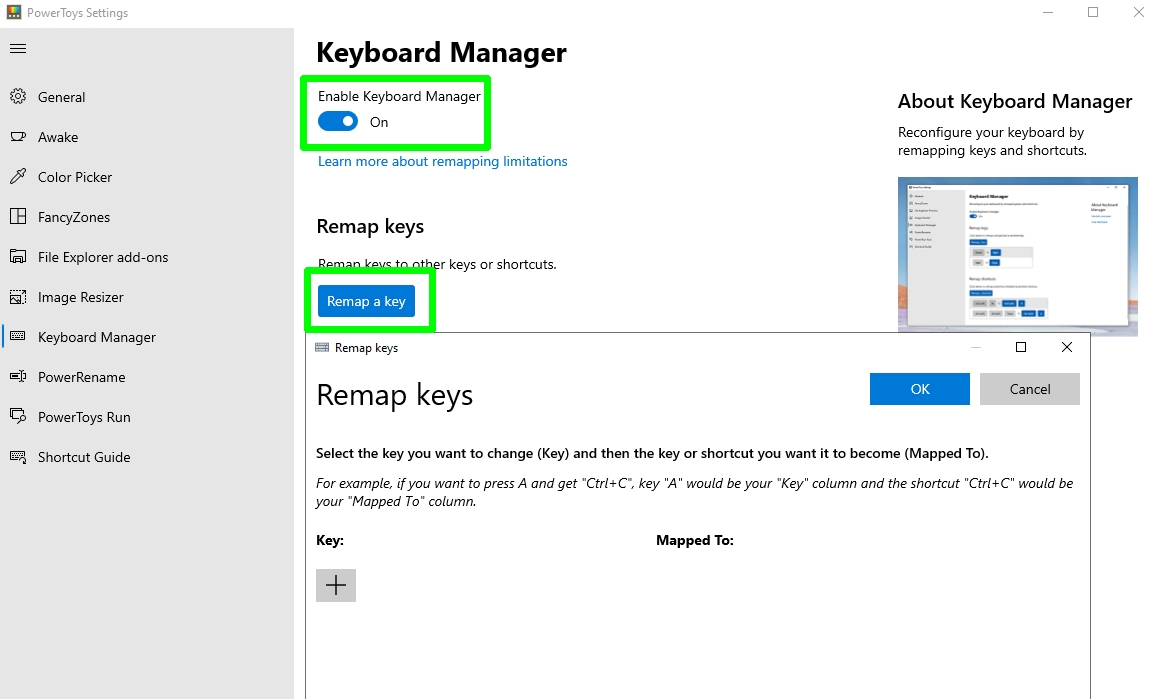
4. Click the plus button, then click the “Key” drop-down menu. Scroll down to “Win” and select that option. Now click the “Mapped To” drop-down menu and choose Disable. Click OK to confirm.
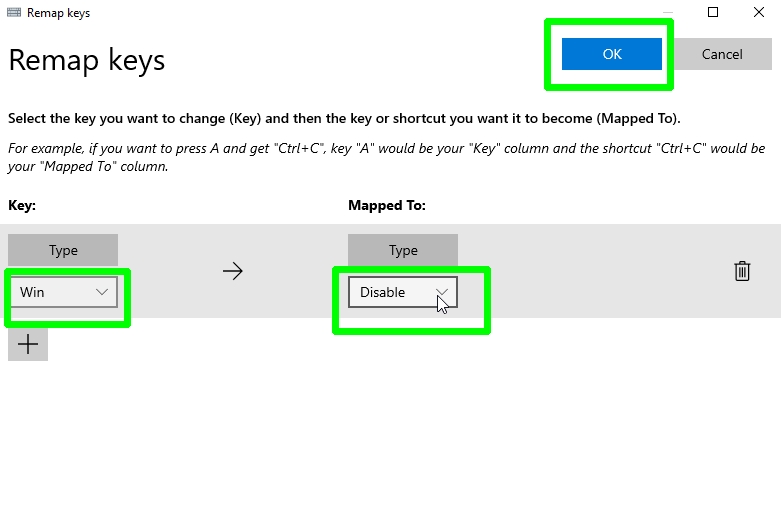
5. Windows will warn you that you won’t be able to use the Win key anymore. As this is what you want, click “Continue Anyway.”
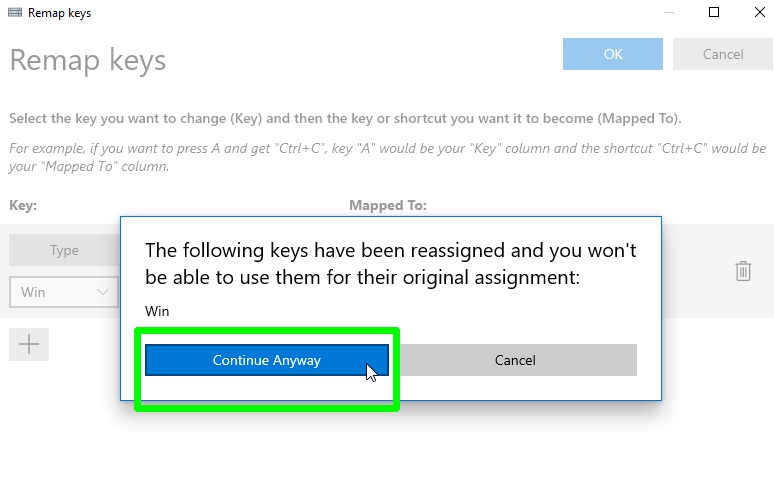
Both Windows keys on your keyboard will be instantly disabled, with no need to restart your PC.
To re-enable the Windows key, simply close PowerTools: right-click its icon in the system tray and choose “Exit.”
For all the latest Technology News Click Here
For the latest news and updates, follow us on Google News.
