


Want to know how to do a clean install of Windows 11, before its public release later this year? The obvious solution is to sign up for the Windows Insider Program and download the latest build that Microsoft makes available through Windows Update.
However, this method only allows you to upgrade to Windows 11 from your current Windows 10 installation. Although upgrading preserves all your files, settings, and programs, it also means that any junk, broken registry entries and performance issues will be transferred to your new setup.
Performing a clean install, in contrast, gives you a completely fresh start with Windows 11, and ensures that it runs as smoothly as possible. You can either install the new operating system on a spare PC, or on a partition on your current hard drive, so you won’t overwrite important files or lose access to Windows 10.
There’s been a lot of controversy about Windows 11 requirements, with Microsoft deeming many processors incompatible with the new operating system. The good news is that preview releases of Windows 11 can be installed despite the restrictions, and will work for the moment, at least.
Here we’ll explain how to bypass the Windows Insider Program, and download the latest version of Windows 11 to clean install on your PC. You won’t even need to enter a Windows product key.
How to do a clean install of Windows 11: Download the latest build
The only official way to test drive Windows 11 is to sign up for the Windows Insider Program and upgrade from Windows 10. Microsoft has yet to release ISO files of the new operating system that can be downloaded and installed individually.
Fortunately, if you want to clean install Windows 11, it is possible to download ISOs of the latest preview builds from a third-party website called UU Dump. This is a safe, trustworthy source, and you don’t even need to register with the site.
Here we show you how to clean install Windows 11 by downloading the correct ISO file for your PC.
1. First, head to UU Dump, where you can download the latest builds of various Windows versions for free. Click the Dev Channel link at the top of the page.
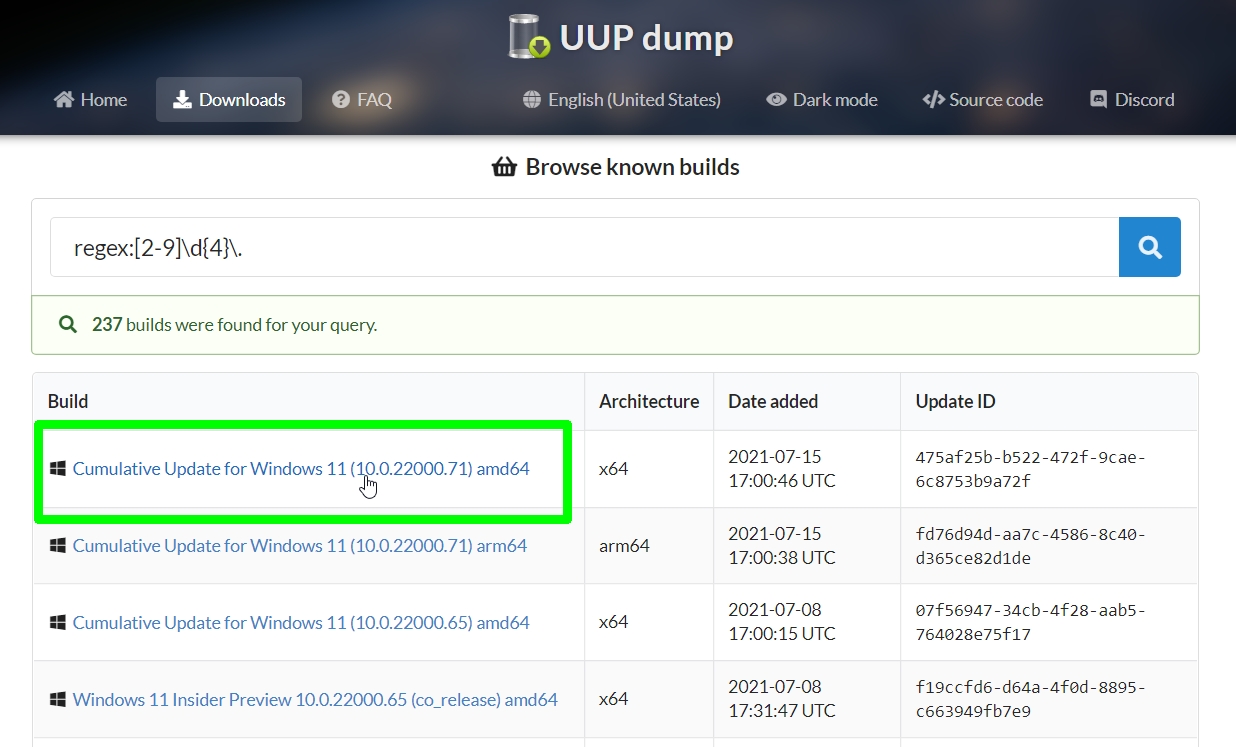
2. Select the most recent version of Windows 11 at the top of the list of releases. At the time of writing, this was Cumulative Update for Windows 11 (10.0.22000.71).
Choose the “x64” build, rather than “arm64”, unless you have an ARM-powered laptop such as the Microsoft Surface Pro X.

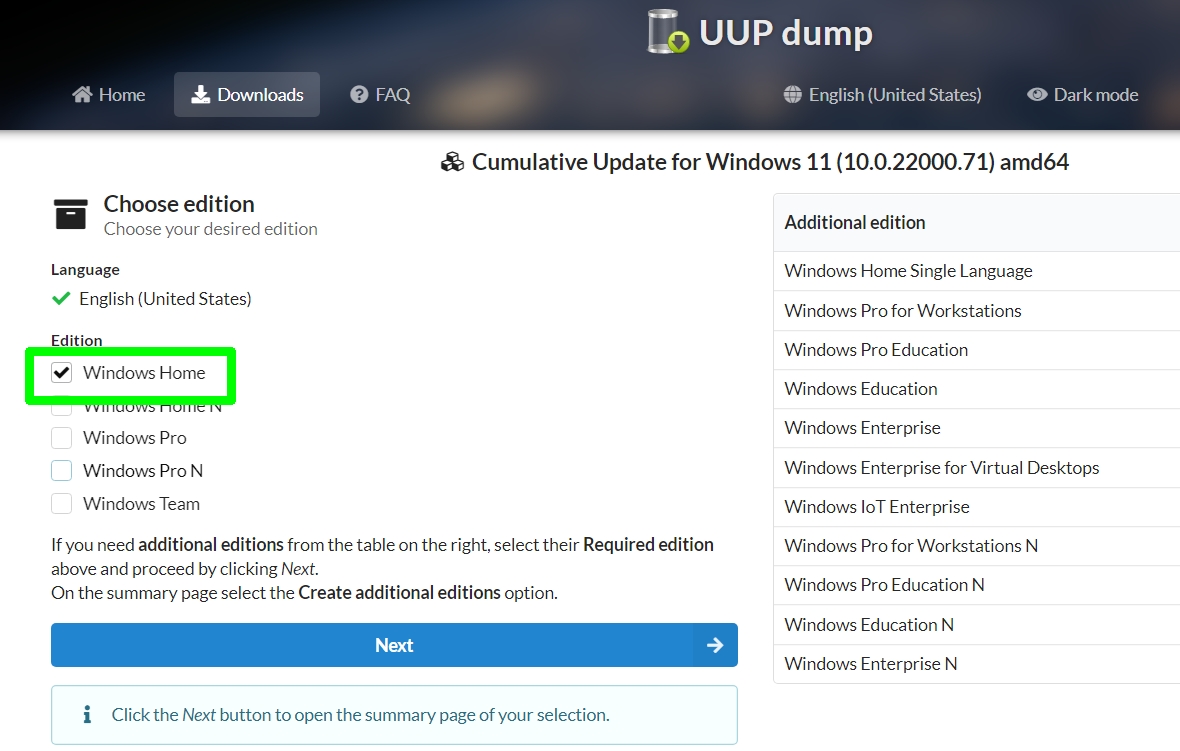
3. Click Next on the following page and select the edition of Windows 11 you want to clean install. We chose Windows Home, because that’s the version we’re running on our laptop. Click Next again to confirm.

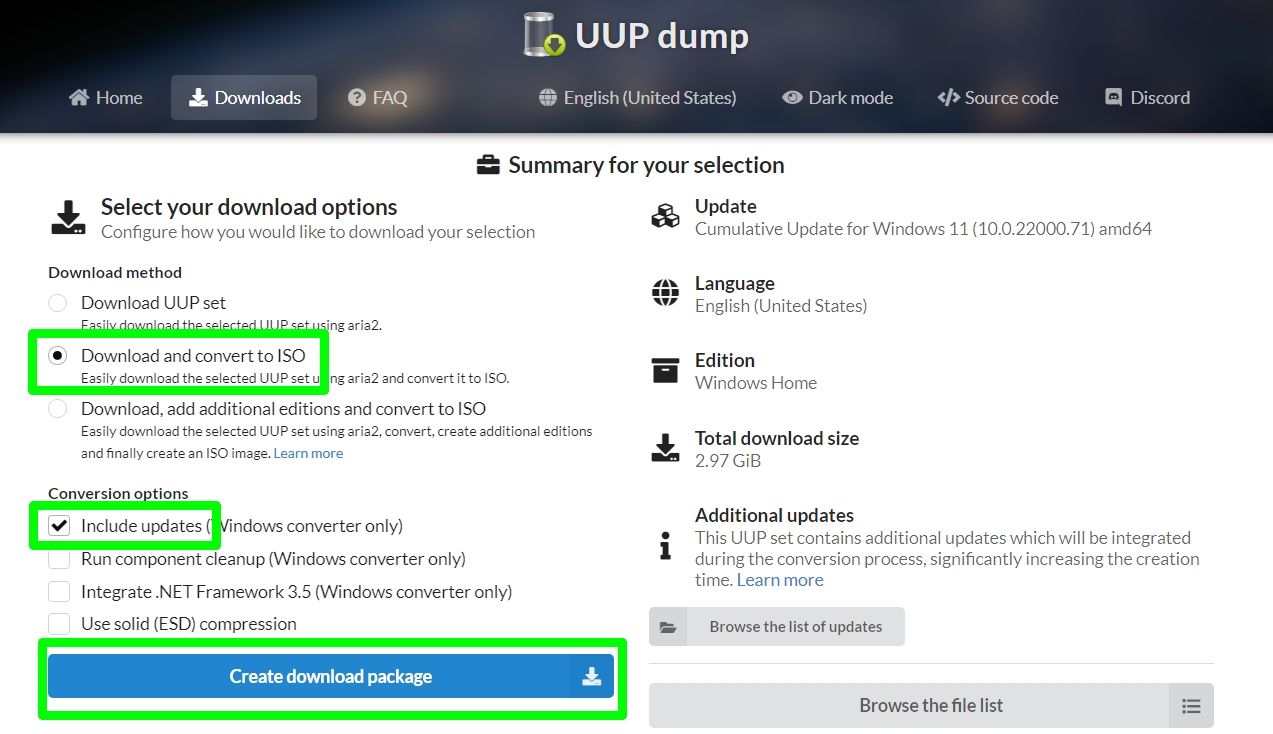
4. Select the download option “Download and convert to ISO”. This will make the downloaded Windows 11 build easier to clean install. Also check the box to “Include updates.”
Click the “Create a download package” button to download a ZIP file containing the Windows 11 setup files.

How to clean install Windows 11: Create the ISO file
Once you’ve downloaded the latest Windows 11 build, you’ll need to install the required files to create an ISO disk image of the operating system. The package you downloaded from UU Dump will do the hard work for you.
Here we explain how to perform the ISO creation process and why you’ll need to be patient to get your clean install of Windows 11.
1. Open the downloaded ZIP file and extract its contents to a folder on your PC. The default folder will have a very long name and be located in your Downloads folder, so you may want to create a dedicated folder on your Desktop for easier access.
We’ve called our folder “win11iso”. Make sure your folder doesn’t have any spaces in its name, as this will prevent installation.


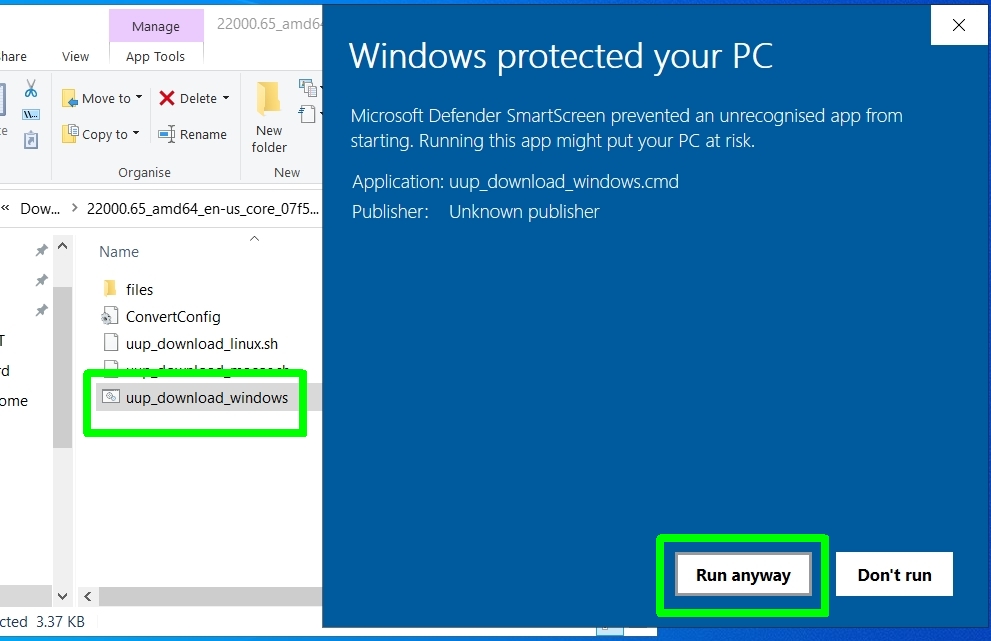
2. Double-click the file in the folder named uup_download_windows. If Windows displays a SmartScreen security warning, click More info and choose Run anyway (the file is completely safe to run.)

3. A command prompt window will now open and start downloading all the installation files required to create the Windows 11 ISO.
Be warned that this can take a long time, and may hang for a while: we waited for over an hour on our HP laptop.
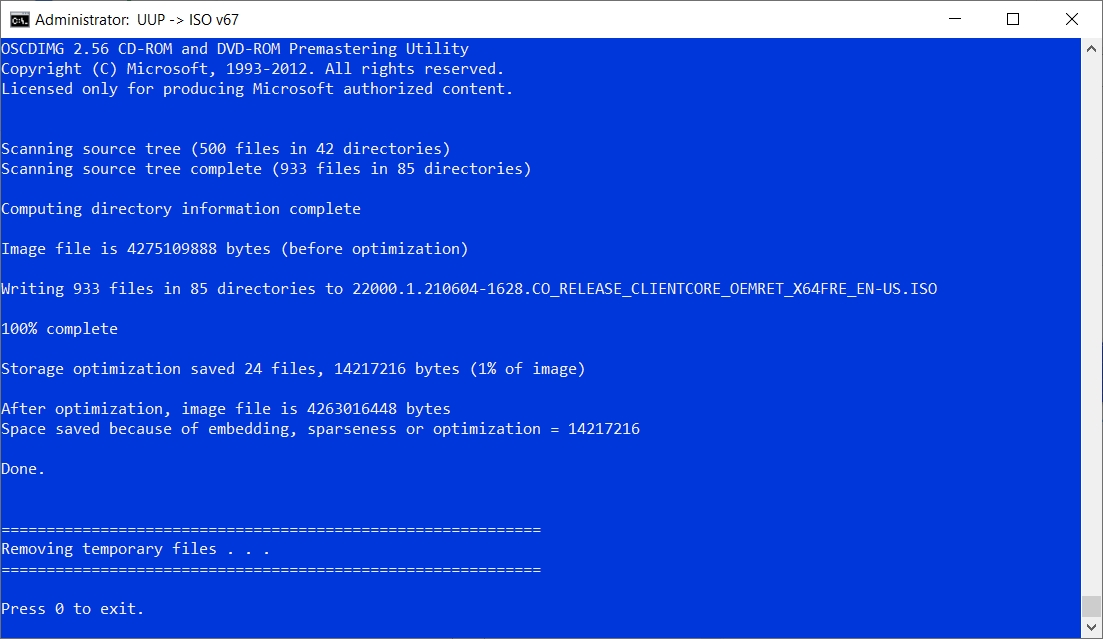

4. Once all the files are downloaded, the ISO file should be created automatically. Press 0 on your keyboard to close the command prompt window and look in the setup files folder from step 1.
You should see the new ISO disc image file in the same folder as the uup_download_windows file you double-clicked in step 2.
How to clean install Windows 11: Create a bootable install disk
Now comes the tricky task of creating a bootable install disk from the Windows 11 ISO file. You’ll need a USB stick with at least 8GB of storage space on it.
Usually, we’d recommend using the excellent free program Rufus to create the bootable USB drive, but sadly Microsoft has made this difficult, in fact impossible, with Windows 11.
If you try to burn the Windows 11 ISO to a USB stick using Rufus or a similar program, it will create an NTFS-formatted drive rather than a FAT32-formatted one. This is because the Windows 11 installation file is larger than 4GB, which is the maximum size supported by FAT32.
To boot into a clean install from an NTFS drive, you’ll need to disable your PC’s Secure Boot feature, and Windows 11 won’t run without Secure Boot being enabled. Luckily, there is a workaround, as we’ll explain below.
1. Insert your USB stick and make sure there’s nothing important stored on it, as all data will need to be erased to create the bootable install disk.
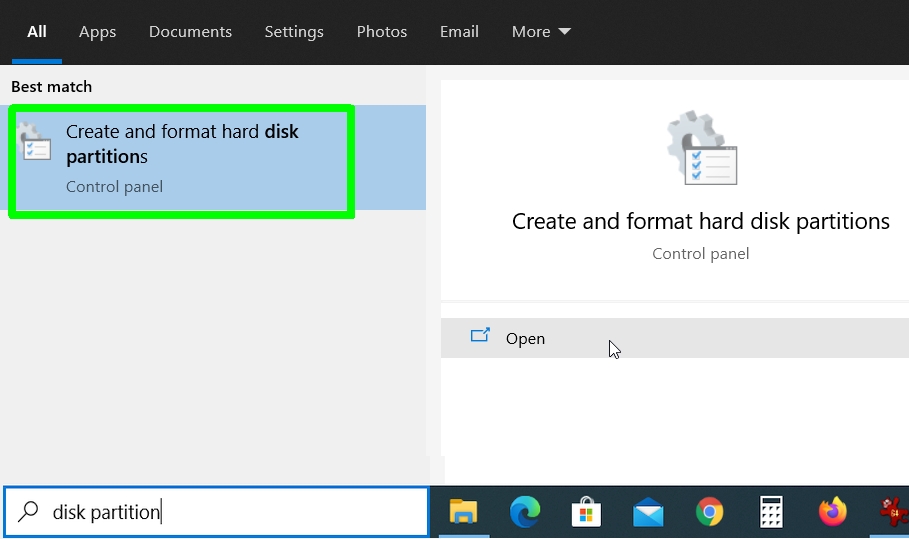
Open the Disk Management Tool by typing “disk partition” into the Start menu search box and selecting “Create and format disk partitions.”

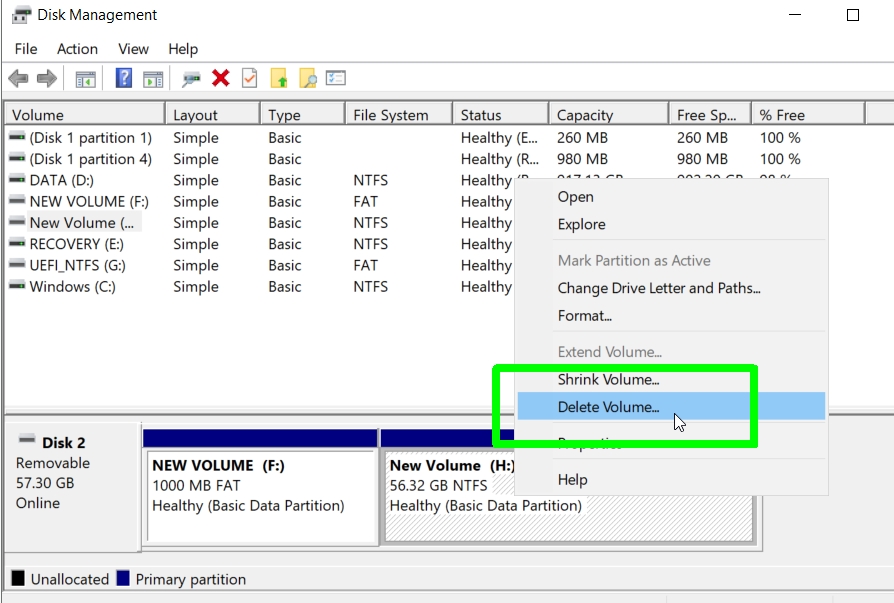
2. Select your USB stick in the list of drives, then right-click each of its partitions in the bottom section of the window and choose Delete Volume. Click Yes when asked if you’re sure you want to continue.

3. Next, right-click the USB stick’s empty space and choose New Simple Volume. Create a new partition that’s 1GB in size and format it as FAT32.
Create a second partition that uses the remaining space on the drive and format it as NTFS.


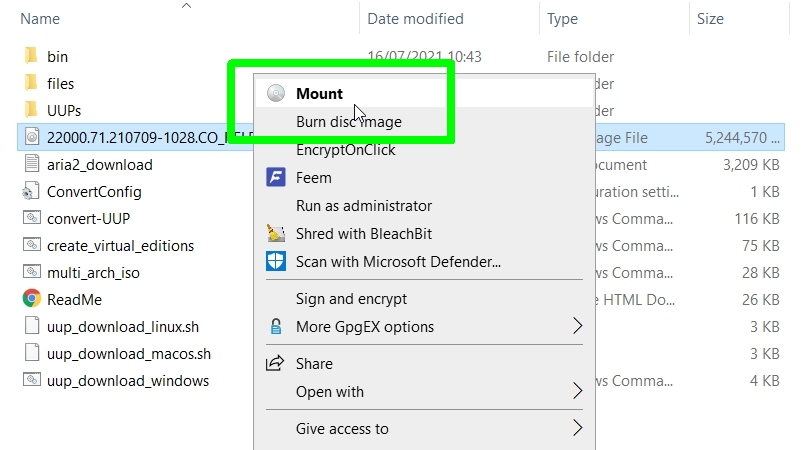
4. Once this is done, go back to the Windows 11 folder, right-click the ISO file and choose Mount.

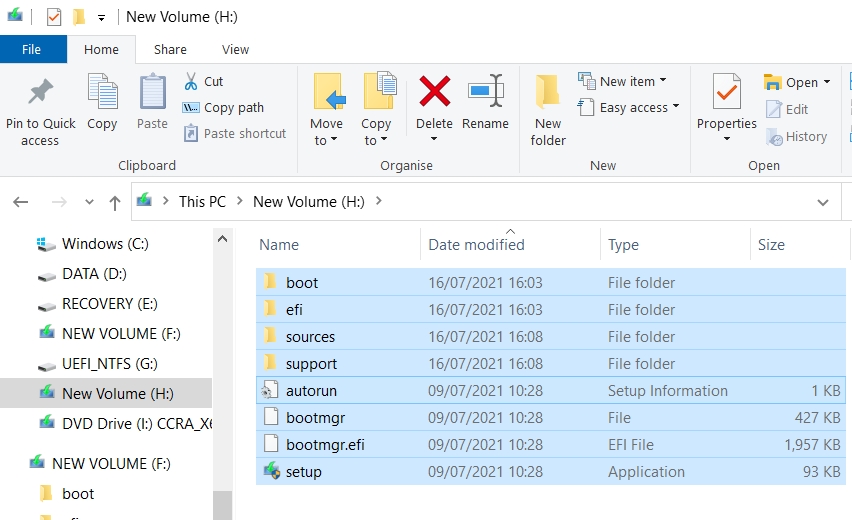
5. When the ISO folder opens, copy all the files and folders, except the “sources” folder, to the FAT32 partition on the USB drive.
Create an empty folder called “sources” on this FAT32 partition and copy the “boot.wim” file from the original “sources” folder into it.


6. Now copy all the files and folders from the ISO, including those you copied before, to the NTFS partition of the USB stick.
This can take a while, but once complete, you should (finally!) have a bootable install disk for Windows 11.

How to clean install Windows 11: Perform the clean install
With that difficult part out of the way, you can now perform your clean install of Windows 11 from the bootable install disk on your USB stick, so make sure it’s inserted in your PC.
In our instructions below, we’ve recommended selecting your USB drive in Windows 10’s Advanced Startup Options, but you could also boot straight from the USB stick by changing the boot order in your system’s BIOS.
1. Restart your PC into Advanced Startup Options. To do this, hold down the Shift key on your keyboard when you choose Restart from the Power menu.
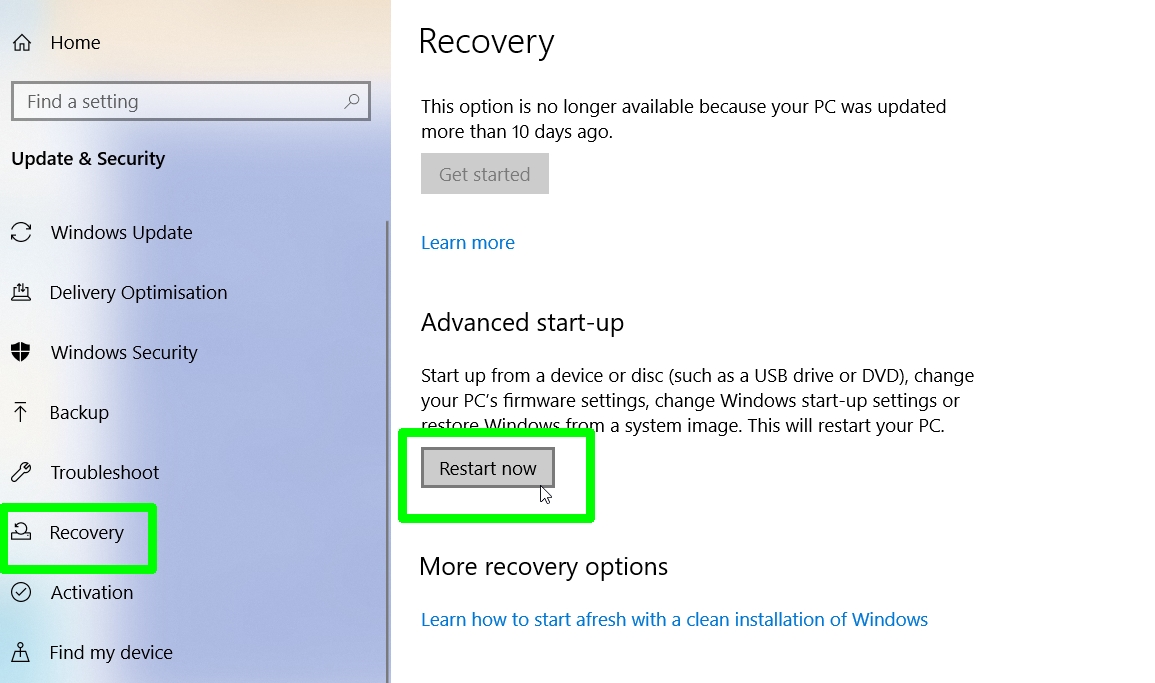
Alternatively, open Settings, choose Update & Security, then Recovery, and click “Restart now” under “Advanced start-up”.

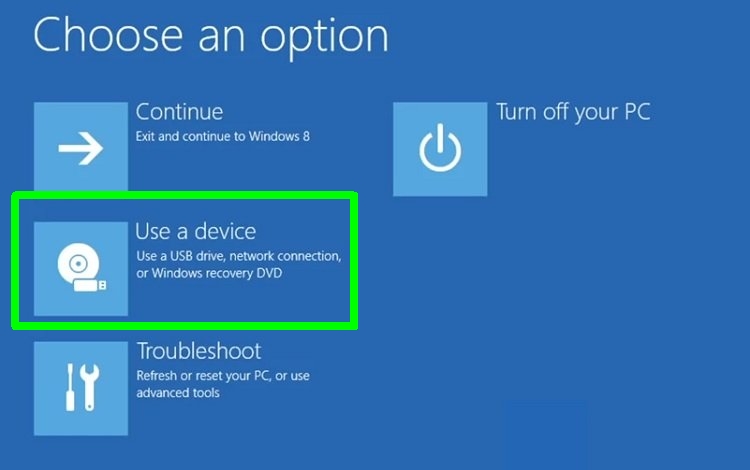
2. When the Advanced Startup screen appears, click “Use a device” under “Choose an option.”
On the following screen, select the USB stick that you copied the Windows 11 ISO to. As you created two partitions, you’ll see two options: the top one should be the NTFS-formatted partition, so click that. If it doesn’t work, try the other option.

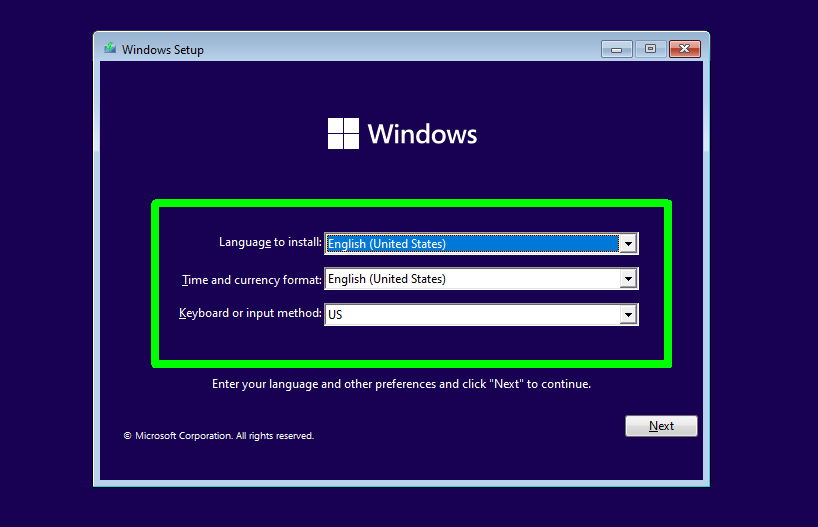
3. The Windows Setup screen will now open. Choose your preferred language, time and currency format, and keyboard and input method from the drop-down menus and click Next.
On the following screen, click “Install now.”

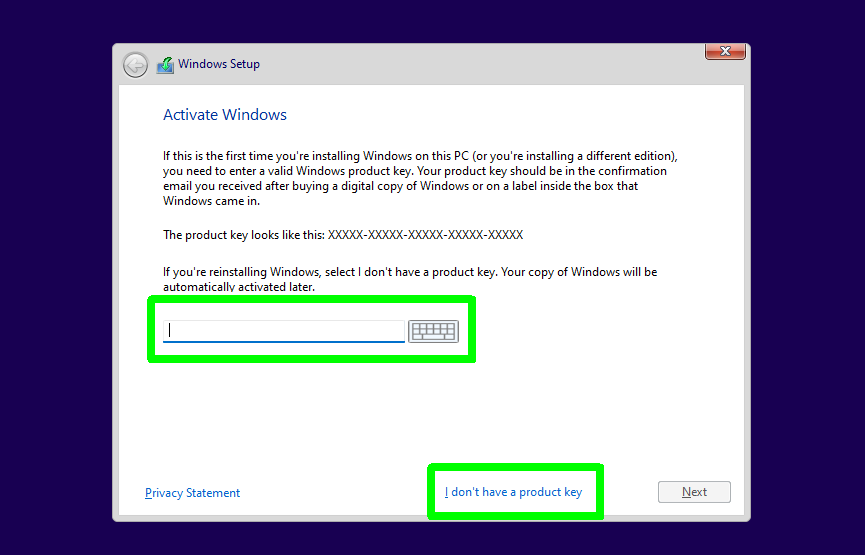
4. You may now be asked to enter your Windows product key. If you have your license key for Windows 10 to hand, type it in, but if not don’t worry: you can just click “I don’t have a product key” to continue.

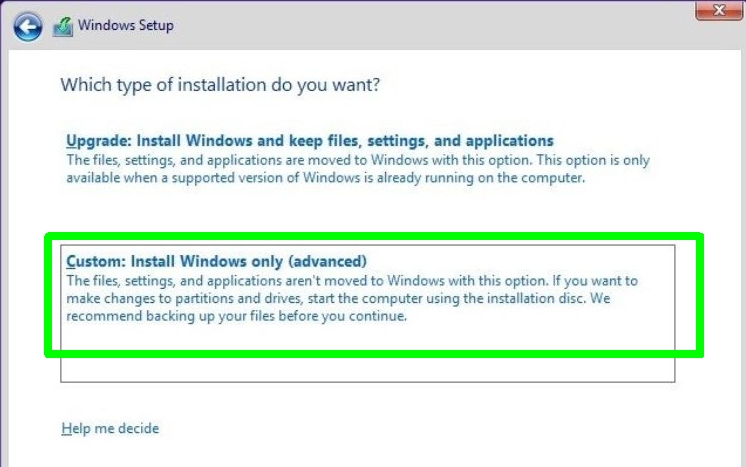
5. Windows Setup will now ask which type of installation you want. To perform a clean install, rather than an upgrade, choose “Custom: Install Windows only (advanced).”
This will mean losing all files, settings, and applications stored on the installation drive, so make sure you have everything backed up.

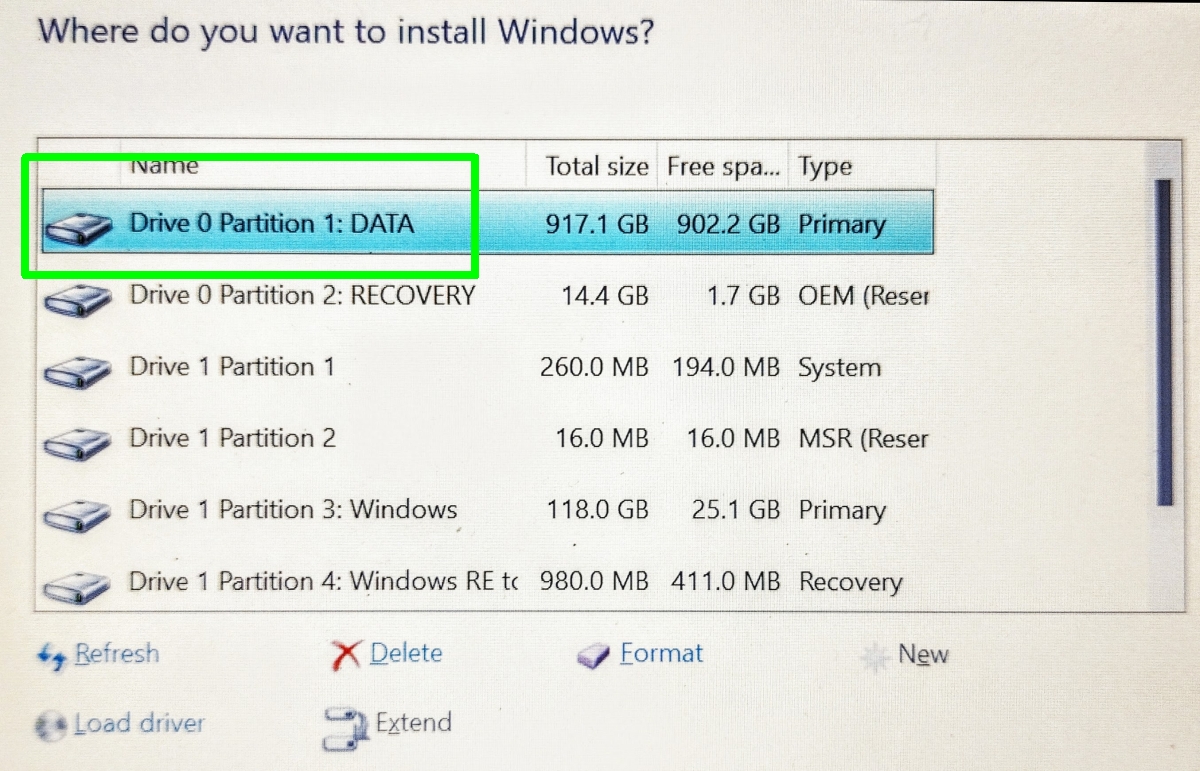
6. Select the drive or partition you want to install Windows 11 on. Obviously, make sure you choose the correct one, so you don’t overwrite anything important. Click Next to continue.

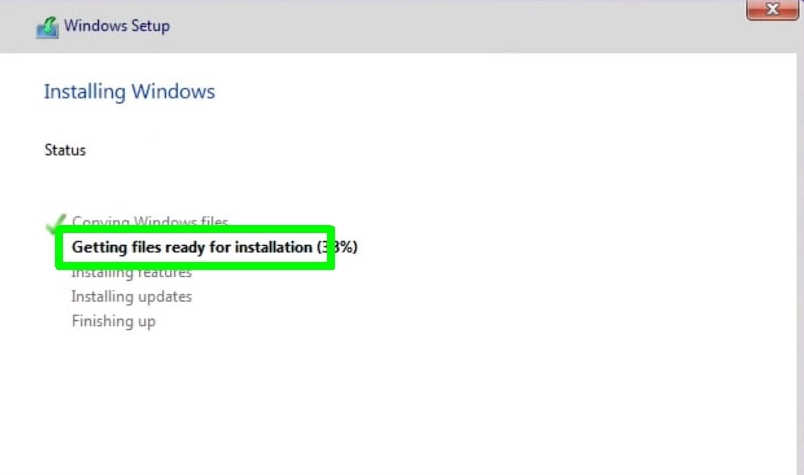
7. The clean install of Windows 11 will now begin – at last! Once the installation is complete, you’ll be prompted to restart your PC, so you can enter the exciting new world of Microsoft’s latest operating system.

For all the latest Technology News Click Here
For the latest news and updates, follow us on Google News.