How to do a hanging indent on Google Slides
Edgar Cervantes / Android Authority
A feature Google Slides borrows from Google Docs is the ability to create a hanging indent. Often used in works cited pages, knowing how to do a hanging indent on Google Slides is especially useful when creating a bibliography page for an academic presentation.
Read more: How to draw in Google Slides
QUICK ANSWER
To do a hanging indent on Google Slides, highlight the entire block of text you want to do a hanging indent for. Drag over the blue triangle in the ruler at the top as far as you want the indent to be. After that, drag the blue rectangle on top of it back to the grey area in the ruler.
How to do a hanging indent on Google Slides
There are two primary ways to create a hanging indent effect on Google Slides. The first way is to indent the desired line on its own, while the second way allows you to highlight an entire block of text and indent only the lines below the first one. Let’s go over both ways.
Indenting lines one by one
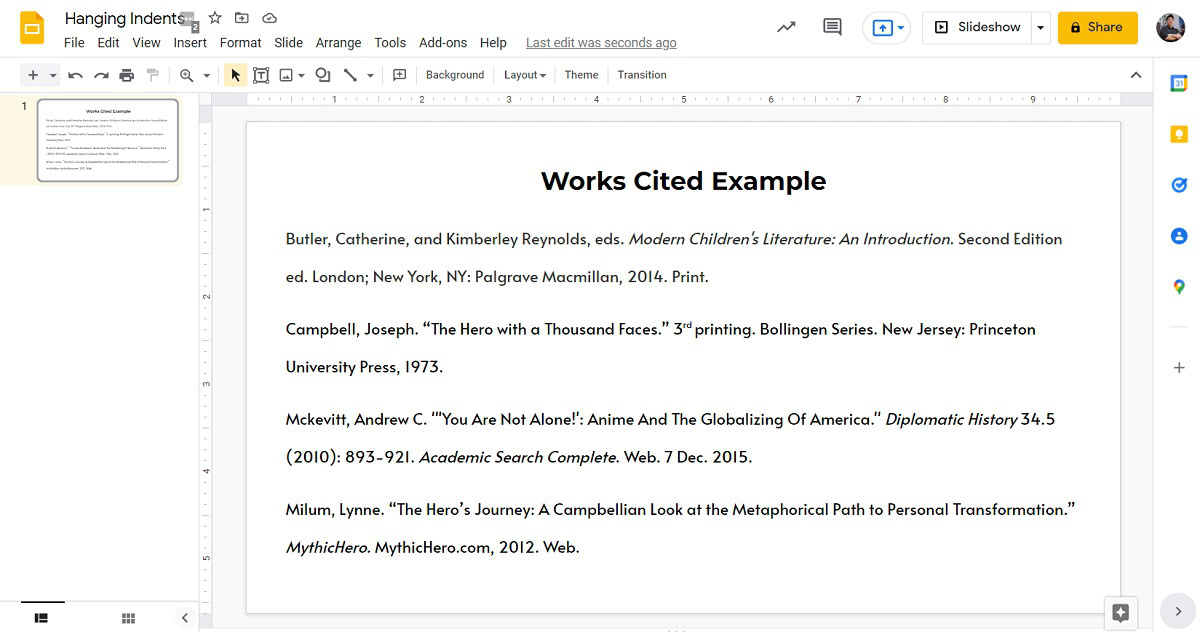
Open your Google Slides presentation and go to the page that contains the content you want to indent.
Curtis Joe / Android Authority
Click the beginning of the exact line you want to indent. In this case, because we want to do a hanging indent for a citation, we want to click the line underneath the first line of the citation.
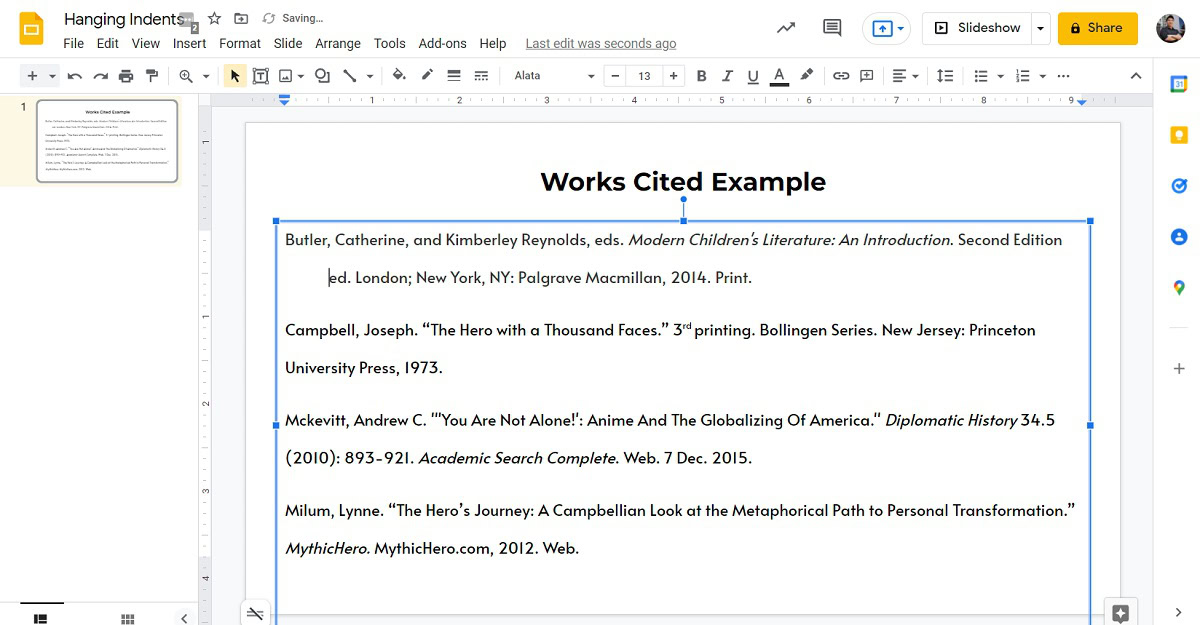
With your cursor at the beginning of that line, press Shift + Enter on your keyboard if you are using a desktop PC. If you are an Apple Mac user, press Shift + Return instead.

Curtis Joe / Android Authority
After you’ve placed the text on its own line using Shift + Enter, go ahead and press the Tab button on your physical keyboard. This will create the hanging indent effect you desire.
Curtis Joe / Android Authority
First Line Indent method
Open your Google Slides presentation and go to the page that contains the content you want to indent.

Curtis Joe / Android Authority
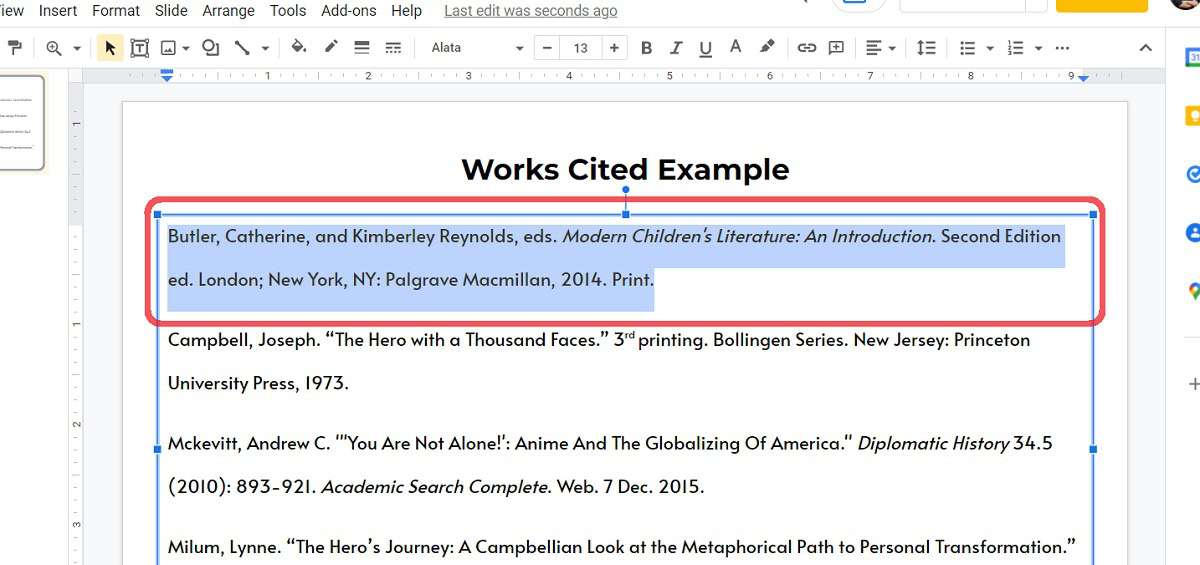
Highlight the block of text for which you want to do a hanging indent.
Curtis Joe / Android Authority
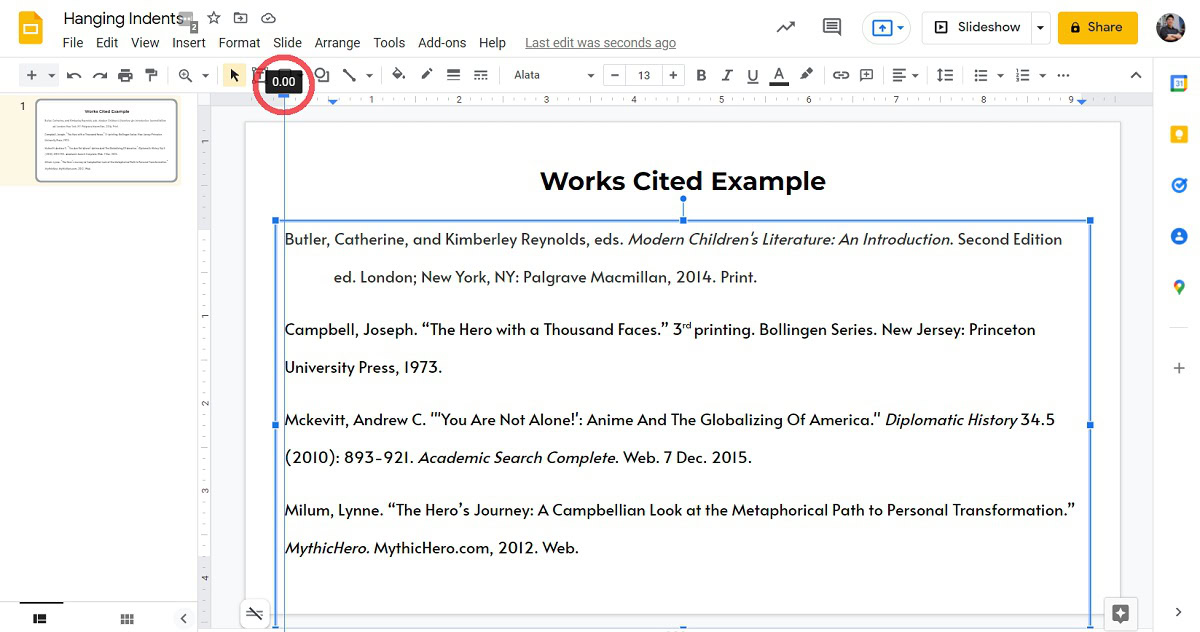
Now, at the top, you will see “ruler” guidelines bordering the sides of your slide on the left and at the top. If you don’t see these, click View → Show ruler.
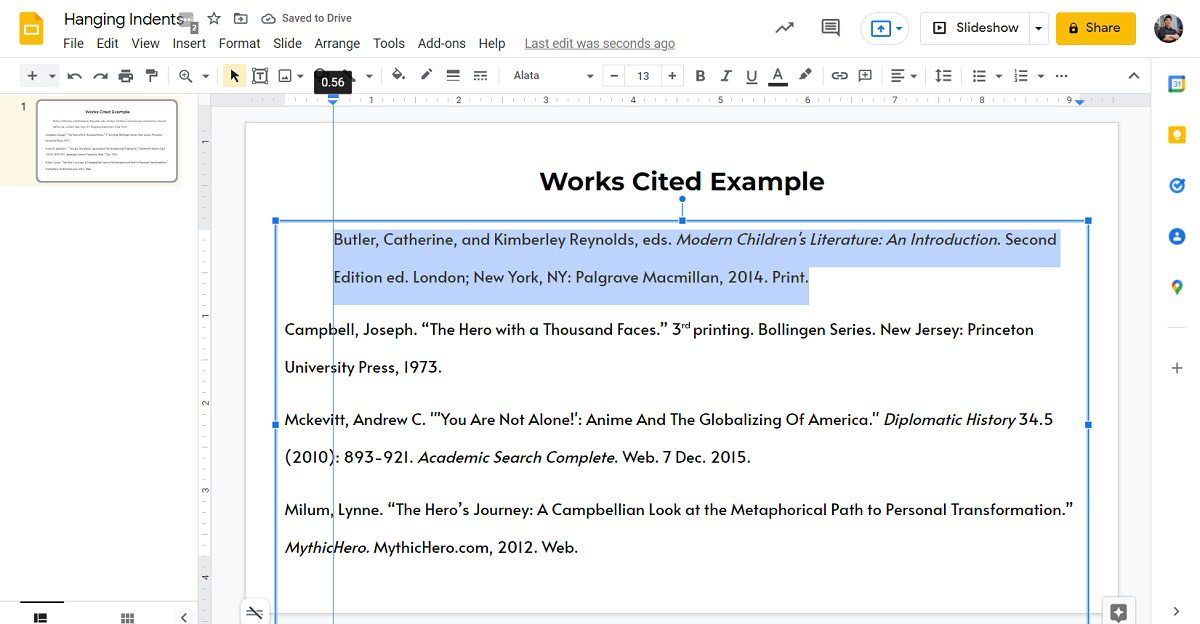
In the top ruler, you will see a blue arrow and a rectangle over it. Drag that blue arrow over to the right to create your indent for all highlighted text.
Curtis Joe / Android Authority
The blue rectangle above that blue arrow is for the First Line Indent. Drag that back to the end of the grey area that indicates where your text began. This will create your hanging indent effect.
Curtis Joe / Android Authority
For all the latest Technology News Click Here
For the latest news and updates, follow us on Google News.

