

VirtualBox can handle automatic updates, but it’s not enabled out of the box. Find out how and if you should do this.
VirtualBox is my go-to virtual machine technology. Not only is it free to use, but it’s also very powerful and makes it easy to create VMs for all types of hosts — from Linux, macOS, Windows and more.
I’ve been using VirtualBox for over a decade, and rarely does it cause me problems. The only time I ever have an issue is when my Linux kernel is updated but VirtualBox is not. When that happens, sometimes the new kernel modules might not play well with the currently-installed version of VirtualBox. If I forget to upgrade VirtualBox, that can cause a problem.
SEE: 40+ open source and Linux terms you need to know (TechRepublic Premium)
Because of that, I always enable the auto-update feature. That doesn’t always guarantee success. Last year, VirtualBox was upgraded, but there were applications on my host that weren’t. Fortunately, the resolution for that situation was running a simple upgrade on my host OS.
The lesson here? Nothing is perfect, but I tend to prefer things to be automatic. I enable automatic upgrades on Linux, so why not follow suit with the application I use? If that sounds like something you might want to enable for your VirtualBox application, let me show you how it’s done.
Before you do, I want to warn you one last time: Enabling auto-upgrades can cause problems should your host OS not also be upgraded. It’s rare that this will happen, and the convenience is worth it for me, but it can occur.
What you’ll need to enable VirtualBox auto-updates
The only thing you’ll need for this is a running instance of VirtualBox. This can be hosted on Linux, macOS or Windows, and the configuration is the same for all host operating systems.
How to enable auto-updates in VirtualBox
Open VirtualBox on your host of choice. From the main window — or the macOS top bar — click File | Preferences. In the resulting window (Figure A), click the Update tab.
Figure A
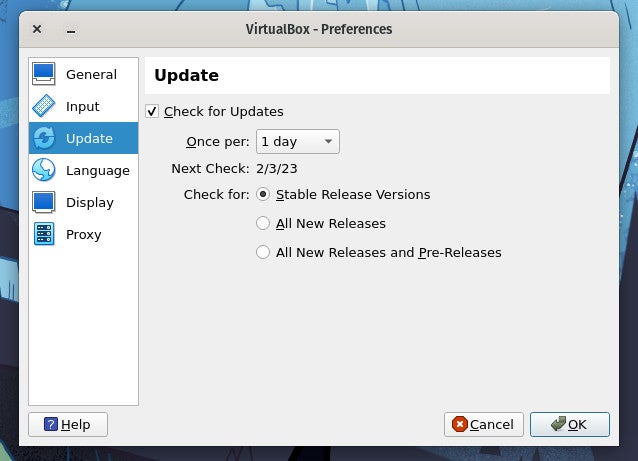
Click the checkbox for Check For Updates. Next, select the frequency you desire and then check the type of updates you want.
I would highly recommend you select Stable Release Versions. Unless you are interested in testing new VirtualBox features, you run a much higher risk of VirtualBox breaking if you select either All New Releases or All New Releases and Pre-Release. You might be okay opting for All New Releases, but enabling Pre-Releases is a recipe for disaster — especially on a production machine.
Once you’ve selected, click OK and you’re done.
What happens after an update
Unless it’s a major update or one that also requires a kernel upgrade, which you will have to do via your host system’s package manager, you shouldn’t have to do anything besides restarting VirtualBox. Should the upgrade be major and your operating system kernel also require an upgrade, you’ll have to restart your host machine. Otherwise, everything should go off without a hitch.
Just remember these two things: First, if you absolutely depend on VirtualBox for daily productions, you might not want to enable auto-updates. Second, if an auto-update breaks VirtualBox, then upgrade your OS and that should resolve the issue.
Subscribe to TechRepublic’s How To Make Tech Work on YouTube for all the latest tech advice for business pros from Jack Wallen.
For all the latest Technology News Click Here
For the latest news and updates, follow us on Google News.