How to encrypt a hard drive on Windows or macOS
Encryption is a powerful security feature, getting stronger over the years to protect data as exploits keep getting more powerful every day. While it’s commonly used in enterprise solutions, you can use encryption for your data as well, and you probably should.
Encrypting a hard drive on your computer isn’t very hard, either. It’s very simple, provided you keep your encryption key handy, and it saves your data from prying eyes. Here’s how to encrypt a hard drive on Windows or macOS.
Read more: Here’s everything you need to know about encryption
QUICK ANSWER
To encrypt a hard drive on Windows, use BitLocker in the Control Panel. To encrypt a hard drive on Mac, you can use FileVault in System Preferences for startup disks and the Disk Utility app for storage disks.
JUMP TO KEY SECTIONS
Should I encrypt my hard drive?
Encryption adds an extra layer of security to your data. It’s a great way to ensure your data is secure. So should you encrypt your hard drive? Short answer: Yes. Encryption will save your data from prying eyes. Without the encryption key, it is nearly impossible for someone else to access your data. Especially if someone tries to recover it after you’ve deleted it.
So if you deal with sensitive data that you wouldn’t like anybody else to see, encrypting your hard drive is the way to go. Even if your data isn’t sensitive per se, encryption can help you protect it, and it’s easy to set up as well.
Relevant: The best external hard drives you can buy
How to encrypt your hard drive on Windows
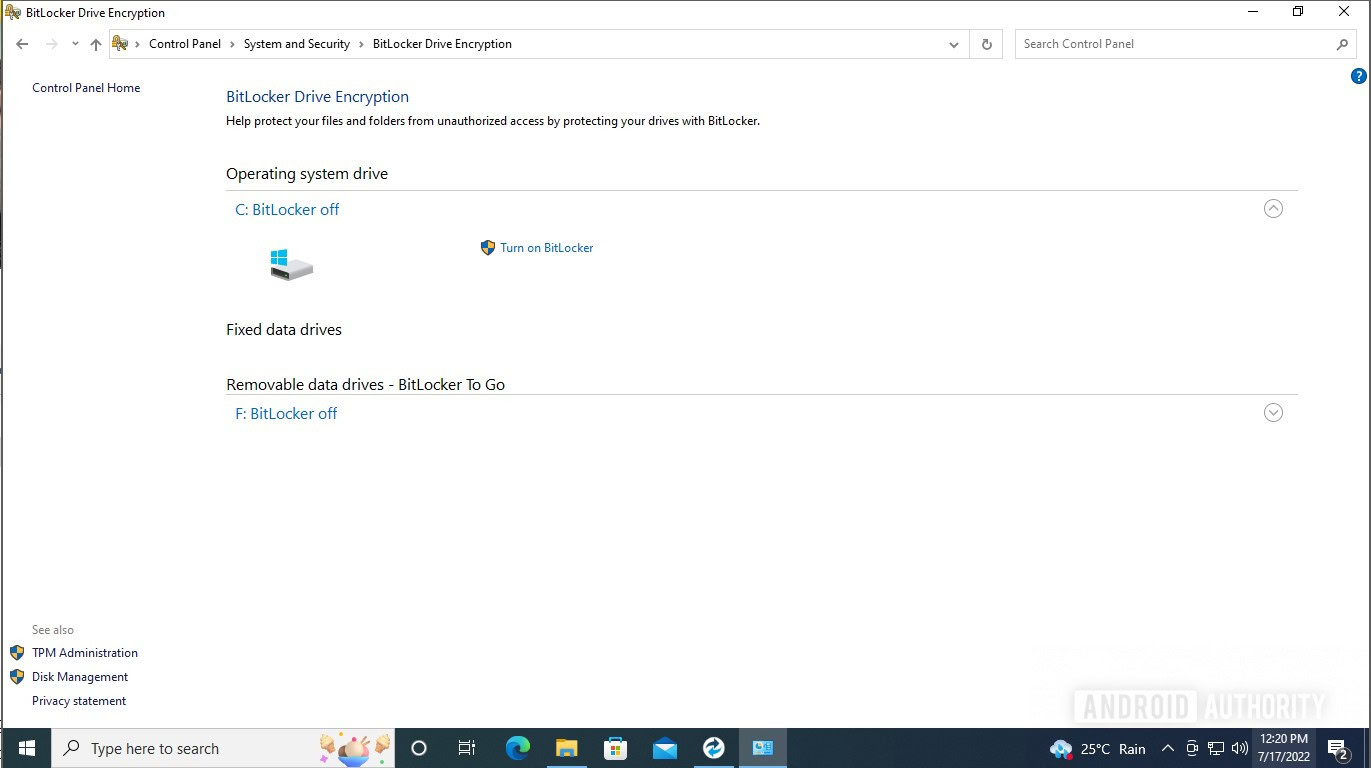
The best way to encrypt your hard drive on Windows is by using BitLocker. You can open it up via search by typing in BitLocker and clicking the top search result or via Control Panel -> System and Security -> BitLocker Device Encryption.
Palash Volvoikar / Android Authority
Click the button that says Turn on BitLocker next to the drive you want to encrypt. If the button isn’t visible, click the arrow button to the right of the drive to expand the options.
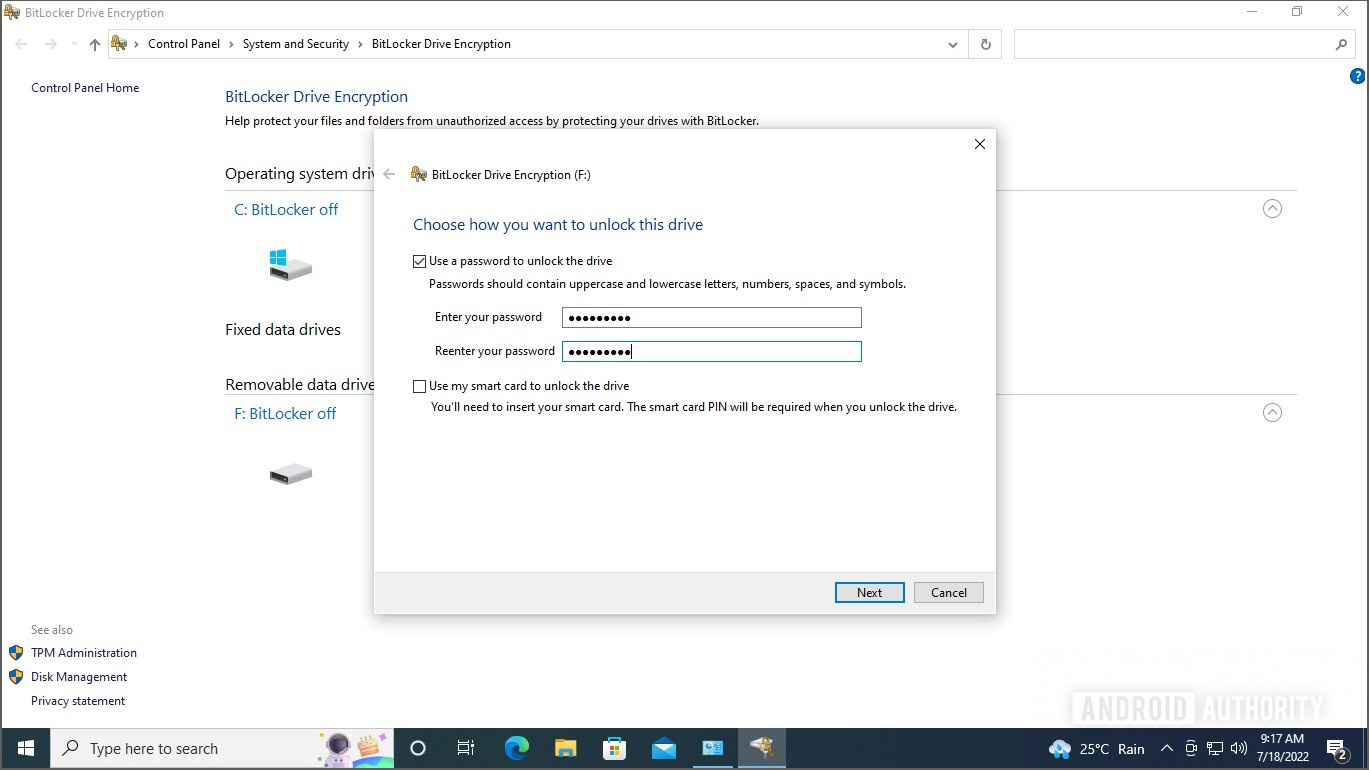
Click the box next to Use a password to unlock the drive, and enter your password. Click Next.
Palash Volvoikar / Android Authority
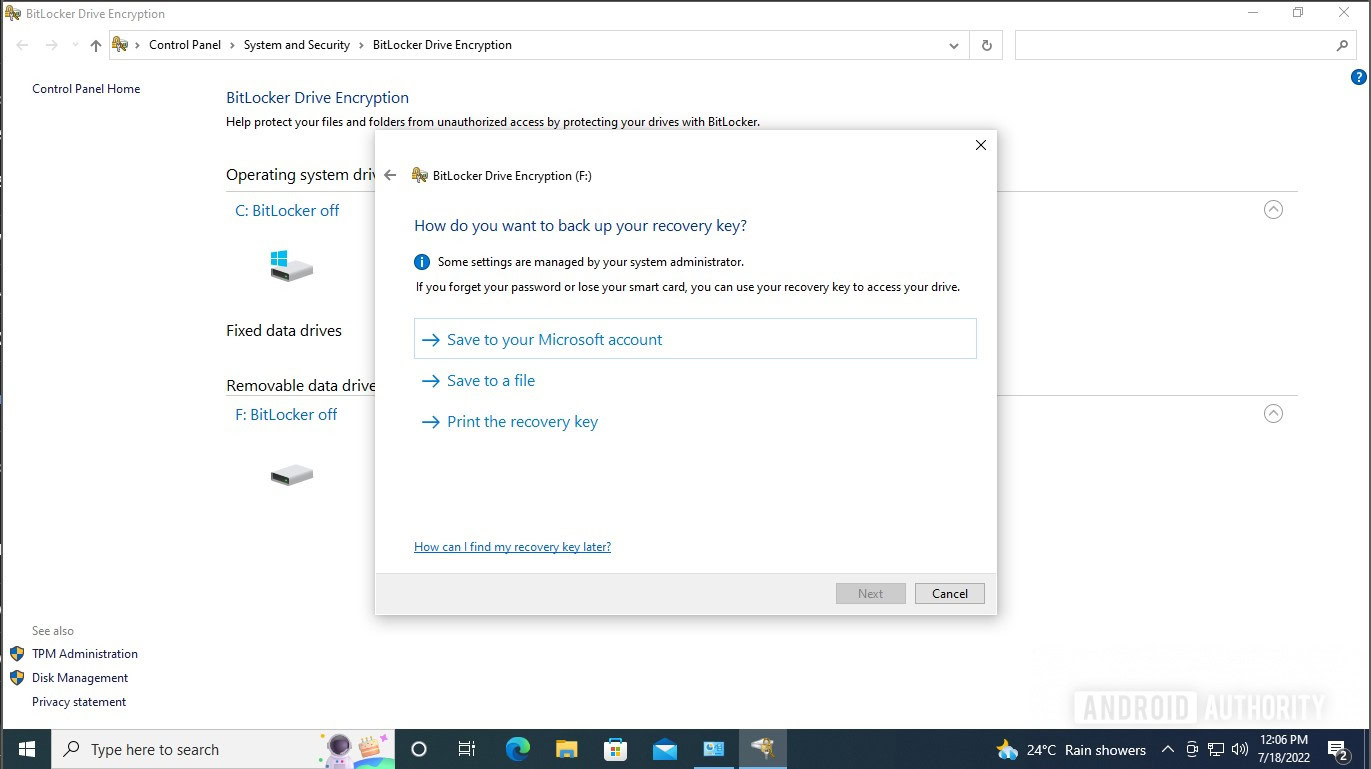
You’ll get an option to back up your recovery key. We recommend clicking Save to your Microsoft account. You can choose to save it to a file or print it, but those two options are available after the encryption has been completed as well. Once the key has been saved, click Next.
Palash Volvoikar / Android Authority
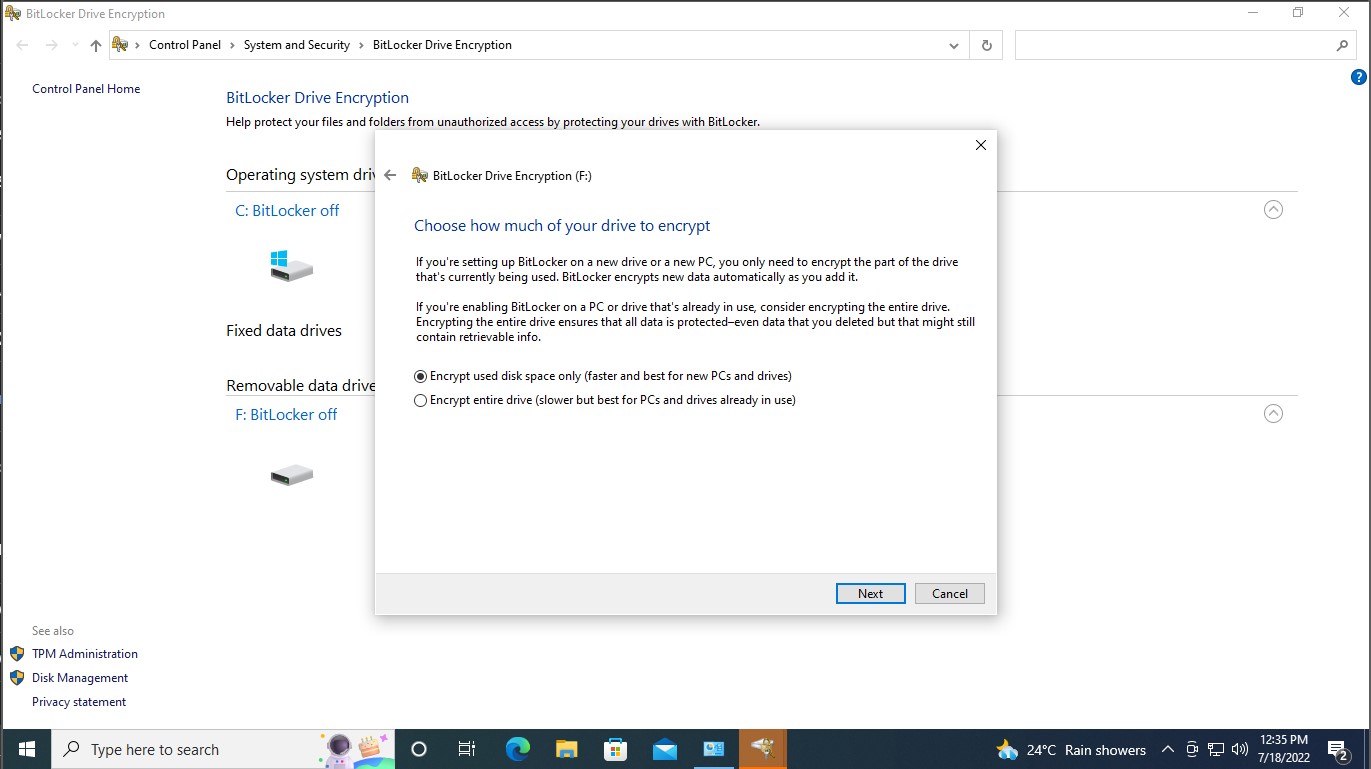
Select whether you want to encrypt your whole drive or only the available disk space, and click Next.
Palash Volvoikar / Android Authority
Lastly, you may get the option to select a new encryption mode which is better but unsupported by older Windows versions. Select the preferred one and click Next.
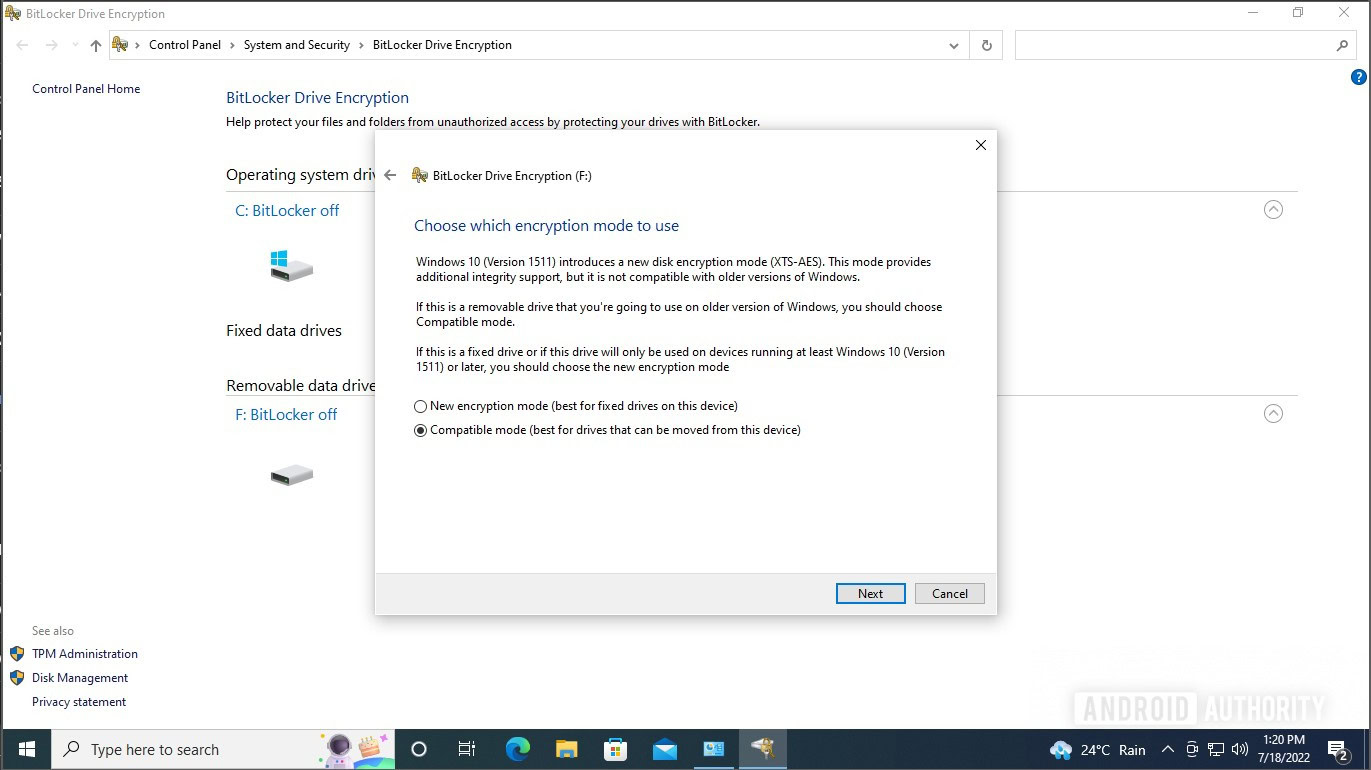
Palash Volvoikar / Android Authority
Click Start encrypting to begin the process.
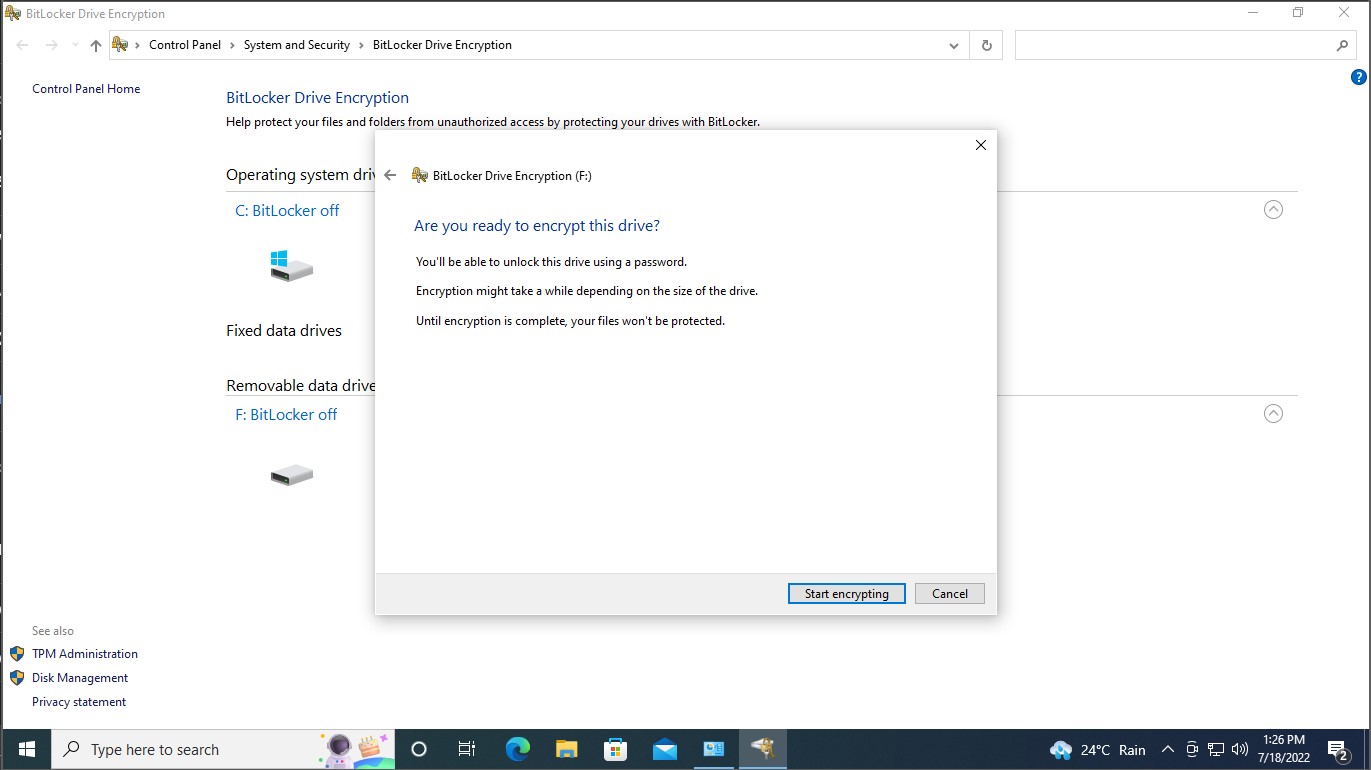
Palash Volvoikar / Android Authority
It will take some time, depending upon the size of your drive. You will get a confirmation that the encryption is complete.
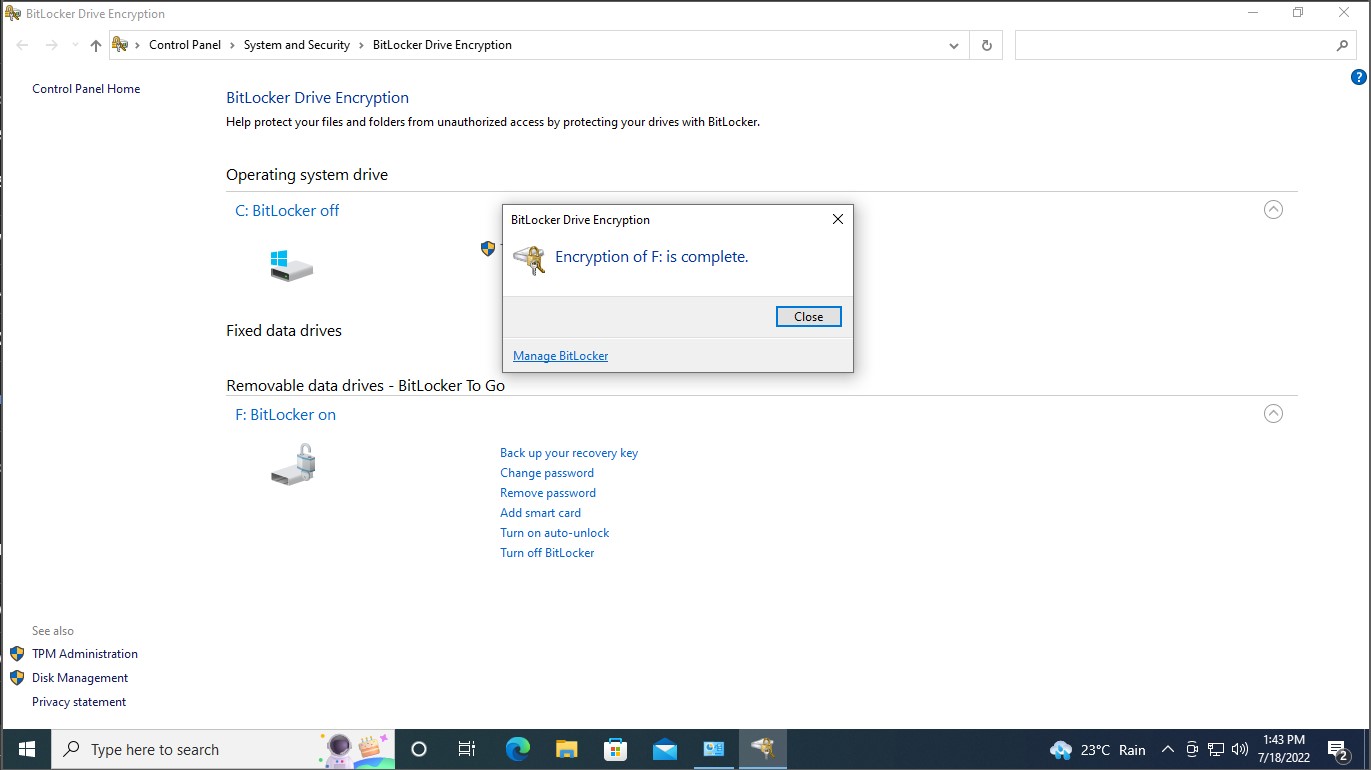
Palash Volvoikar / Android Authority
You can manage additional settings from the same Bitlocker Control Panel page, which lists the drives.
Read more: The best internal and external hard drives for you
How to encrypt your hard drive on a Mac
On Mac, there are options to encrypt drives two ways. If you want to encrypt your startup drive, you’ll need to use FileVault. To encrypt non-system drives, you can use the Disk Utility.
Encrypt a startup disk using FileVault
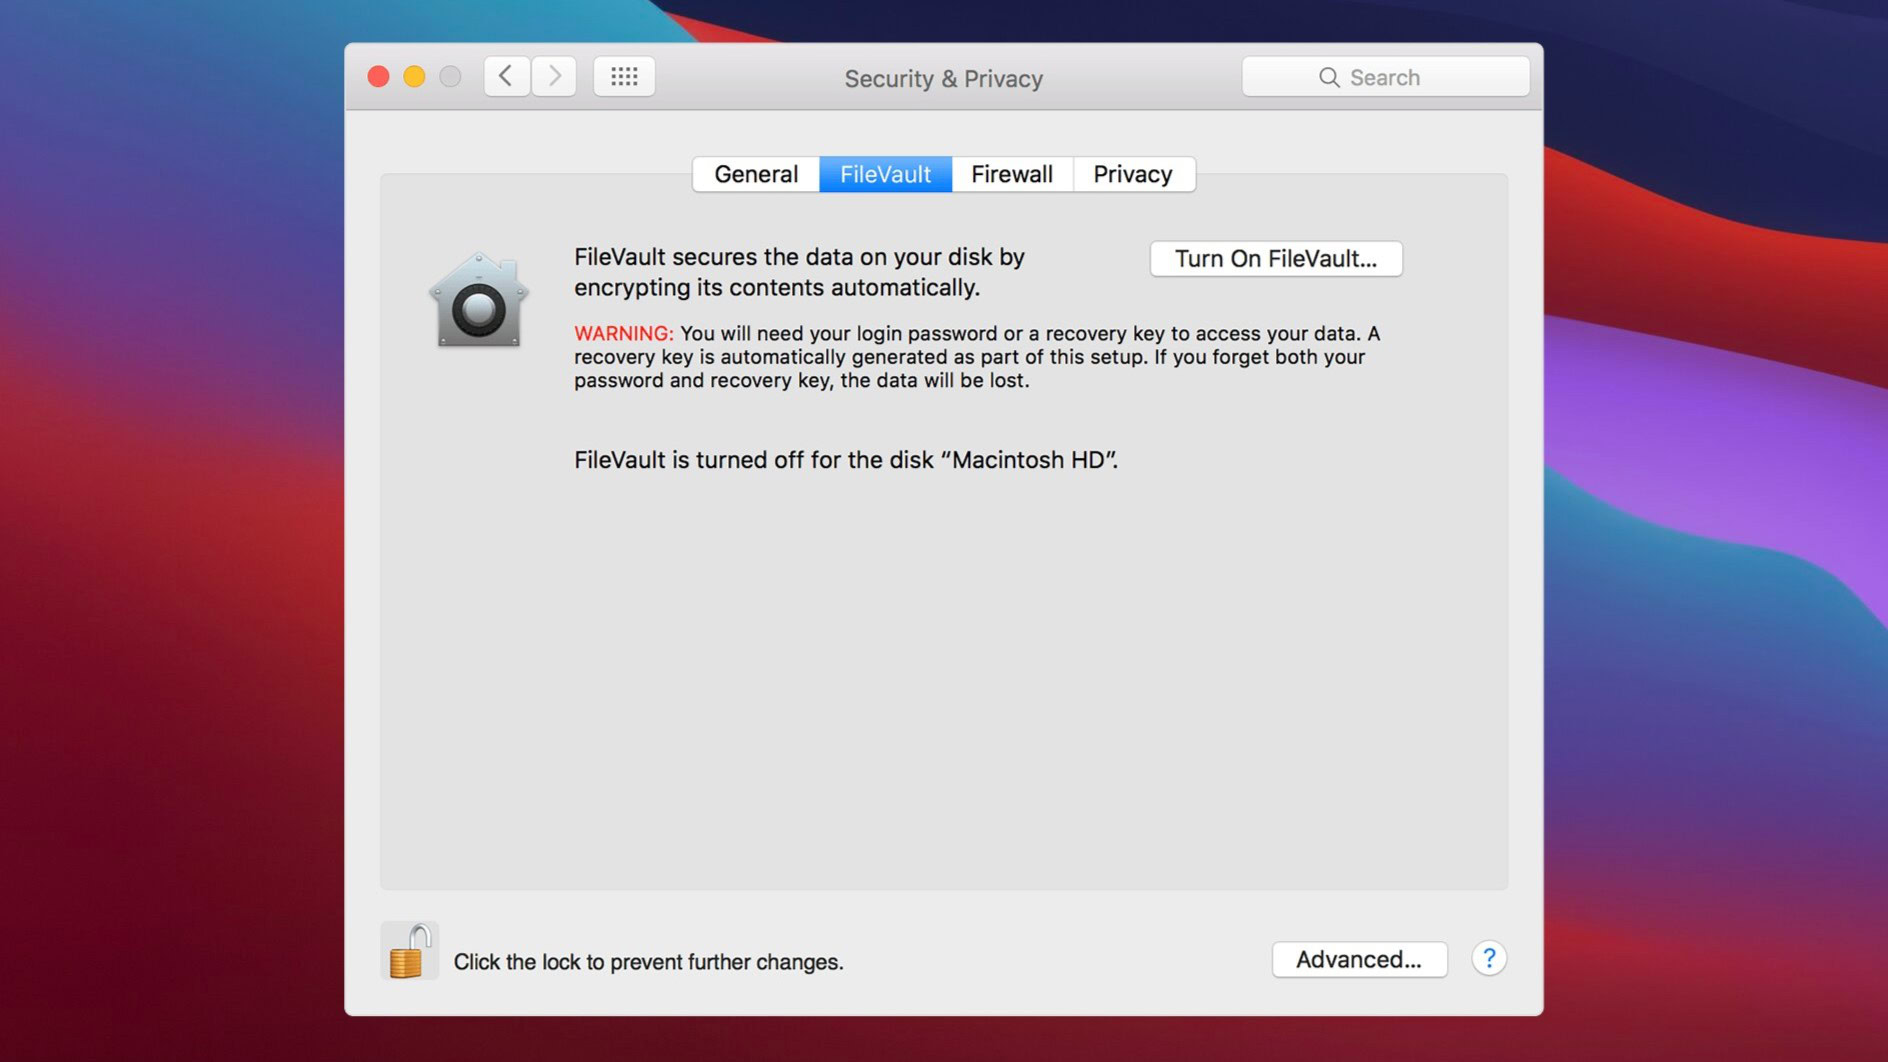
- Click the Apple logo menu button at the top left corner of your screen.
- Select System Preferences.
- Click Security & Privacy.
- In the new window that opens up, click the FileVault tab towards the top.
- Click the locked icon.
- Enter an administrator username and password.
- Click the Turn On FileVault button.
In case you have multiple user accounts on your Mac, you will need to enable each user to access the encrypted disk. Click Enable User next to each user that you want to grant access to, and enter the respective user’s password.
More: The best internal and external SSDs for you
Encrypt a storage drive using Disk Utility
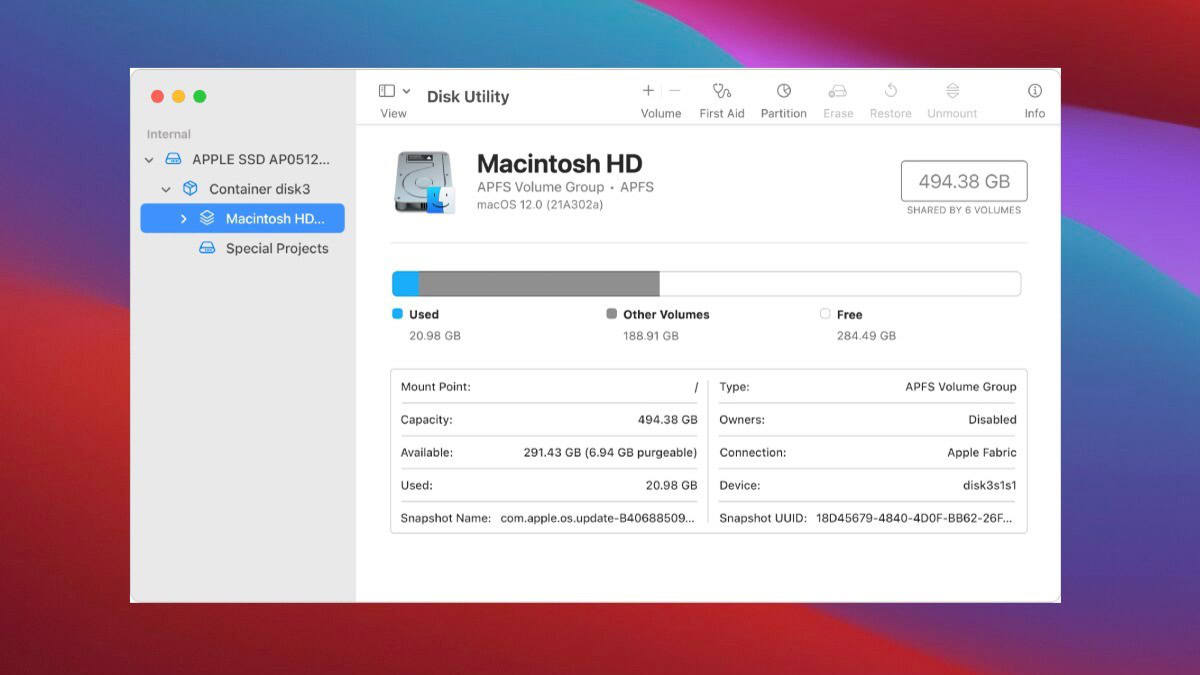
You will lose the data on the storage drive if you encrypt it using the Disk Utility, so make sure to backup your data before you begin this procedure.
- Open the Disk Utility app on your Mac via search.
- In the left navigation sidebar, click the storage drive you want to encrypt.
- Click Erase in the toolbar towards the top.
- Type in a name for the drive volume.
- Click the drop-down next to Scheme and select GUID Partition Map.
- Click the drop-down next to Format and select an option that says encrypted in parentheses.
- Enter the password, verify it, and click Choose.
- Click Erase, wait for the process to finish, and click Done.
Read more: How to tell if my computer has been hacked
FAQs
Some Windows 10 and 11 devices come with hard drive encryption turned on by default. It’s not the default for all Windows devices but depends upon the hardware manufacturer.
For all the latest Technology News Click Here
For the latest news and updates, follow us on Google News.
