

Learning how to schedule an email in Gmail takes mere moments, and will let you take much greater control of when your messages are sent.
Gmail’s email scheduling took a surprisingly long time to be implemented, only launching in 2019. Still, it’s a useful tool that saves you the trouble of installing any add-on software to do the same job. In this guide, we’ll show you how to schedule an email in Gmail, using the current desktop and mobile interfaces.
For the purpose of this guide, we’ll assume you’re already a Gmail user and are familiar with how to compose emails. The scheduling process only takes a few quick clicks; when the hardest part is making sure you don’t hit “Send” by accident, you can be sure it’s not unnecessarily complicated.
Scheduling emails is handy if you’re using Gmail for work, as it can help manage the workflow of both yourself and your colleagues, but there’s nothing stopping you from scheduling personal emails too.
If you need to send an email and it’s not urgent, you could schedule it instead of sending right away, giving yourself a bit of extra time to go back and edit the message if necessary.
How to schedule an email in Gmail on desktop
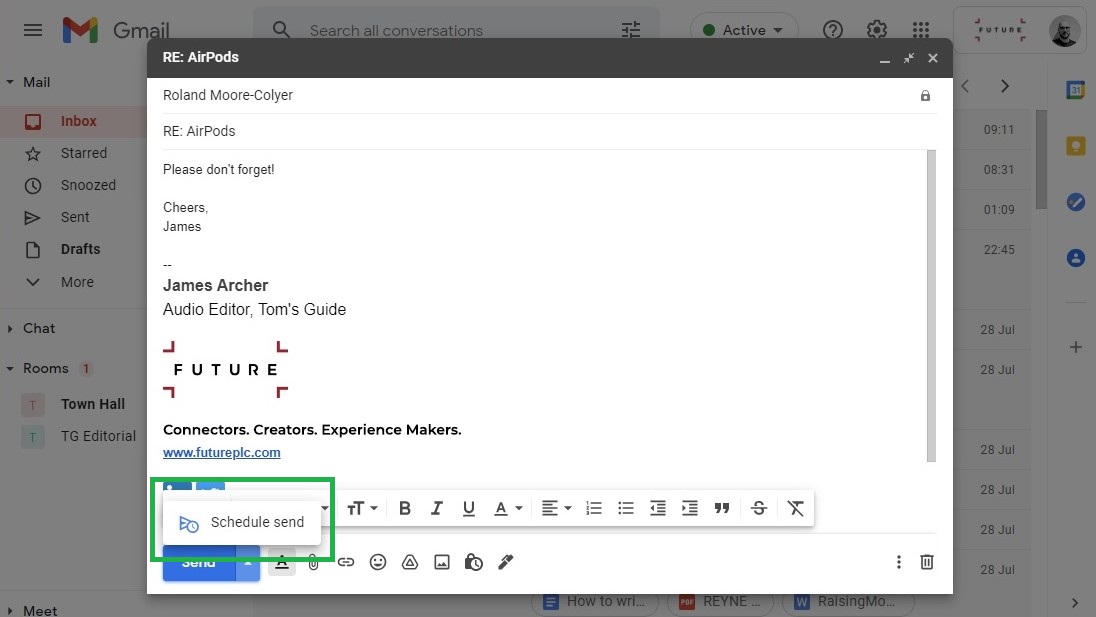
1. Once you’ve composed your email, click the blue button with a down arrow next to the Send button. Don’t click on “Send” itself.
2. Click “Schedule send.”

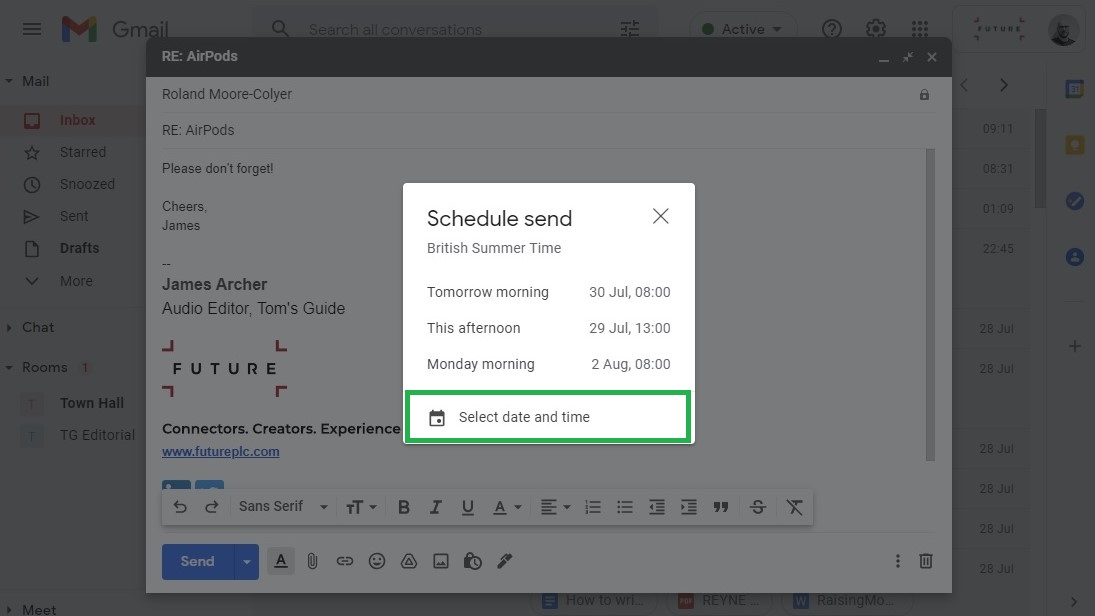
3. You’ll be presented with a few preset times, which you can select by clicking on them. To schedule the message to be sent at a specific time, click “Select date and time.”

4. Click a date to select it, and click the time to specify exactly when you want the email to be sent. Then, click “Schedule send.”
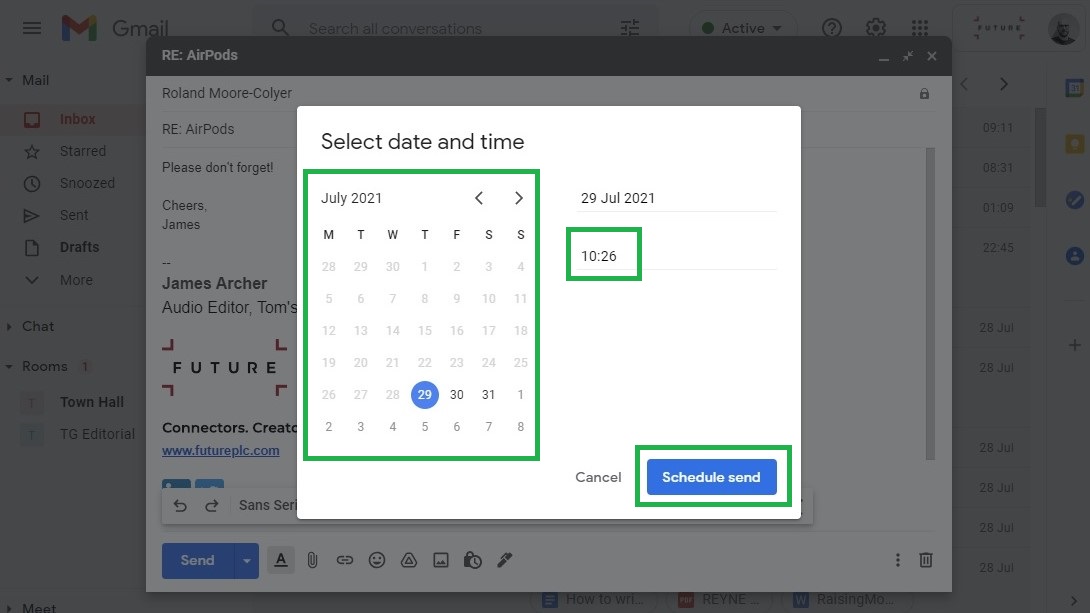

Your email is now scheduled. Before it sends, you can find the message in your “Scheduled” folder, where you can edit the contents, reschedule it for a different time, or cancel sending entirely.
How to schedule an email in Gmail on mobile
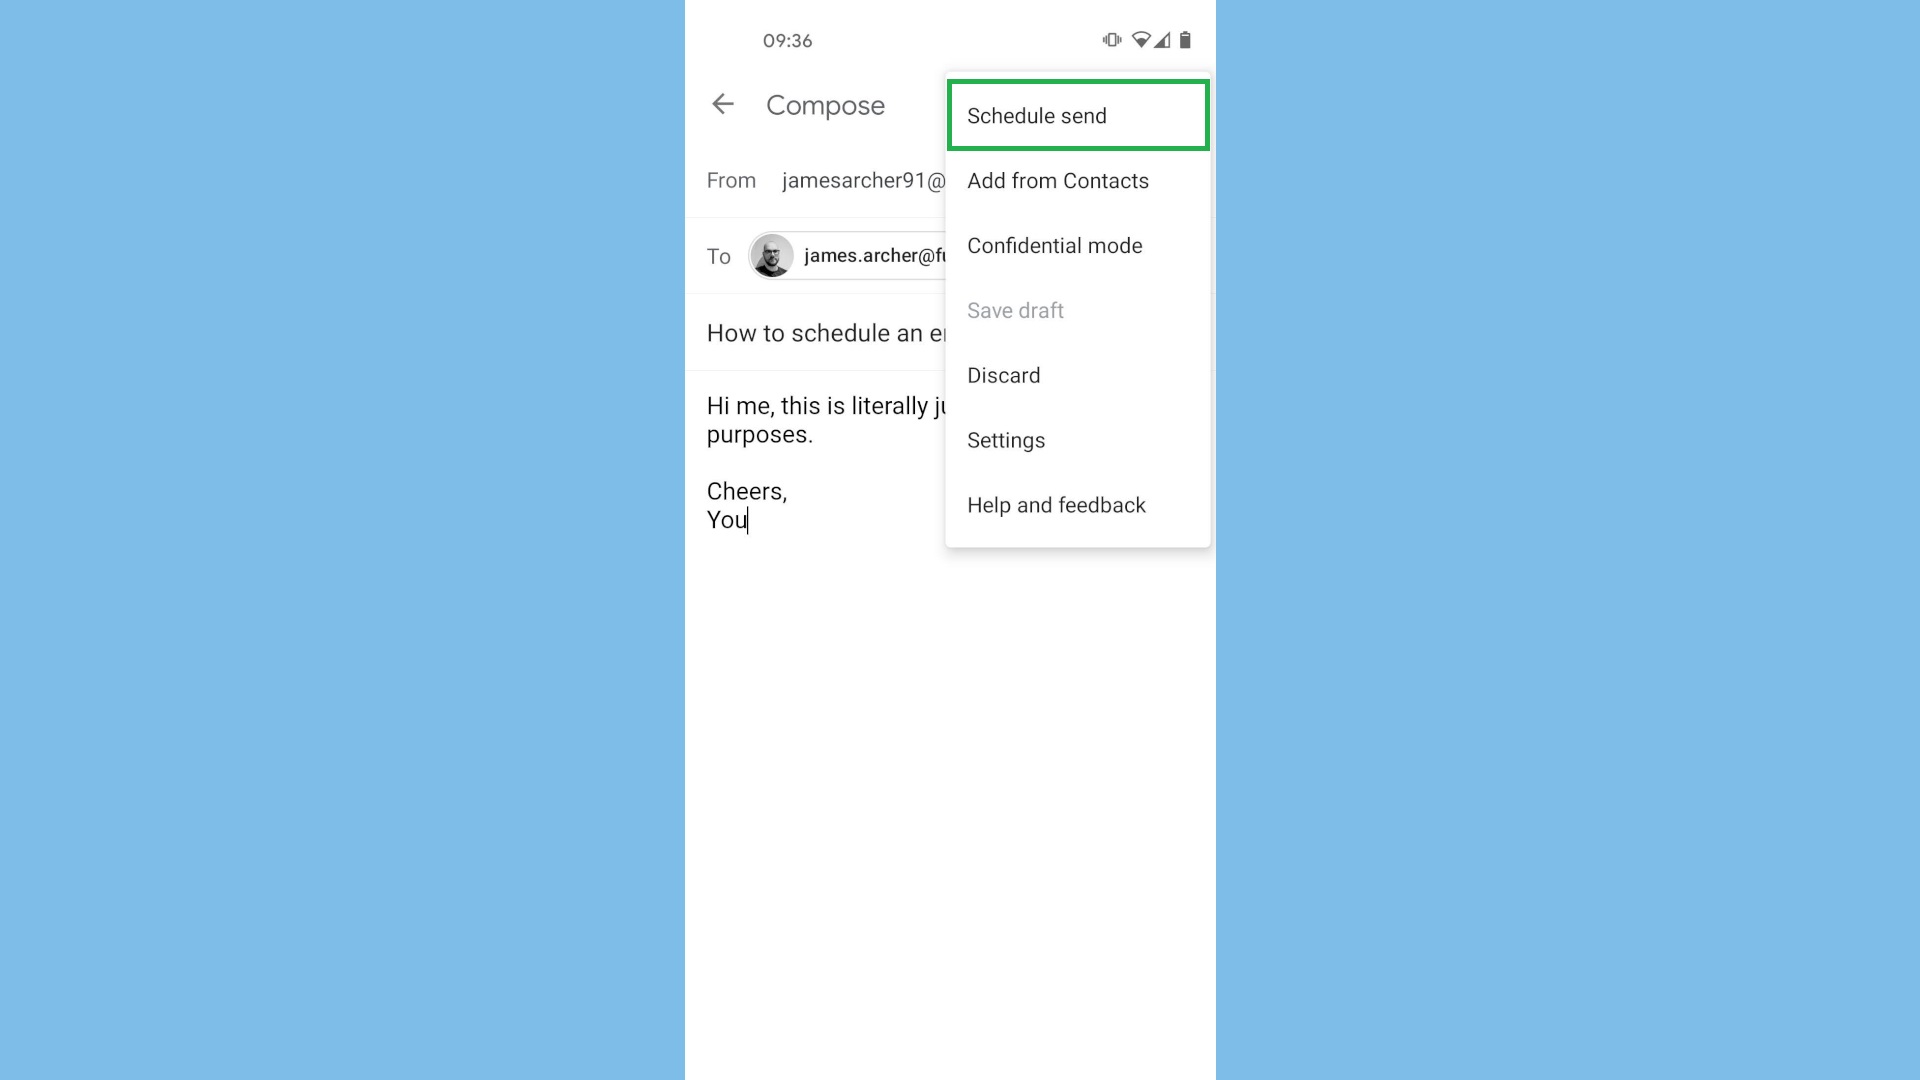
1. Once you’ve composed your email in the Gmail mobile app for Android or iOS, tap the three-dot symbol next to the Send button.
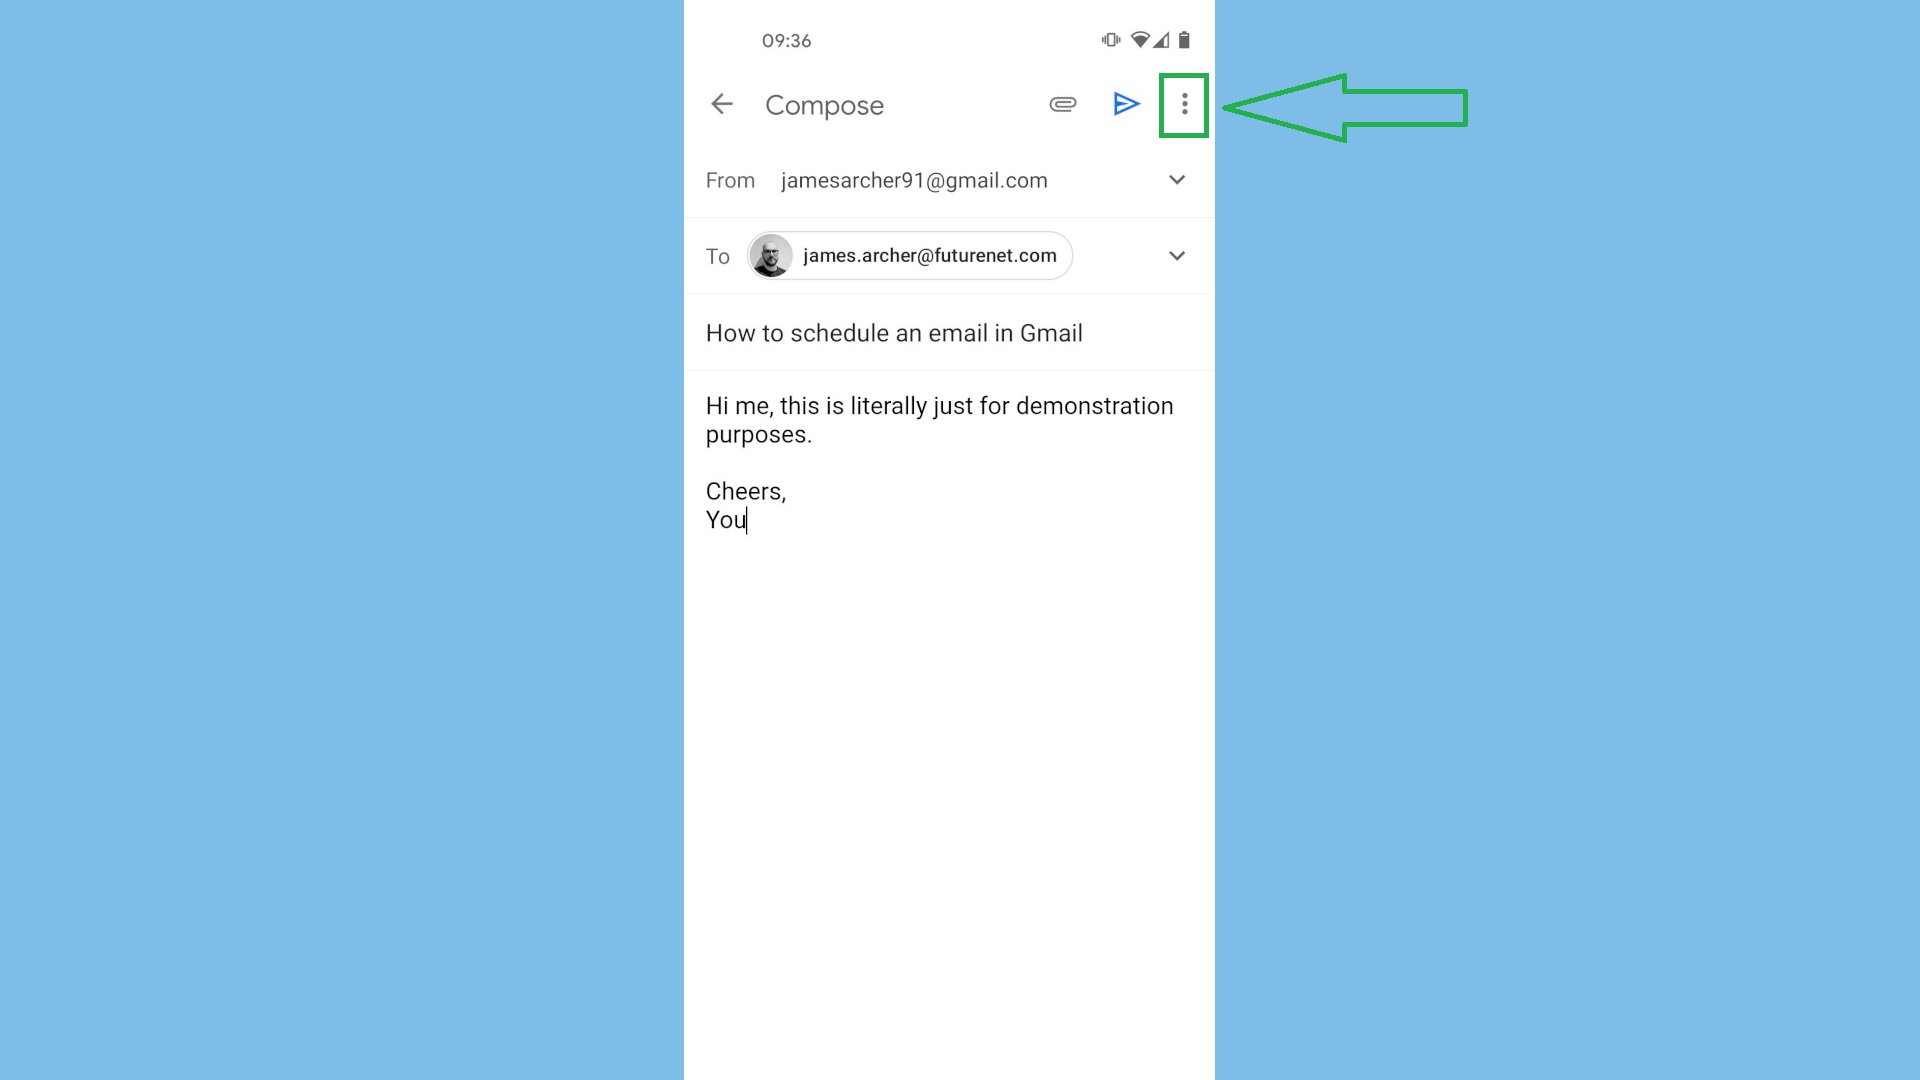

2. Tap “Schedule send.”
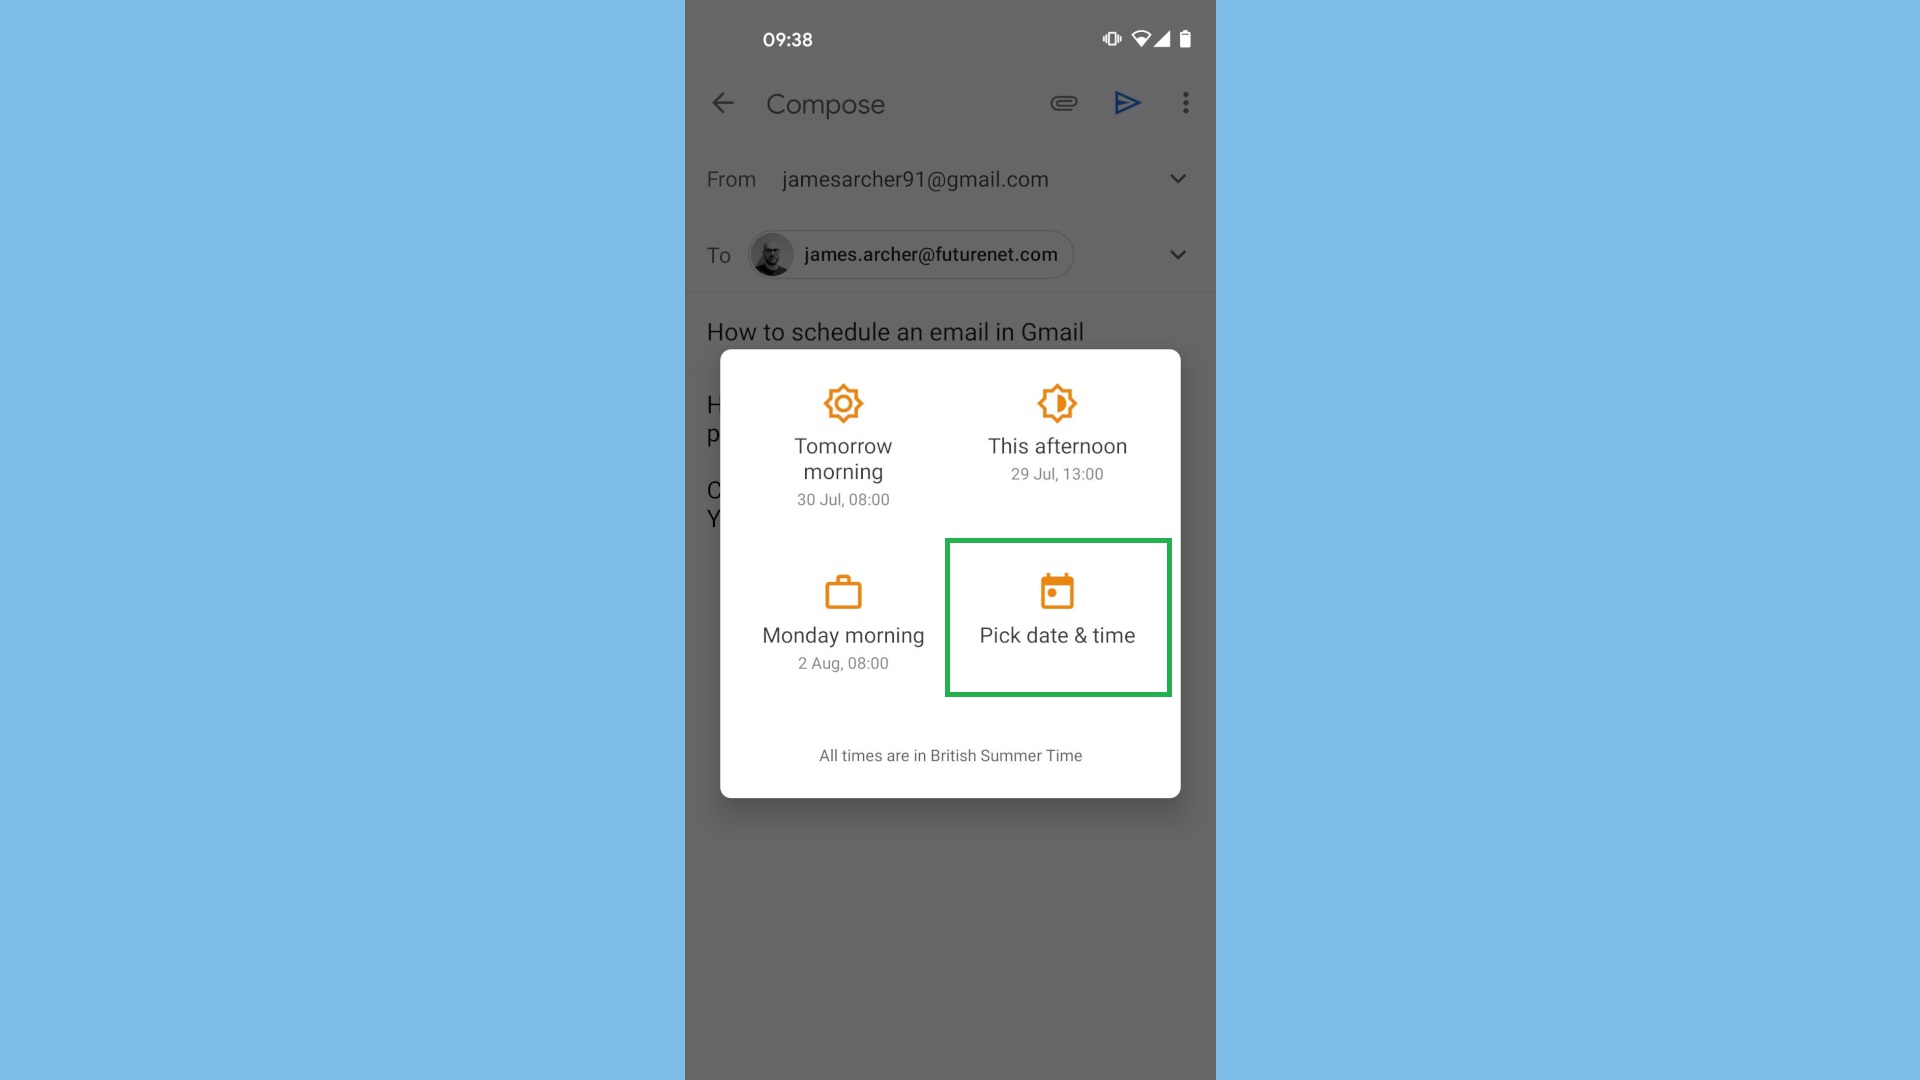
3. You can tap one of the preset times to schedule your email, or tap “Pick date & time” to choose a specific time.
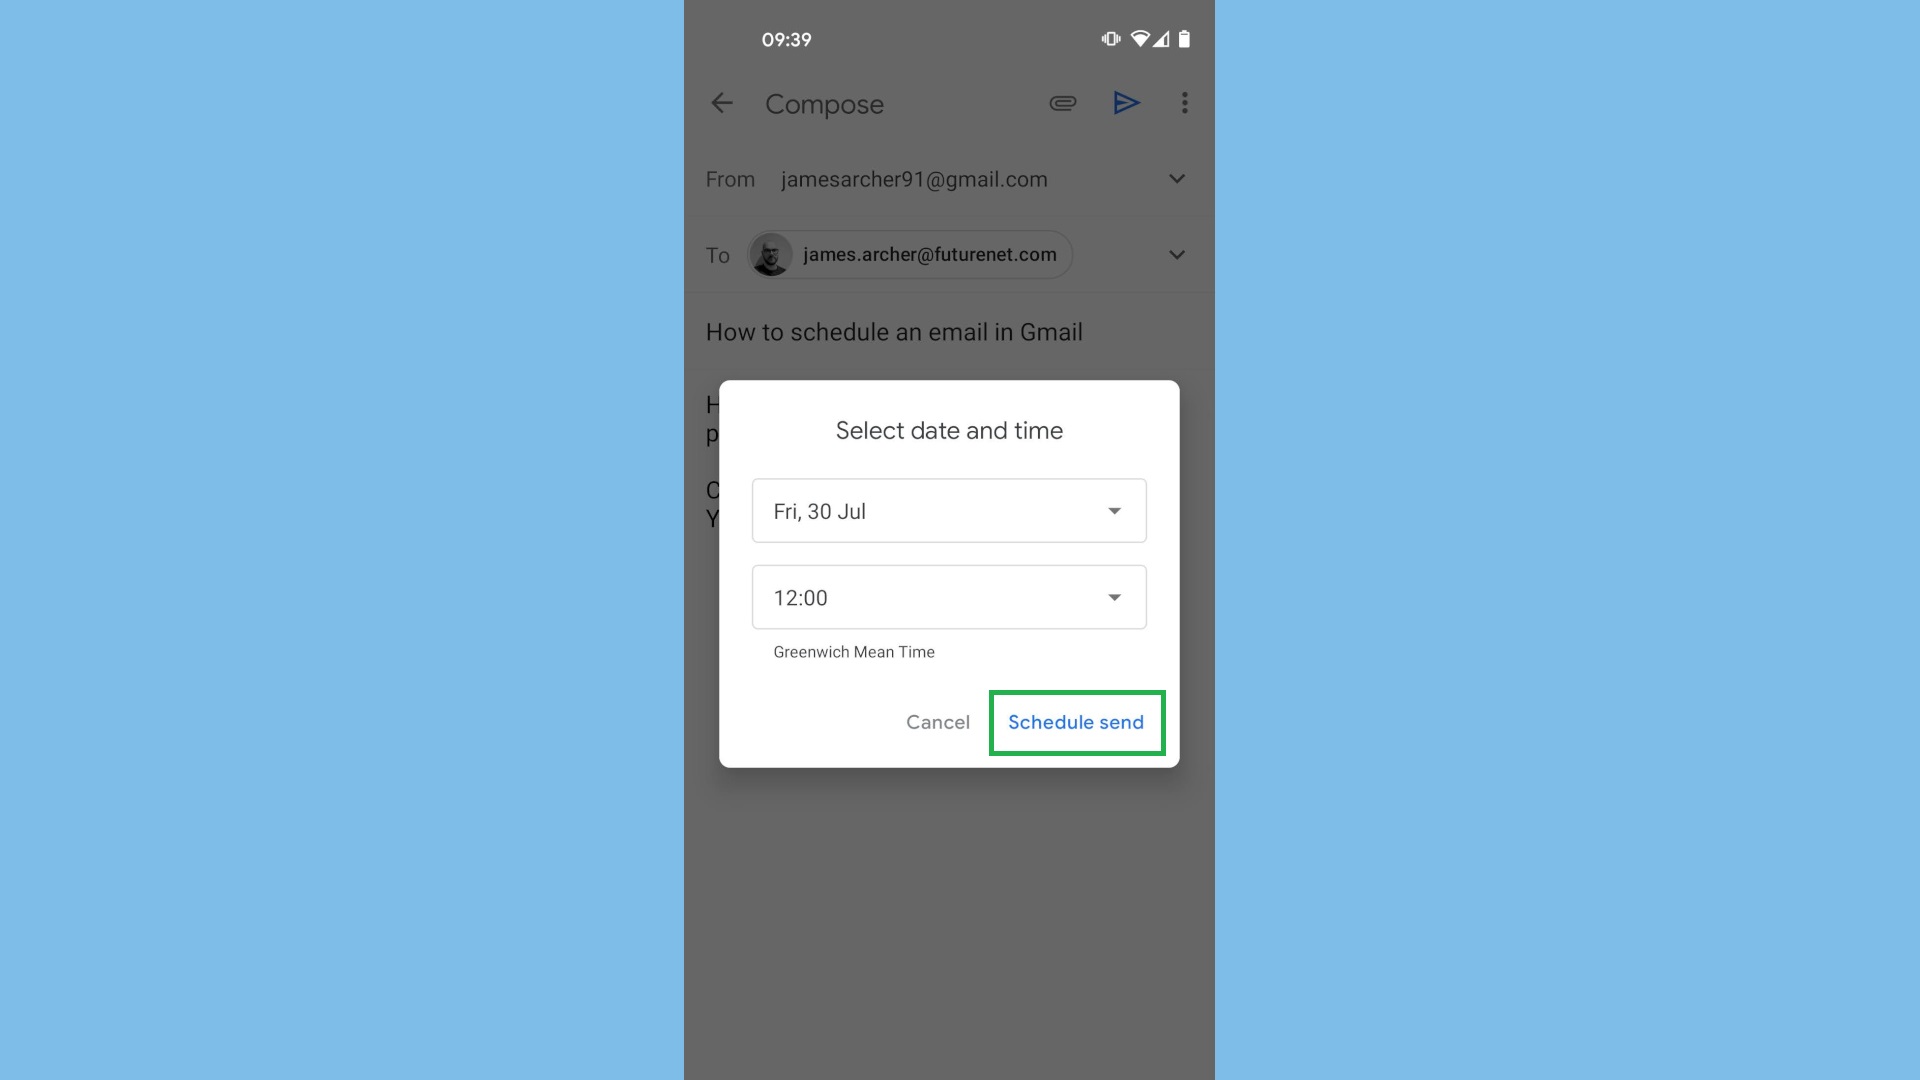
4. If you tapped “Pick date & time,” select a date and time and tap “Schedule send.”
As with the desktop method, your email will wait in your “Scheduled” folder until it automatically sends at the specified time. Until then, you can open the message to edit, reschedule, cancel or delete it.
Want more tips on getting the most out of Gmail? Head over to our main How to use Gmail hub, where you can find guides on how to change you name in Gmail, how to block emails in Gmail, how to recall email in Gmail and many more.
For all the latest Technology News Click Here
For the latest news and updates, follow us on Google News.