

Whether you want consistency across all your different music app subscriptions or are fully switching from one app to another, knowing how to transfer Spotify playlists to Apple Music can save you a whole lot of time.
After all, why spend hours manually rebuilding playlists when you can get an app to do it all for you? This can still be a tricky process, but by following the steps below, you’ll be able to move entire playlists between Spotify and Apple Music with ease.
Before we get into the individual steps for transferring Spotify playlists to Apple Music, there are a few things you’ll need. Obviously, chief among these are active Spotify and Apple Music accounts; you should also have both apps installed on your phone.
The best way to transfer Spotify playlists to Apple Music is by using a third-party app. However, since there are different apps specific to each mobile OS, we’ve split this guide into two. First, we’ll look at how to transfer Spotify playlists on iOS, so scroll down below that if you want to know how to transfer playlists on Android.
How to transfer Spotify playlists to Apple Music on iOS
1. Download and install SongShift from the App Store. The free version will let you transfer one playlist at a time, while upgrading to SongShift Pro ($4.99/£4.99 per month) lets you transfer multiple playlists at once.
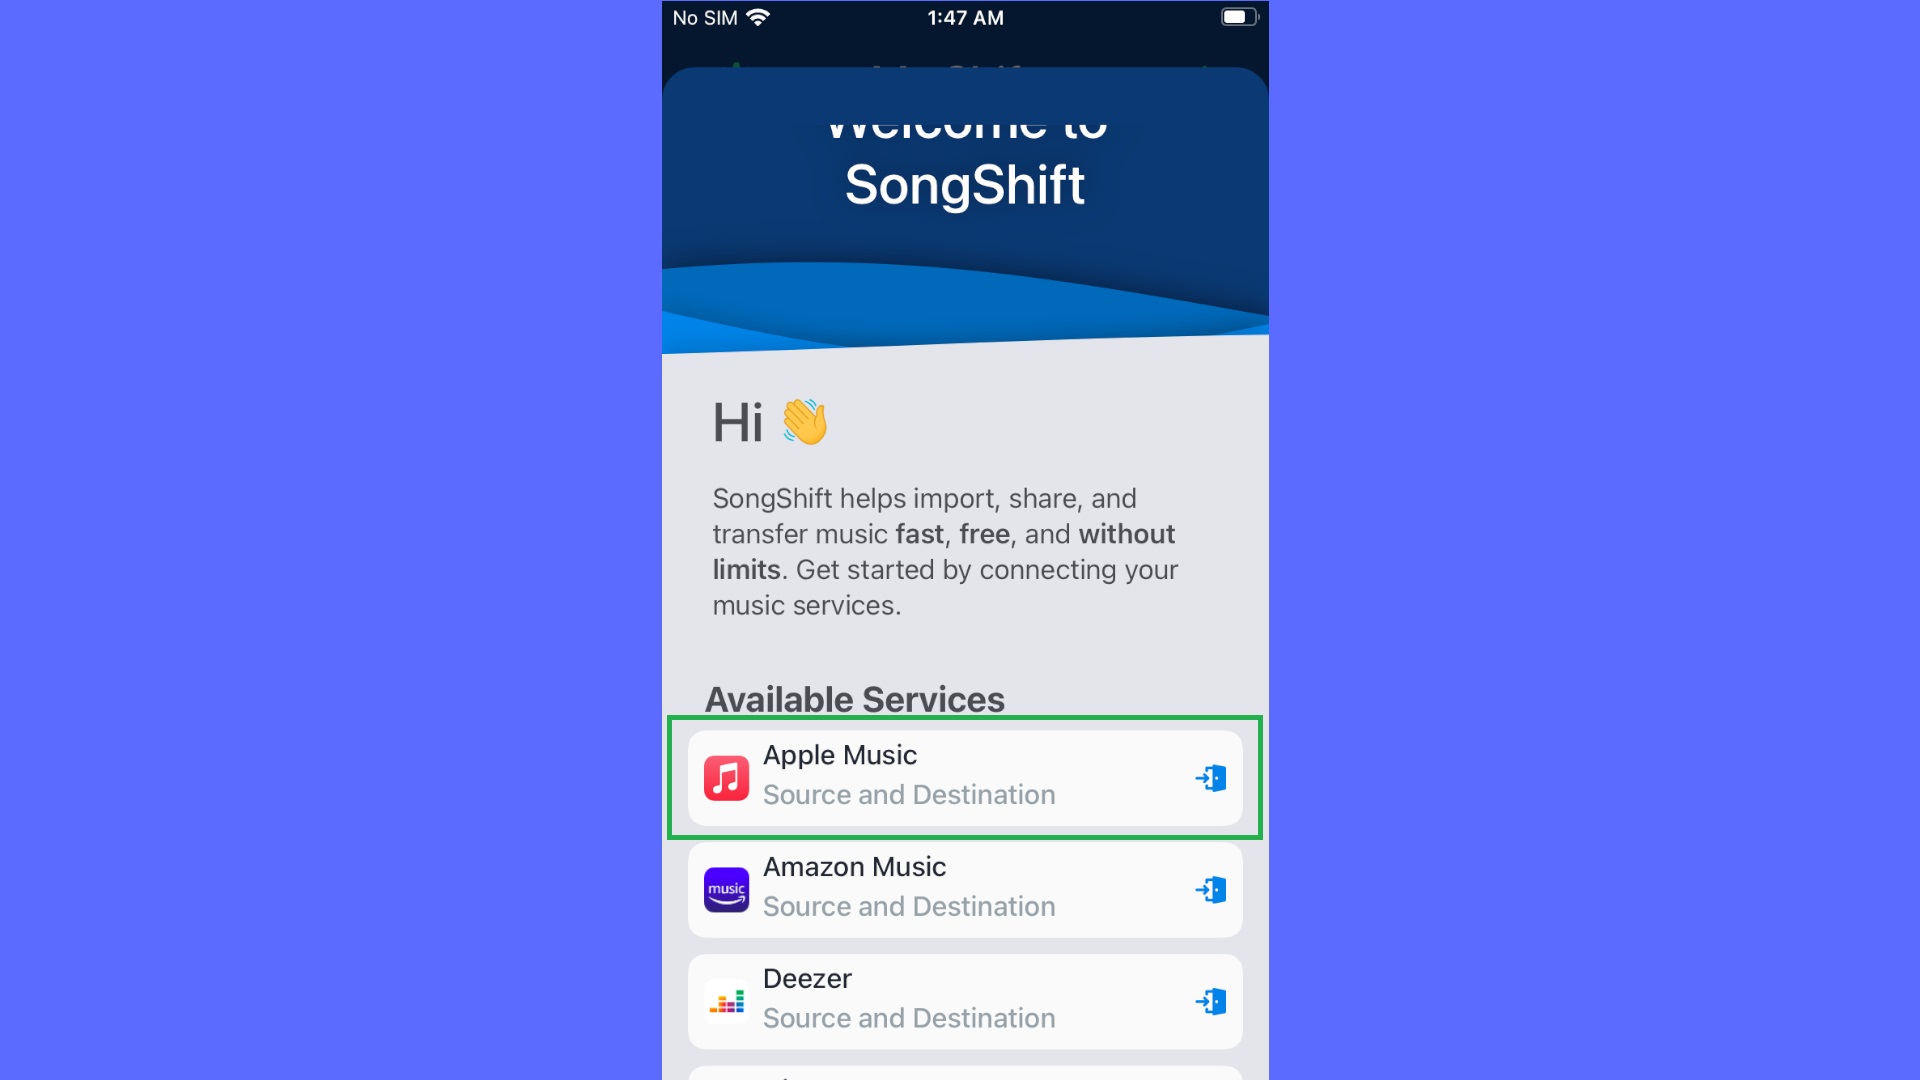
2. In SongShift, you’ll need to sync your Apple Music and Spotify accounts. Tap Apple Music at the top of the list, then tap ‘Continue’ followed by ‘Connect.’

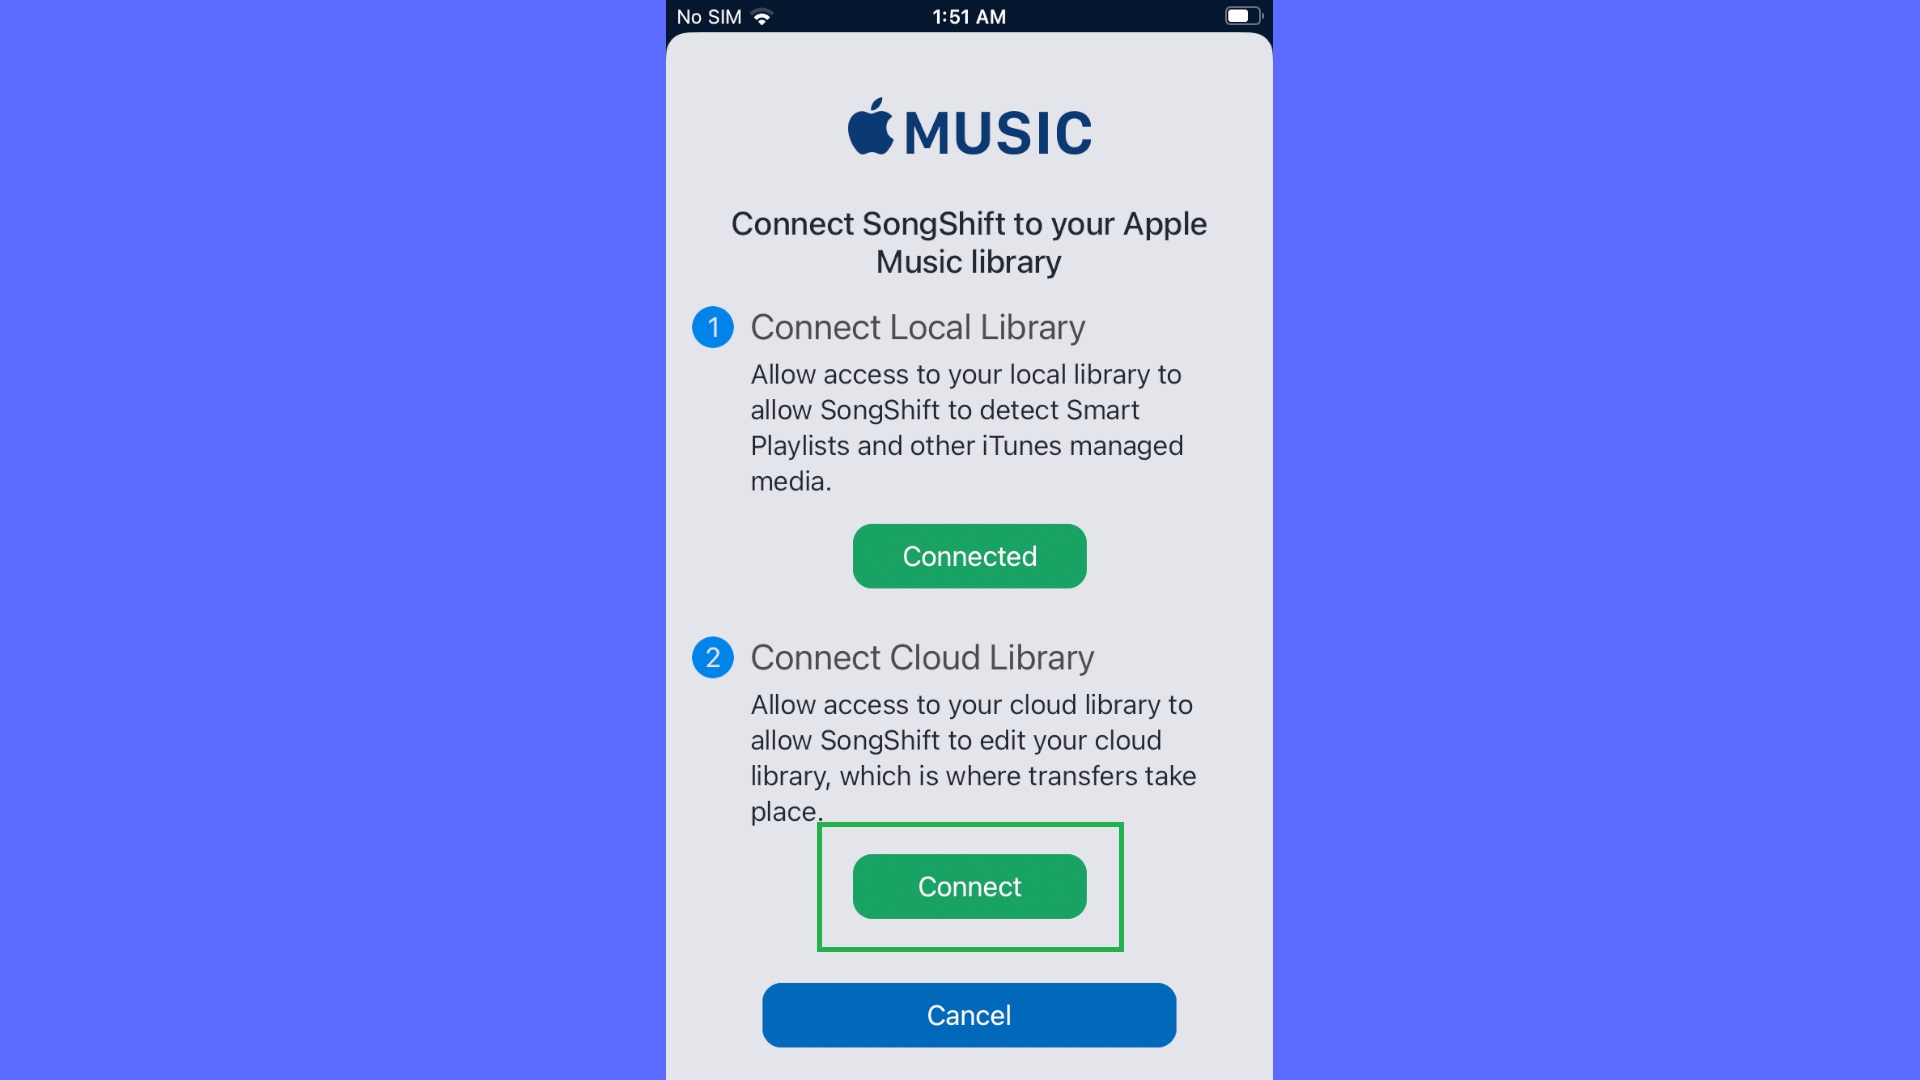
3. Tap ‘OK’ to let SongShift access your Apple Music library. Under ‘Connect Cloud Library,’ tap ‘Connect.’ This will open the iTunes site in a browser.
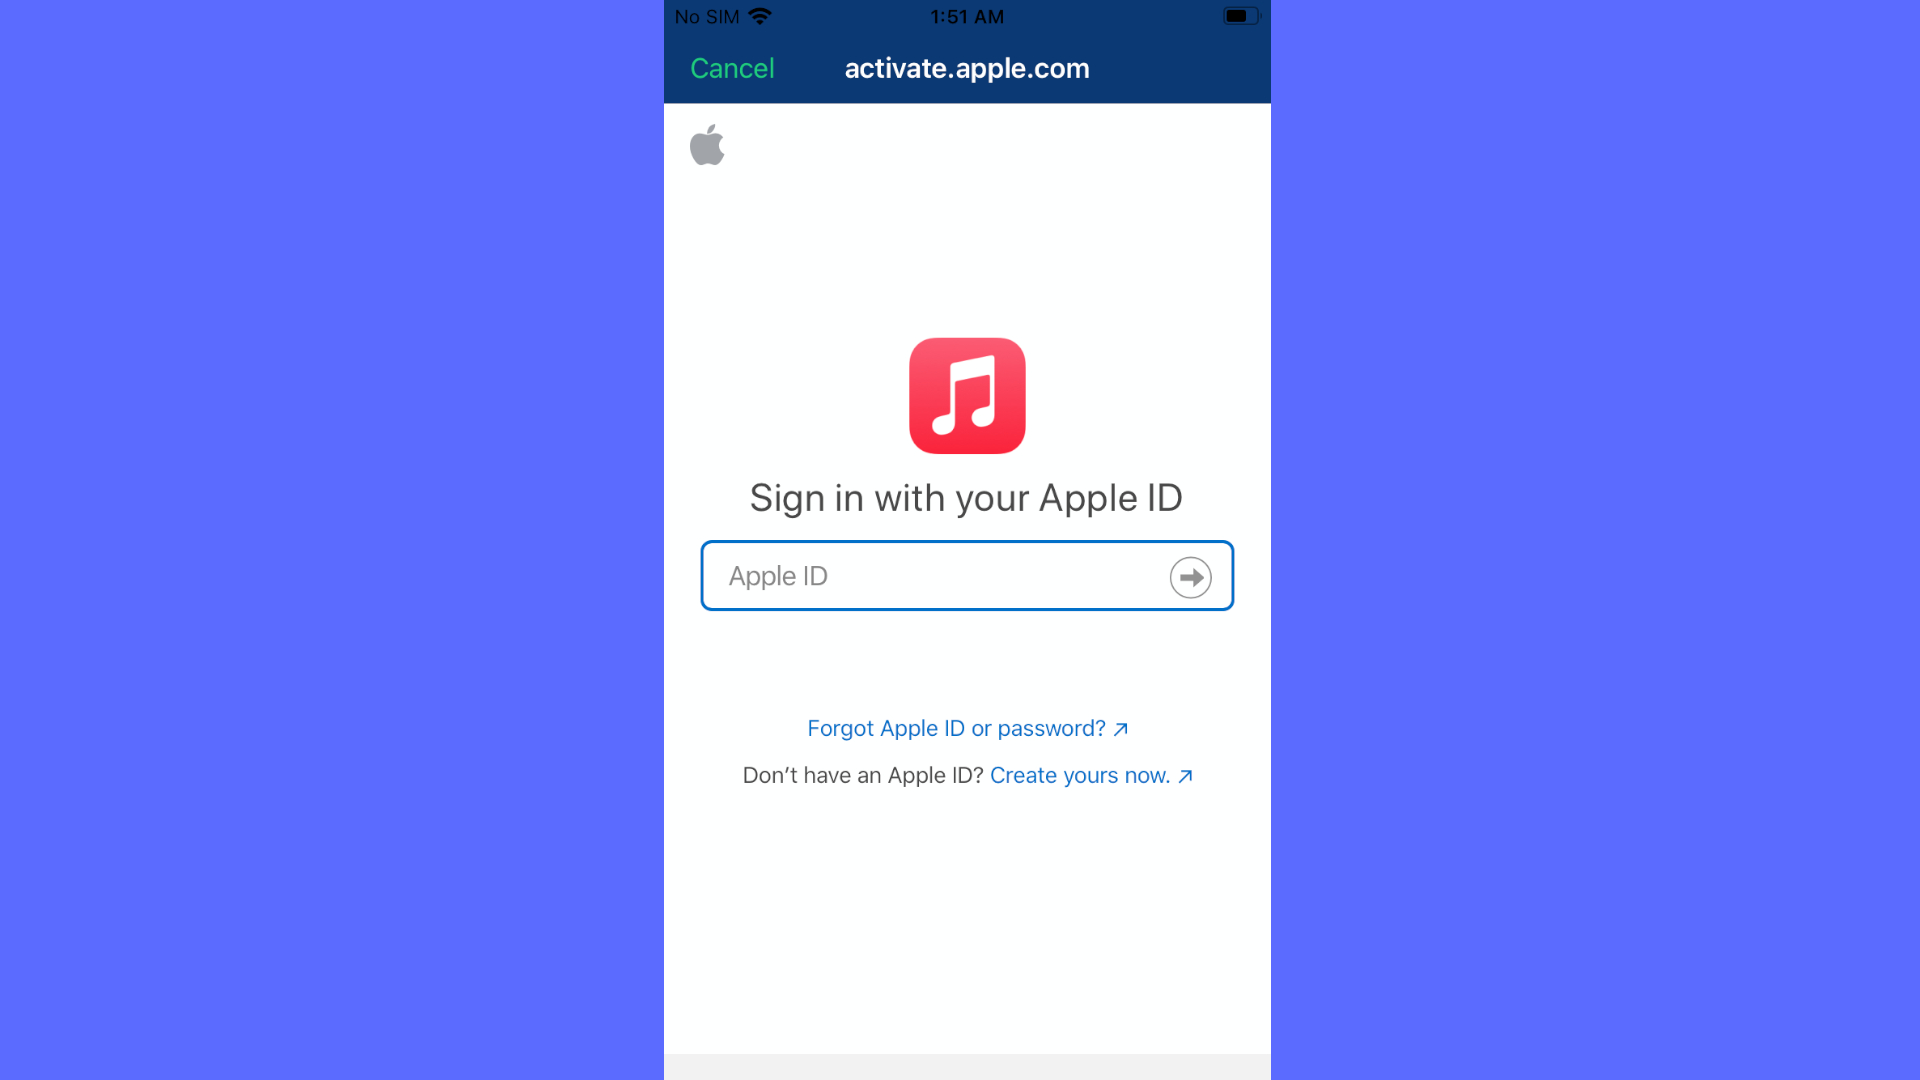
4. Sign in using your Apple ID, entering any 2-Factor Authentication details if you have it enabled.
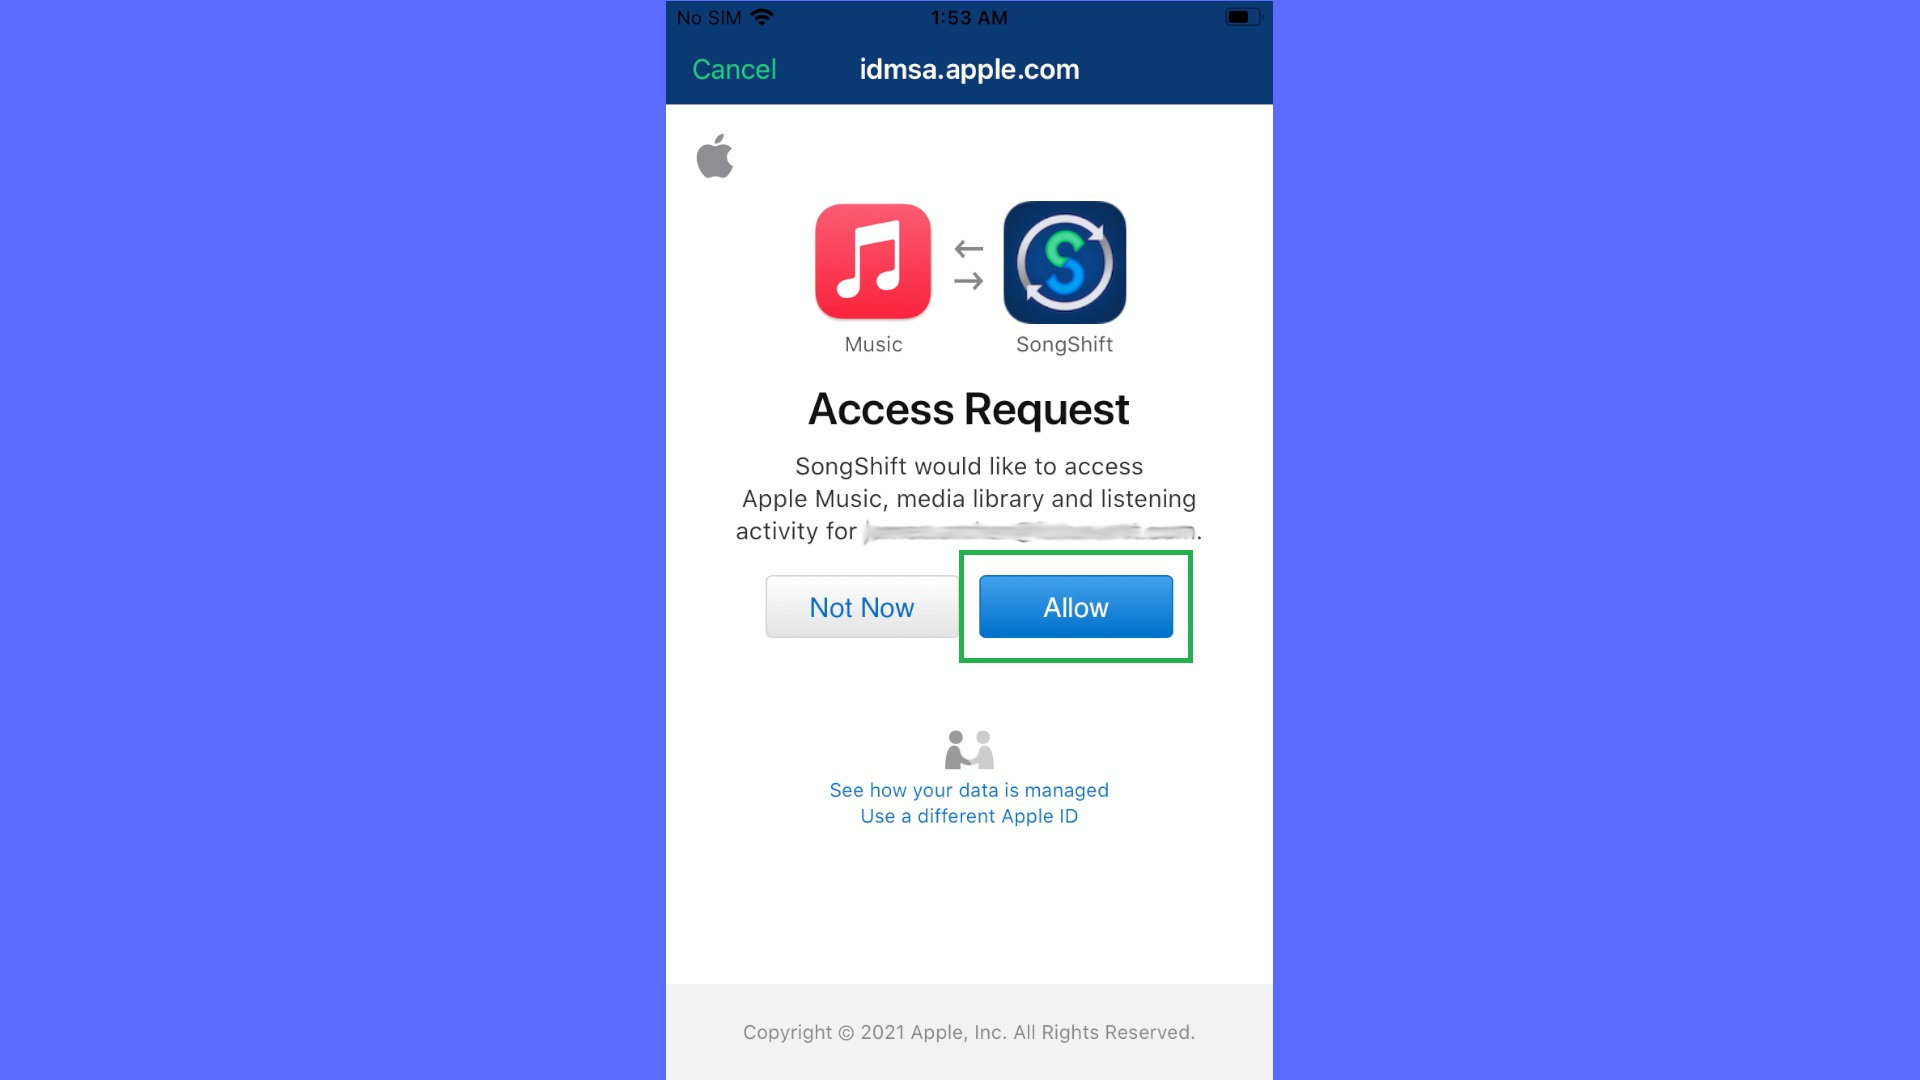
5. Tap ‘Allow.’ Apple Music is now synced, and you’ll be returned to the list of available services in SongShift.
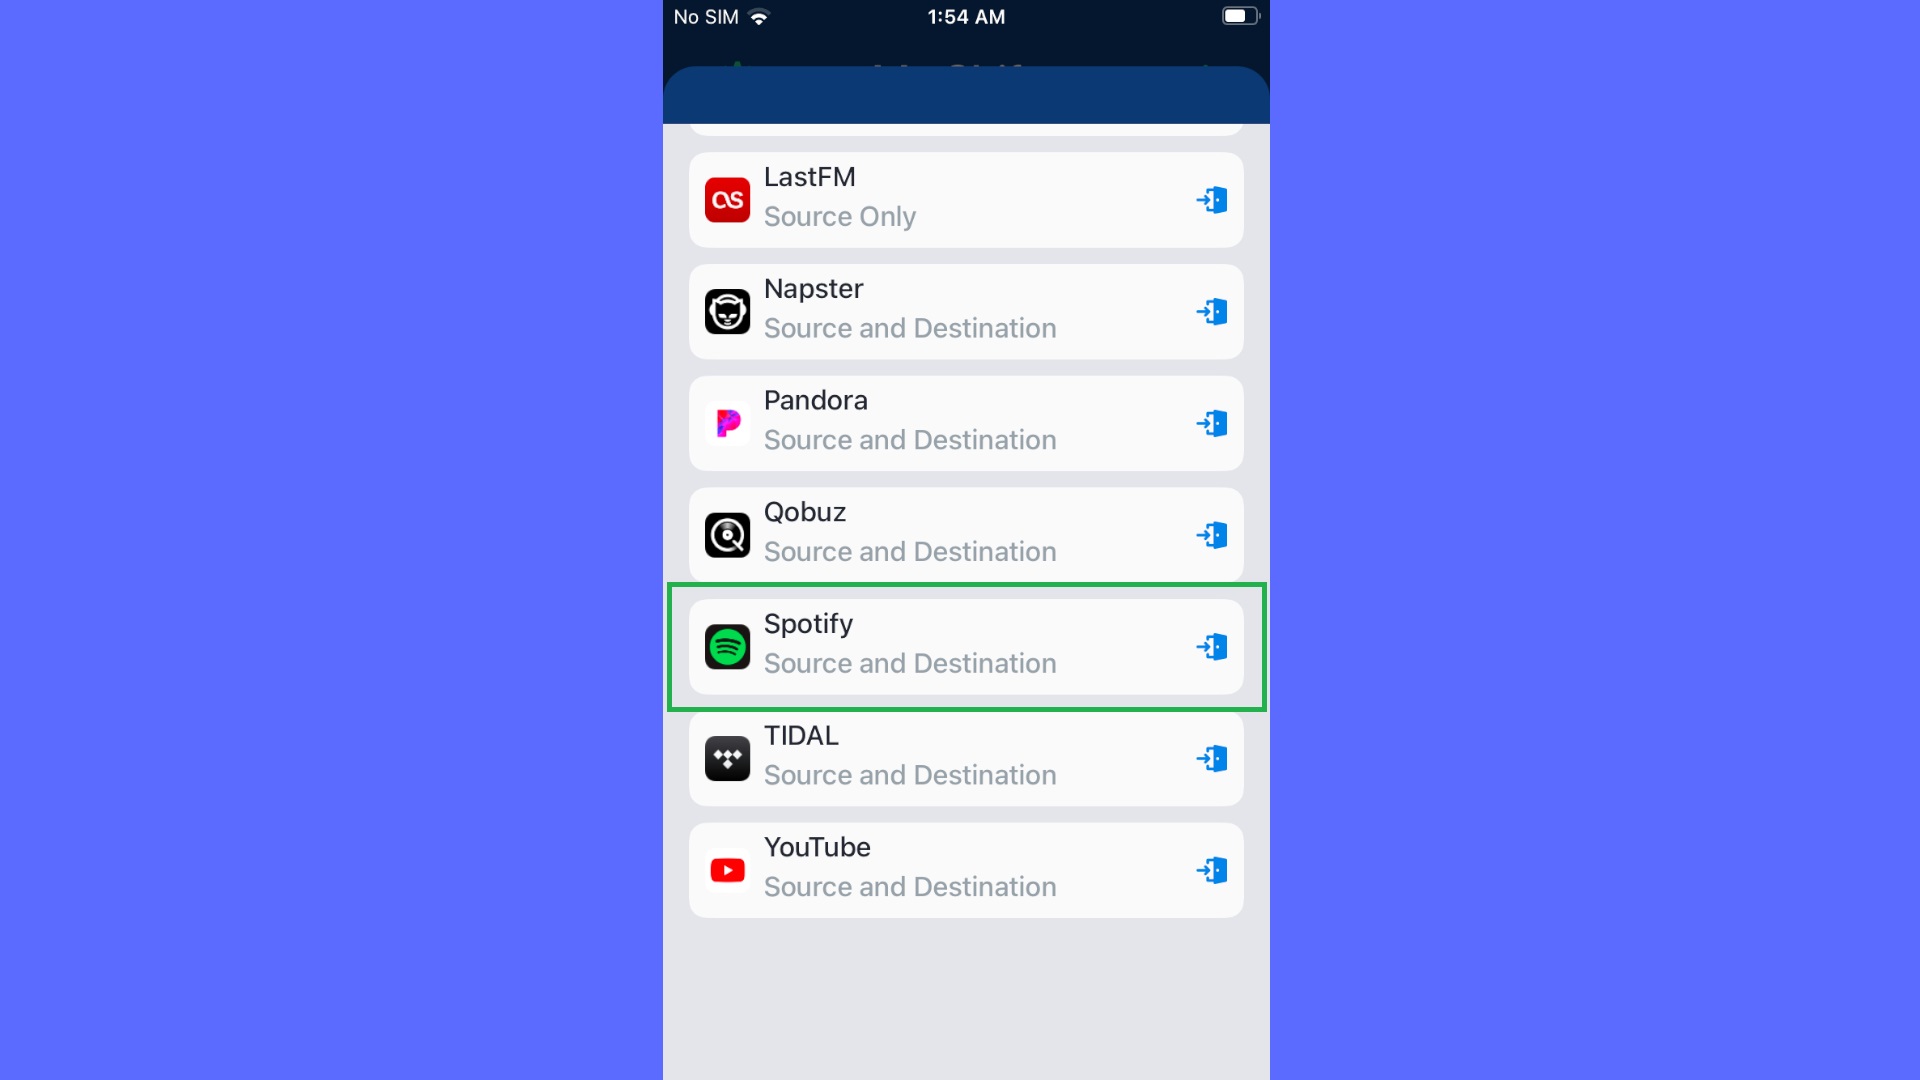
6. Scroll down to Spotify and tap it. Enter your Spotify account credentials and tap ‘Log In.’
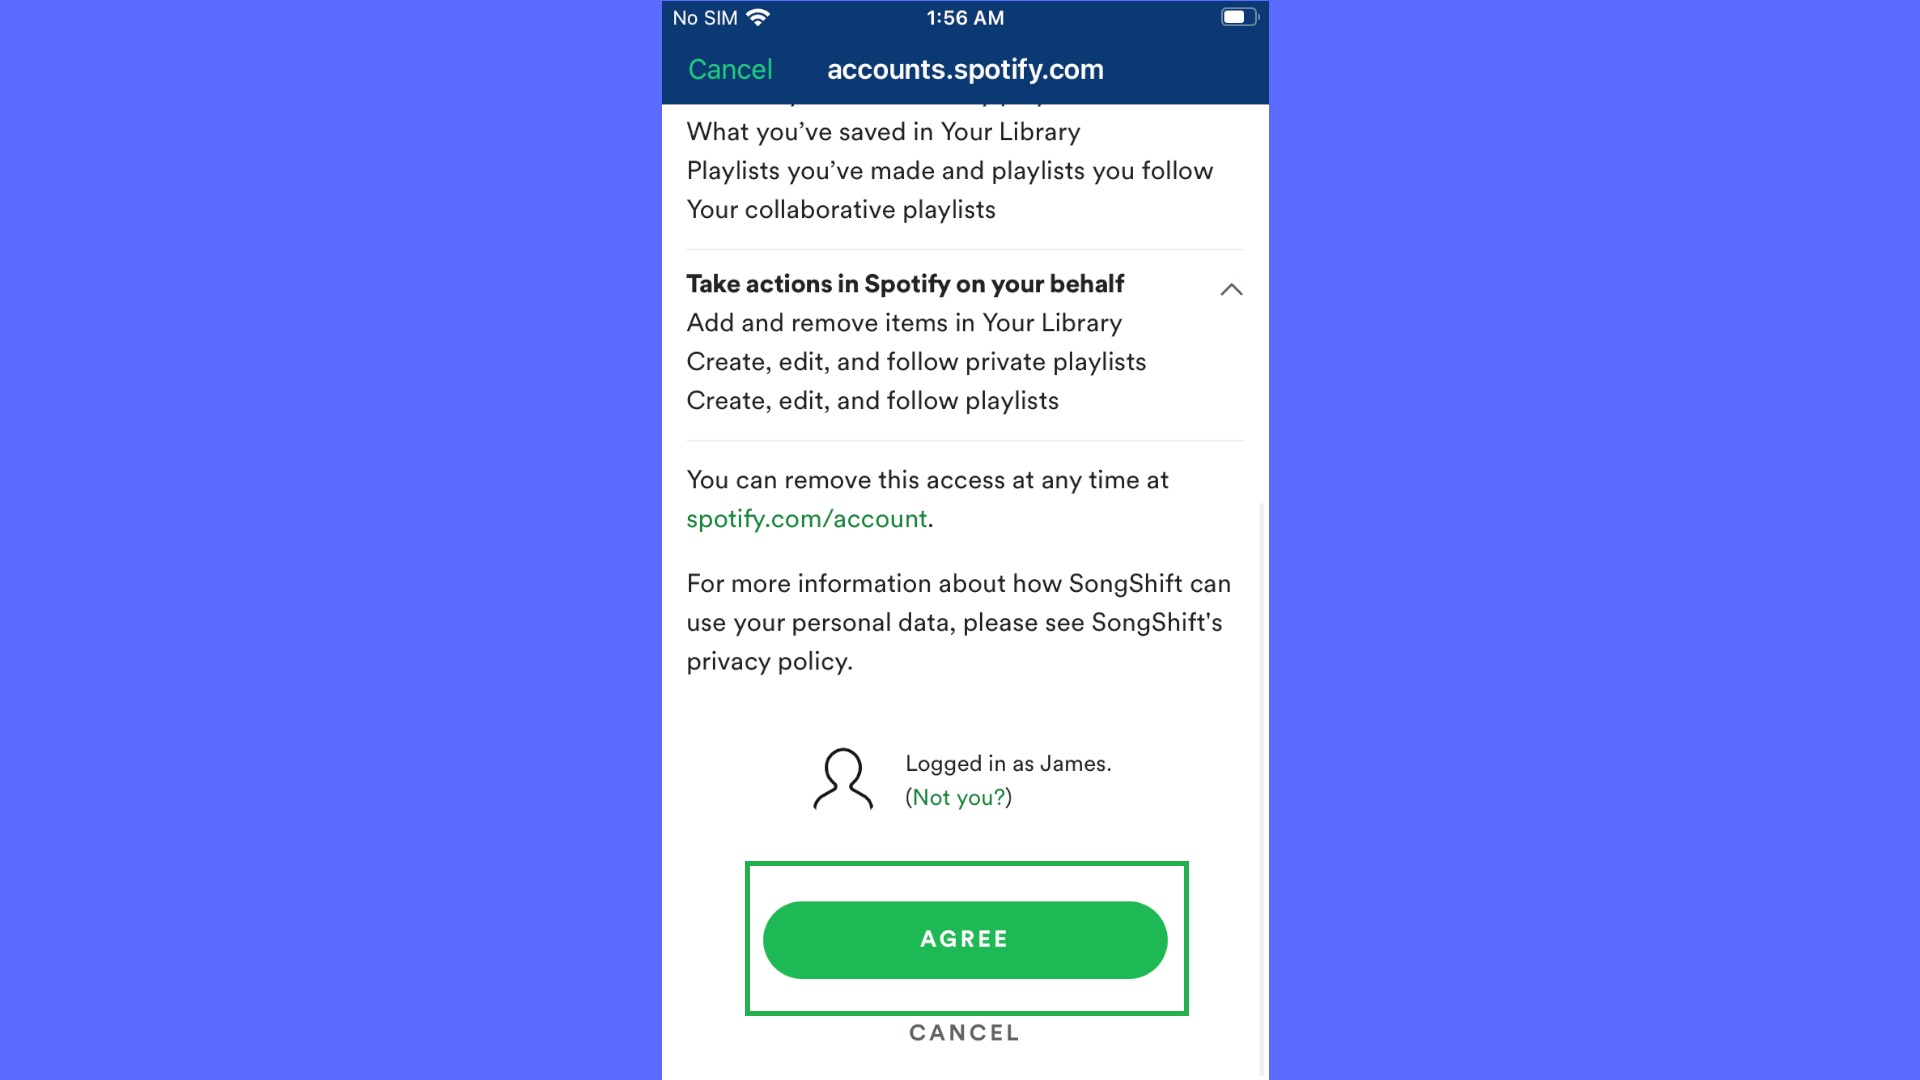
7. Read the terms and conditions and tap ‘Agree.’
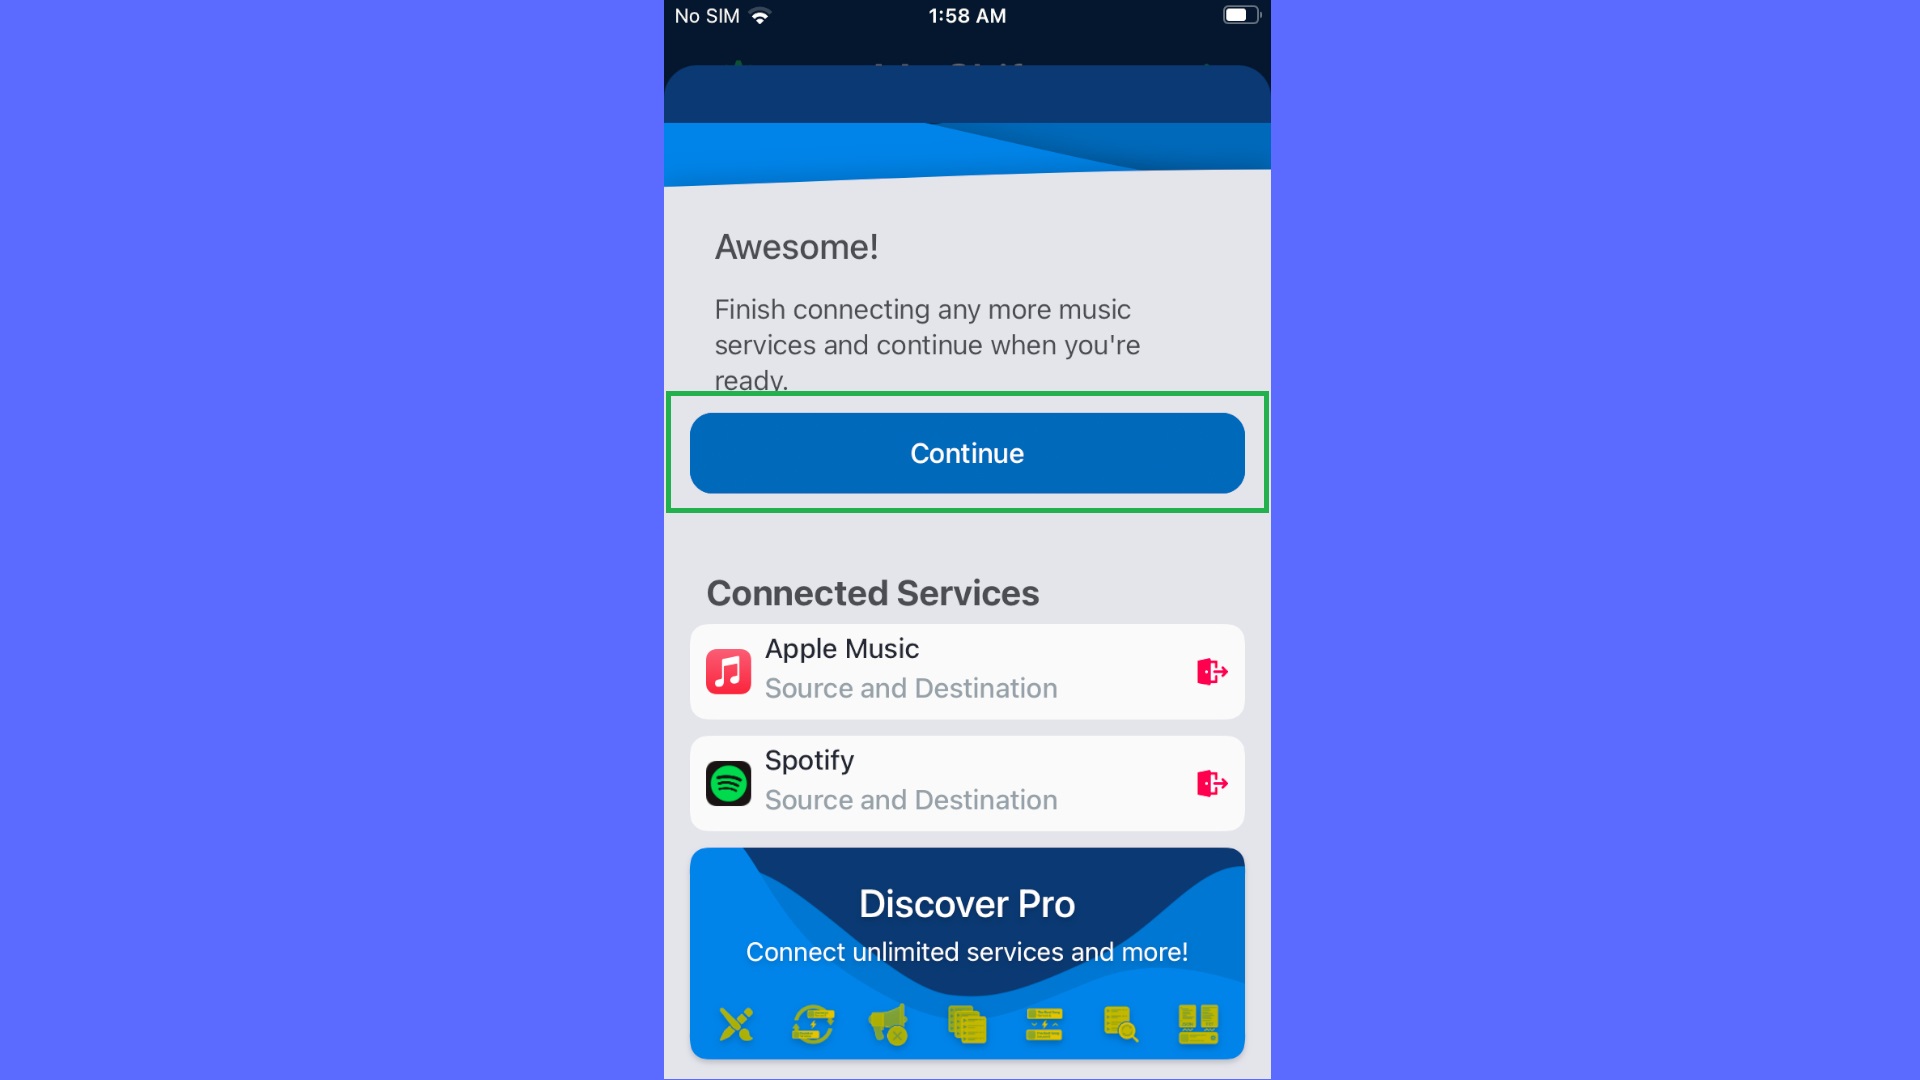
8. Spotify is now also synced, and again you’ll be returned to the list of available apps This time, tap ‘Continue’ at the top.
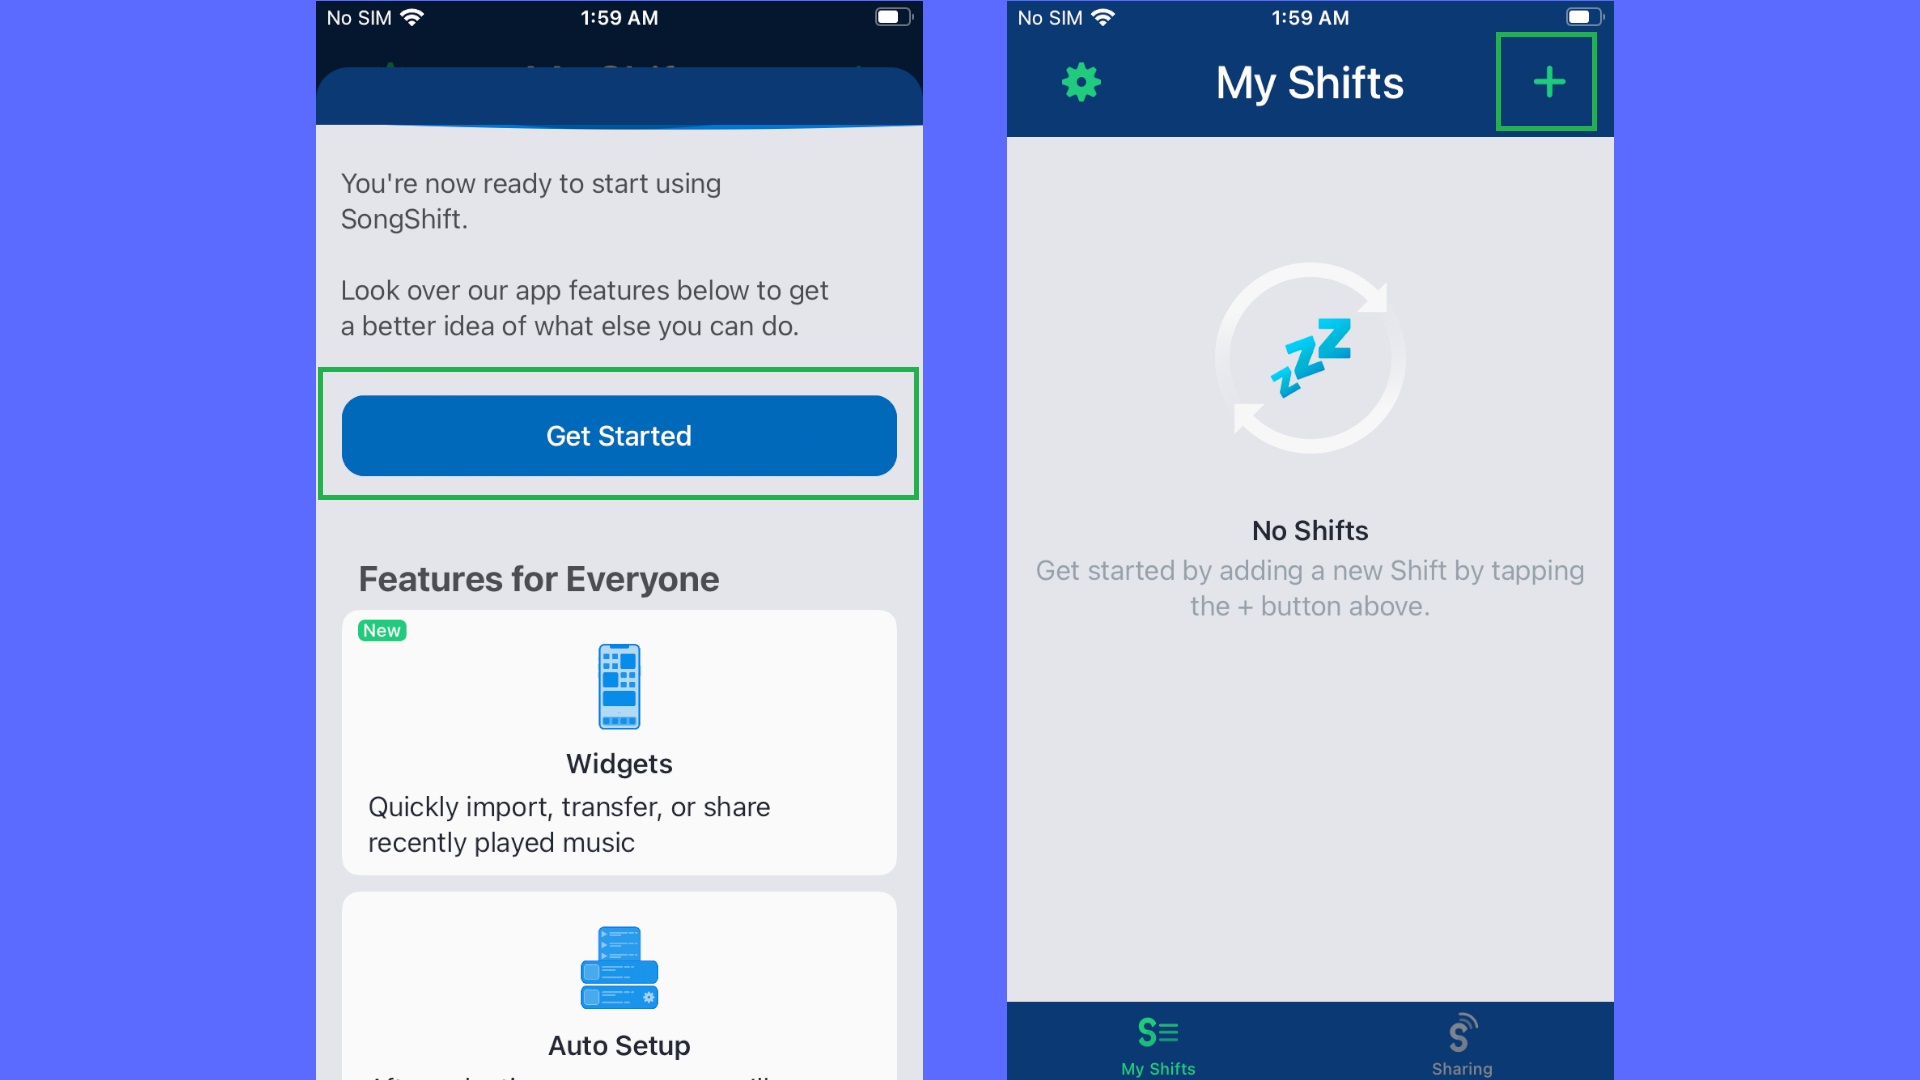
9. Tap ‘Get Started,’ then the ‘+’ symbol that appears in the top-right of the app.
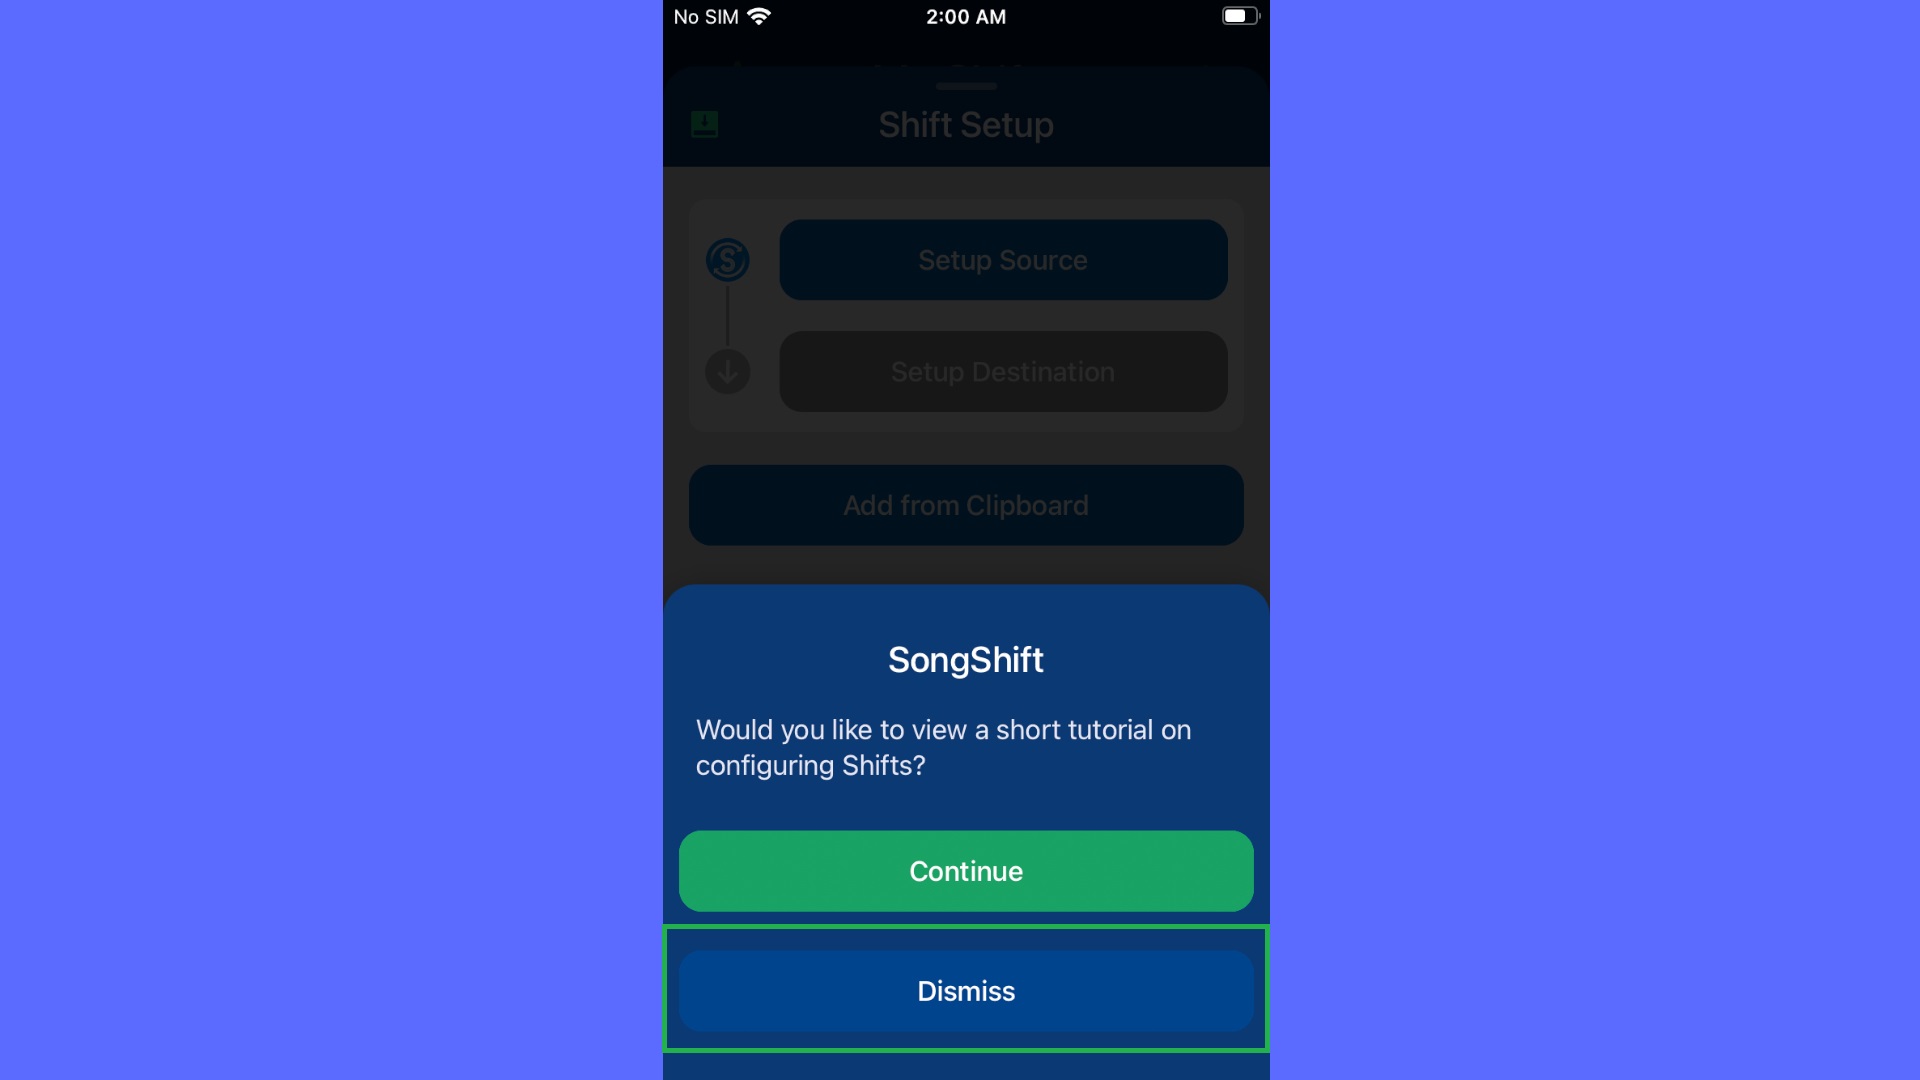
10. If you haven’t used SongShift before, you’ll be offered the chance to view a short tutorial, but it isn’t necessary, so tap ‘Dismiss.’
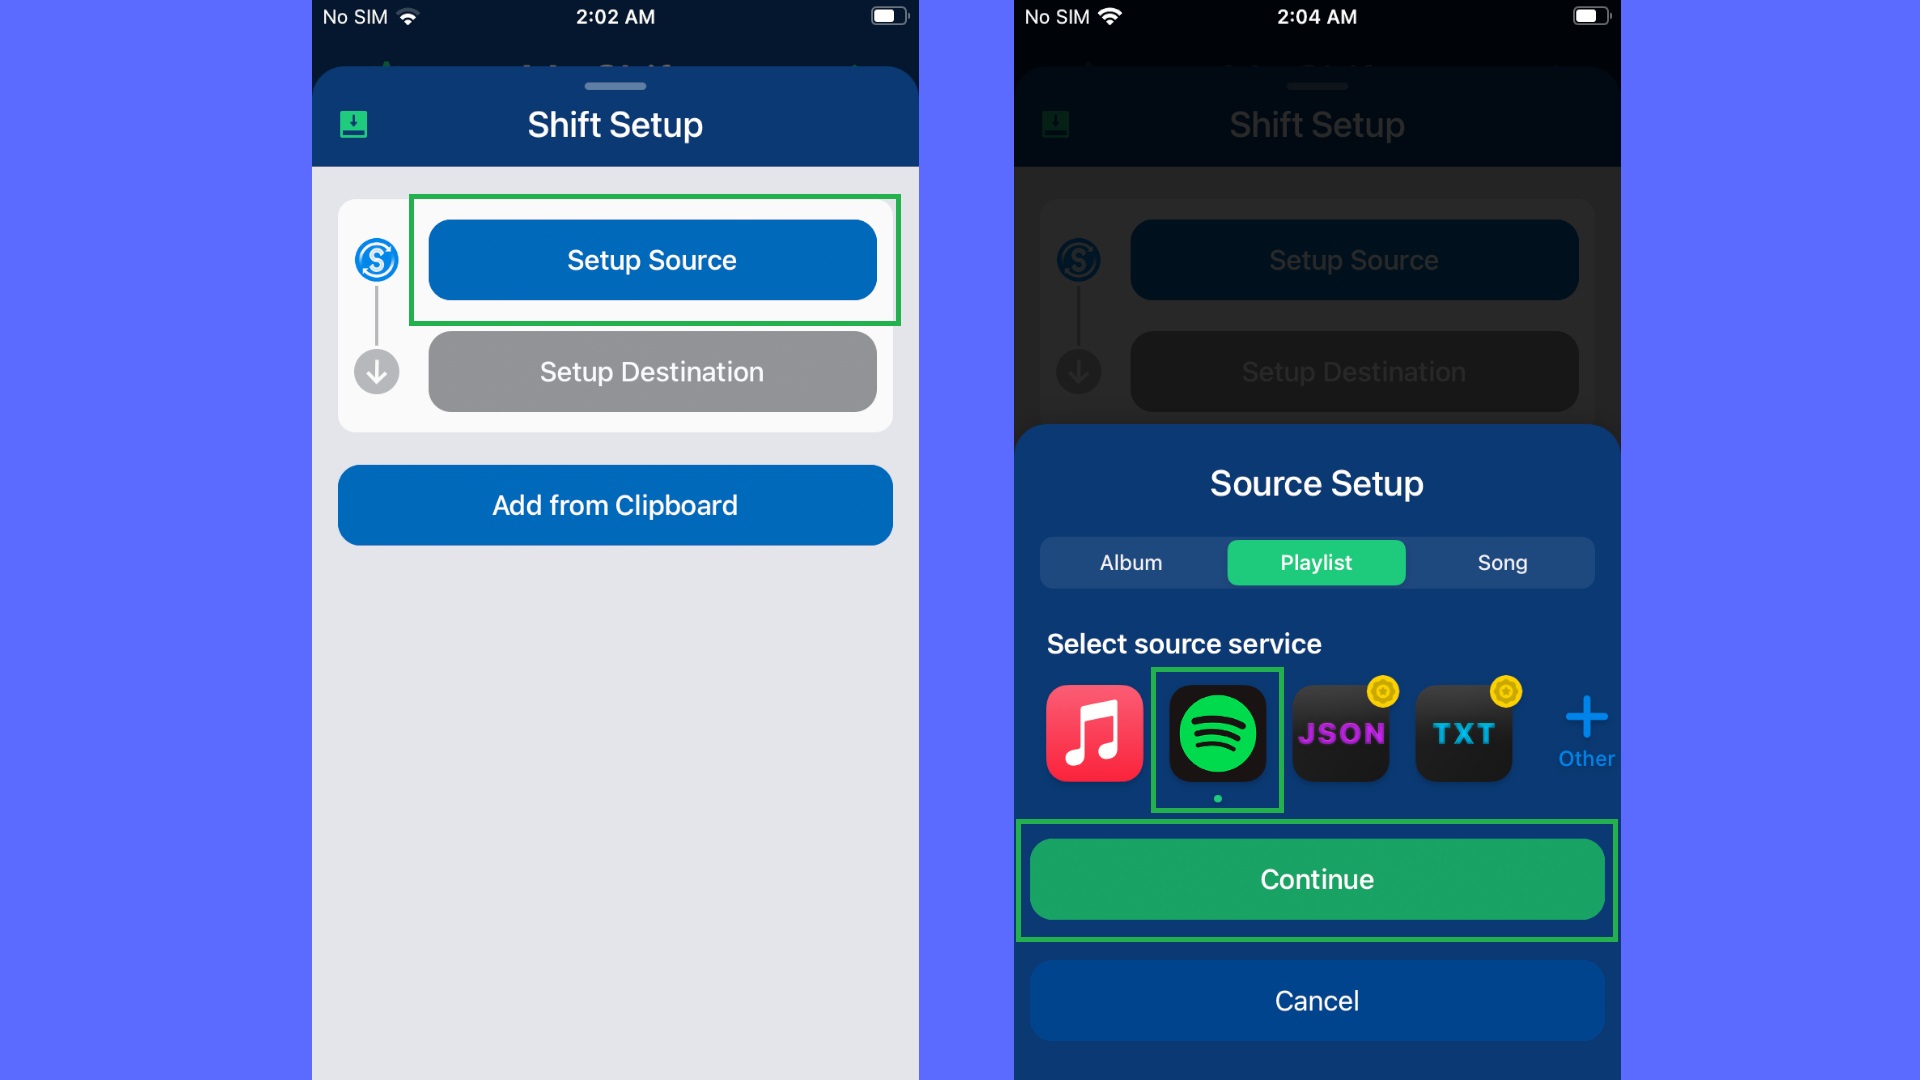
11. Tap ‘Setup Source’ then tap on the Spotify icon and hit ‘Continue.’ Note that ‘Playlist’ will be highlighted by default, but you can also use this method to transfer albums and individual songs.
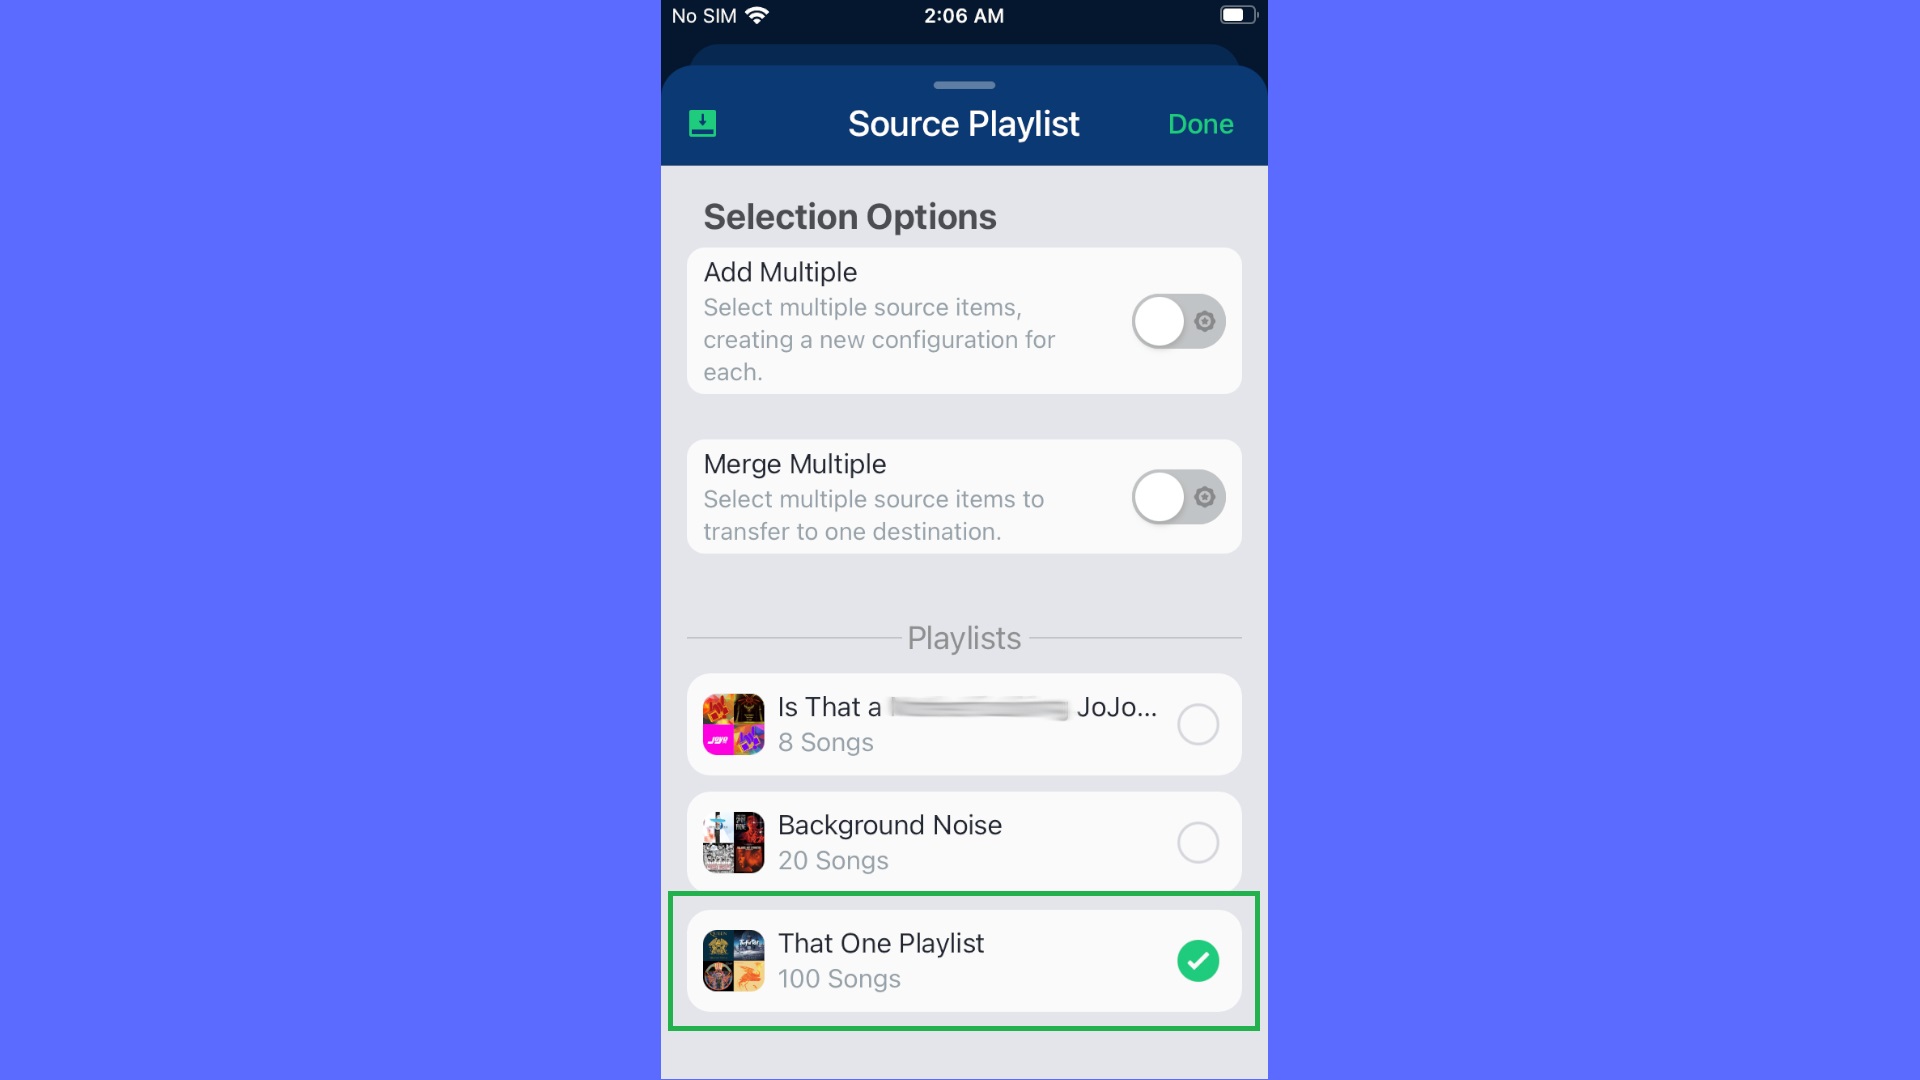
12. Select the Spotify playlist you want to transfer and tap ‘Done’ in the top-right corner. If you’re using SongShift Pro you can choose to add multiple playlists here; on the free version, that option is greyed out.
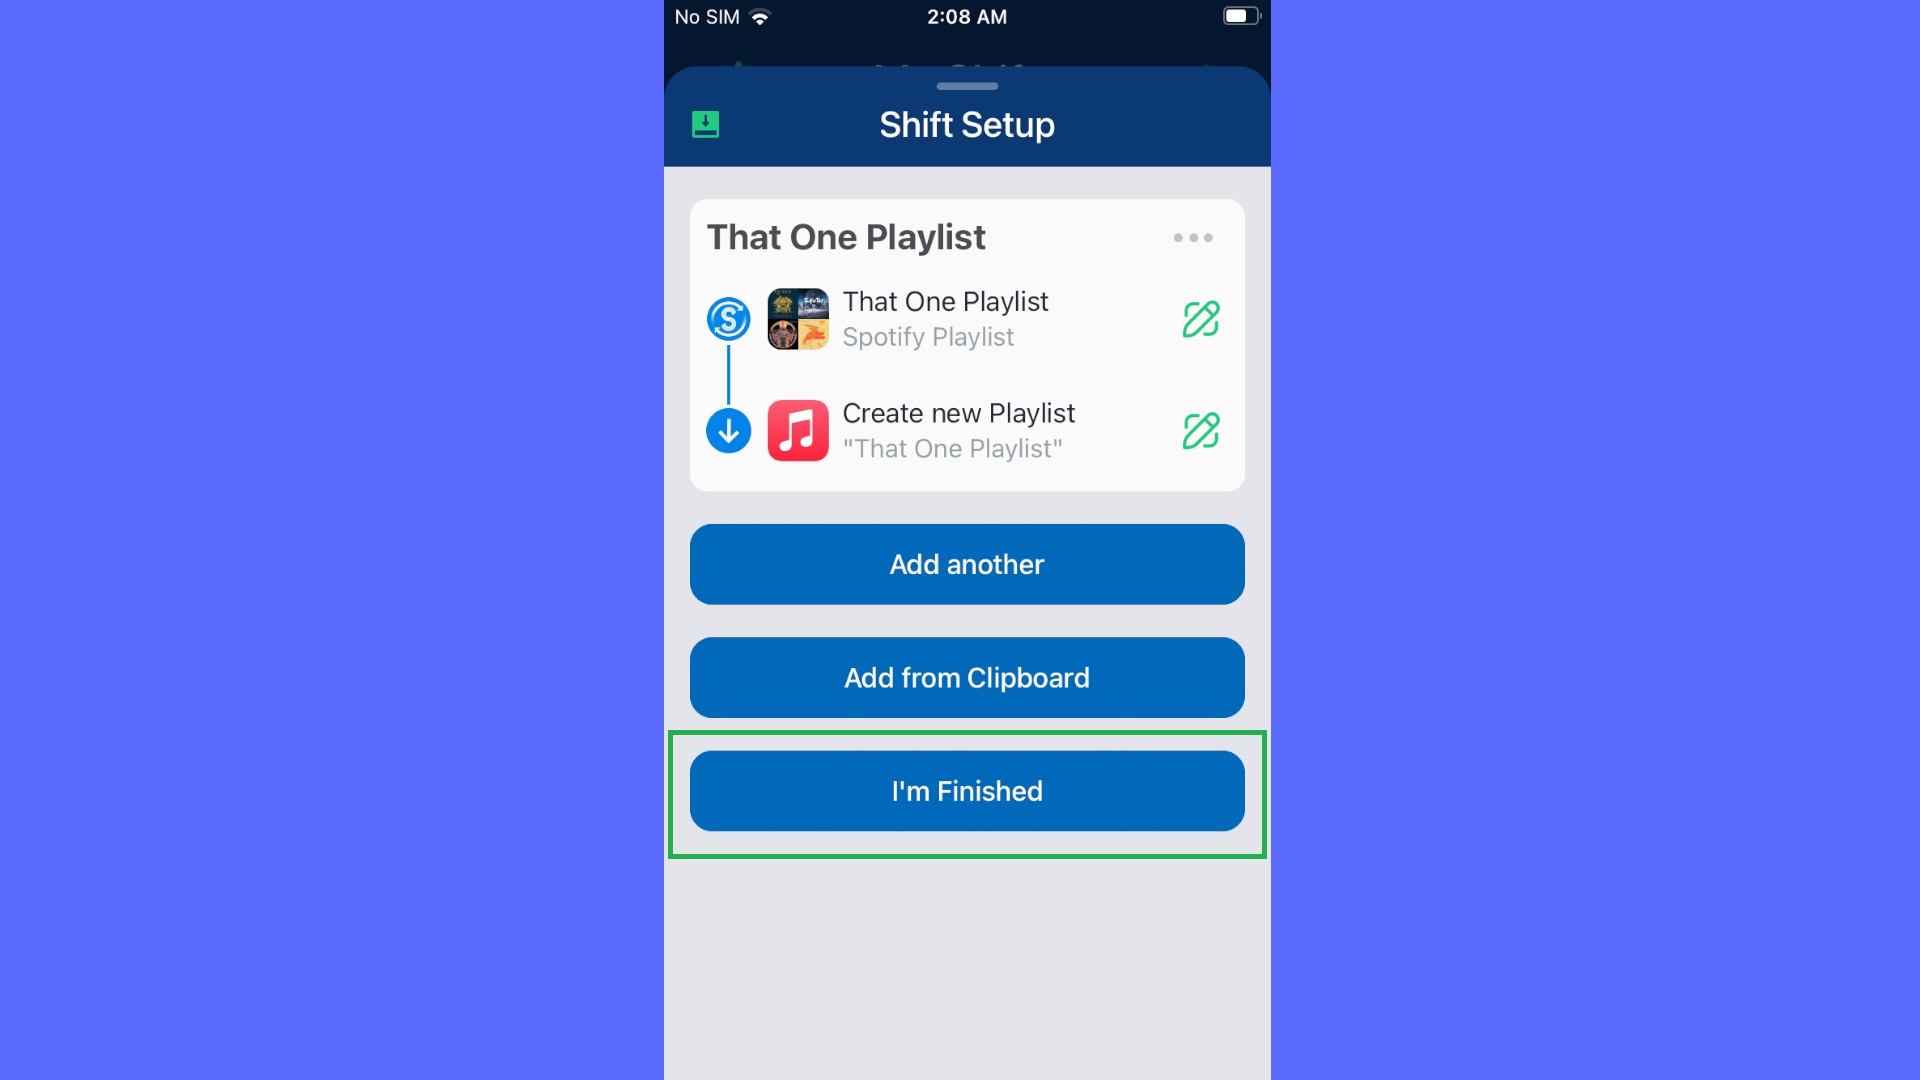
13. SongShift should automatically select Apple Music as the destination. Tap ‘I’m Finished’ and wait for processing to complete.
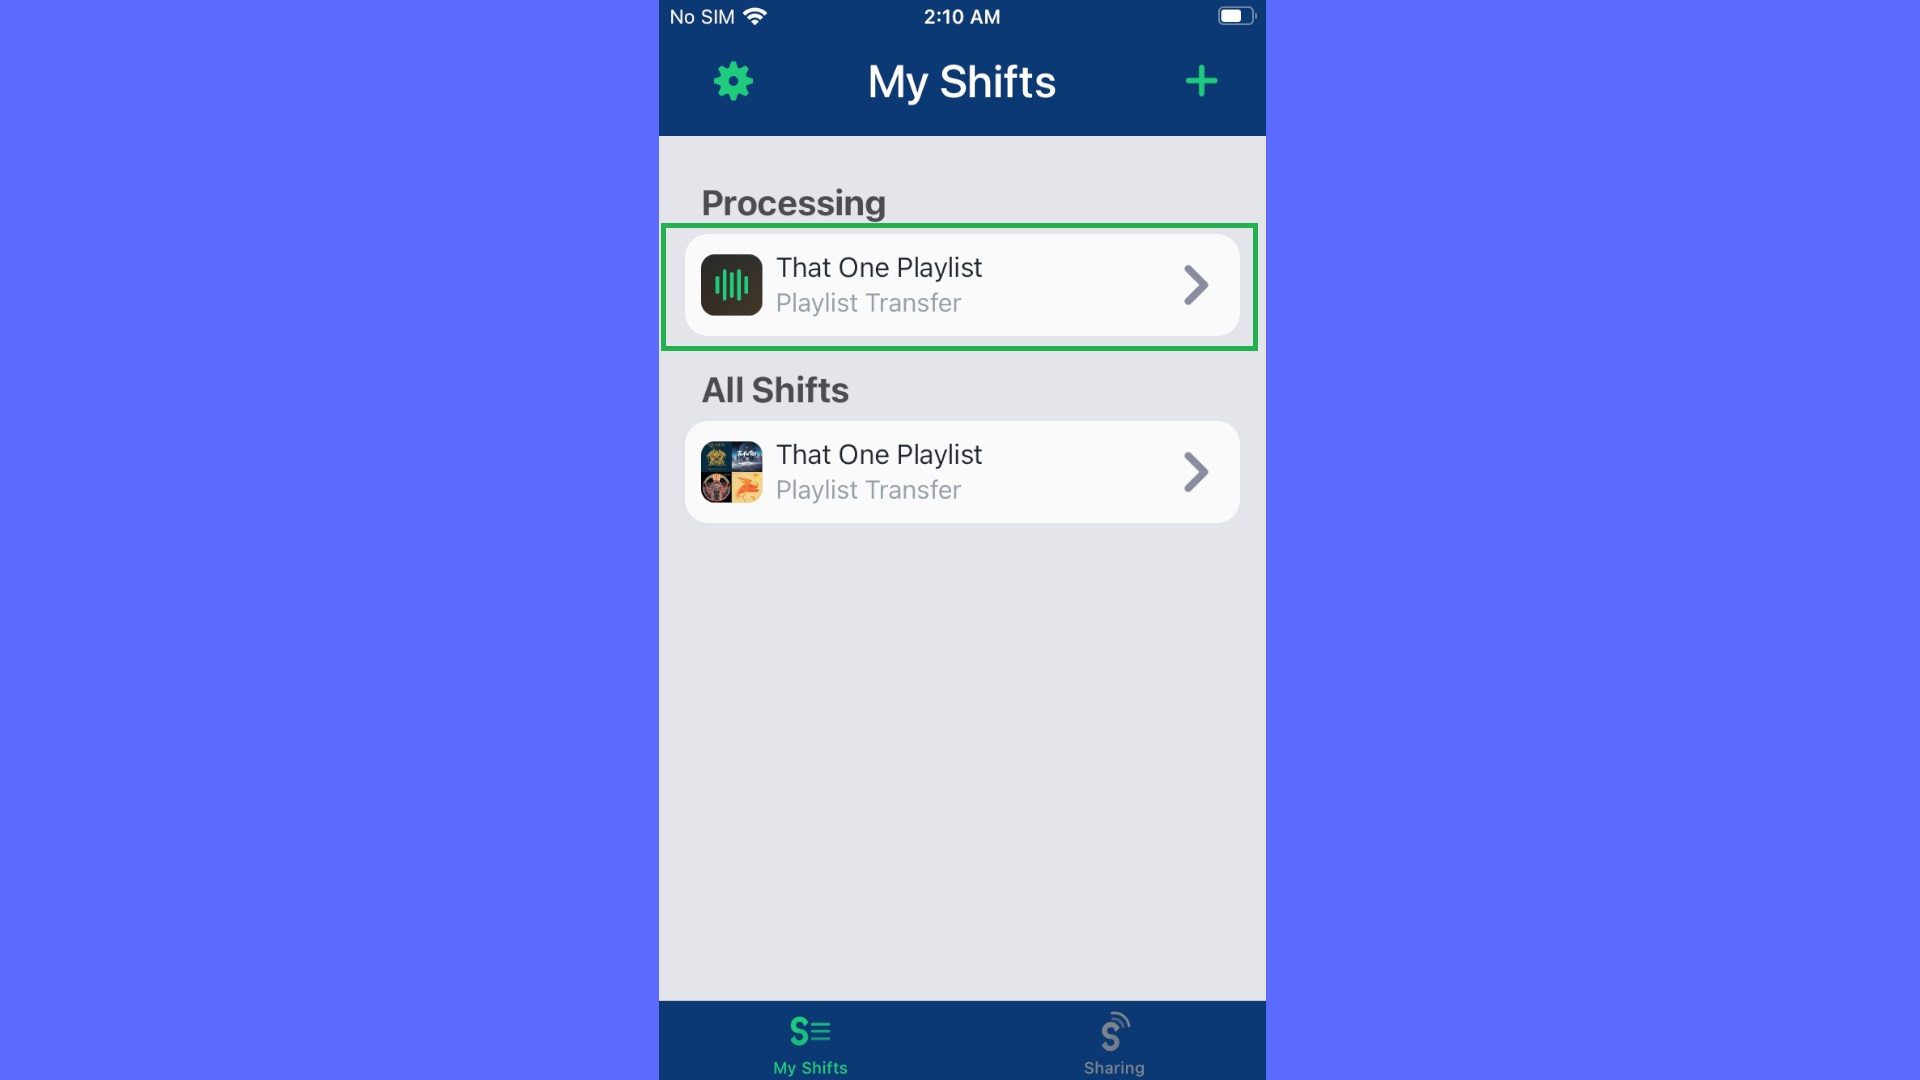
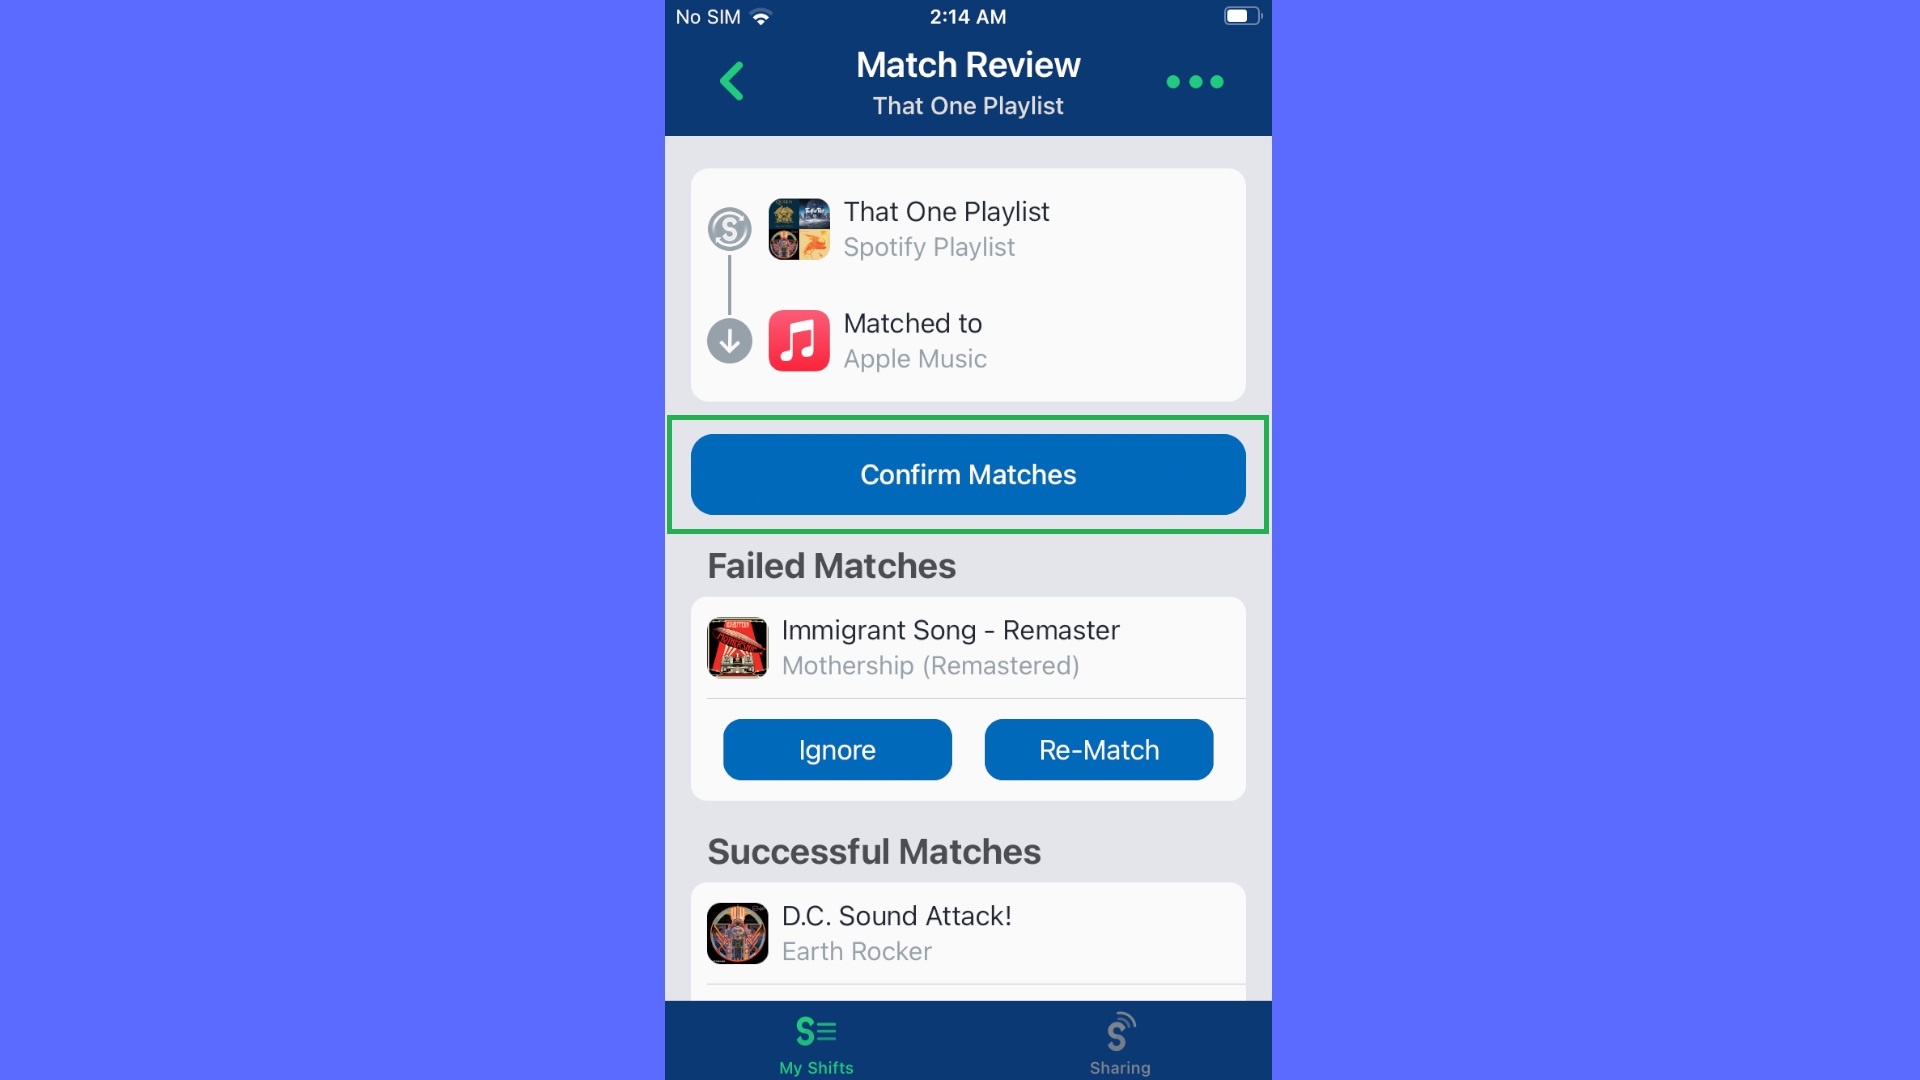
14. Once ‘Processing’ changes to ‘Ready for Review,’ tap on the playlist. Here you can review any failed matches — in other words, Spotify songs that weren’t found to have an identical Apple Music version. If you want you can tap ‘Re-match’ and manually search for the song in Apple’s Music’s library, or you can just tap ‘Ignore,’ which will leave it off the playlist.
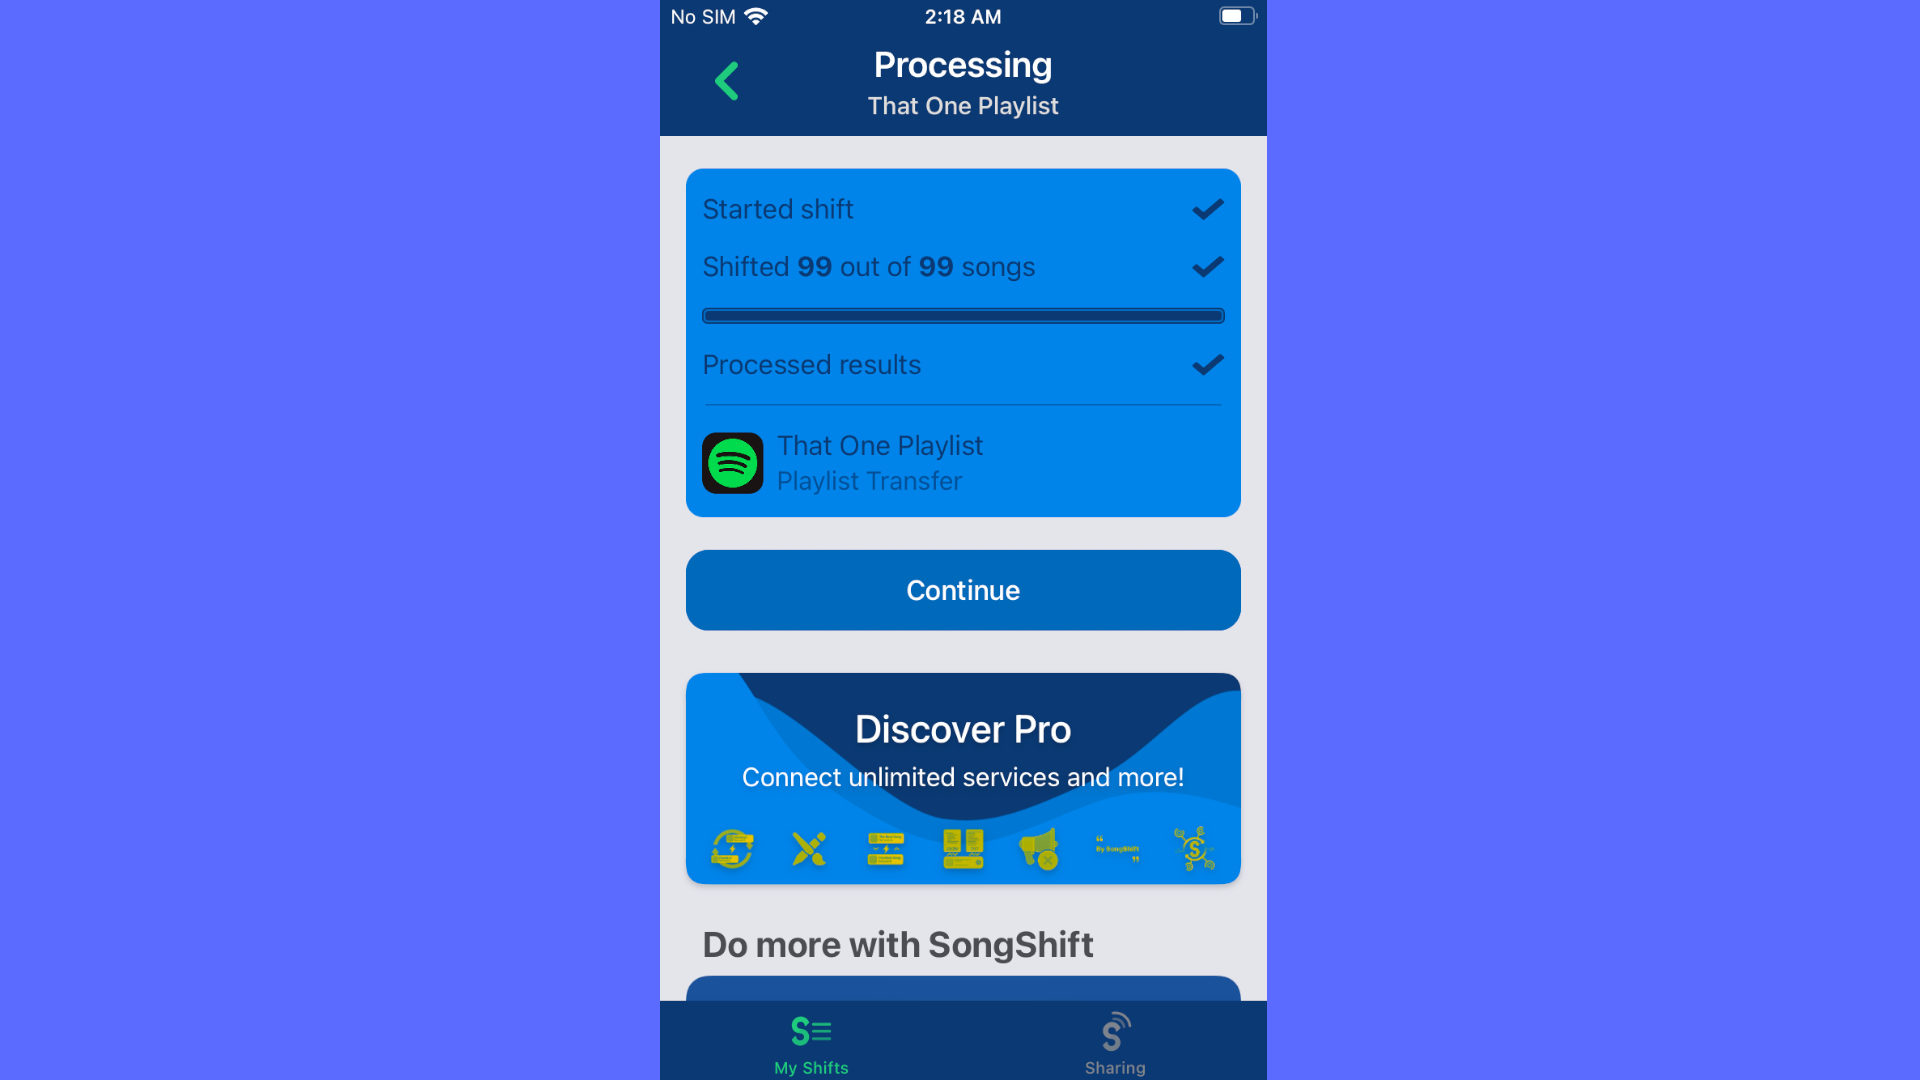
15. Once you’ve reviewed the matches, tap ‘Confirm Matches’ and wait for the process to complete. On the next screen, once ‘Processed results’ is checked, tap ‘Continue.’
16. While SongShift doesn’t make it abundantly clear, that’s it — you’ve transferred your Spotify playlist to Apple Music, and can now find it in the latter’s Library section.
How to transfer Spotify playlists to Apple Music on Android
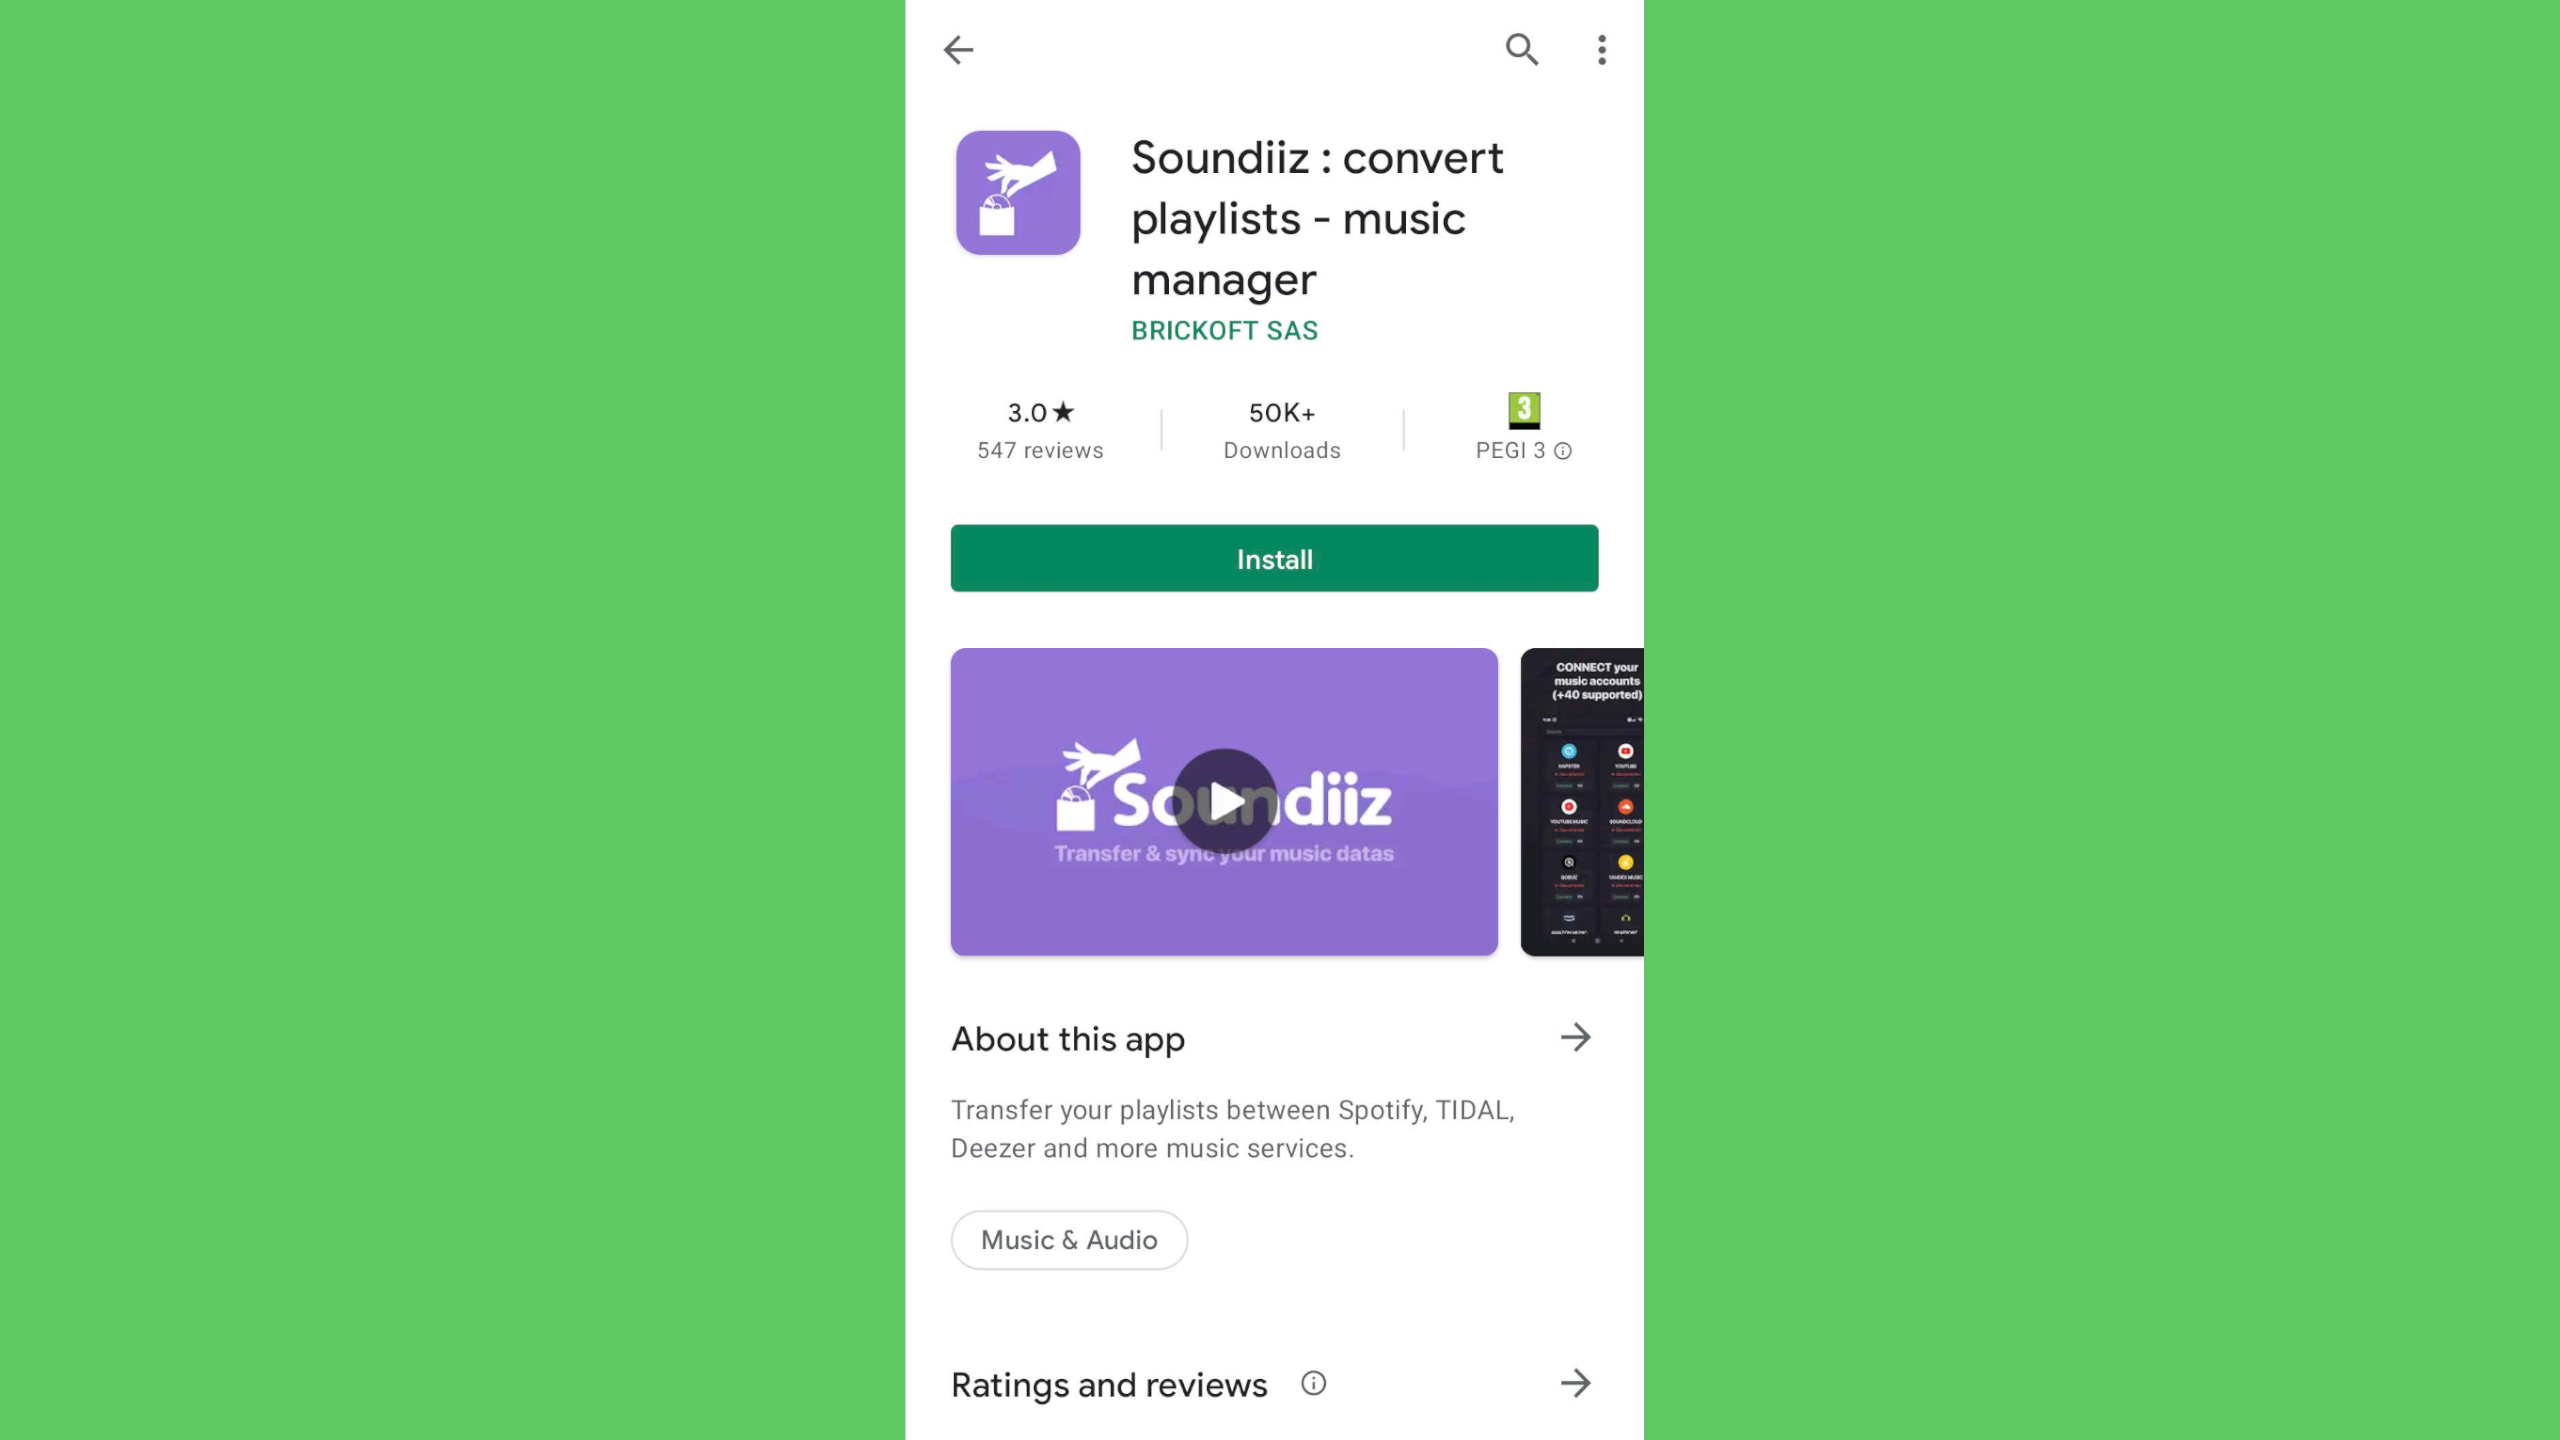
1. Download and install Soundiiz from the Play Store. It’s free, though unlike SongShift you’ll need to create an account.

2. Tap ‘Sign up’ or opt to sign in using your Google, Facebook, Apple or Twitter account.
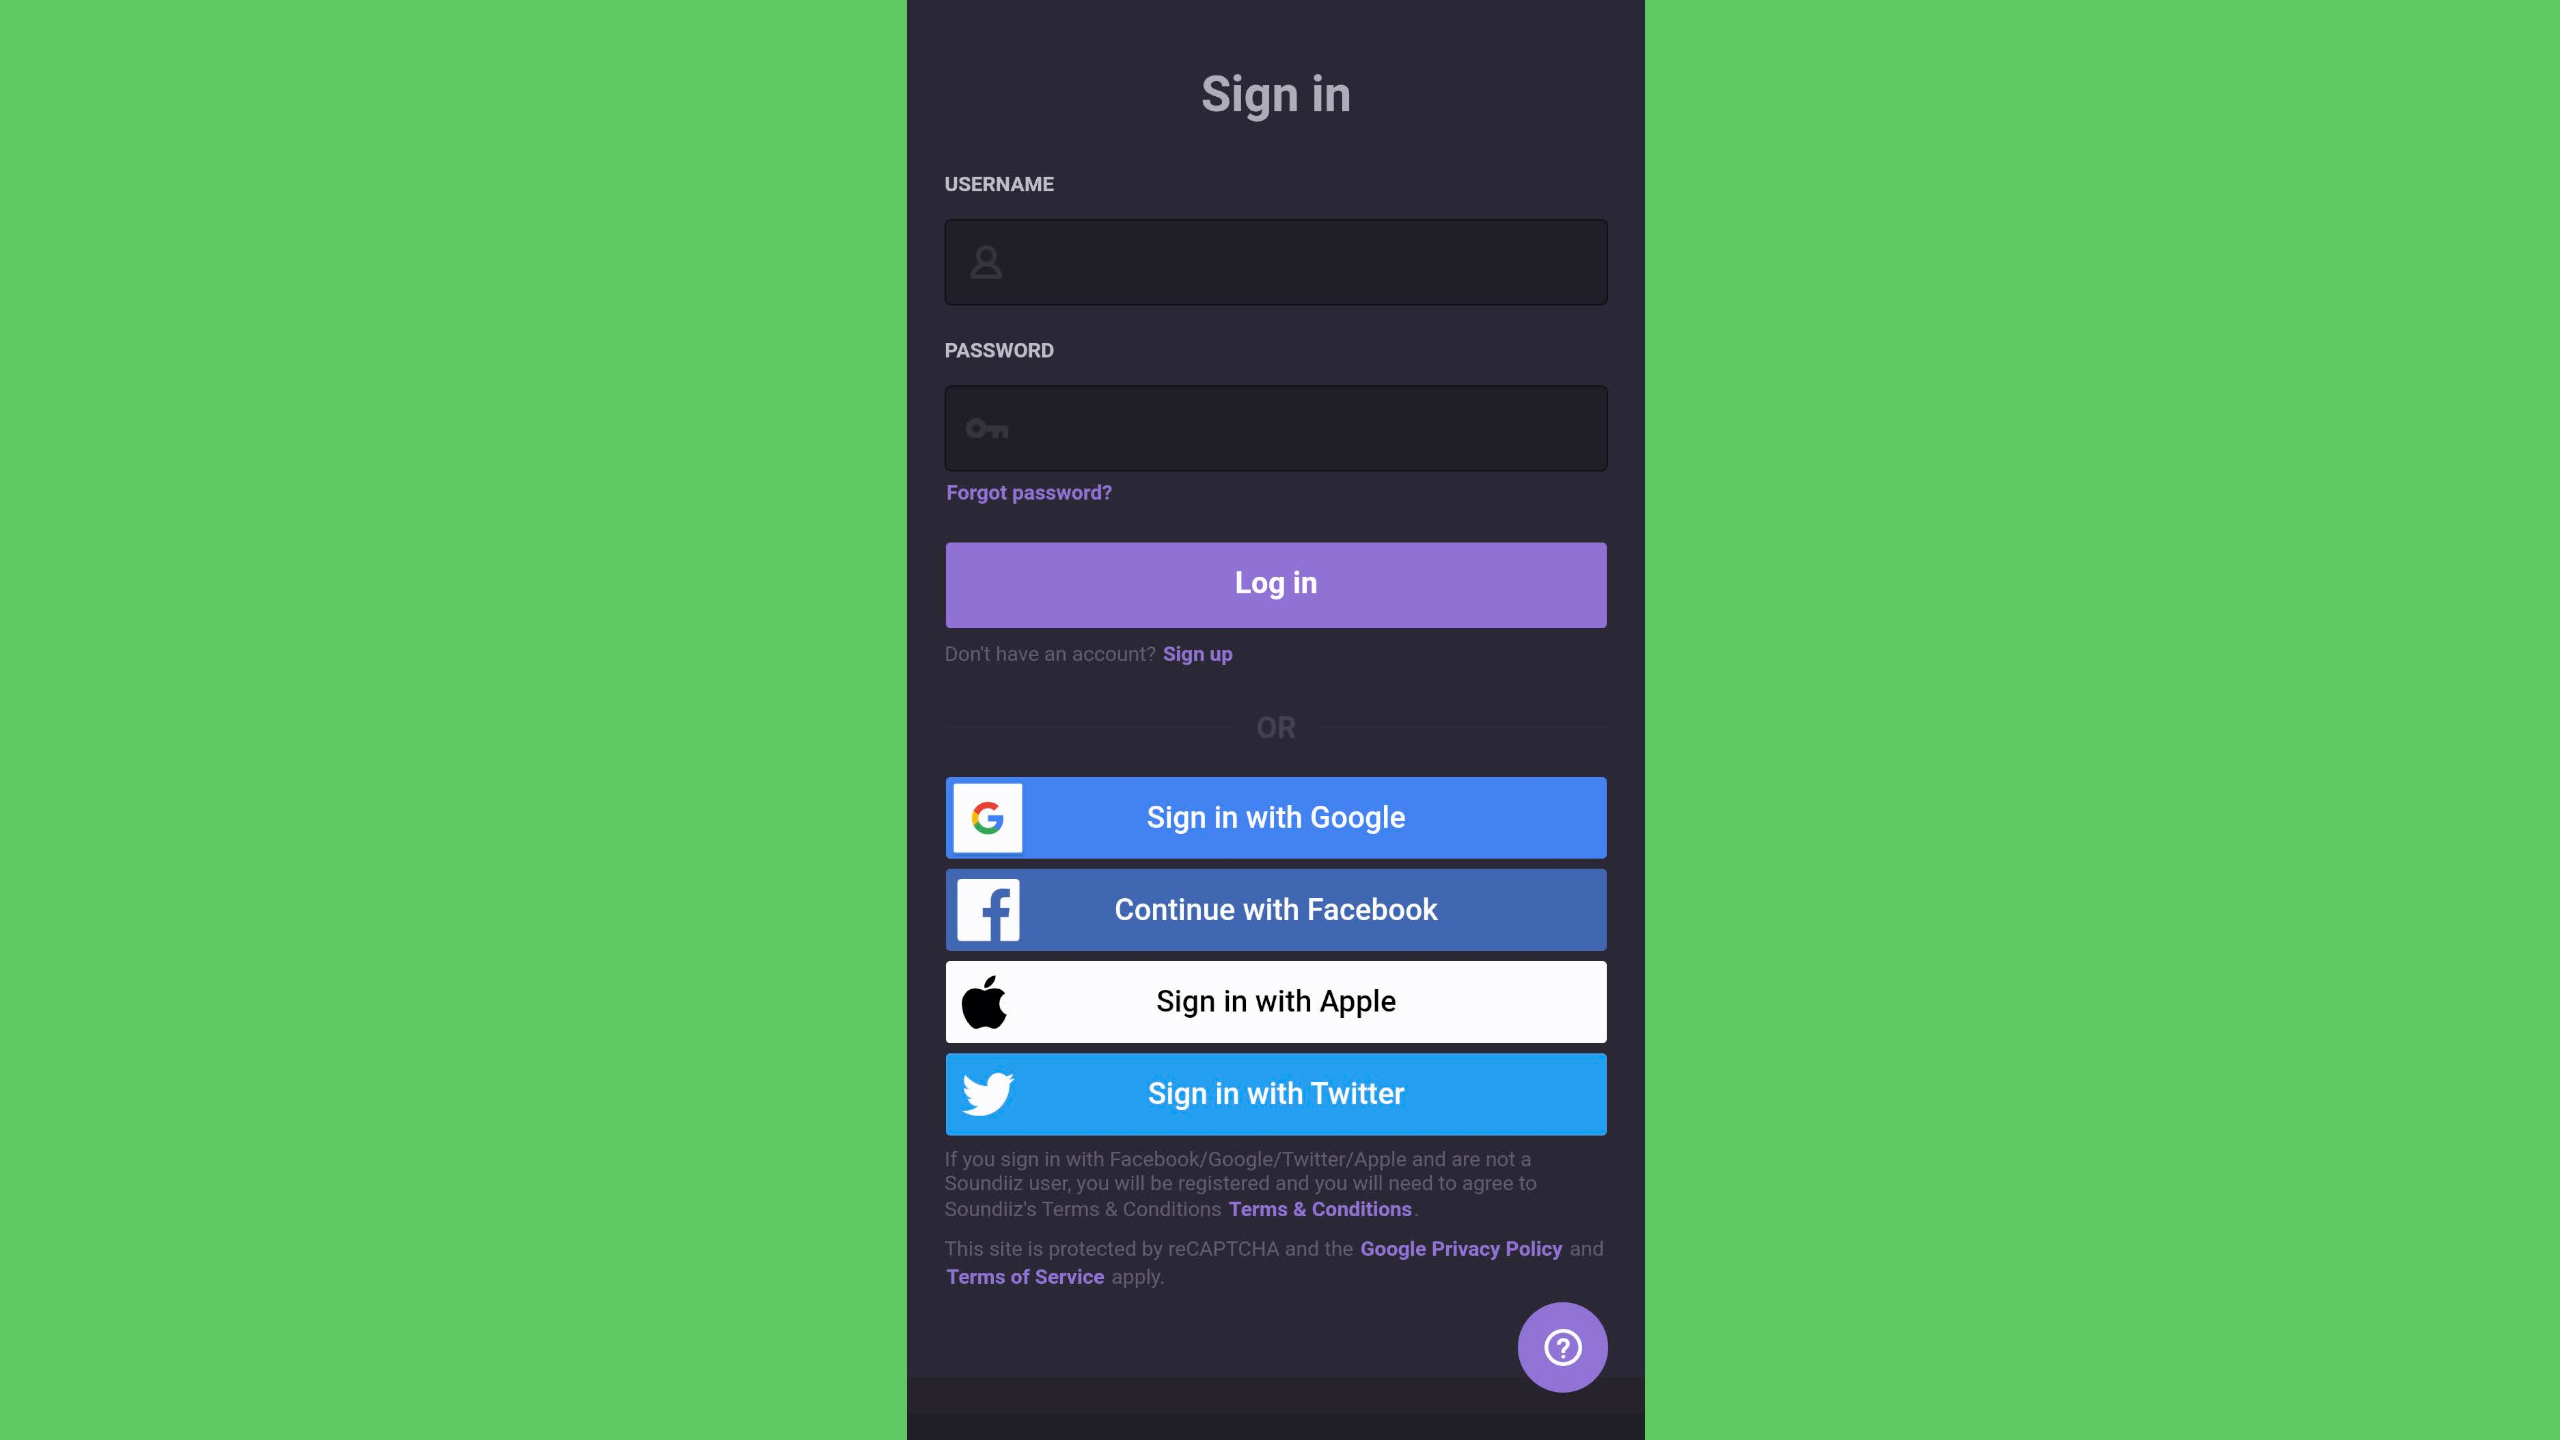
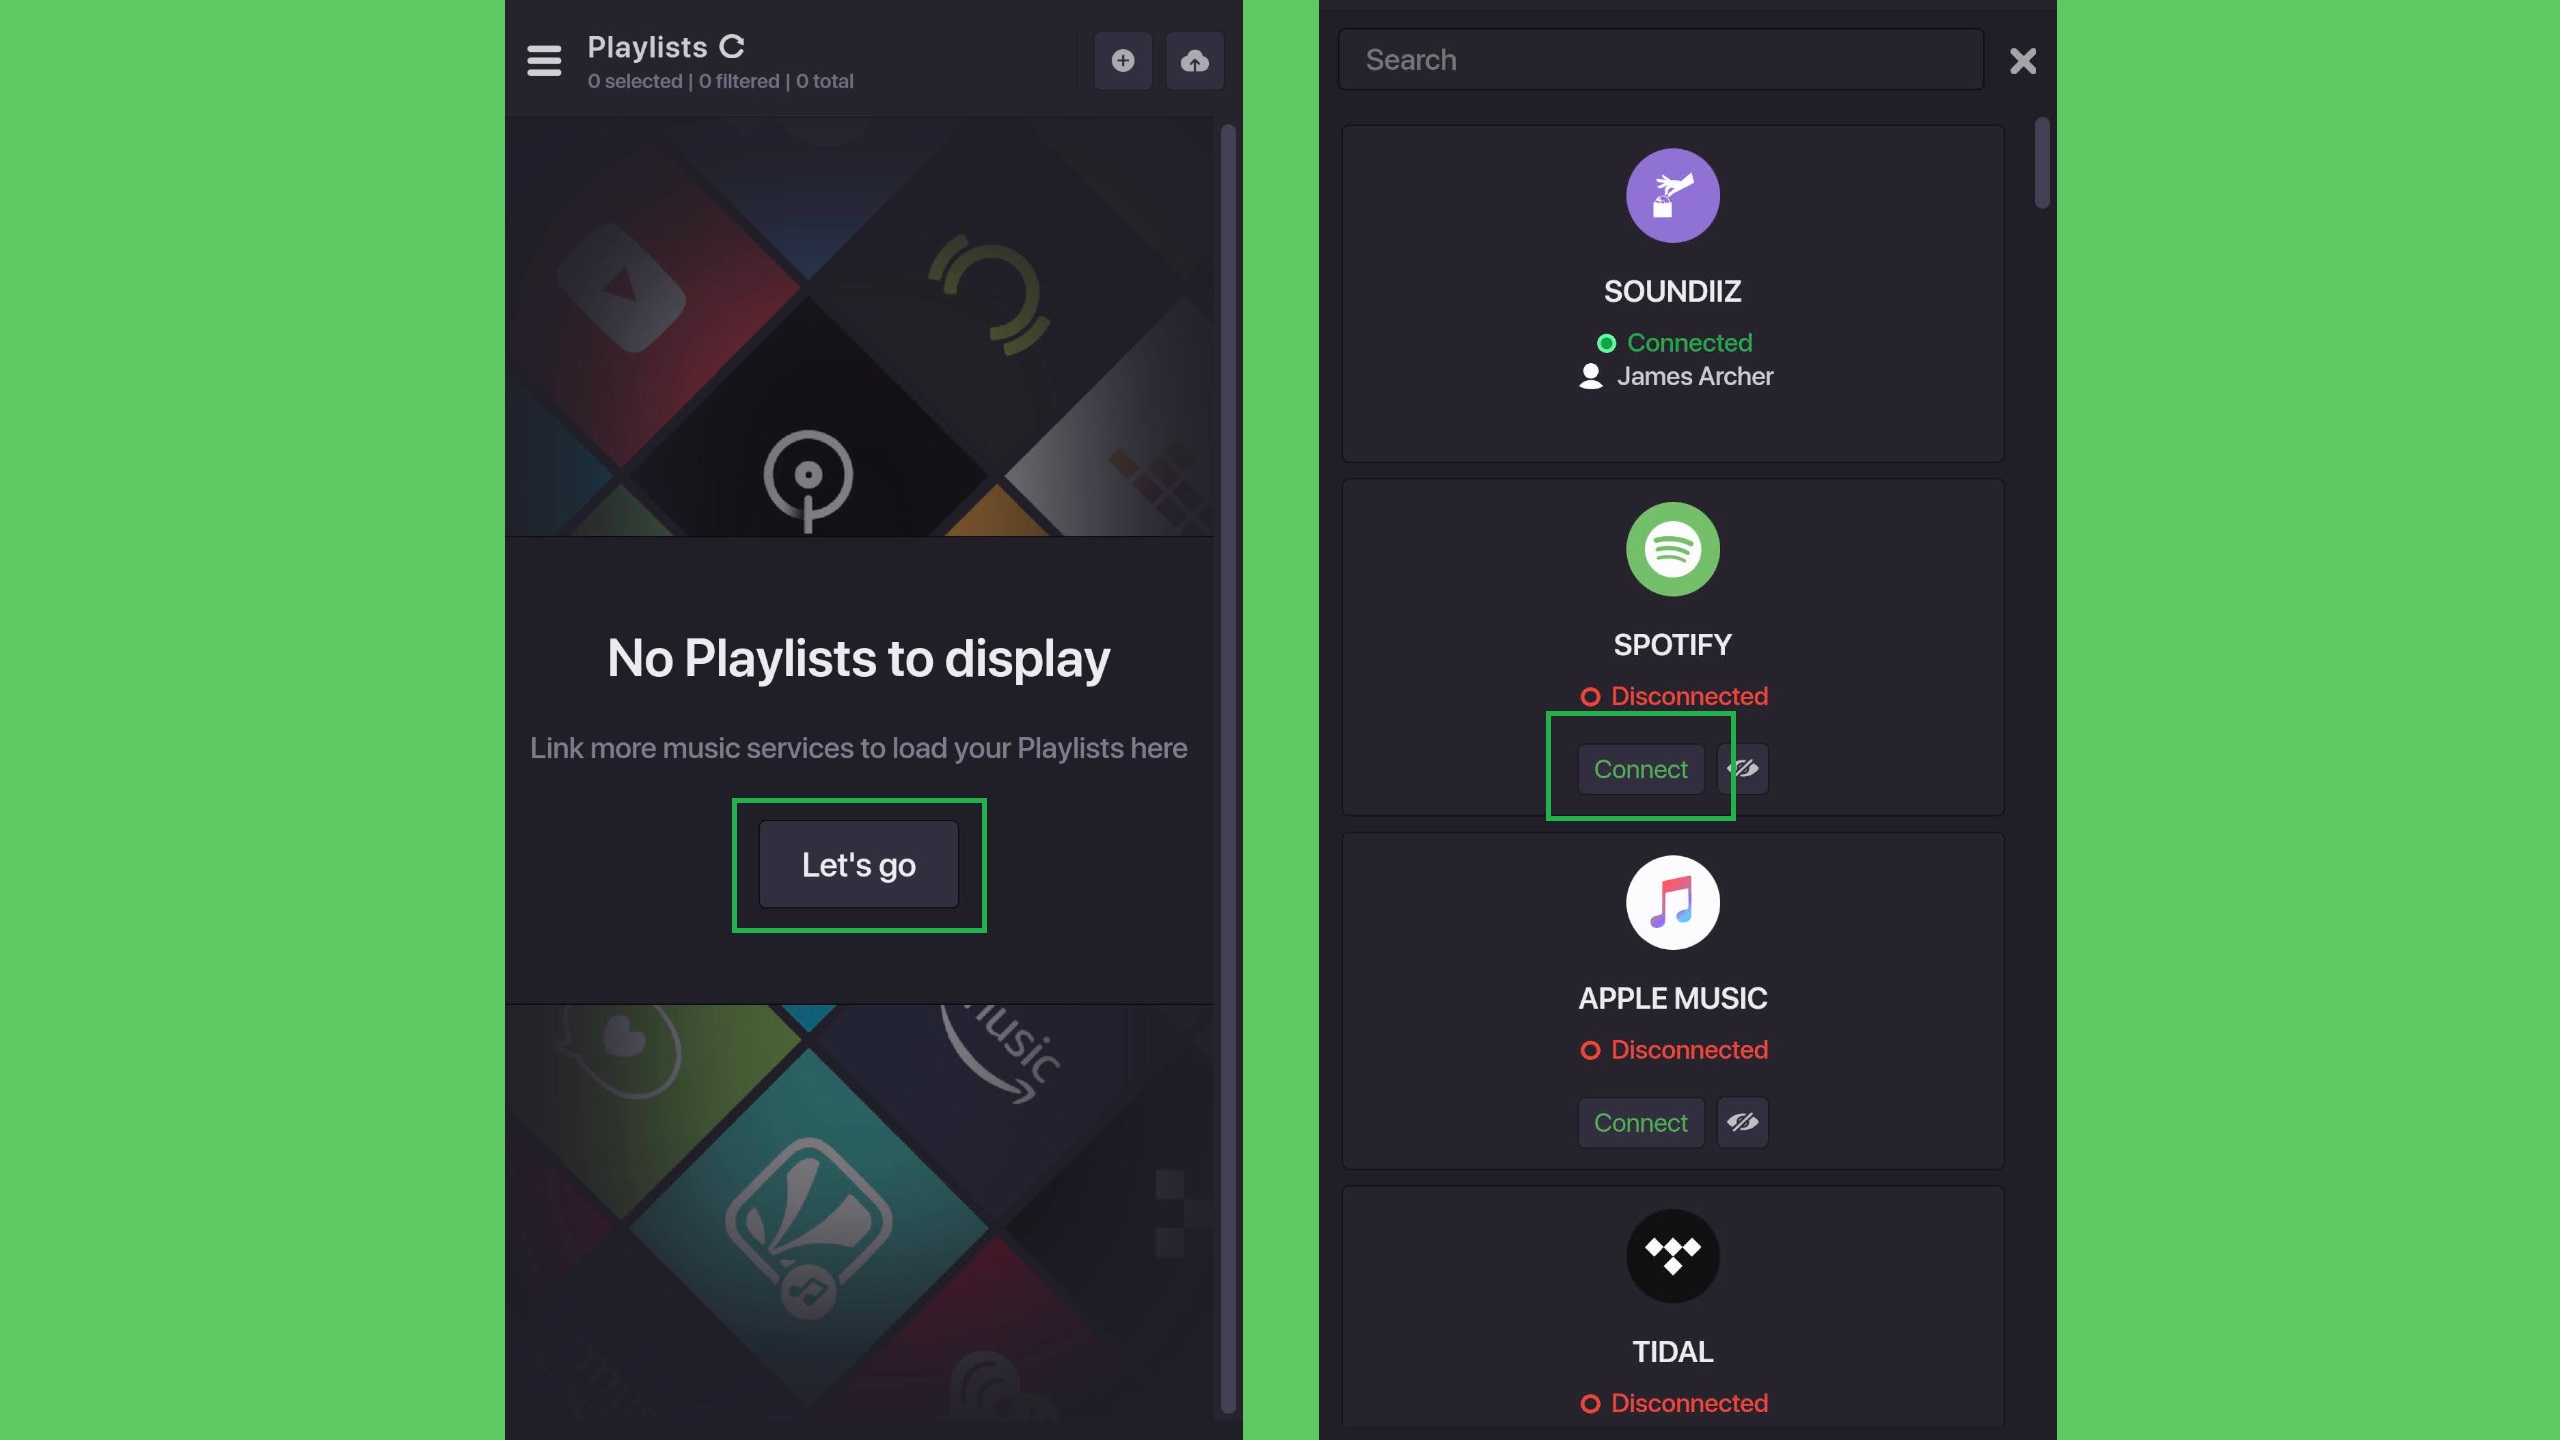
3. Tap ‘Let’s go’ and you’ll see a list of installed music apps. Start syncing Spotify by tapping ‘Connect.’
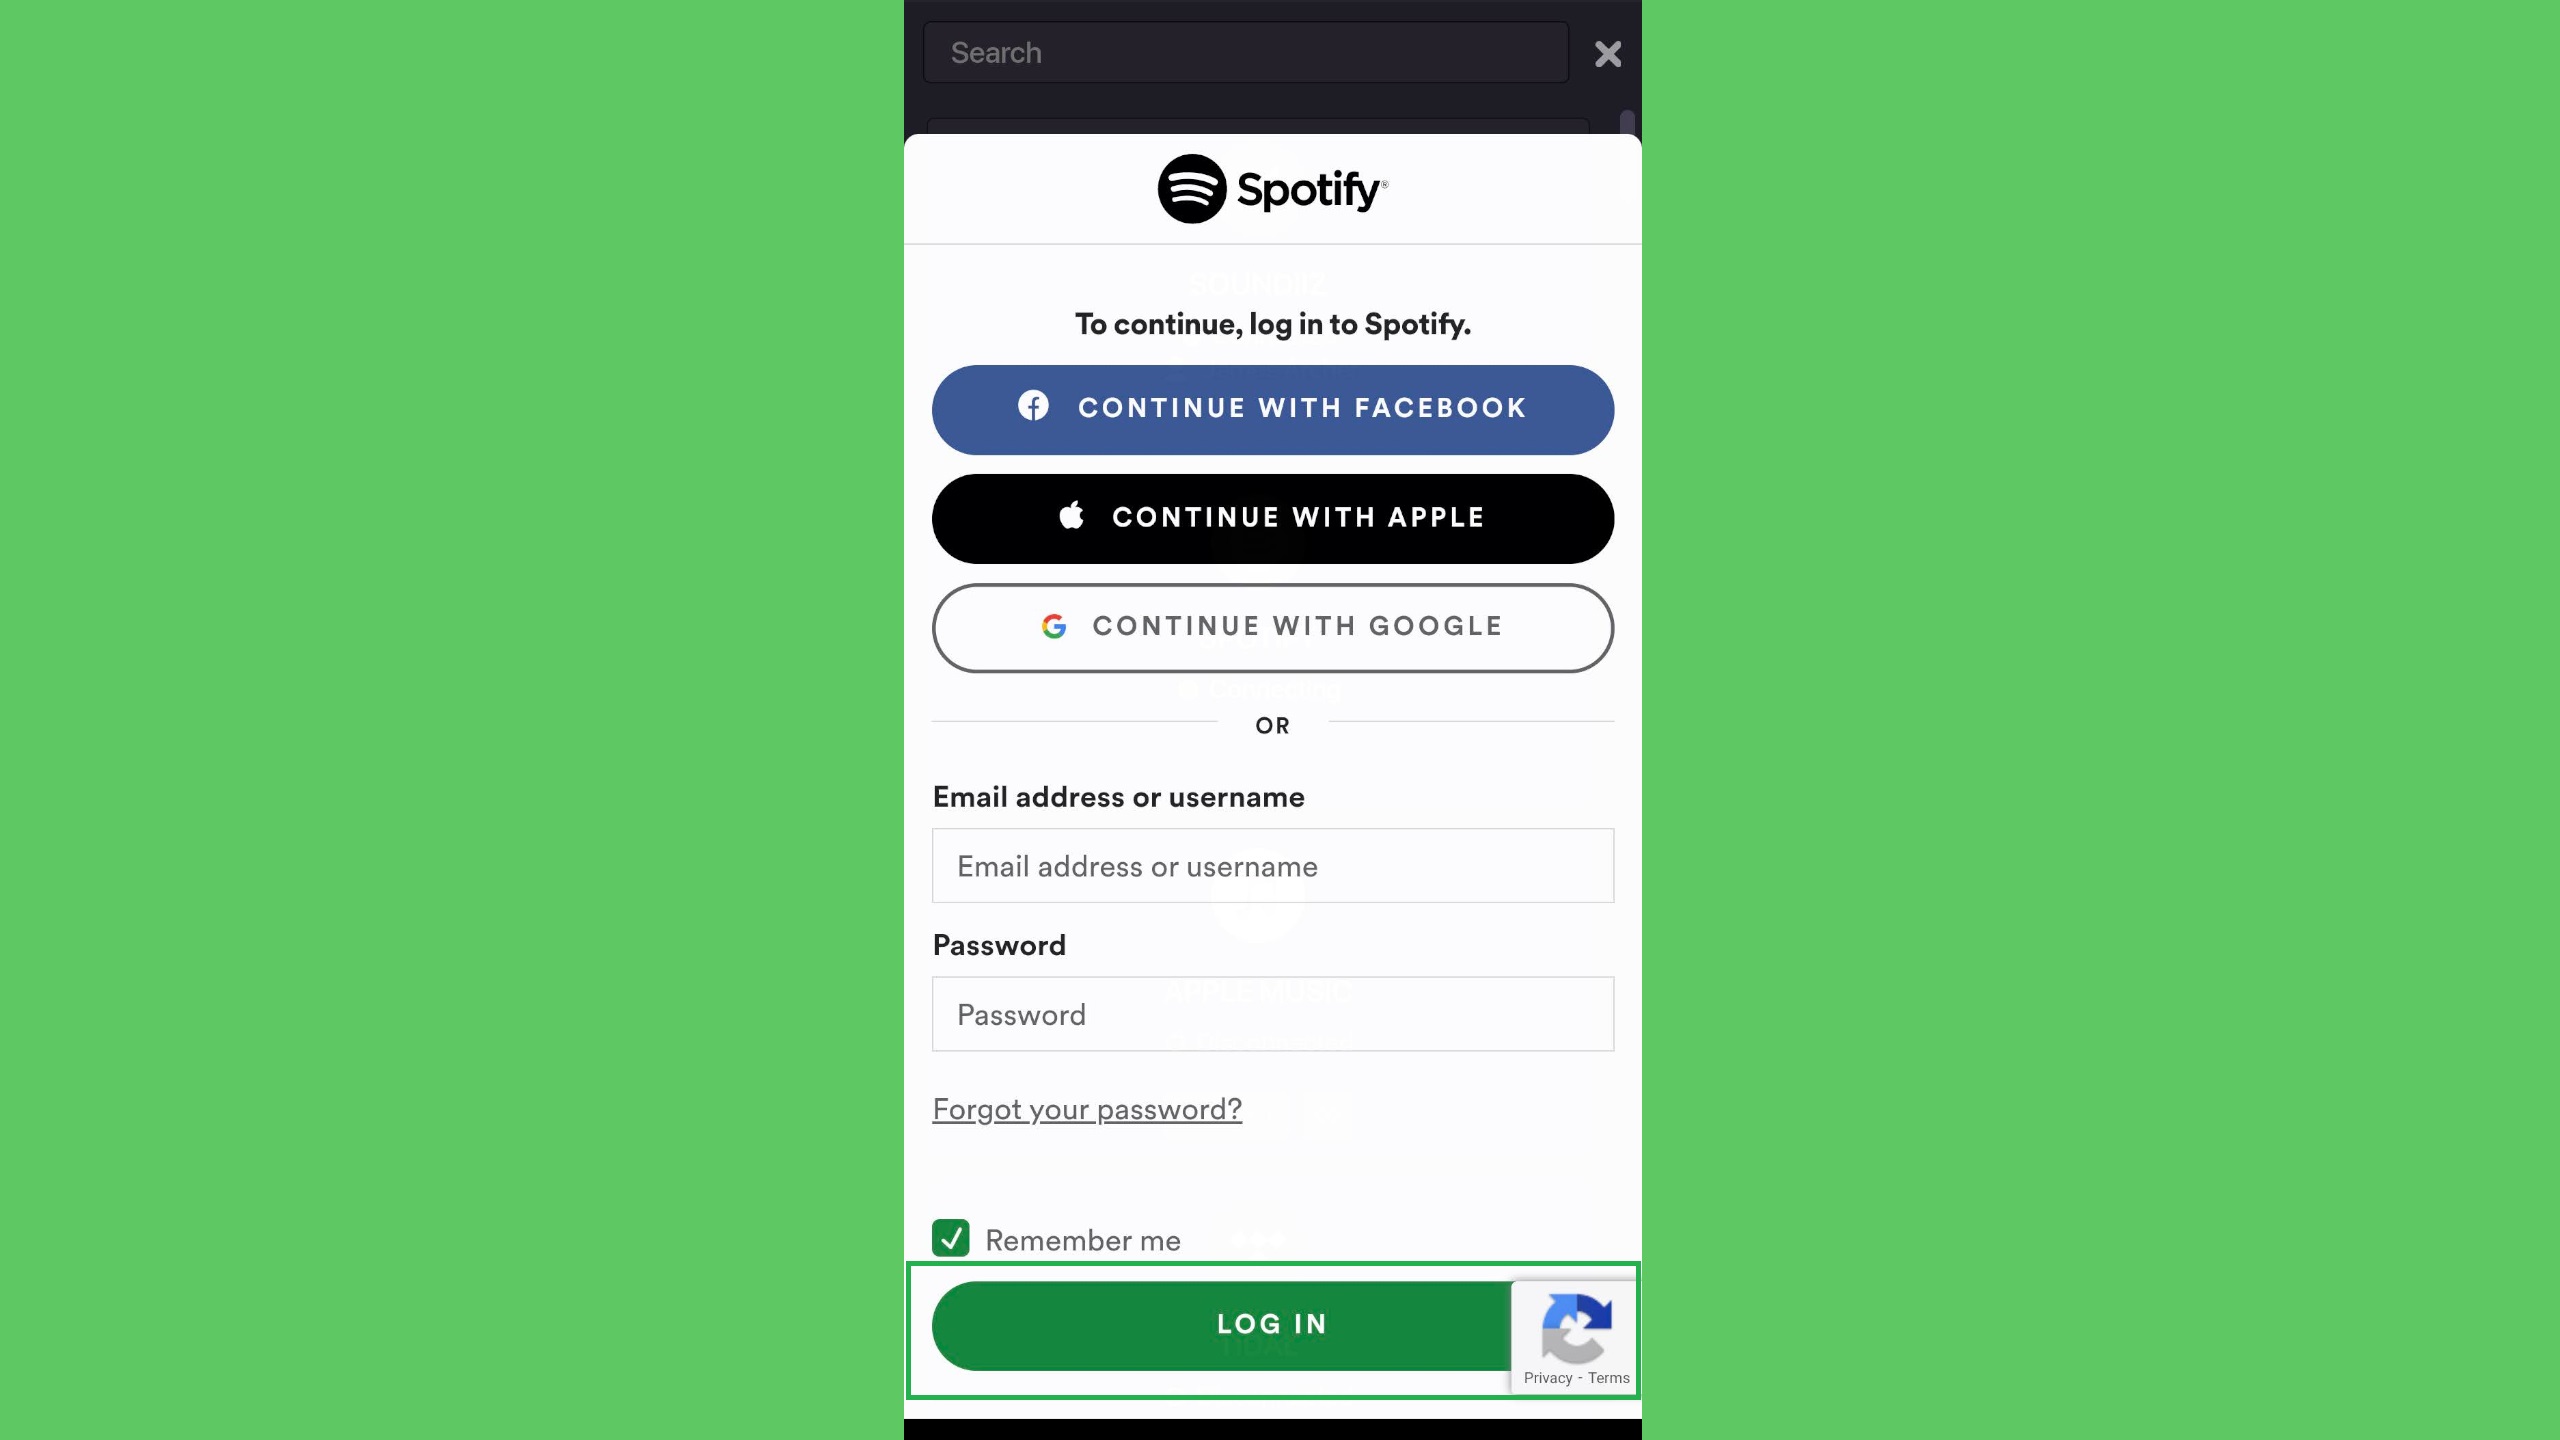
4. Sign in to your Spotify account and tap ‘Log in.’
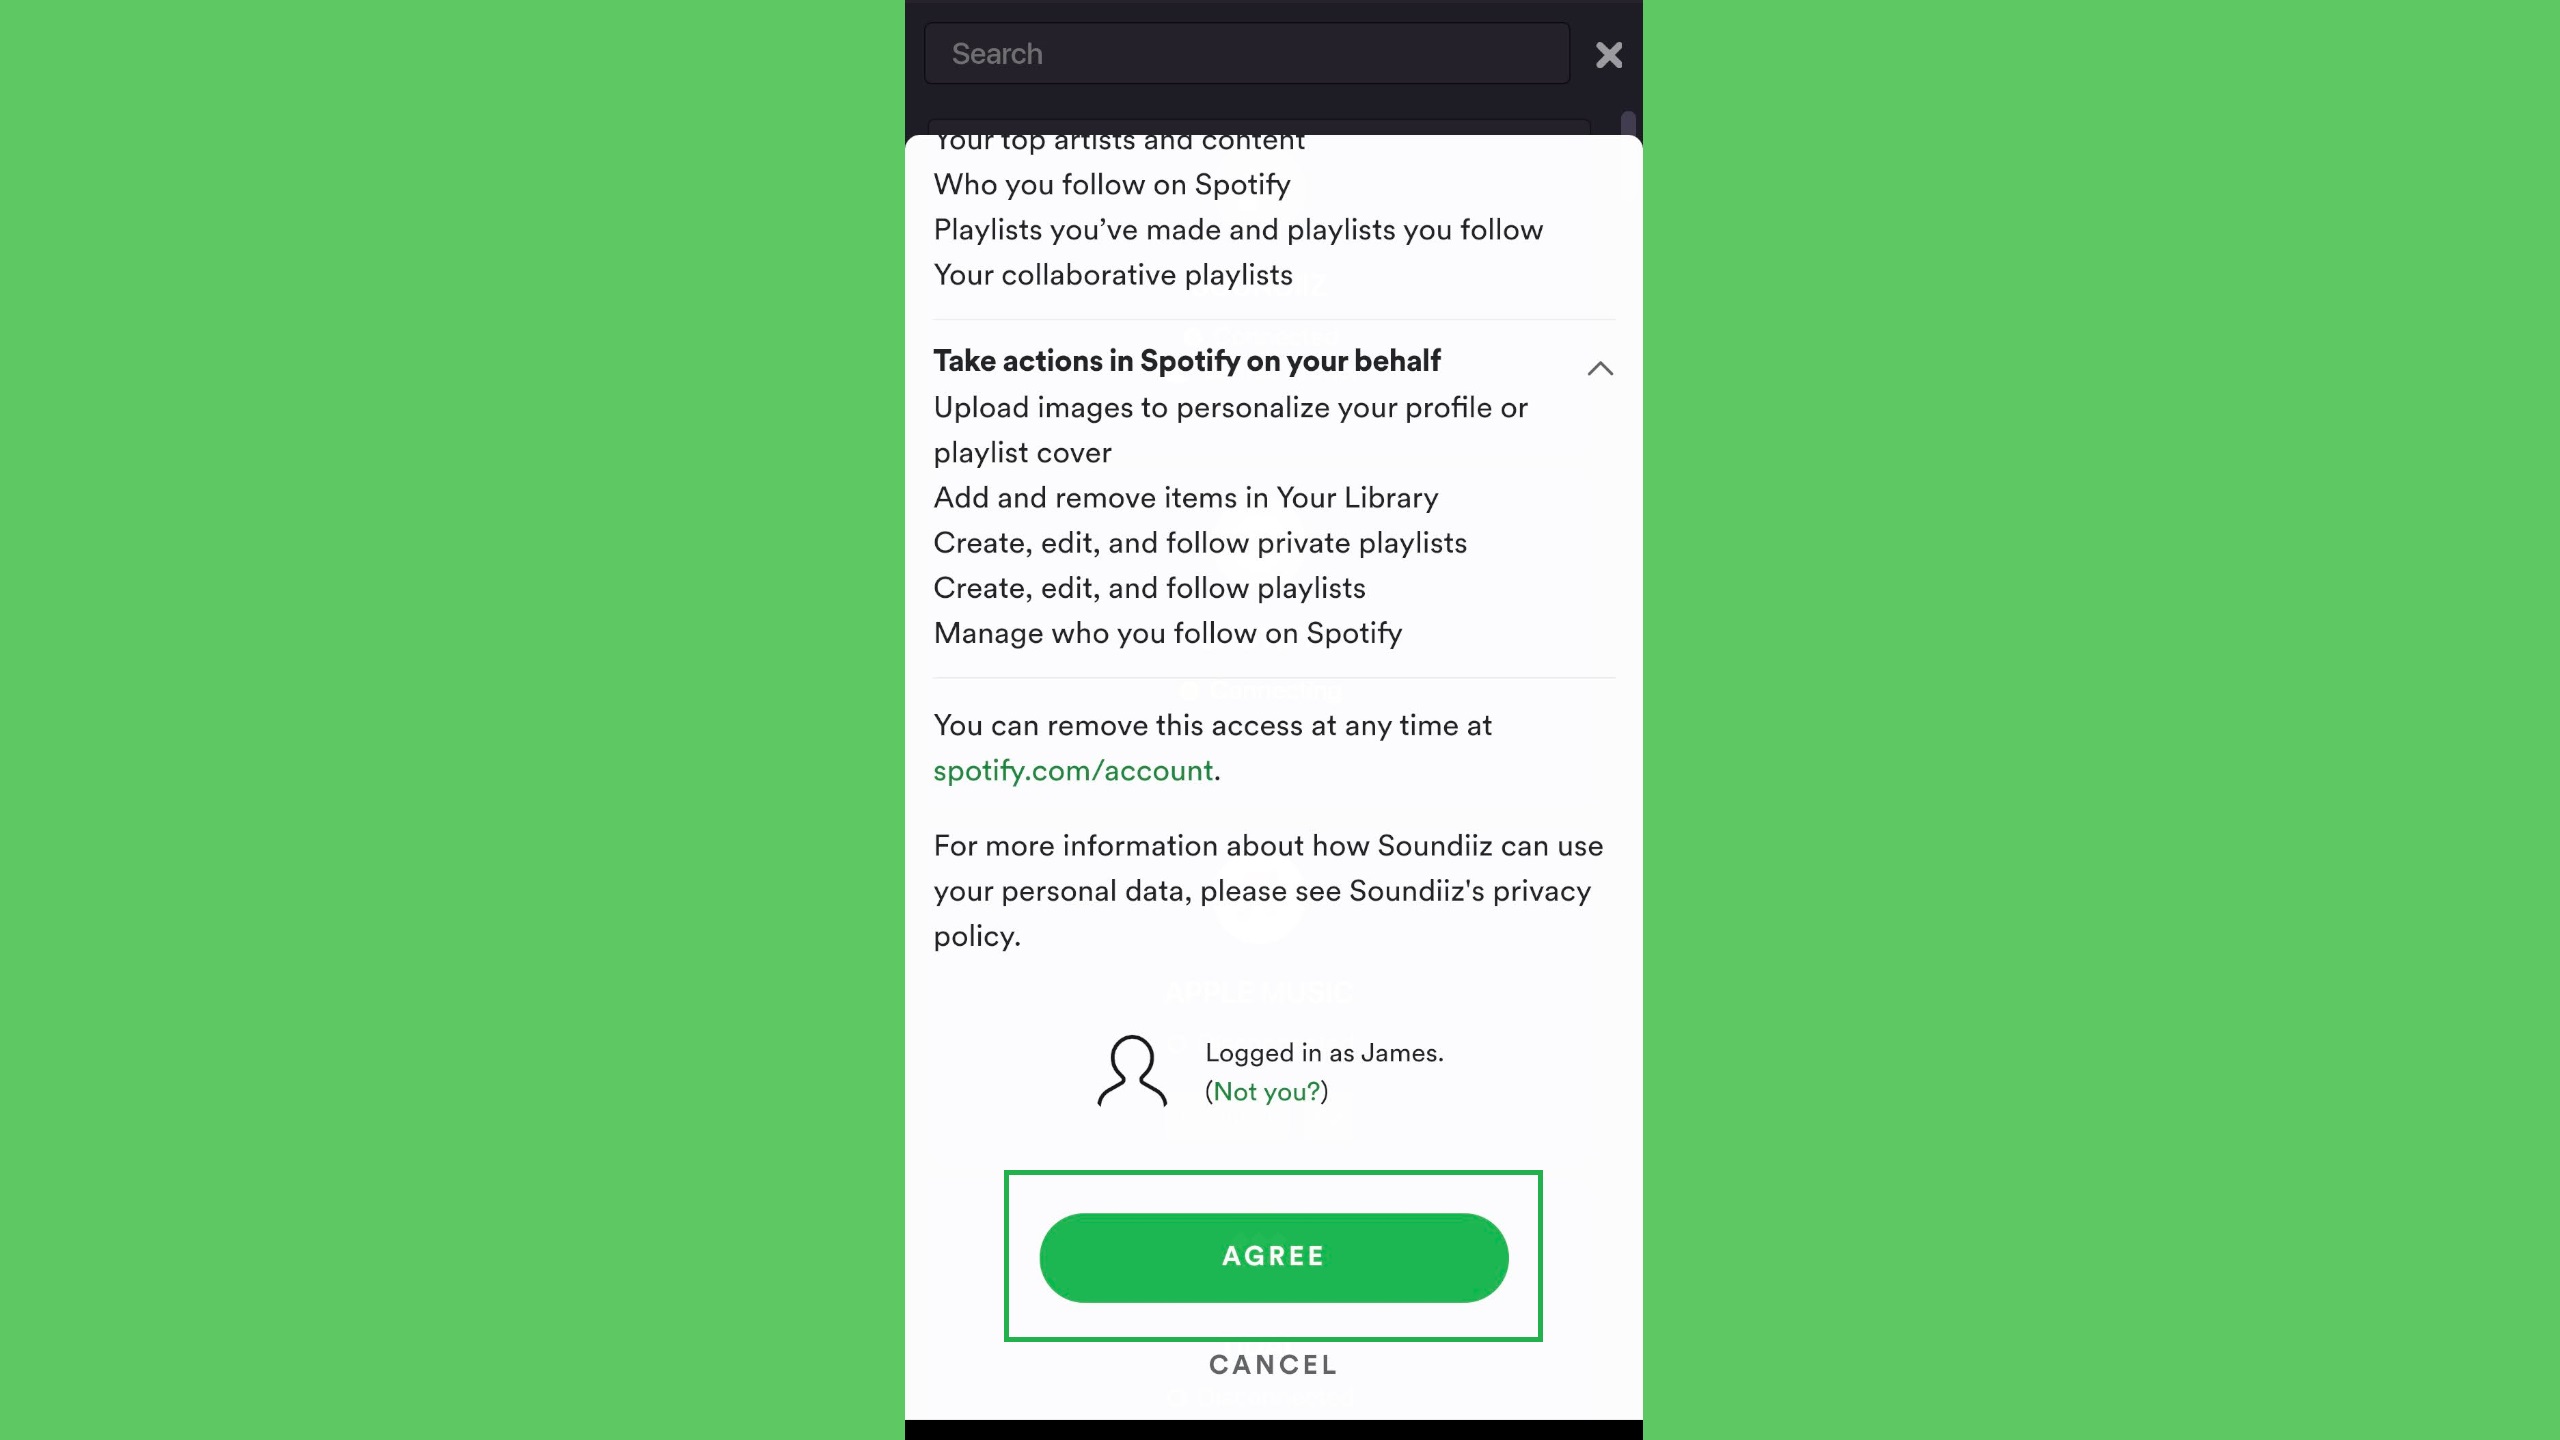
5. Read the terms and conditions and tap ‘Agree.’
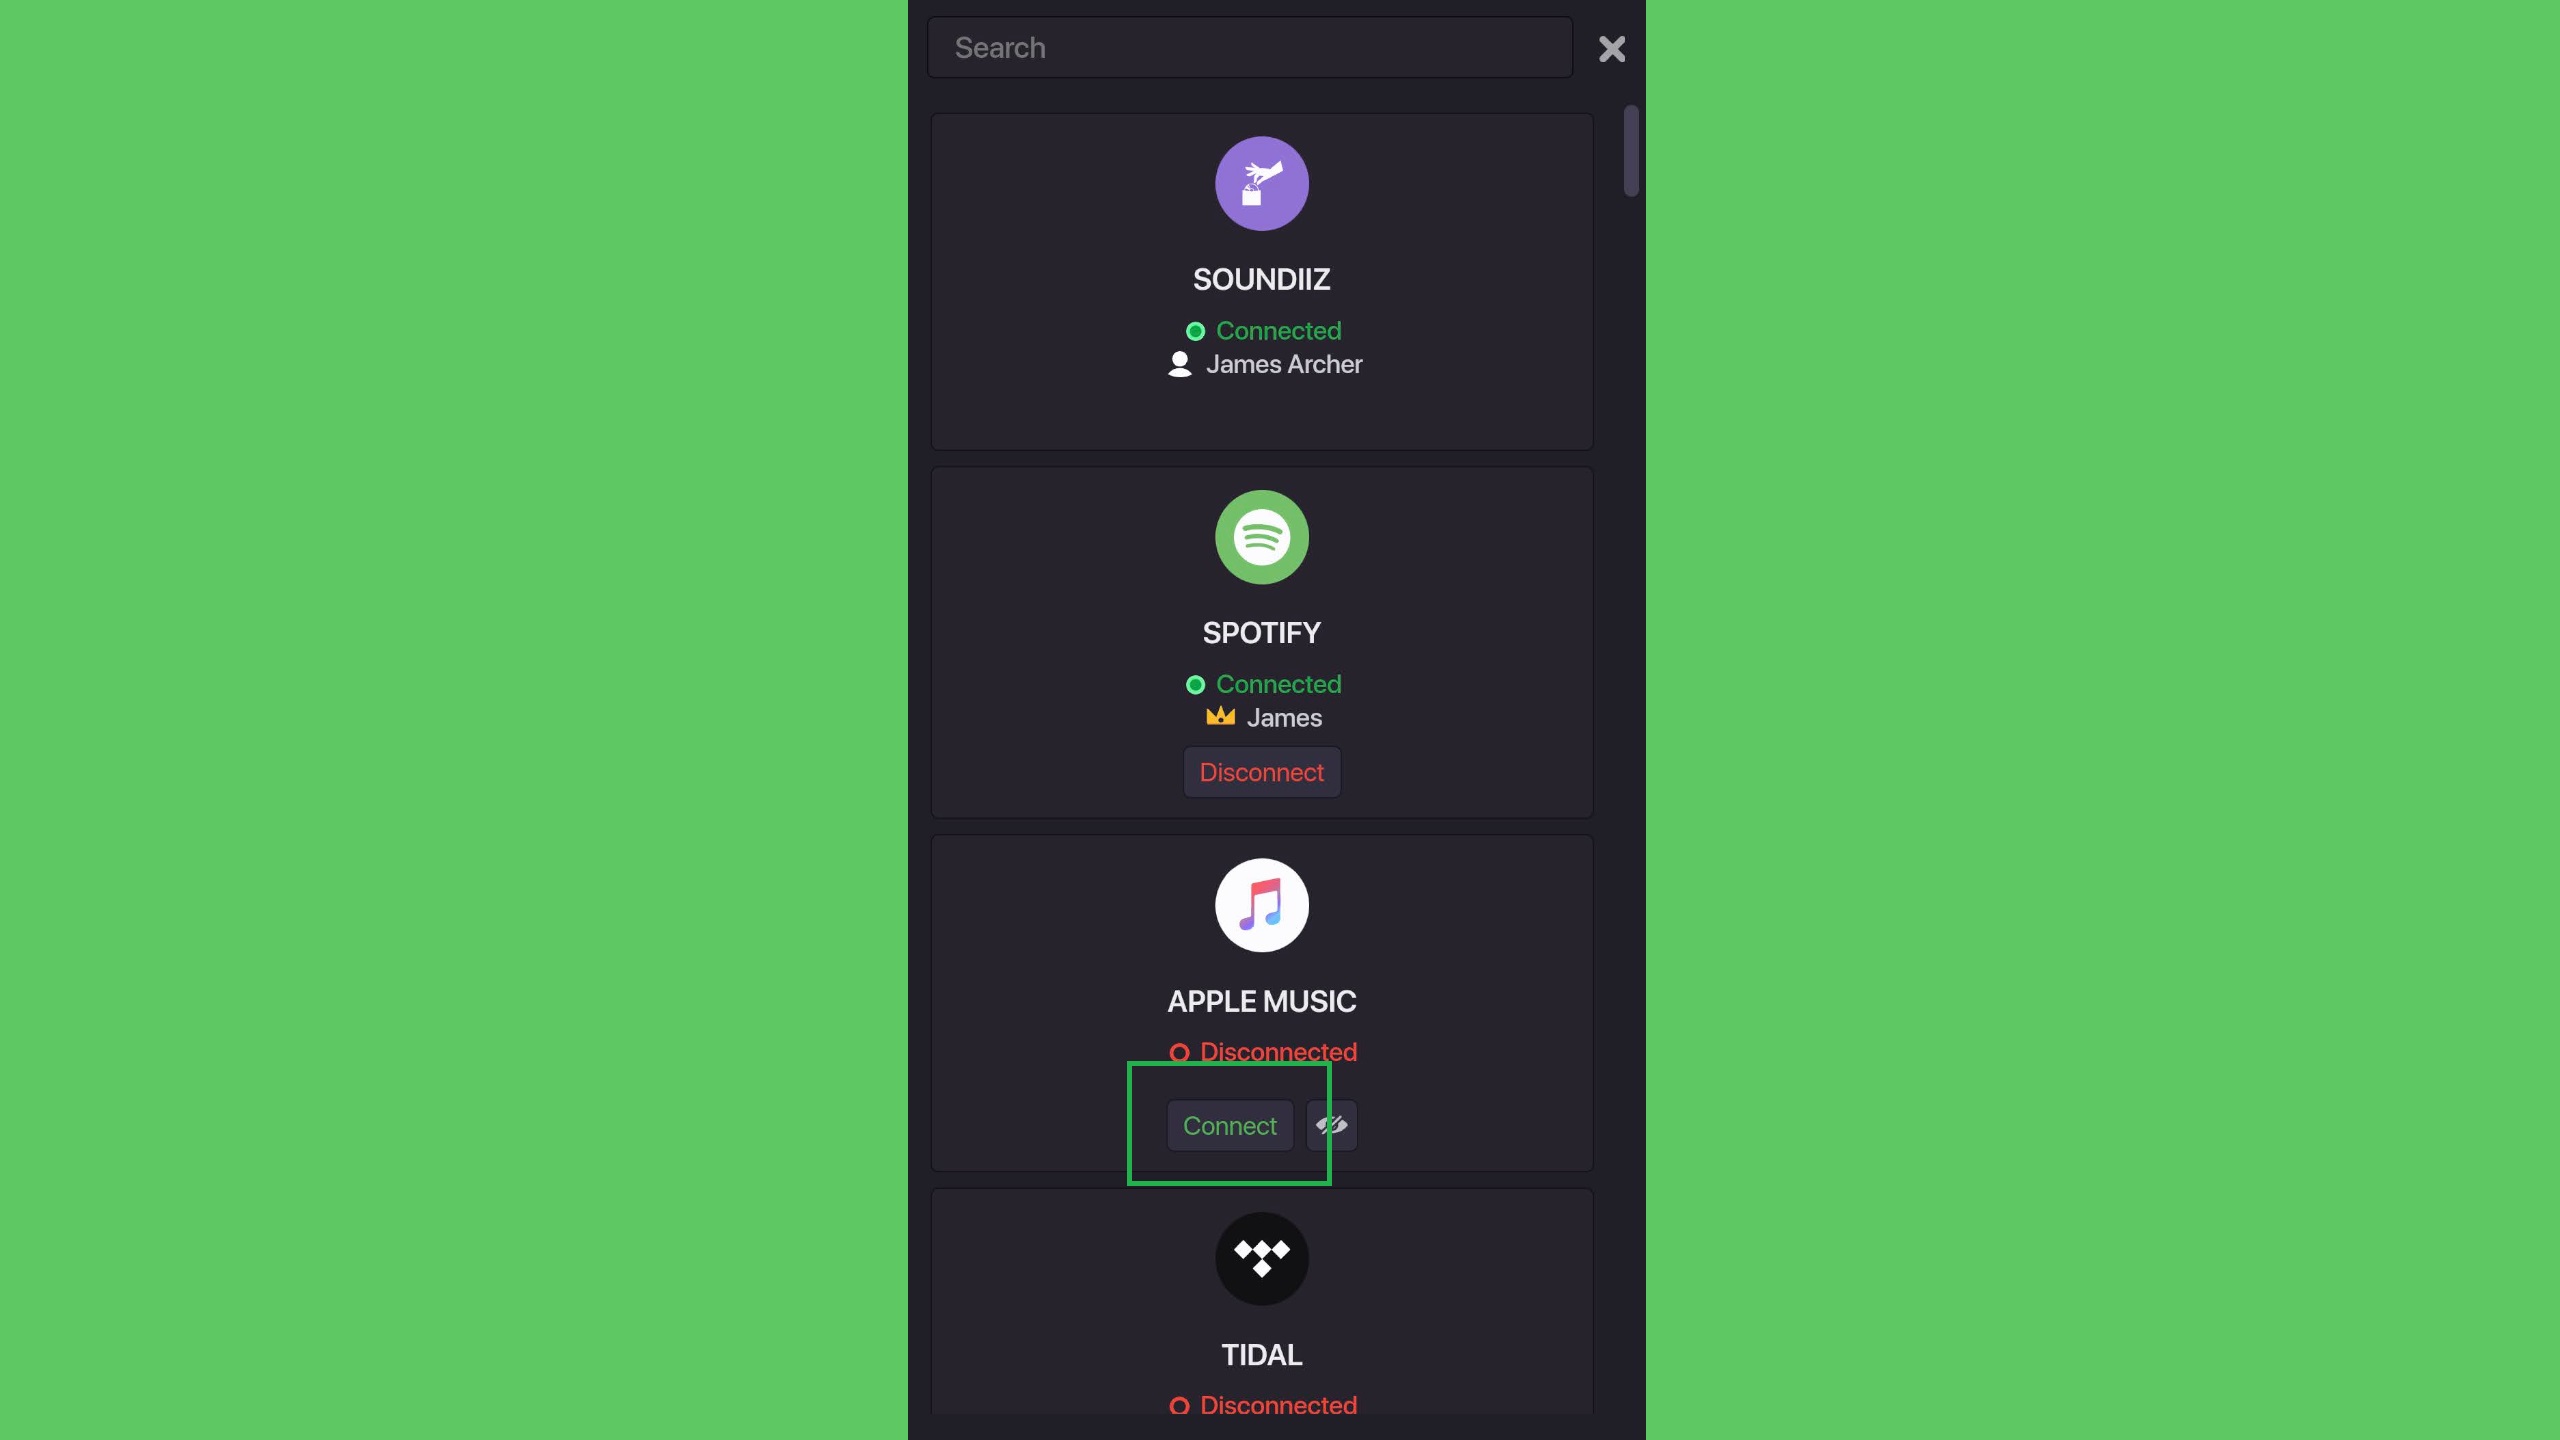
6. Spotify is now synced, so look for Apple Music in the music app list and tap ‘Connect’ for it.
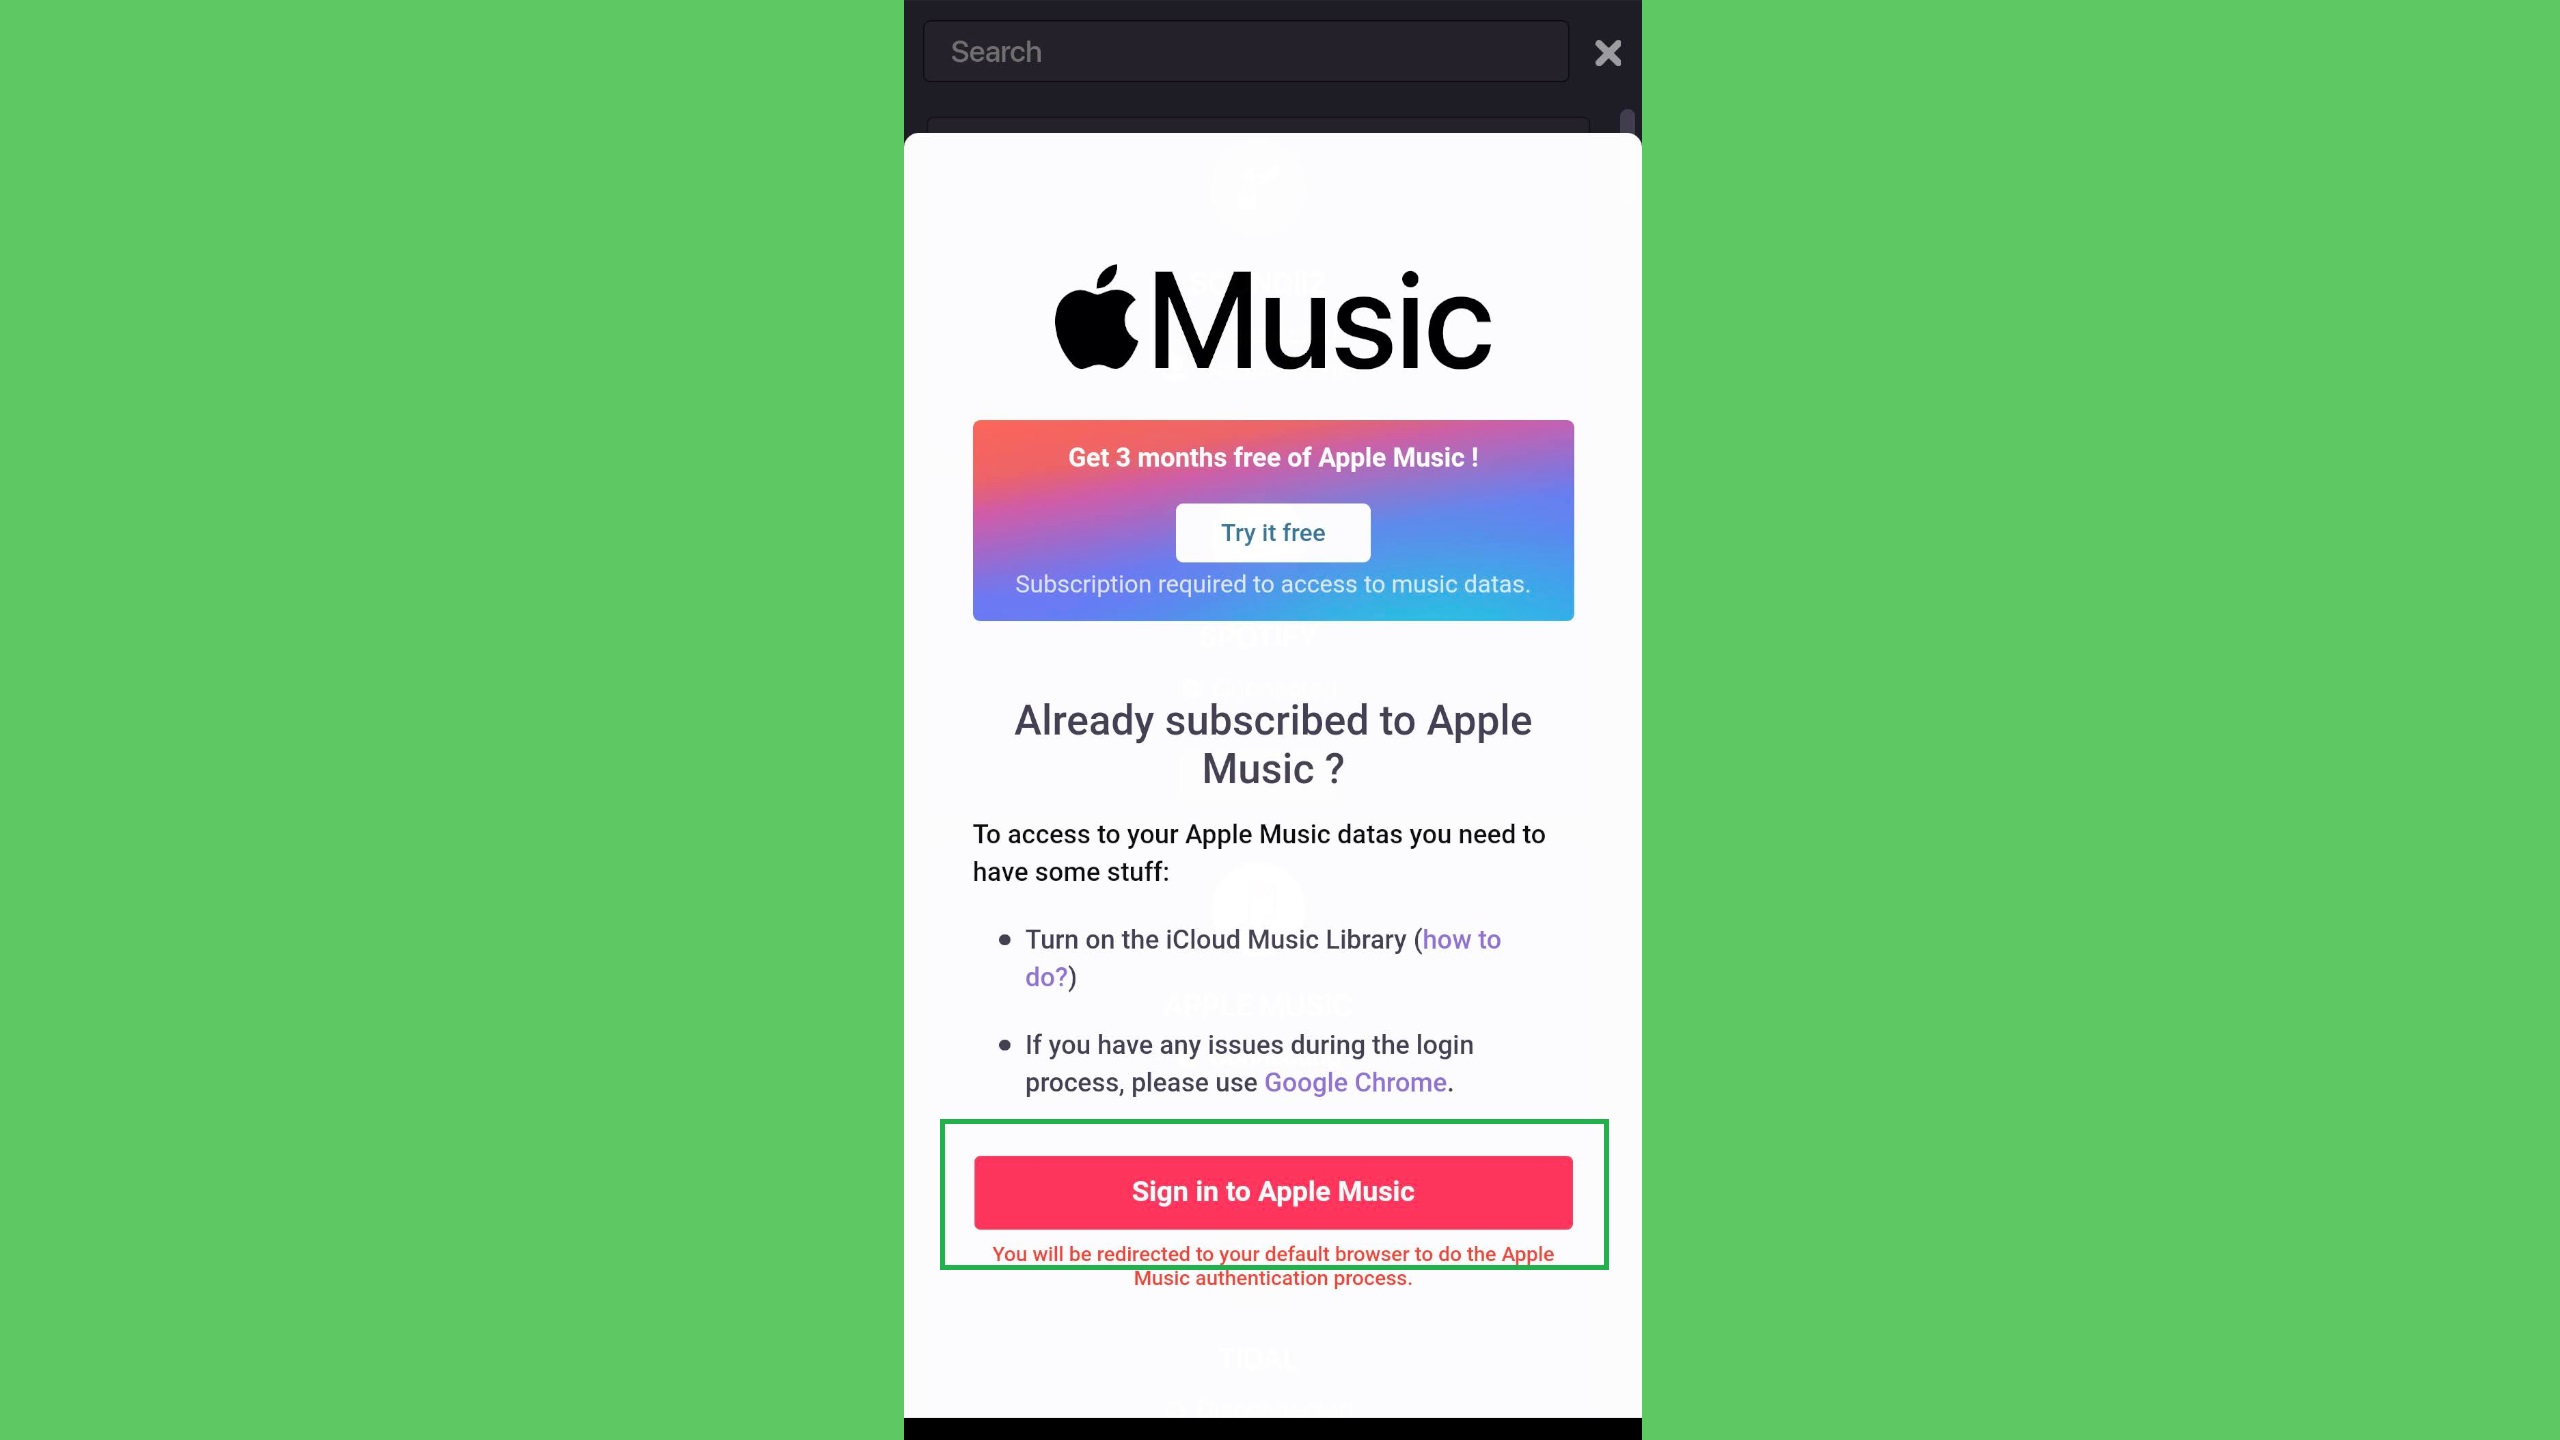
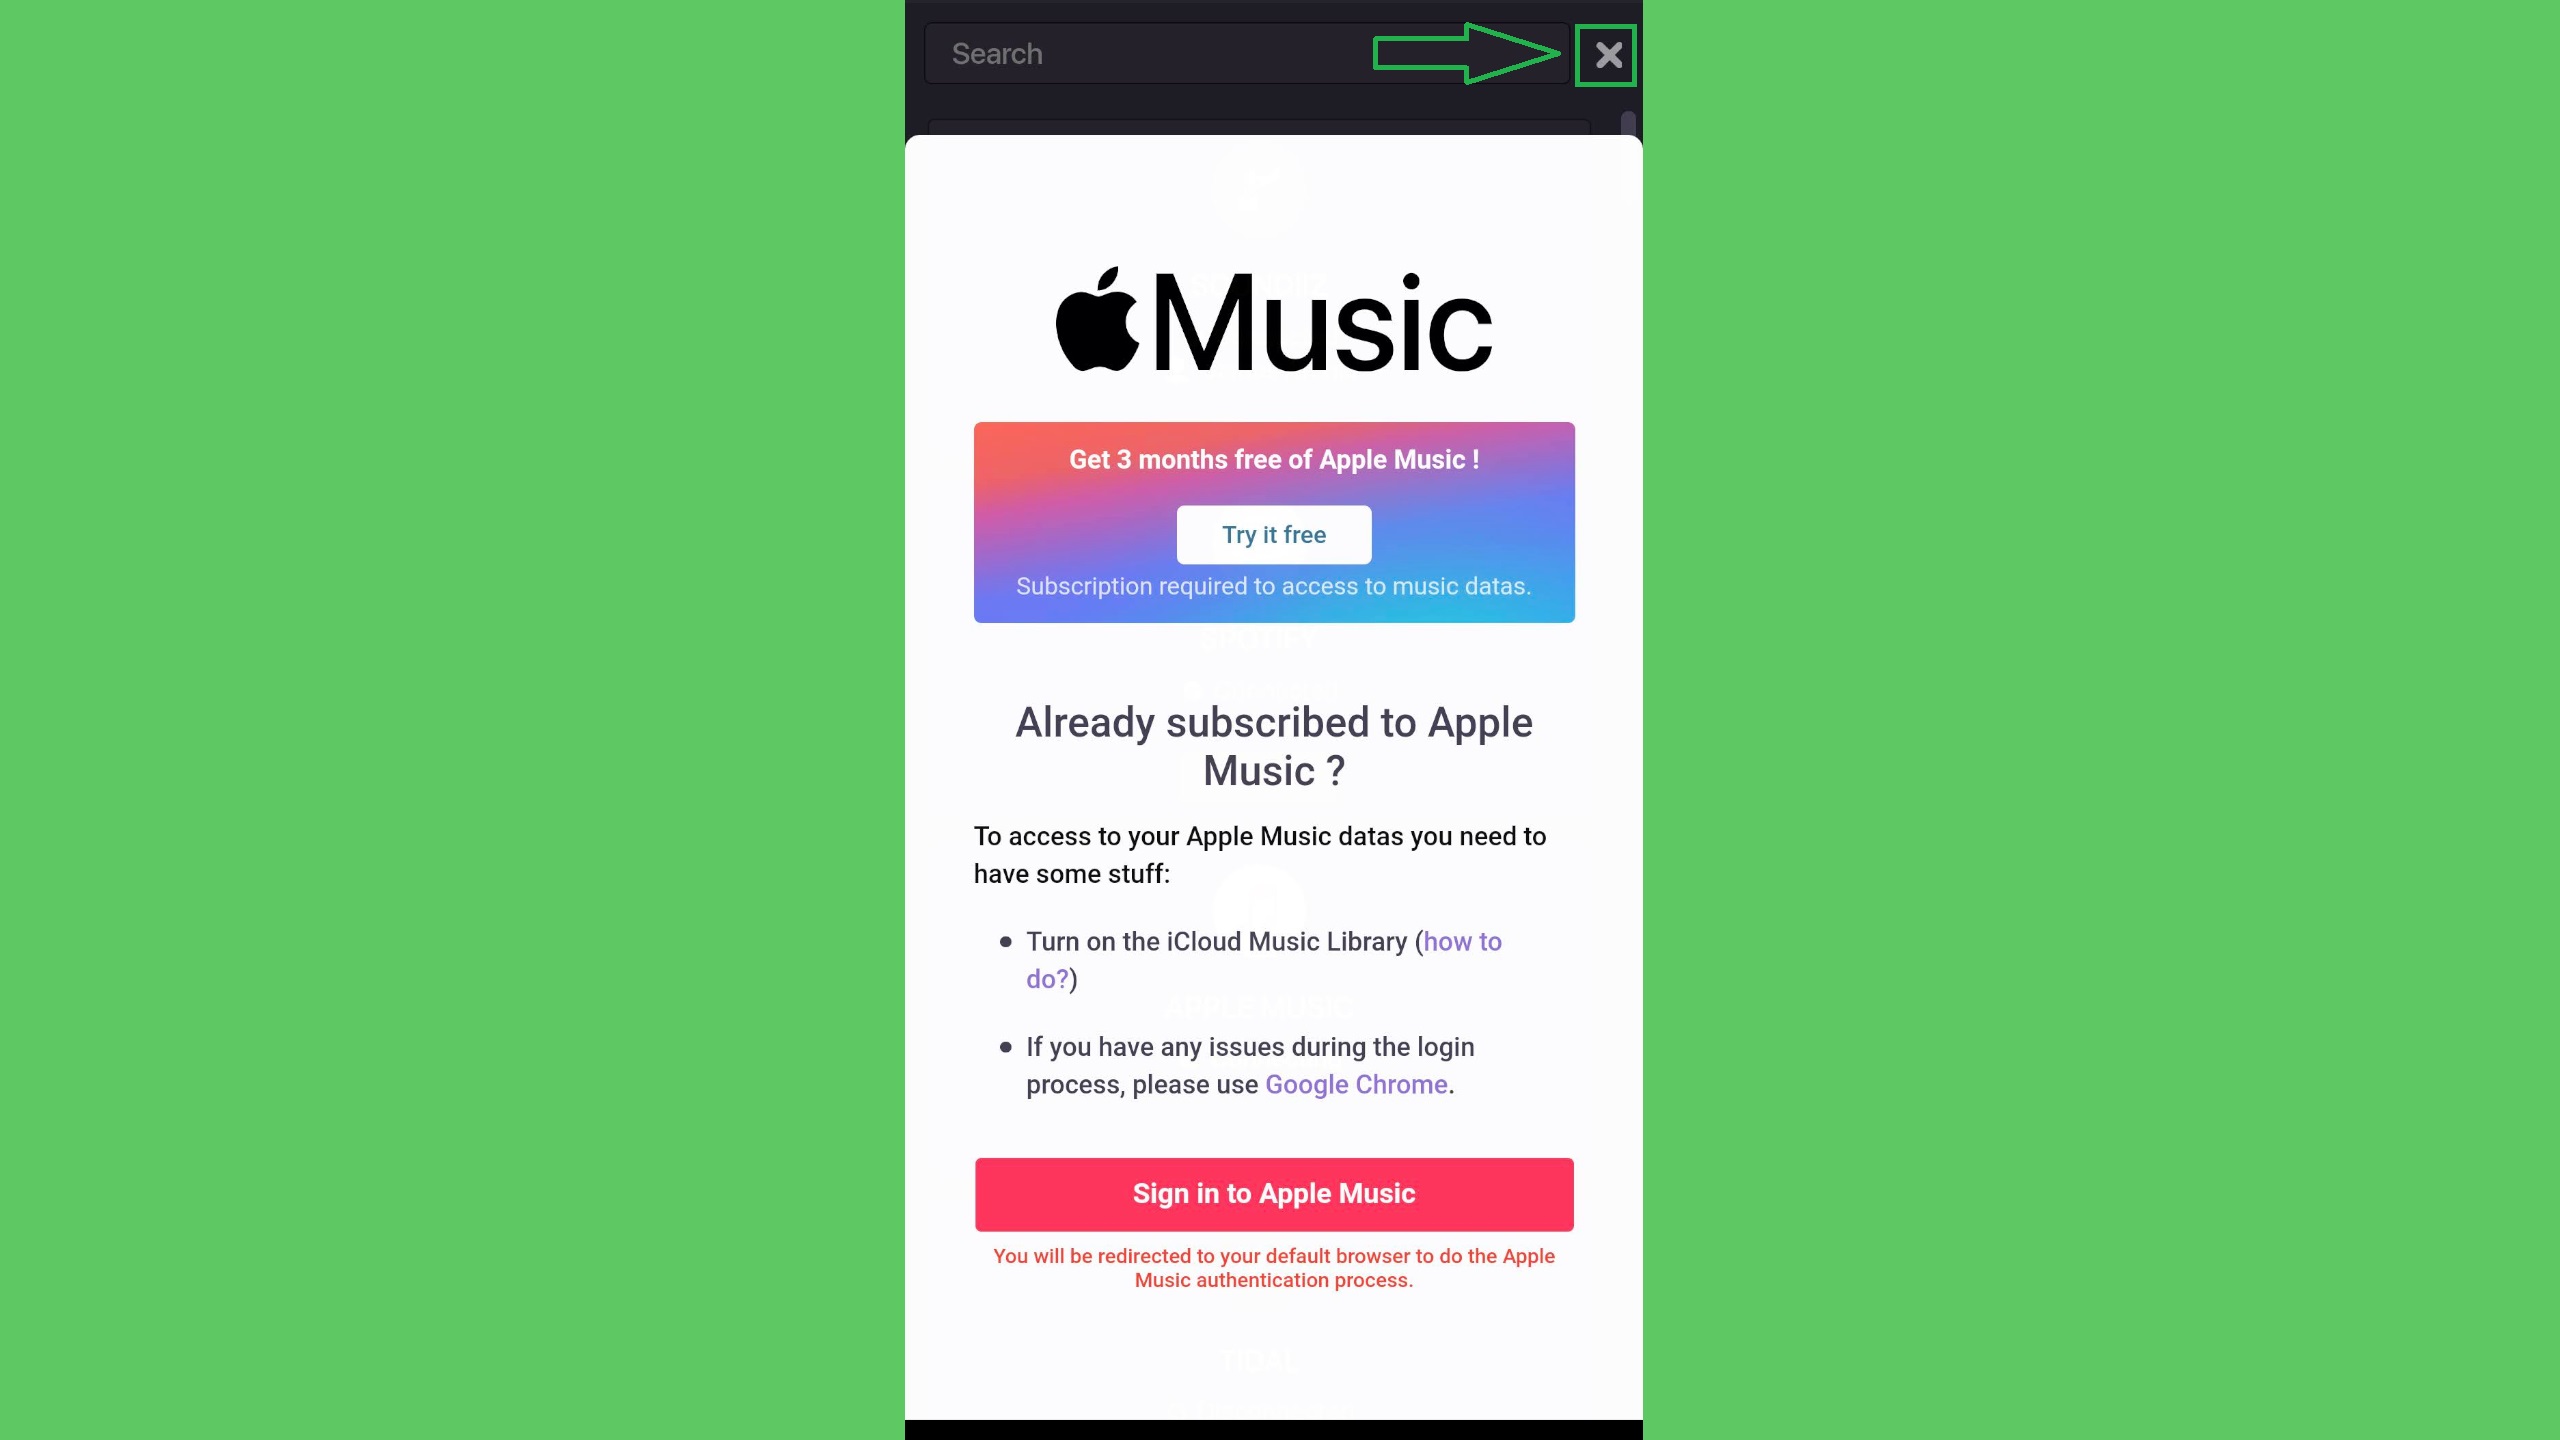
7. Tap ‘Sign in to Apple Music.’ This will open the Soundiiz site in a browser, rather than iTunes, but enter your Soundiiz credentials all the same.
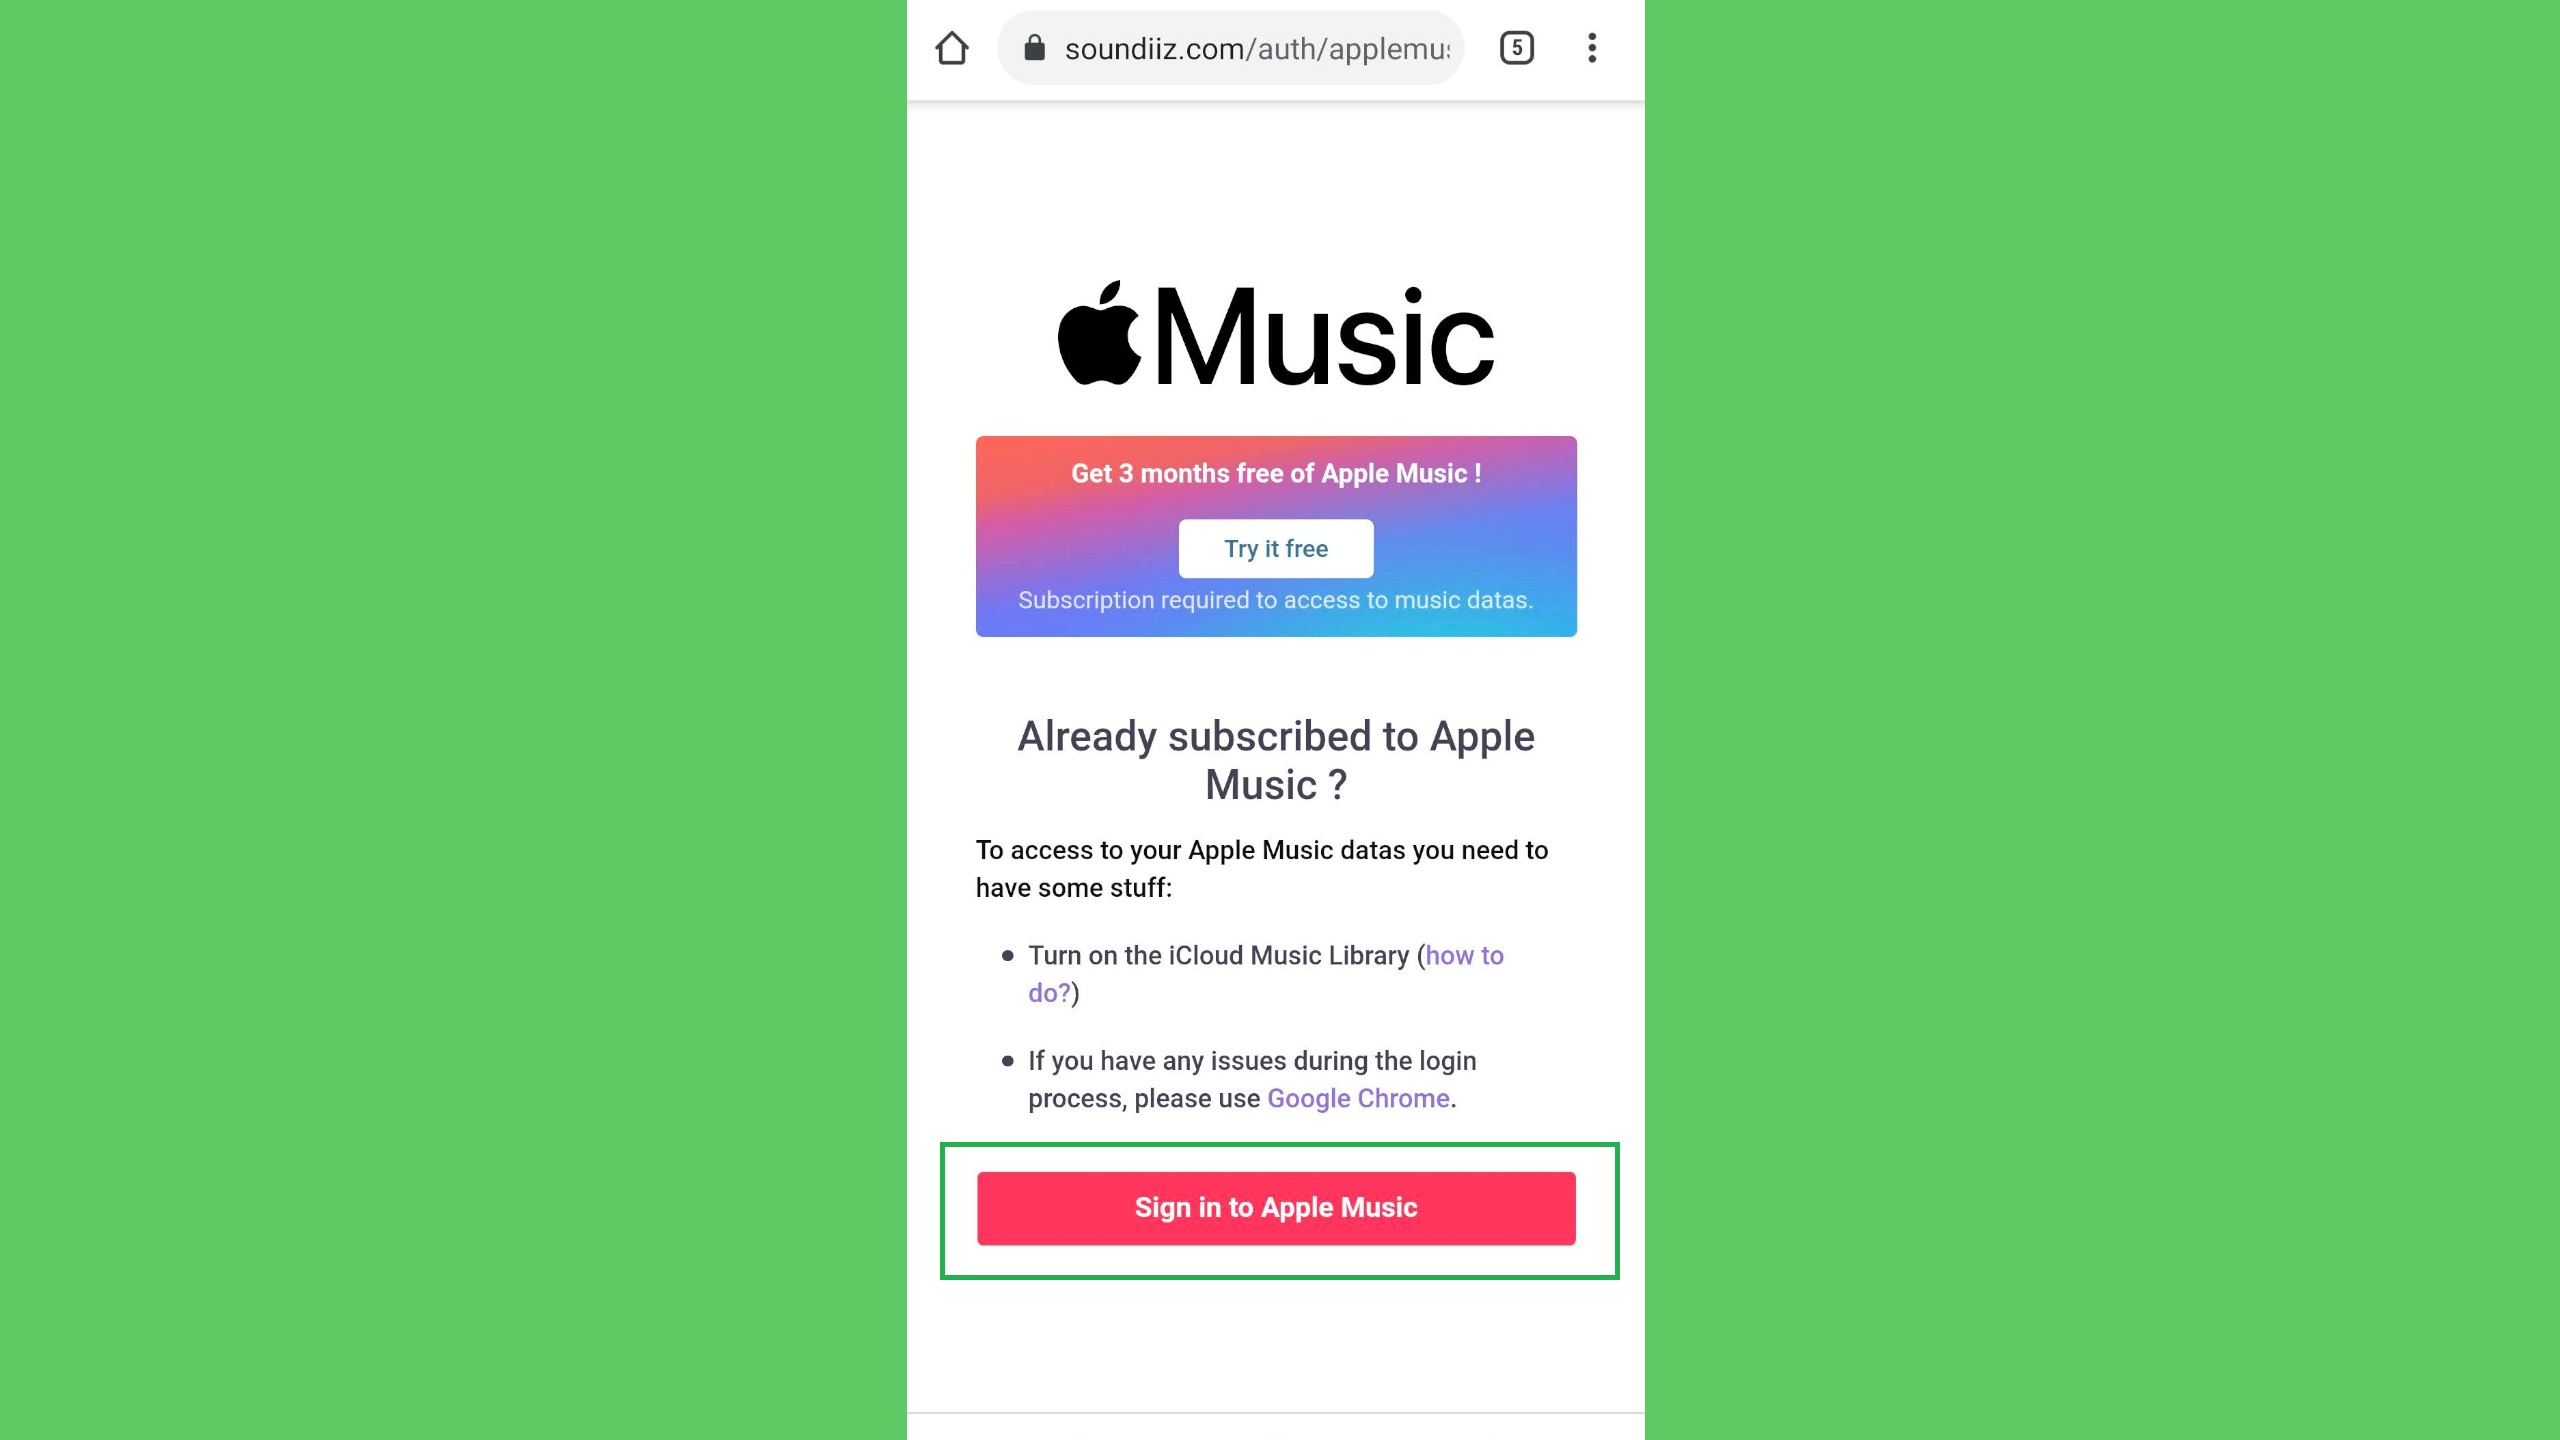
8. Tap ‘Sign in to Apple Music.’ This will open another browser tab.
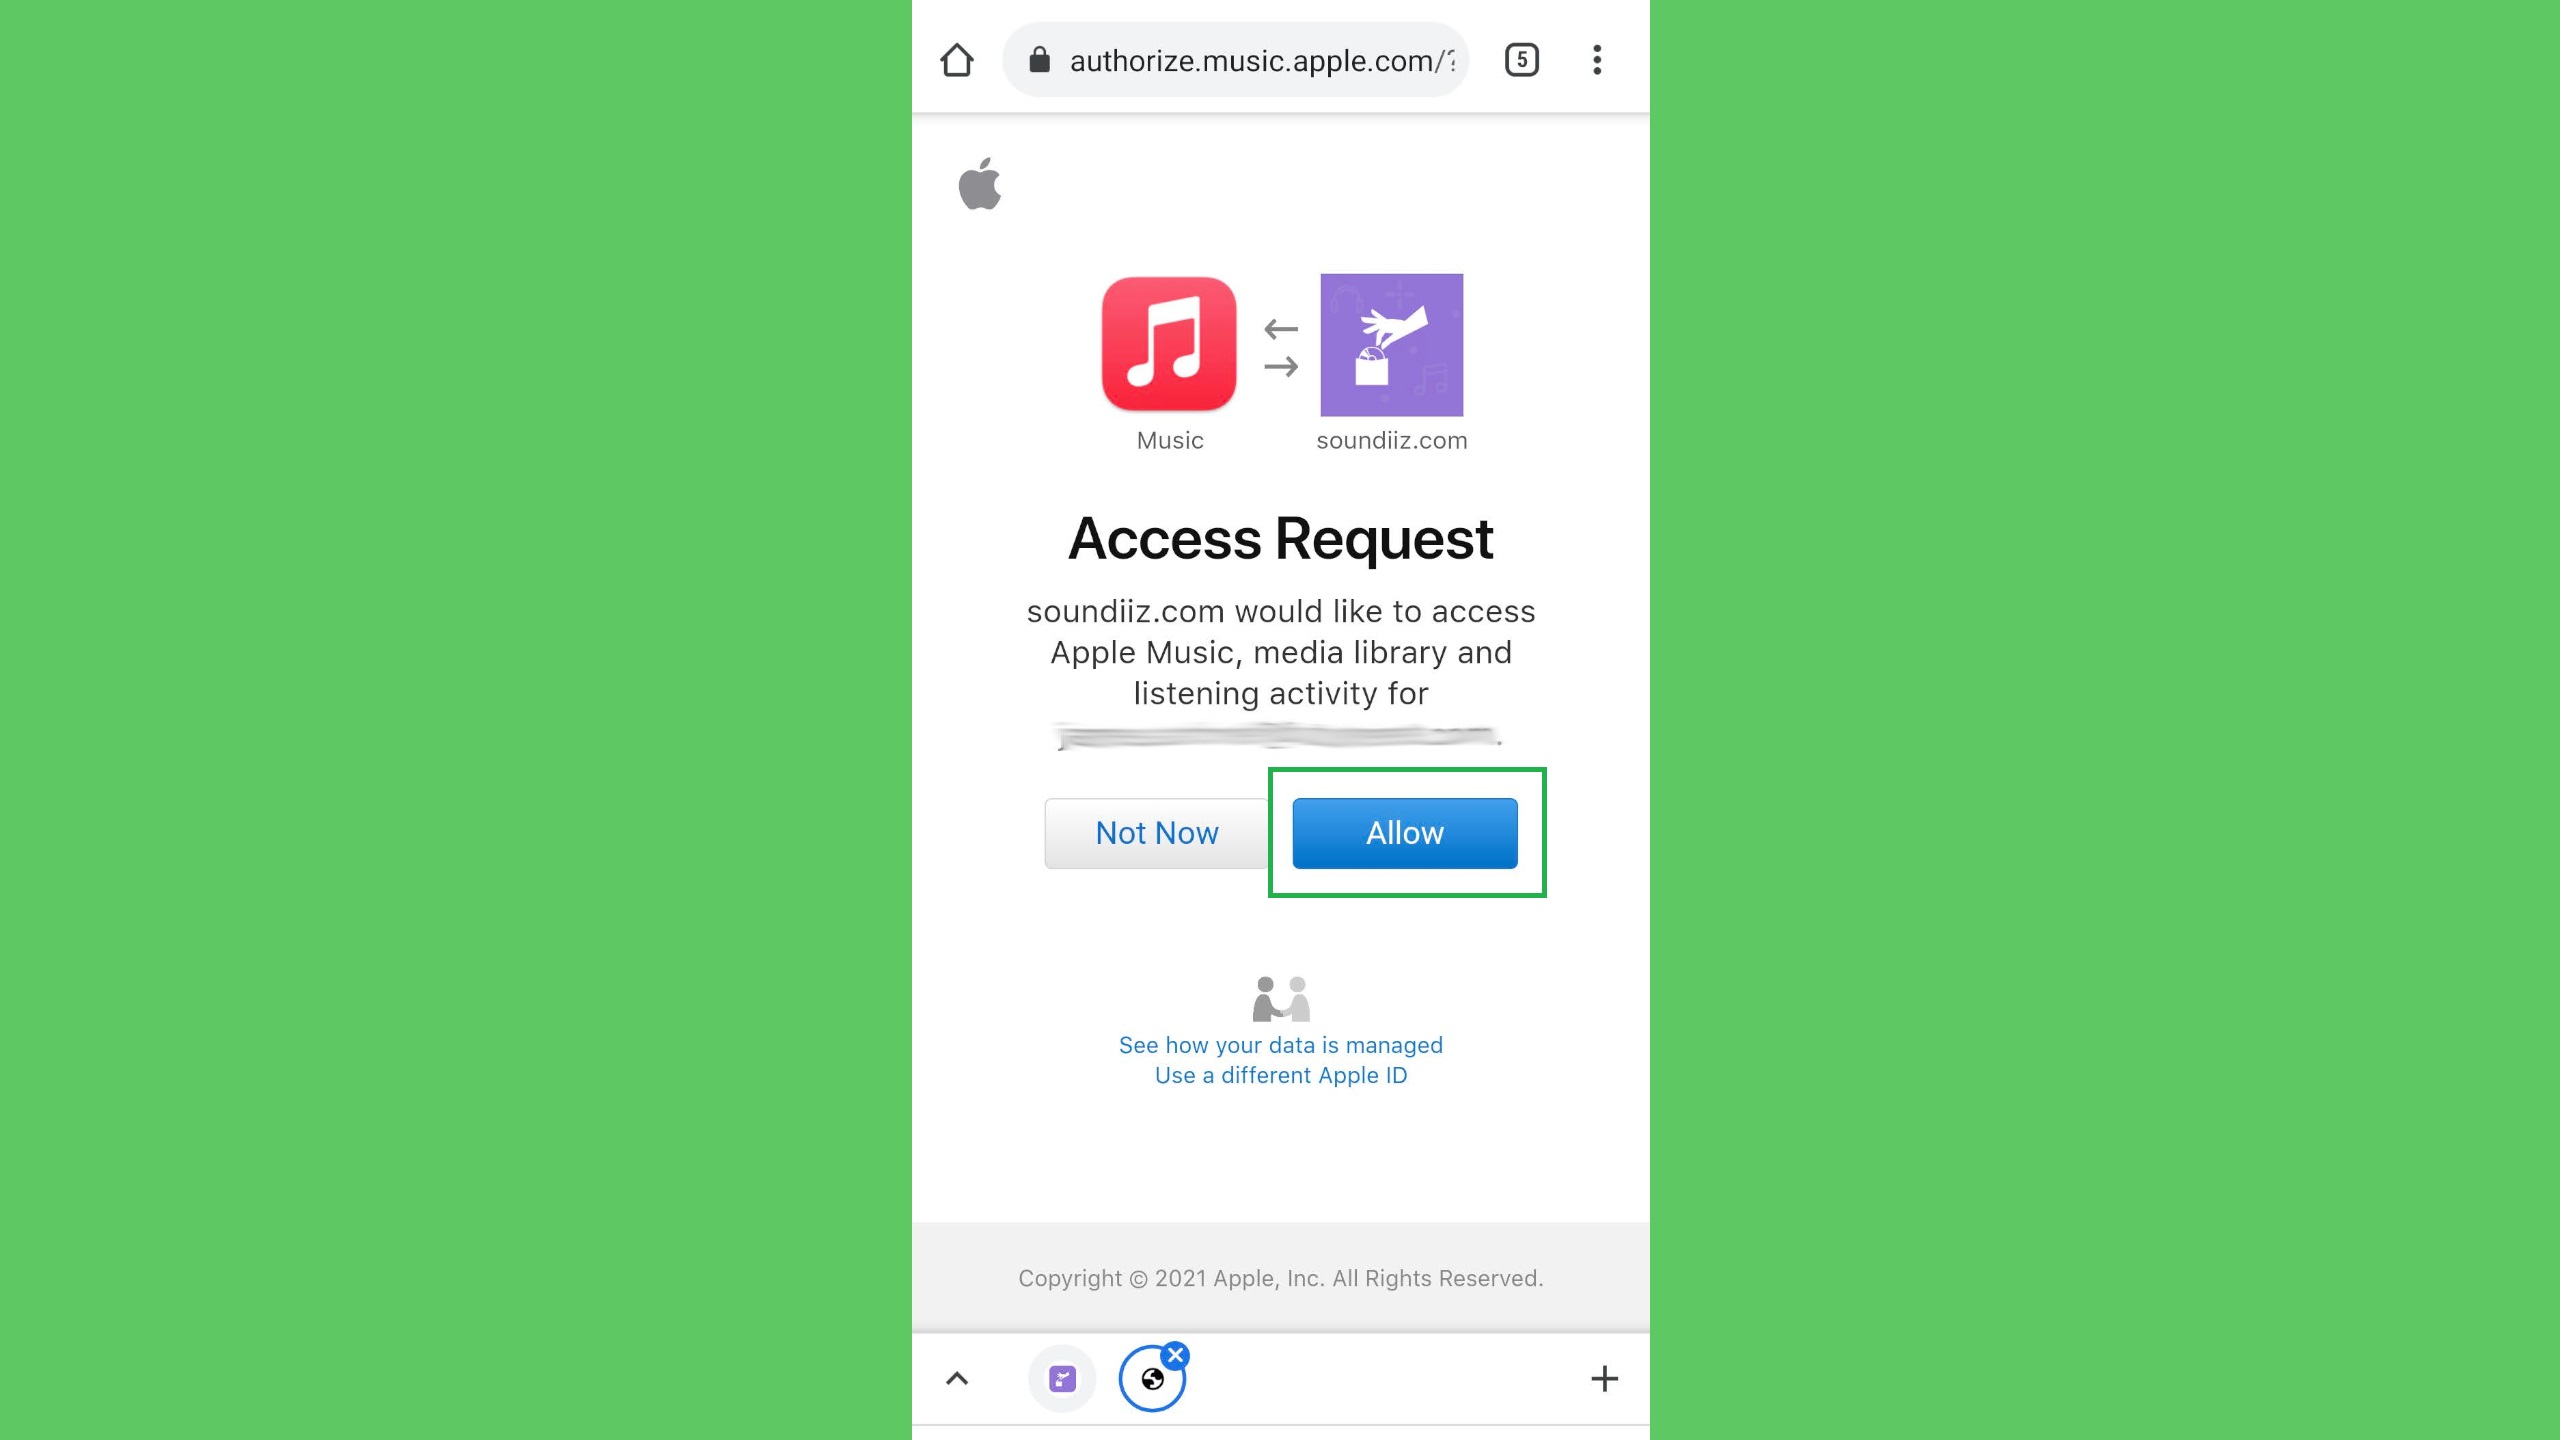
9. Enter your Apple Music credentials and tap ‘Allow.’
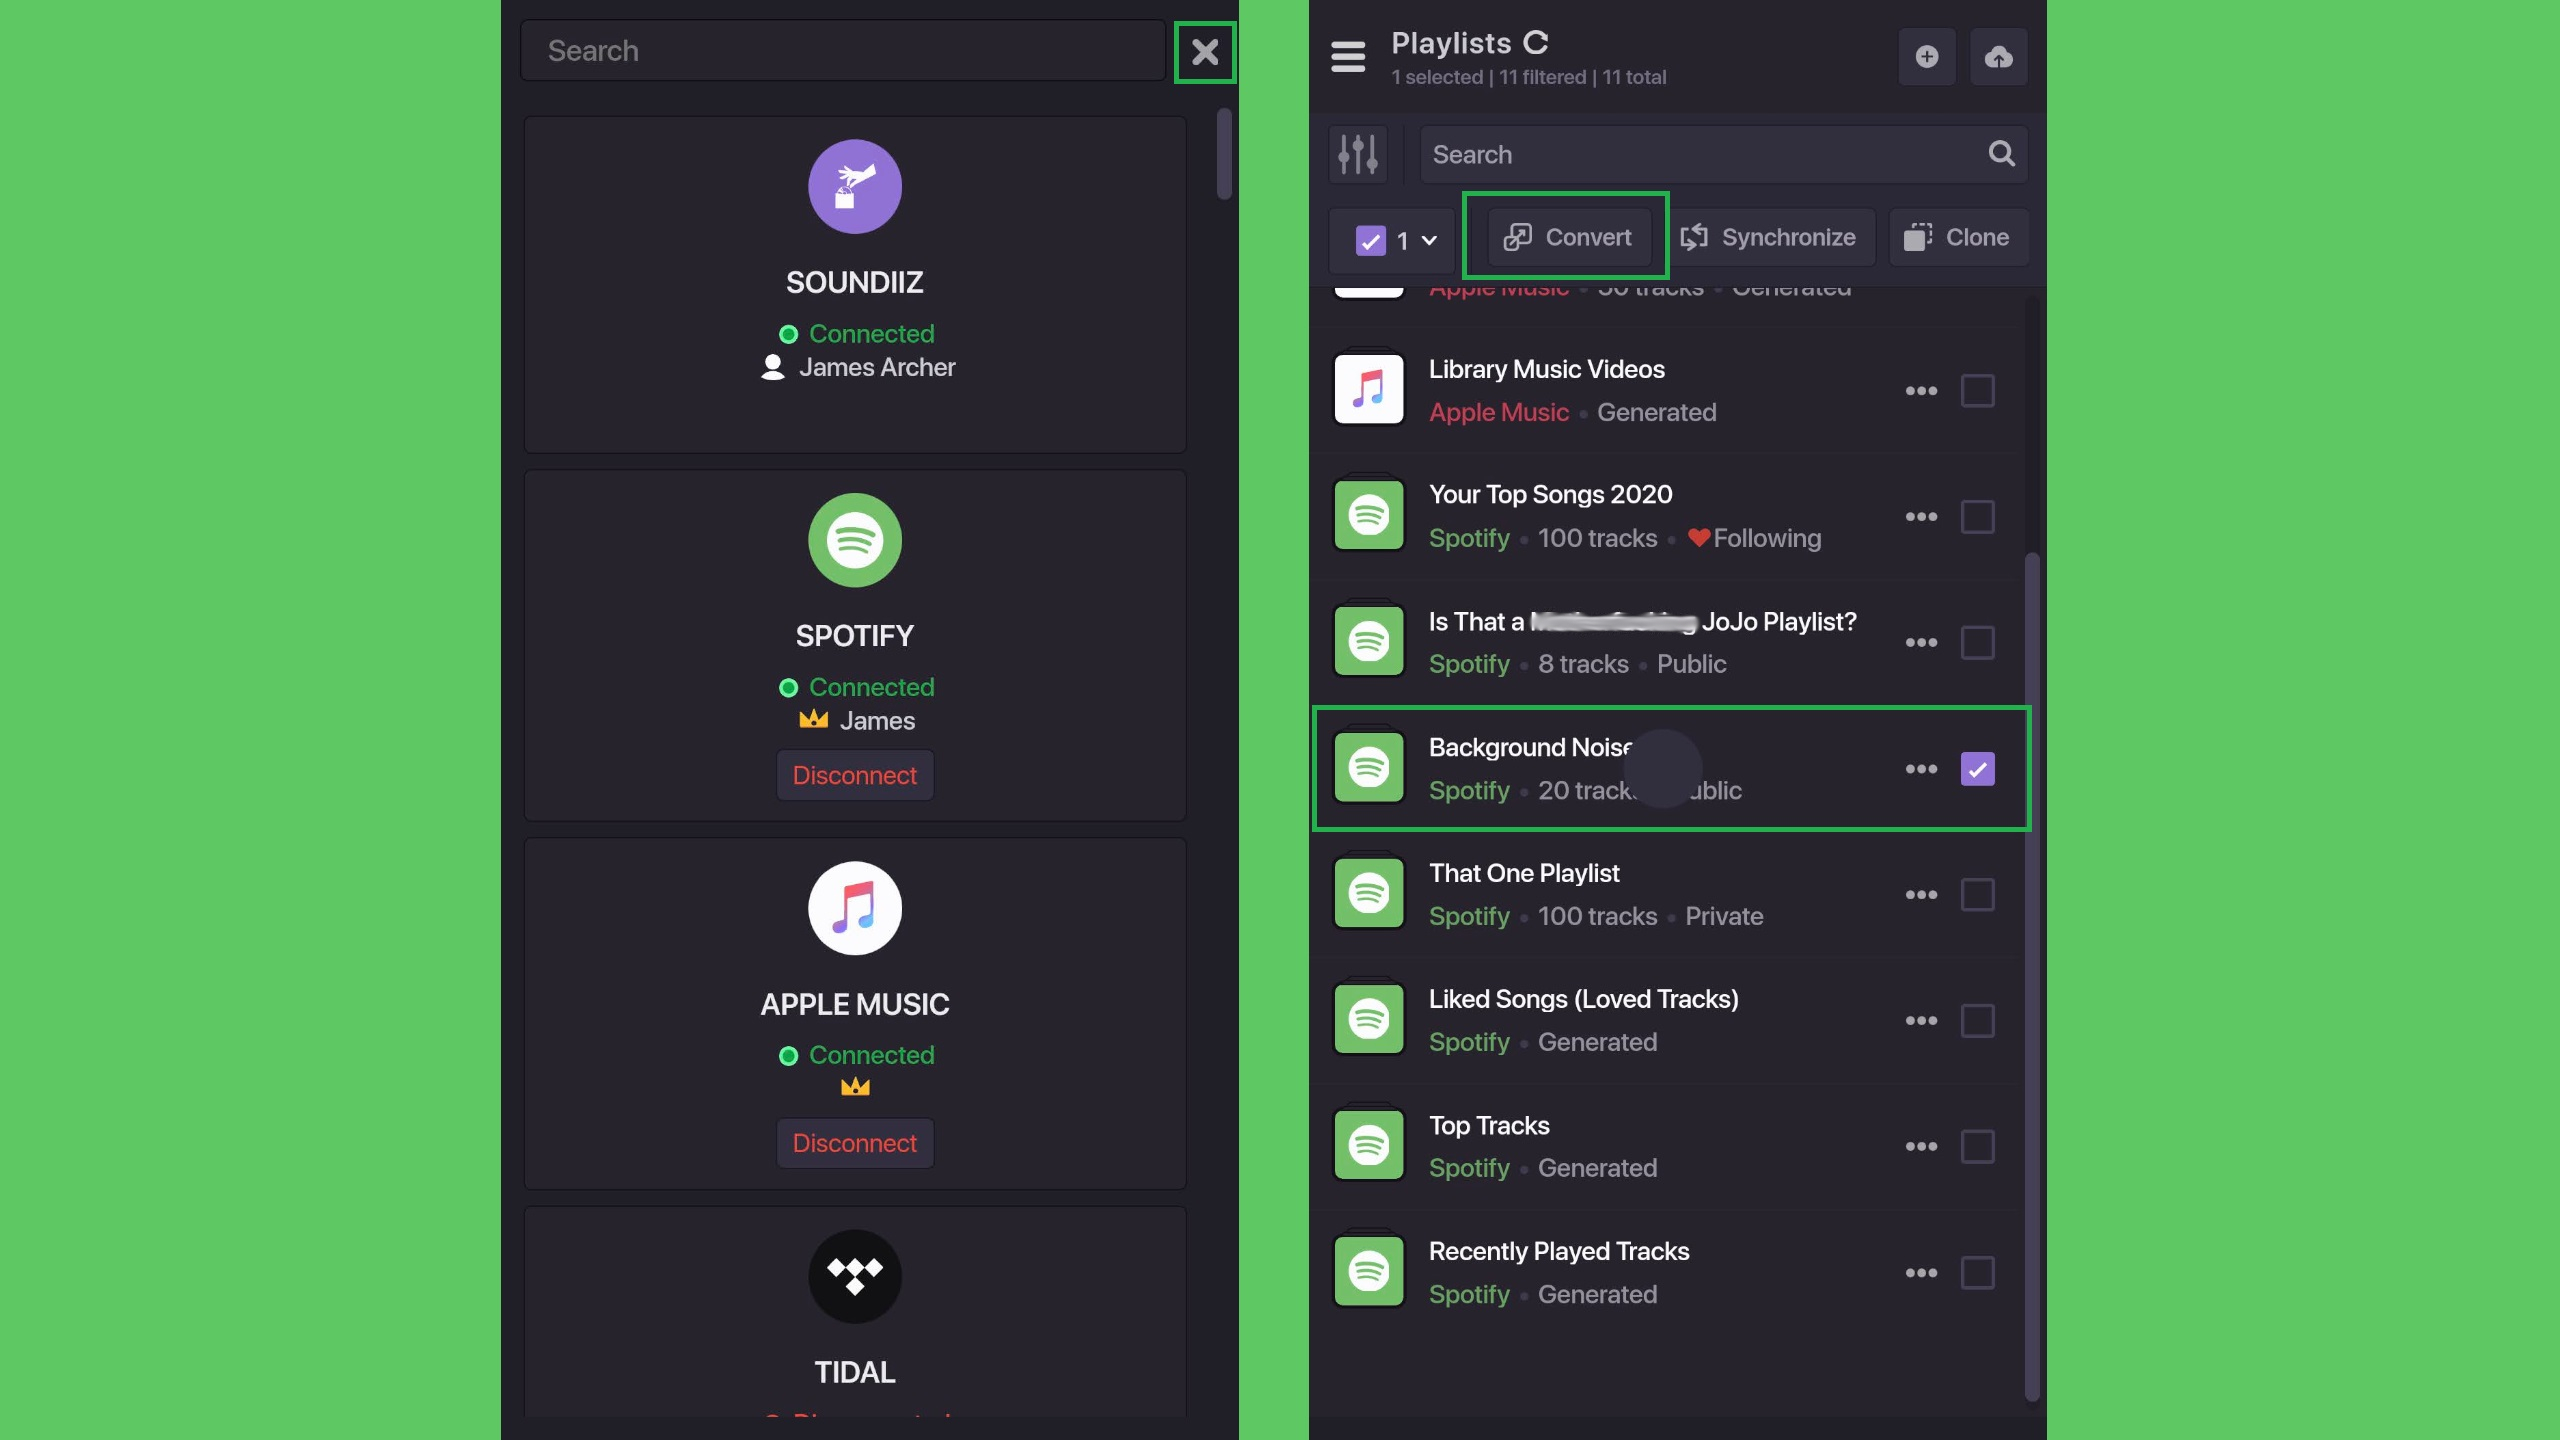
10. This part is slightly unintuitive, but you’ll need to manually return to the Soundiiz app and tap the ‘X’ in the top-right corner. This should return you to the apps list, with Apple Music now being connected.
11. Tap the ‘X’ again and you’ll see a list of all your playlists across both Spotify and Apple Music. Select the Spotify playlist you want to transfer, then tap ‘Convert.’
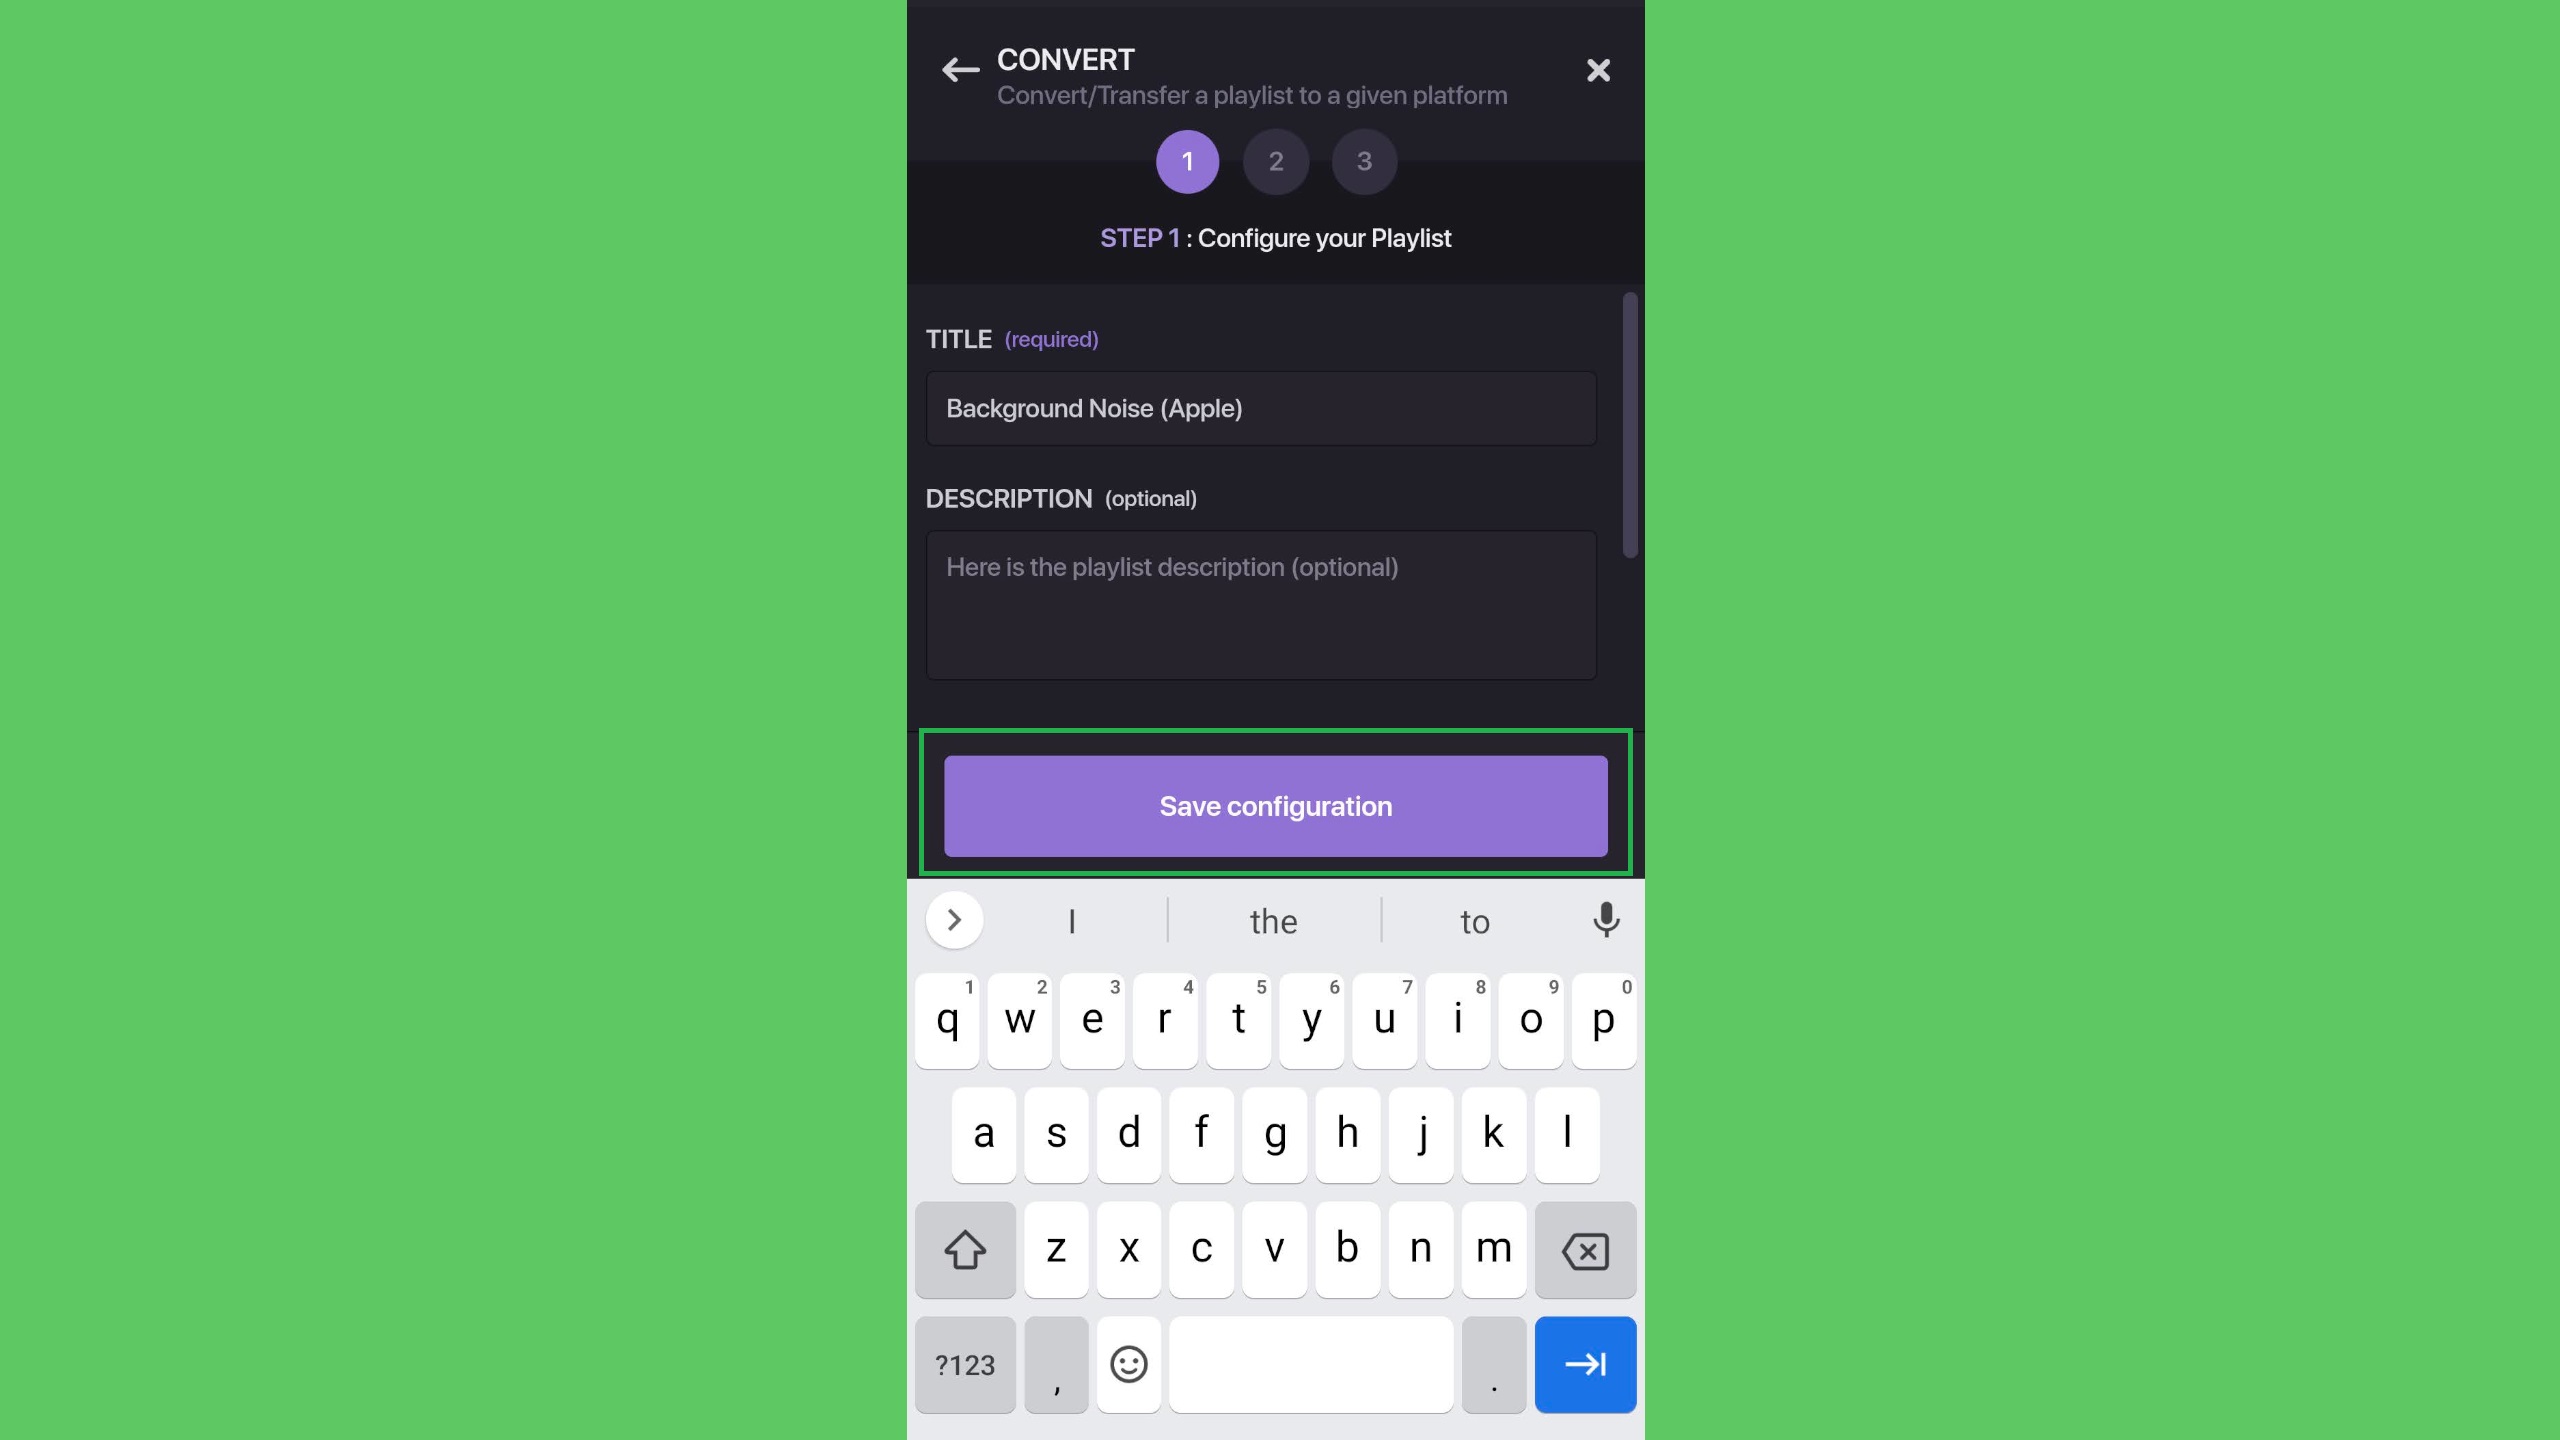
12. Optionally, enter a new name and description for the playlist as it will appear on Apple Music. Tap ‘Save configuration.’
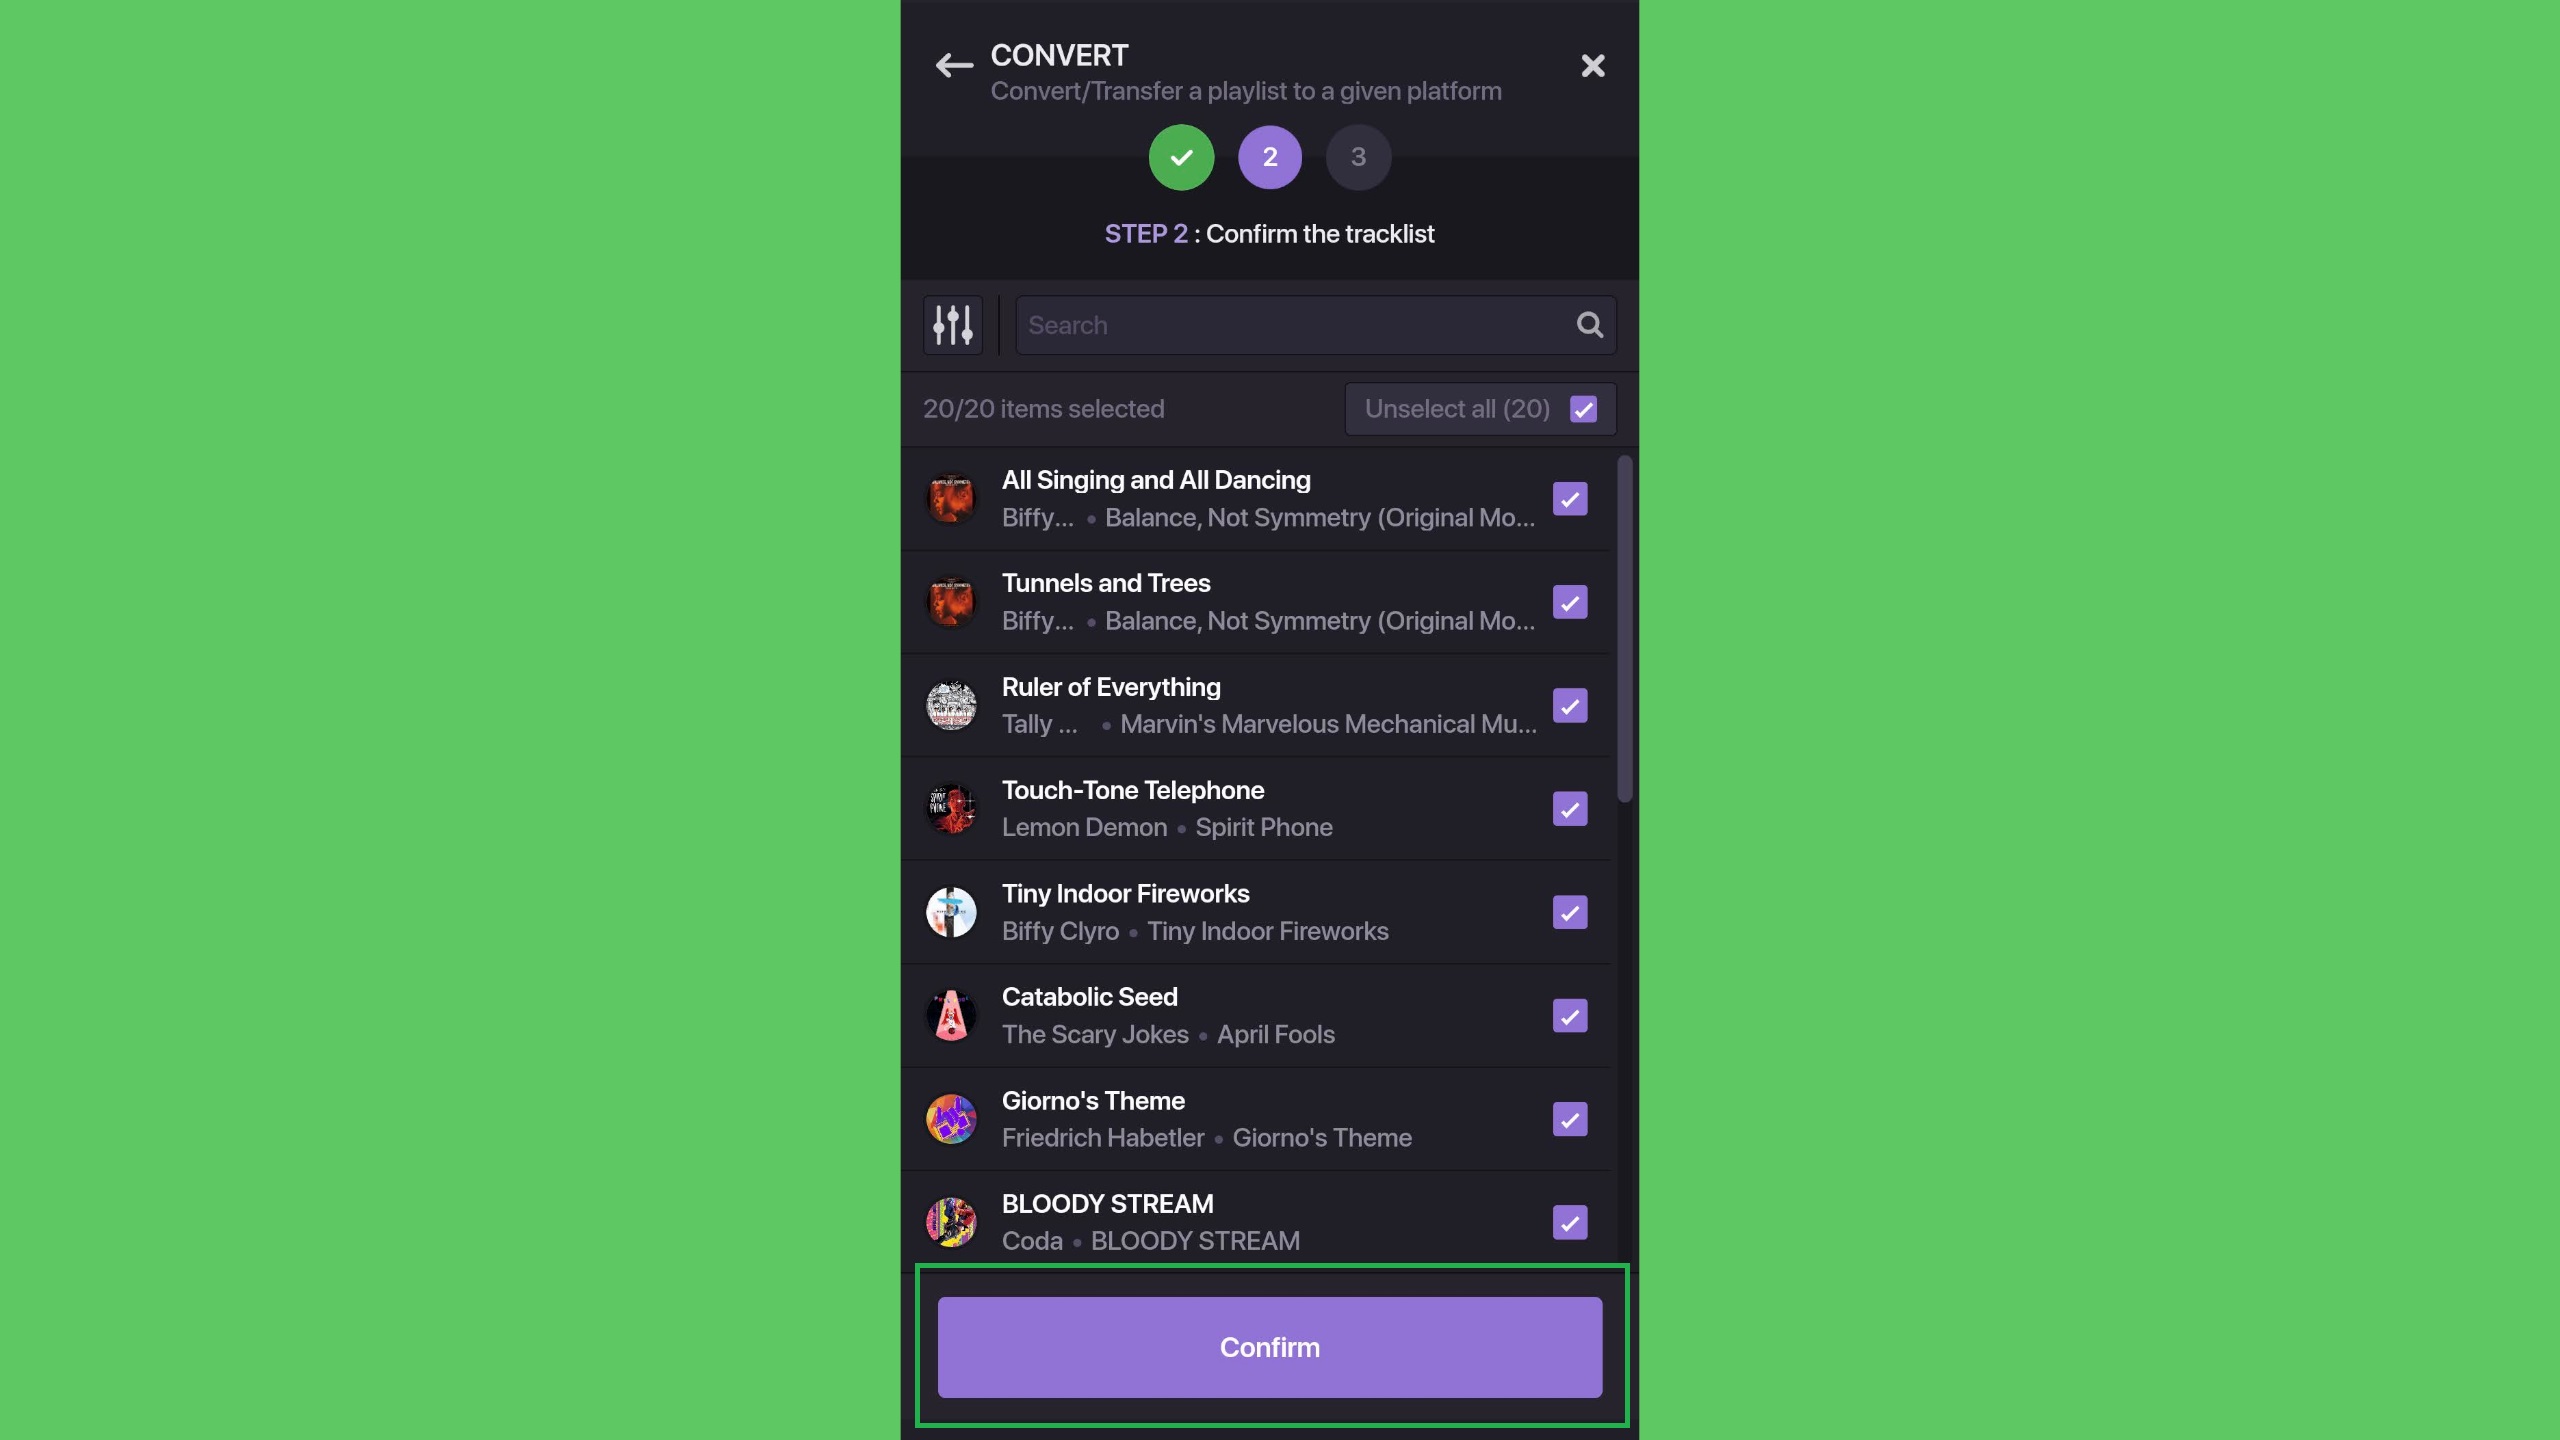
13. Review the list of songs that will be transferred; to remove a song from the playlist before it’s transferred over, tap the song to uncheck it. Otherwise. Tap ‘Confirm.’
14. Tap the Apple Music icon to select it as a destination. Wait for the conversion process to finish, then tap ‘Show.’

15. You’ll be shown the playlist you’ve transferred, which can now be found in Apple Music. Happy listening.
For all the latest Technology News Click Here
For the latest news and updates, follow us on Google News.