How to use a Nintendo Switch Pro controller on your PC
Knowing how to use a Nintendo Switch Pro controller on your PC gives you the best of both worlds. The Nintendo Switch Pro is an ergonomic delight to use. Far more comfortable than the Joy Cons which come with the Switch (though obviously less flexible), the $70 pad is one of the nicest I’ve played with, so it’s only natural you’d want to use it as much as possible.
Fortunately, Nintendo has made the Switch Pro controller work with PC, either wired using a USB-C cable or wirelessly over Bluetooth. It certainly beats using a mouse and keyboard for sports games or a few sessions of Rocket League.
It may not offer the advanced options you can get by using a DualSense controller with PC, but in terms of comfort and stamina, the Switch Pro pad and its superhuman battery remains extremely hard to beat.
Here’s how to use your Nintendo Switch Pro controller on your PC.
How to use a Nintendo Switch Pro controller on your PC (wired)
There’s really not much to this method, but…
1. Grab a USB-C cable and plug one end into the top of the Switch Pro controller, and the other into your PC.
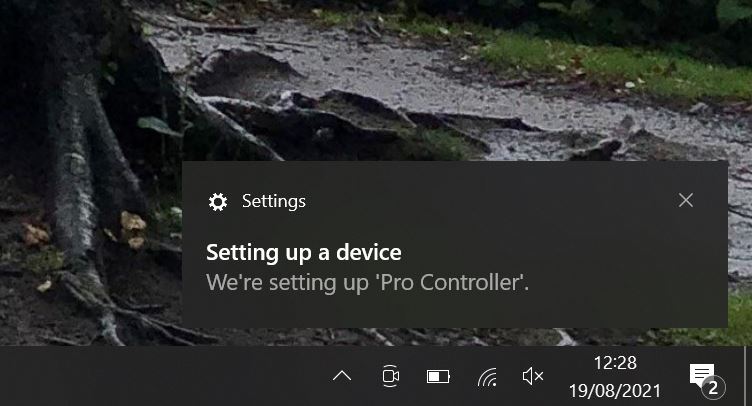
2. Windows should detect and identify the Nintendo Switch controller, and you’ll see a small notification in the task bar telling you when it’s done.
How to use a Nintendo Switch Pro controller on PC (wireless)
To use the Switch Pro controller on your PC wirelessly, you’ll either need to have Bluetooth built in, or have a Bluetooth dongle lying around. Assuming you do, here’s how you connect your Switch Pro controller to PC via Bluetooth.
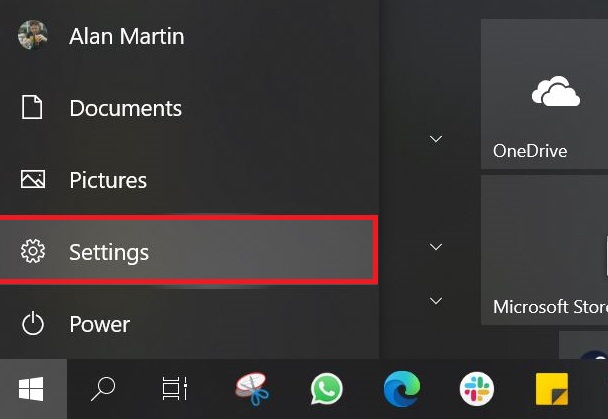
1. Press the Start button, and then press “Settings”.
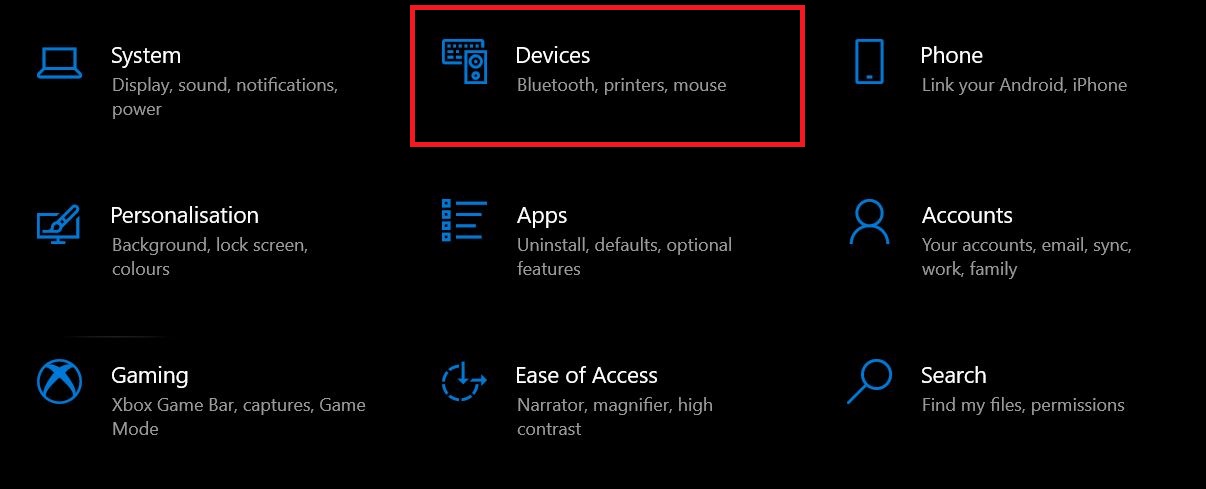
2. In the window that opens, select “Devices,” which is the second choice on the top row.
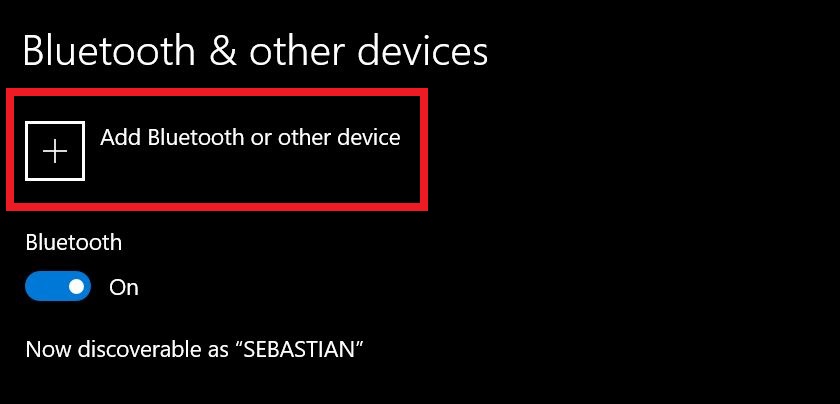
3. Make sure the Bluetooth toggle is switched on, and then press “Add Bluetooth or other device.”
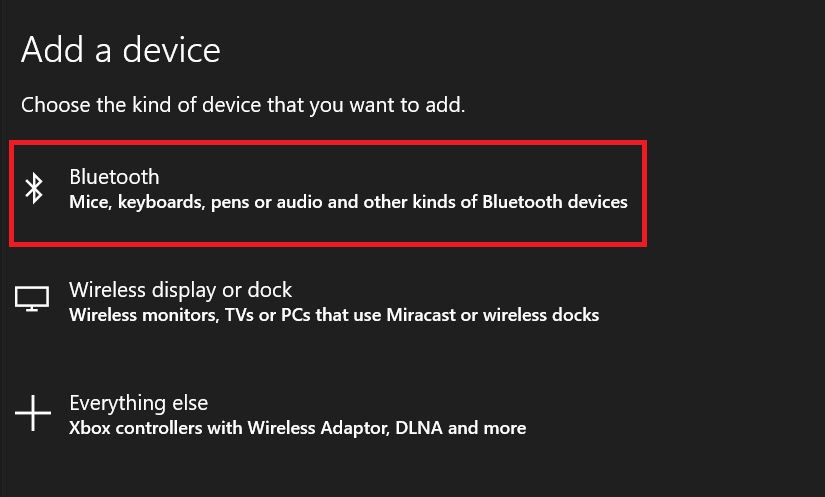
4. You now have to choose the kind of device you want to connect. Ignore the mention of Xbox controllers at the bottom, and press the top option: “Bluetooth.”
5. You now need to put your Switch Pro controller in pairing mode. Pick it up and find the small button on the left side of the charging port (number 2 in the diagram below – thanks Nintendo!).
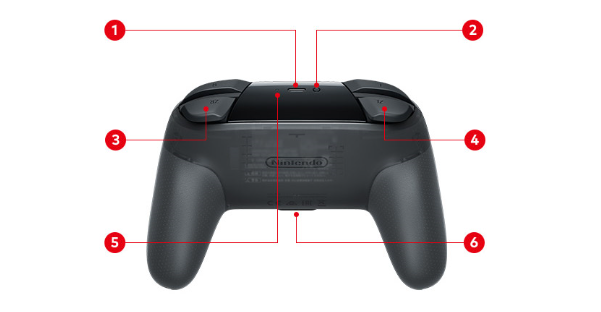
Press and hold the button until the set of lights on the underside of the pad (marked 6 in the image above) starts flashing back and forth.
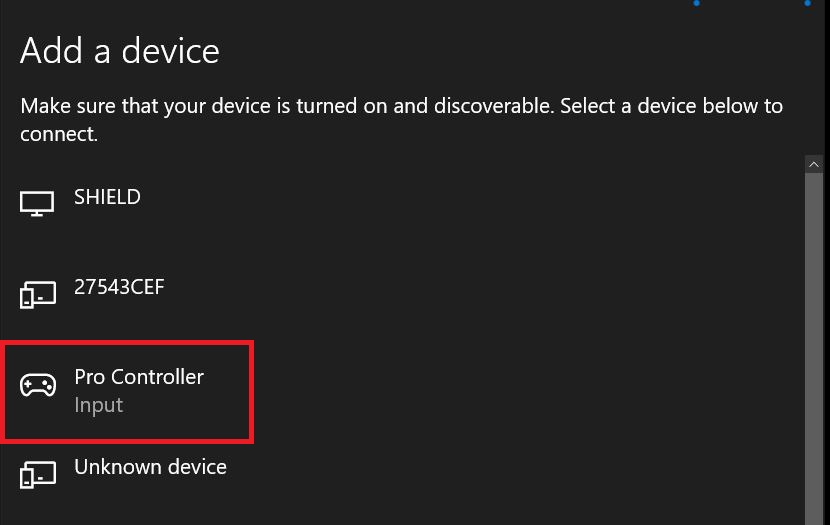
6. Back on your computer, a list will have begun to fill featuring Bluetooth devices that can be connected. The Switch Pro controller will appear here, and it’s thankfully easy to spot, named simply “Pro Controller.” Click this option.
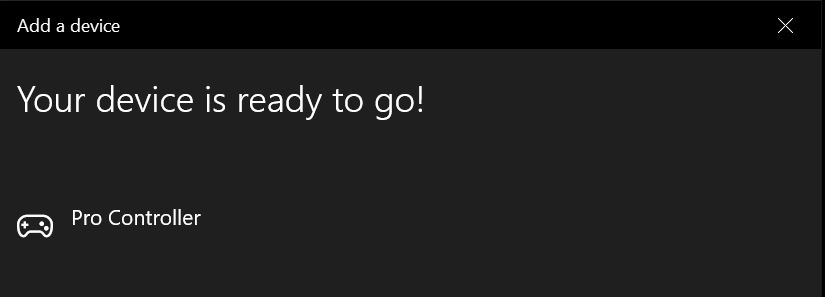
7. All being well, you’ll get confirmation with the words “Your device is ready to go!” Once you’ve seen this message, your gamepad is connected.
How to setup the Nintendo Switch Pro controller in Steam
Before you begin to play with your Nintendo Switch Pro controller on PC, you’ll want to do a little finetuning on Steam.
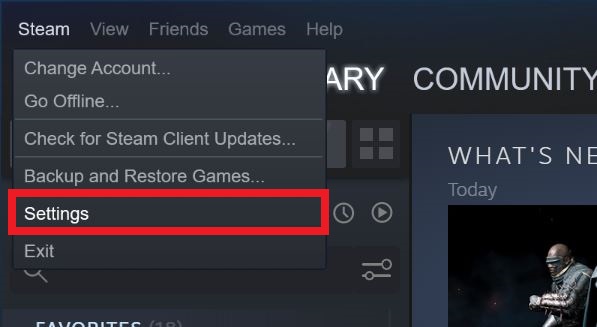
1. Sign into Steam, and press the Steam menu button in the top-left hand corner of the window. Select “Settings” in the drop-down menu.
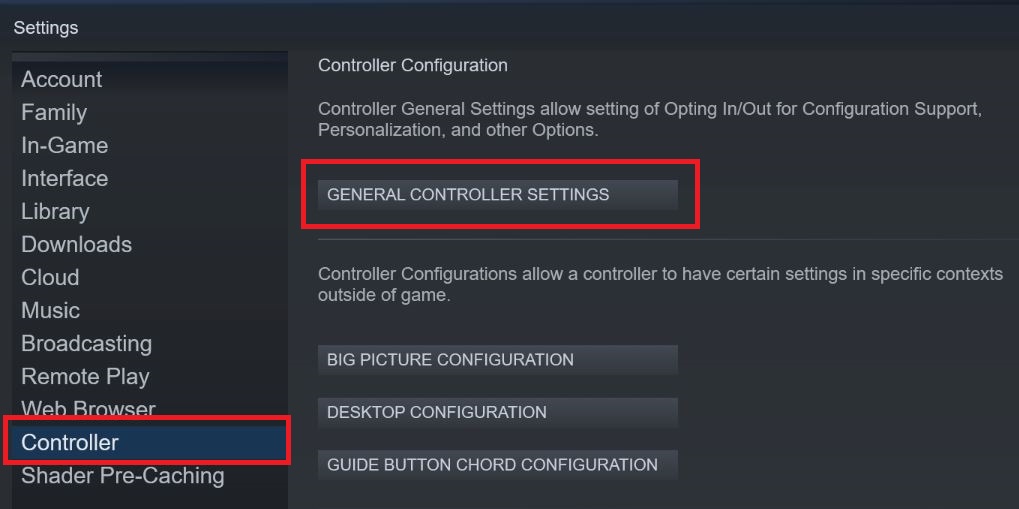
2. From the menu that appears, select “Controller”. This will open up a new panel on the right, where you need to choose “General Controller Settings.”
3. Select “Switch Pro Configuration Support” so that Steam knows what kind of gamepad it’s working with.
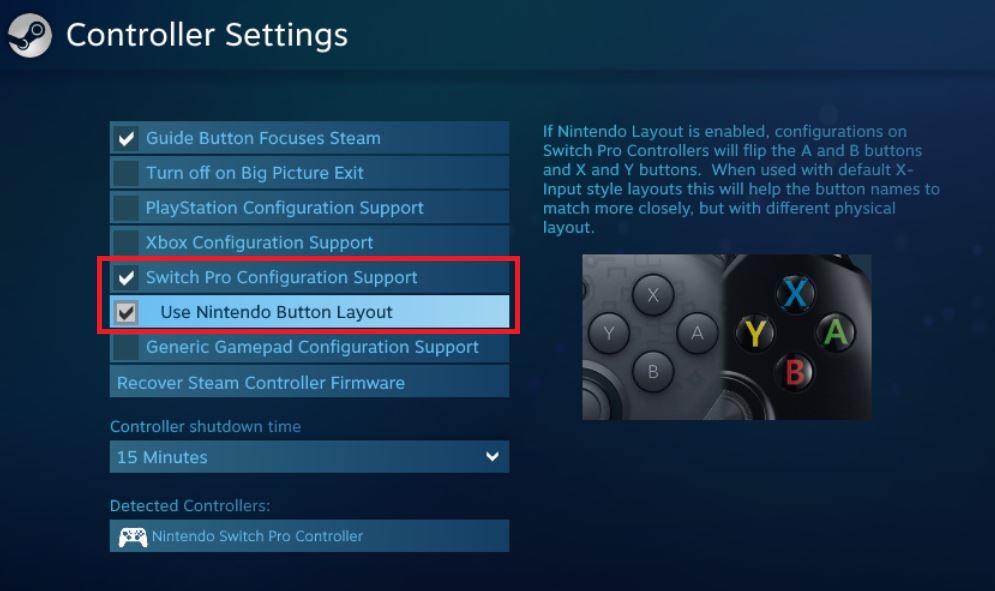
When you do this, you’ll see an extra option that lets you use the “Nintendo Button Layout.” This is because Nintendo’s positioning for A, B, X and Y differs from Microsoft’s on the Xbox controller, You can either make the Switch Pro Controller mirror this, or have it the way Nintendo intended.
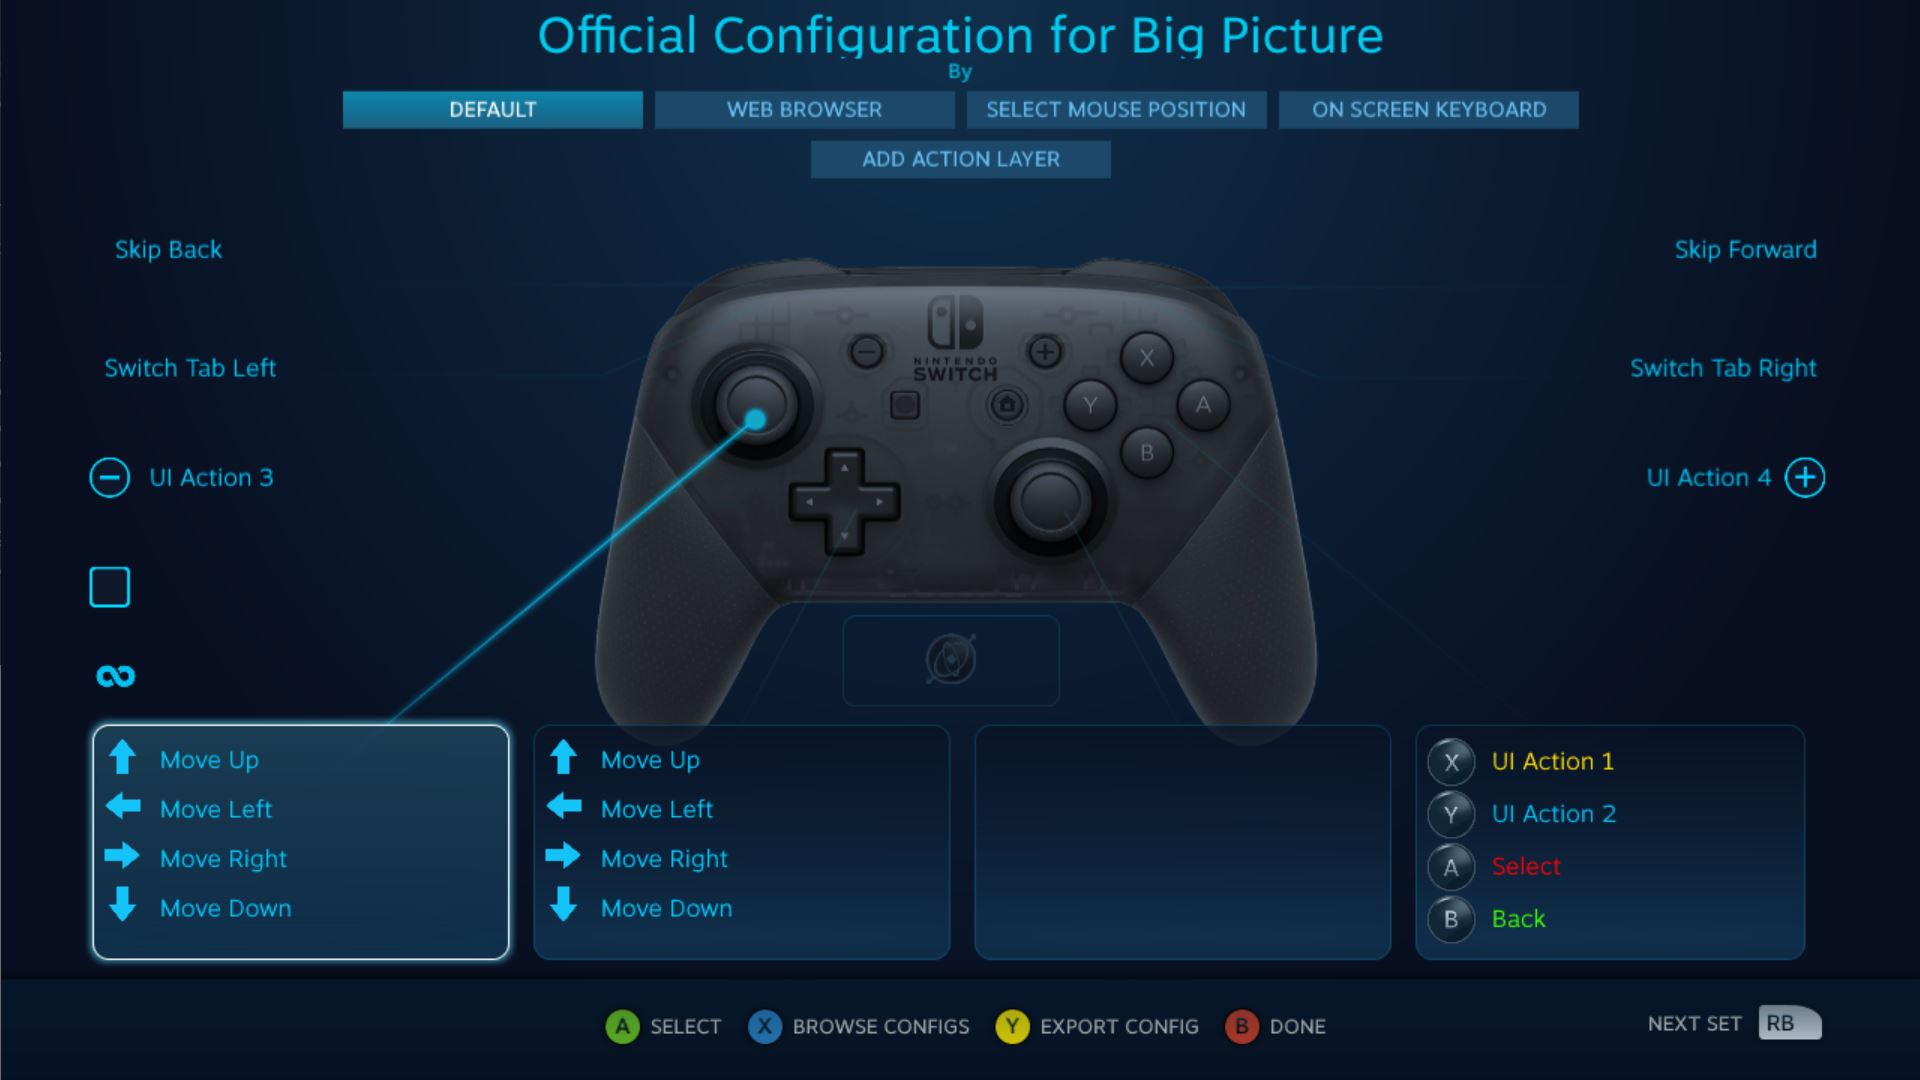
4. You’re now free to customize the Nintendo Switch Pro controller as much as you like. Go back to the previous menu and select “Big Picture Configuration” and you can tweak everything to your liking.
How to use the Nintendo Switch Pro controller with non-Steam games.
But what about your non-Steam games? Well, you can mess around with programs like X360ce if you like, but an easier solution is to just bring your non-Steam games into Steam. Here’s how.
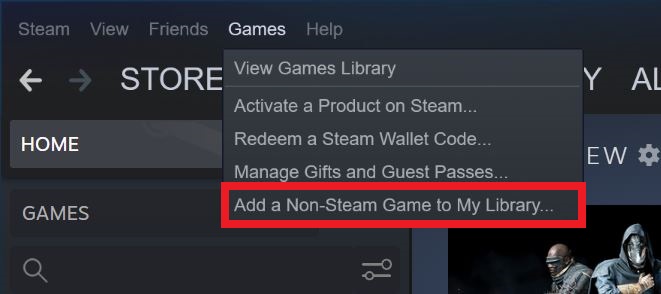
1. Sign into Steam again, and select the option labelled “Games” along the top bar. From the drop-down menu that appears, choose “Add a Non-Steam Game to My Library.”
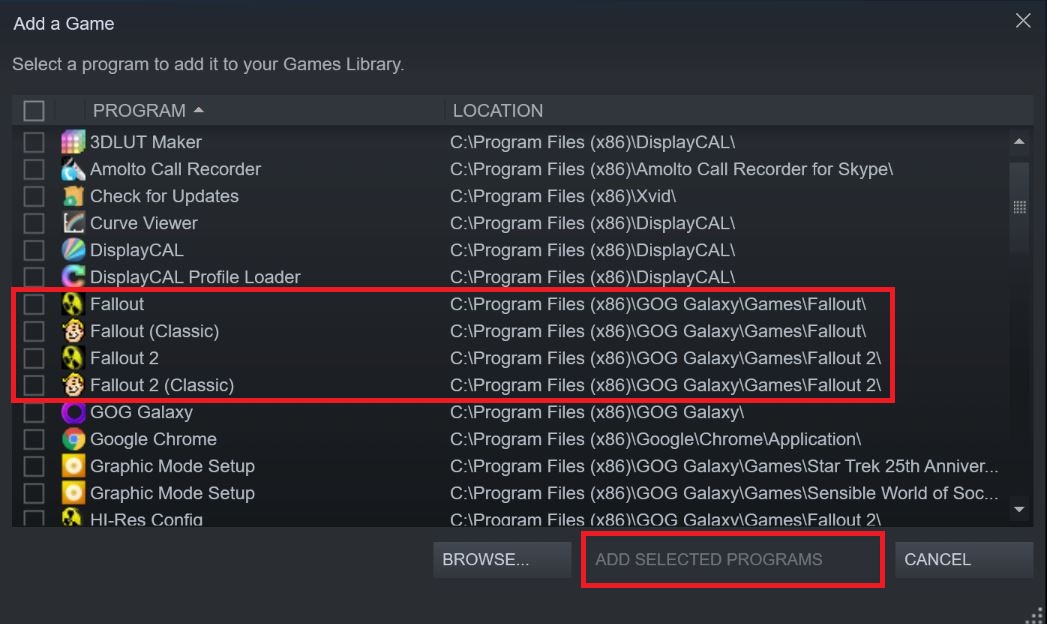
2. A new window will appear that will list a whole bunch of applications from your computer. Just find the games you want to add, select them, and then press “Add Selected Programs.”
For all the latest Technology News Click Here
For the latest news and updates, follow us on Google News.
