How to use Photos and Pages to size and crop pictures for printing
The high-water mark of home photo printing may have long passed, but if you own an inkjet printer, it’s likely the printer driver and feed mechanism includes photo-paper options, including printing onto 4 by 6 and other standard photo formats. But how can you take a picture, crop it, and print it the way you want without using a photo-editing app?
You might think Preview is the answer, as it lets you crop and resize images—but it’s a fussy hard lift in Preview to take images that aren’t exactly the right proportions of the final paper size and adjust them into shape. Or to get a photo to print smaller on a larger paper size you plan to cut down for a particular purpose like to be part of a collage or fit into a desk photo carousel.
You can get a better result often with Photos or Pages, depending on your precise needs.
Photos best for exact fits
The Photos app works well for one or more images of the same dimensions that you’re printing to fill a photo print size or larger page, or when you plan to trim two edges. Here’s how:
- Select an image in Photos.
- Choose File > Print.
- In the upper-right corner, choose your printer from the top pop-up menu and then choose your paper size from the second. Most inkjet printers can print to the very edge, known as “borderless” printing.
- If you have an option for paper type, choose the one closest to what you’re using, as this clues in the printer about the quantity of ink to use, among other settings. For instance, pick Photo on High Gloss Paper for glossy print stock.
- Below the menus, you can click to select a crop. Click Fit, and you often have a white edge at the top and bottom or right and left. Click Fill, and you can drag a slider at the type to size the image and click to drag the image within the printing area.
- When satisfied, click Print.
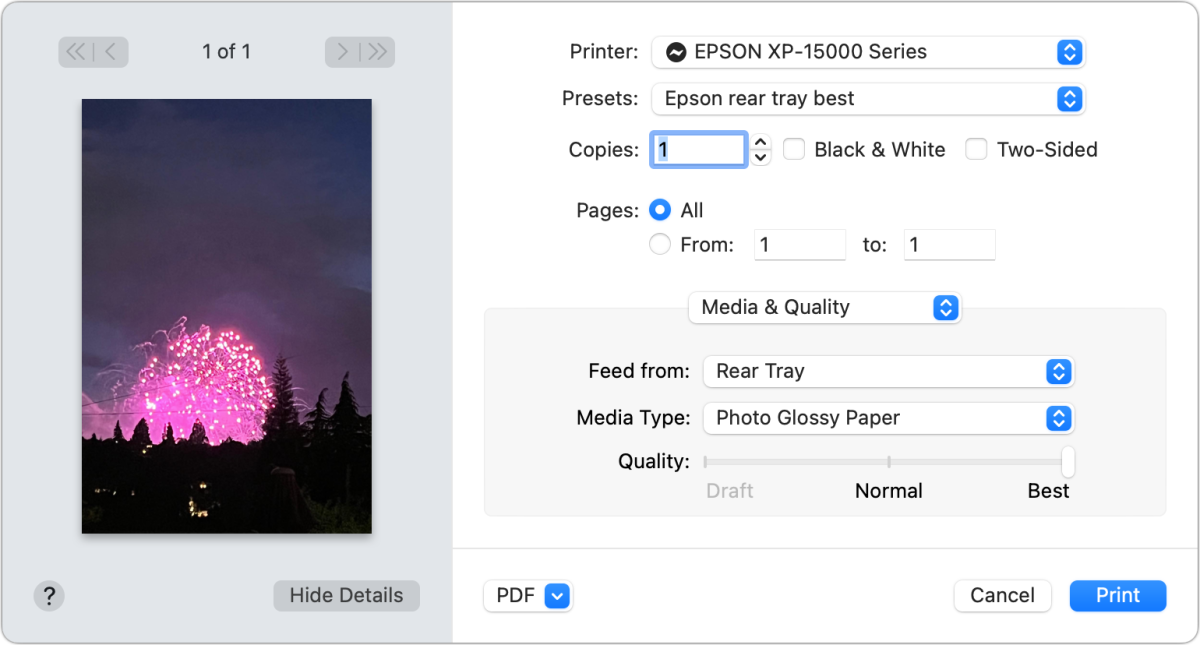
- In the Print dialog, make sure your paper, feed, and quality settings are correct before clicking Print.

Pages offers more control and better precision
If you need more flexibility, try Pages. It might sound unintuitive, but Pages lets you control four aspects of photo/page elements at once:
- Paper size
- Page-to-paper reduction or enlargement
- Photo sizing
- Photo cropping

Here’s the workflow that will make it easy for you to manage this process:
- In Pages, create a new blank document: choose File > New, select a blank document template, and click Create.
- Switch to page layout by choosing File > Convert to Page Layout and confirm.
- Set the page size to your output format by clicking the Document icon in the upper-right corner, choosing your printer beneath the Printer & Paper Size menu, and then choosing your paper, such as 4 x 6 Borderless.
- Click the Format icon in the upper-right corner of the window.
- Drag your photo onto the page.
- With the image selected, you can click the Arrange tab in the Format pane.
- In the Size area, look at the dimensions of the image and make sure “Constrain proportions” is checked in the Size section. Most iPhone and other camera images won’t be in the proportion of what you want to print, so you need to resize. For a portrait-oriented image that you want to print onto 4-by-6 inch paper, for example, type in 6 inches into the Height field and press Return.
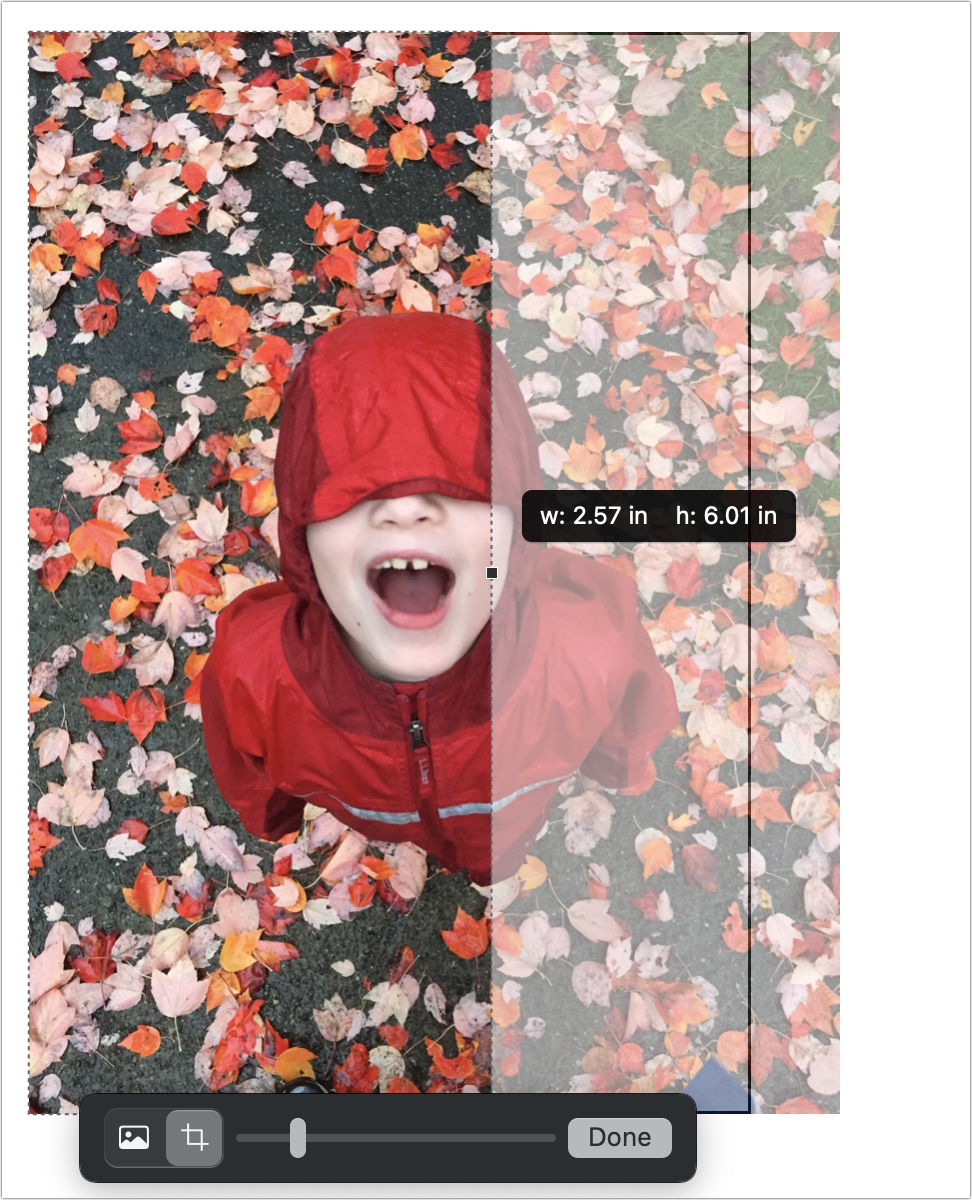
- In most cases, the photo will now be 6 inches tall but over 4 inches wide. You can move next into cropping for width. (If it’s narrower than 4 inches wide, type in 4 inches into the Width field and press return, then crop for height.) Double-click the image, and size and crop tools appear below the image that use the current image’s size as the frame.
- To crop, make sure the Crop icon is selected in image toolbar below the photo, then drag the handles with black squares to change the crop. As you drag, Pages shows you the dimensions. You can also click and drag the image to move it from left to right with a width crop, or move it up and down with a height crop.
- Click Done.
You can now print this image via File > Print. As above, check that the output options match how you want paper to flow through the printer and at what quality.
The steps above work if you’re sizing and cropping an image to fit exactly on a sheet of photo or other paper, or you’re sizing it smaller than the page dimensions to trim it after printing. For larger paper that you want to fit several images on, you can size and crop each of them before printing.
If you want more guidance while sizing, you can eyeball it by creating a rectangle of the final cropping size and use that to help guide sizing and cropping:
- Click the Shapes icon in the toolbar and click the Rectangle shape.
- In the Format pane’s Style tab, set the Fill to No Fill and the Border to Line. Set the border’s width to 0.25 pt, a “hairline” width.
- In the Format pane’s Arrange tab with the rectangle selected, set its dimensions.
- Click the Lock button so the rectangle doesn’t move when you drag the image in using the steps in the previous list to resize and crop.
- Unless you want a hairline border, when you’re done with the rectangle, select it, click Unlock, and press the Delete key. (If you can’t select it, select the image and then choose Arrange > Send Backward or Arrange > Send to Back. That puts the image on a virtual layer beneath the rectangle.)
Ask Mac 911
We’ve compiled a list of the questions we get asked most frequently, along with answers and links to columns: read our super FAQ to see if your question is covered. If not, we’re always looking for new problems to solve! Email yours to [email protected], including screen captures as appropriate and whether you want your full name used. Not every question will be answered, we don’t reply to email, and we cannot provide direct troubleshooting advice.
For all the latest Technology News Click Here
For the latest news and updates, follow us on Google News.
