How to use the Apple Weather app on your iPhone
The iOS Weather app offers a handy way to check on conditions across multiple locations.
The Weather app built into your iPhone may not offer all the bells and whistles of dedicated third-party weather apps, but it’s no slouch. Through the Weather app, you can check the current weather, see the hourly forecast and view the 10-day forecast.
The app also displays other types of data such as the air quality, UV index, wind, precipitation, humidity and air pressure. You can add other locations beyond your current one to keep track of their weather patterns. A notifications feature will alert you to specific types of weather, including rain and snow.
Apple’s Weather app has benefited from some recent enhancements. After purchasing the much-lauded Dark Sky weather app in 2020, Apple shut it down at the start of 2023. However, many of the features from Dark Sky have since been ported to the traditional Weather app.
What you’ll need to use the Apple Weather app
The Weather app is built into iOS, so you don’t need to download it. Should it go missing, you can download and install it from the App Store.
SEE: BYOD Approval Form (TechRepublic Premium)
How to use the Apple Weather app
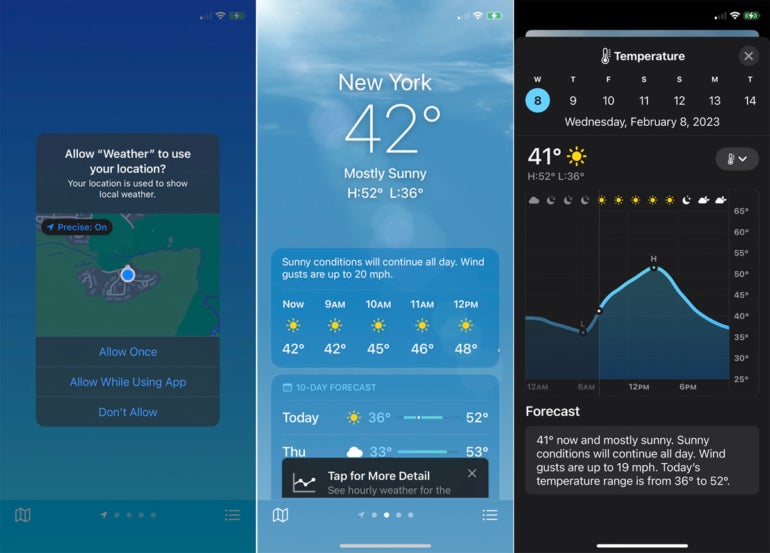
Open the app for the first time and it will ask to use your location. To automatically get the weather no matter where you are, allow location sharing while using the app. The screen then shows the present temperature for your current city or location.
Tap the notification at the bottom that says Tap For More Detail. The next screen displays the projected temperature for the next 10 days (Figure A).
Figure A
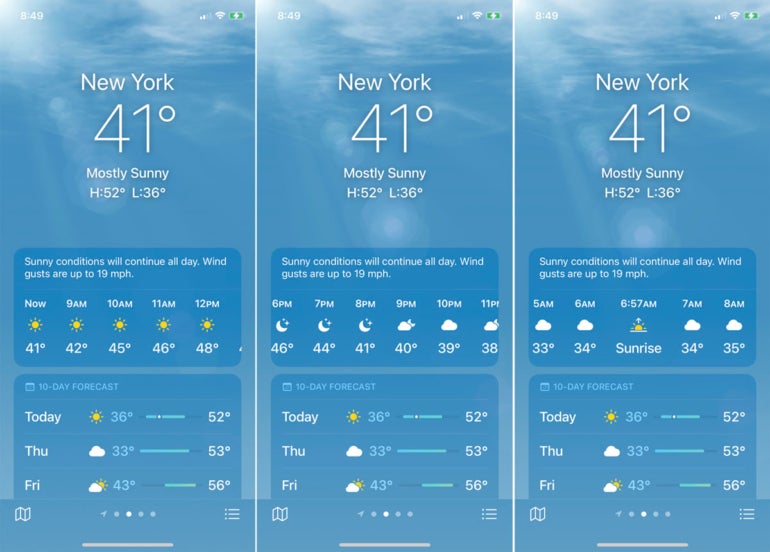
Return to the main screen. The top pane displays the expected temperatures and weather conditions for the next 24 hours. Swipe left on this pane to see the forecast for each hour (Figure B).
Figure B
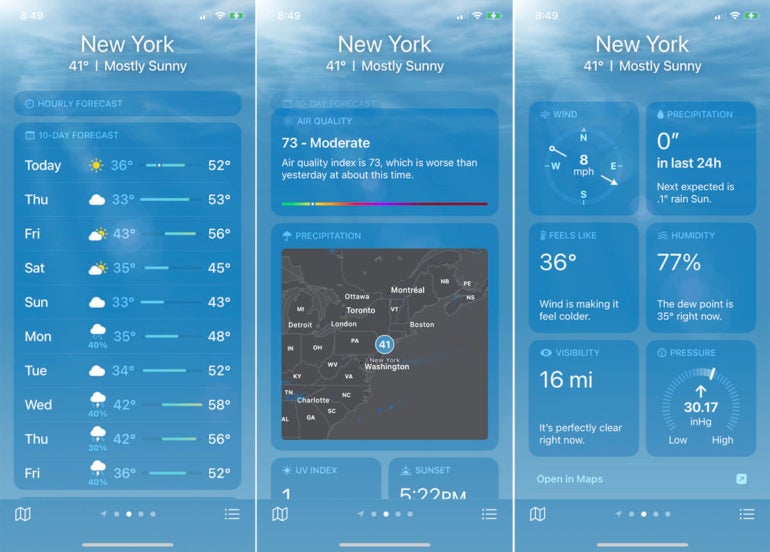
The next pane displays the 10-day forecast. Keep swiping down to see data on the air quality, precipitation, UV Index, times for sunset and sunrise, wind, humidity, visibility and air pressure (Figure C).
Figure C
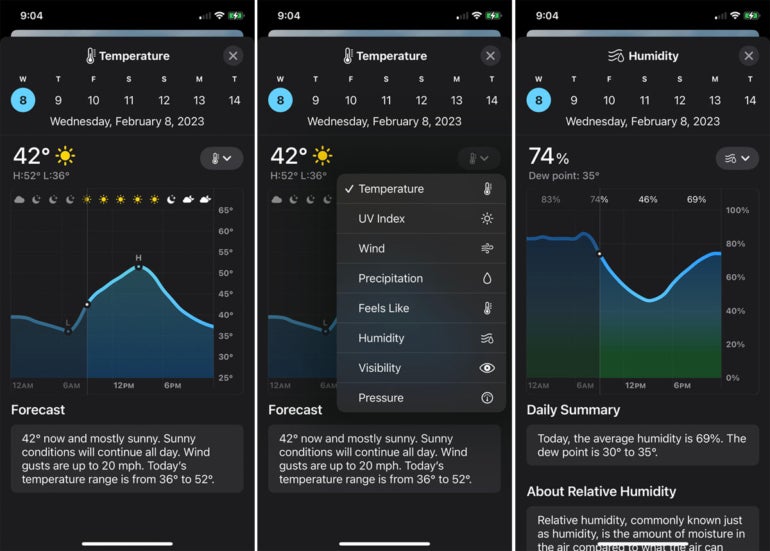
Swipe back up to the top of the screen. Tap on each pane to drill down to the details screen to show you the 10-day forecast. From the details screen for most of the panes, tap the down arrow to switch to a different factor, such as wind, precipitation or humidity (Figure D).
Figure D
To view a weather map, tap the icon in the lower left corner. The map displays the temperature in your location with changing visuals of the 12-hour forecast. Tap the third icon at the upper right to switch the display among precipitation, temperature and air quality. When finished, tap Done (Figure E).
Figure E

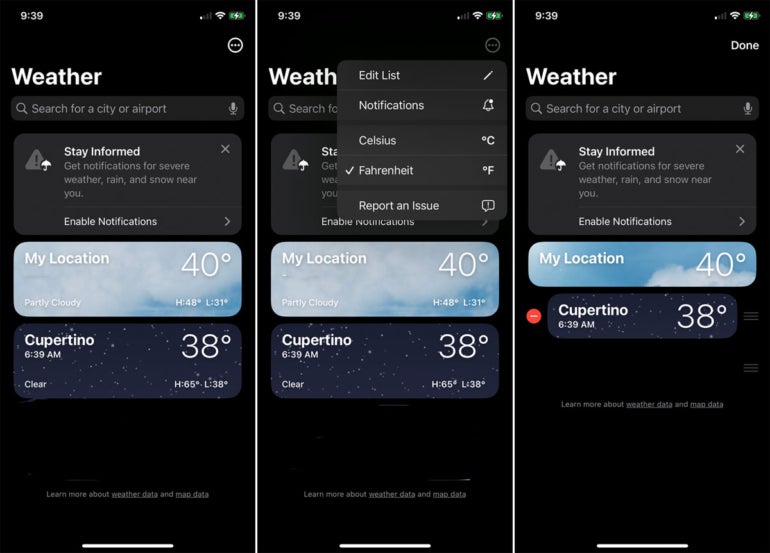
Next, you can add more cities and locations to the app to track their weather conditions. Tap the icon in the lower right corner. At the next screen, tap the three-dot icon at the top and select Edit List. Remove any existing city that you don’t wish to track (Figure F).
Figure F
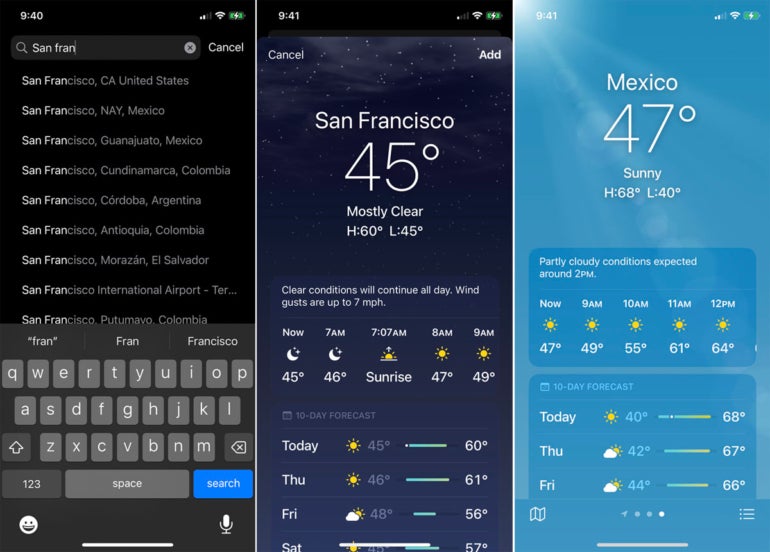
To add a new city or airport, start typing its name in the search field at the top and then choose it from the list. Tap Add. Repeat that step for any additional cities you want to view. You’re then able to view each city by swiping left and right (Figure G).
Figure G
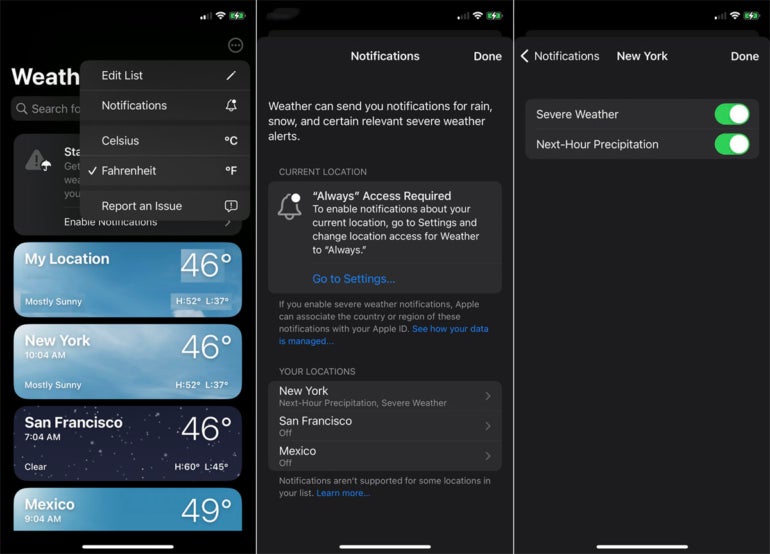
Finally, you can set up notifications to be alerted to certain types of weather conditions. Tap the icon in the lower right corner, tap the three-dot icon and then select Notifications. Tap Continue and then Allow to allow Notifications.
Select a city for which you want to set up notifications and then turn on the switches for Severe Weather and/or Next-Hour Precipitations depending on what you want to include. Tap Done, and the notifications will appear on your phone in the event of those conditions (Figure H).
Figure H
If you’re in the mood for more Apple-related matters, check out these articles: How to resolve errors when trying to enable Advanced Data Protection and a look at the MacBook Pro featuring M2 Pro and M2 Max chips.
For all the latest Technology News Click Here
For the latest news and updates, follow us on Google News.
