

If you deploy virtual machines with VirtualBox, you’ll want to take advantage of the shared folder feature. Find out how this is done in VirtualBox 7.
I use VirtualBox every day for the deployment of virtual machines. One feature I regularly use is Shared Folders, which makes it easy to share files and folders between guest and host. By doing this, I can create specific files and folders on my host and then share them with any virtual machine I create. I can do this without having to copy/paste, drag and drop, or send via email.
SEE: 40+ open source and Linux terms you need to know (TechRepublic Premium)
Sharing a folder between guest and host is far more efficient than any other method of getting files to your virtual machines. Today, I’m going to walk you through the new process of creating a Shared Folder in VirtualBox 7, the major version of VirtualBox that was released in 2022.
Jump to:
What you’ll need to use the Shared Folders feature in VirtualBox 7
To use this feature, you’ll need a running instance of VirtualBox and a virtual machine to share a folder with. I’ll be demonstrating this with a Pop!_OS host and a Linux Mint guest, but the process is similar regardless of what host-guest combination you use.
How to install Guest Additions
The first thing you must do is install Guest Additions — otherwise, Shared Folders will not work. The installation of Guest Additions will vary depending on the guest you’ve installed. With Linux Mint, the installation is as simple as this:
- Start the guest.
- With the guest running, click Device | Insert Guest Additions CD Image.
- When prompted, click Run.
- Type your sudo passwords.
- Allow the installation to complete.
- Reboot the guest virtual machine.
Some Linux guests won’t automatically detect runnable software in the mounted Guest Additions CD. For those, you’ll have to follow these steps:
- Start the guest.
- With the guest running, click Device | Insert Guest Additions CD Image.
- Double-click the VBox_Gas icon on your desktop or open your file manager and navigate to the directory housing the mounted CD.
- Right-click a blank spot in the file manager and select Open In Terminal.
- When the terminal opens, issue the command sudo ./VBoxLinuxAdditions.run.
- Type your sudo password.
- Allow the installation to complete.
- Reboot the guest virtual machine.
You should now have Guest Additions installed and working for your guest virtual machine.
How to create a shared folder
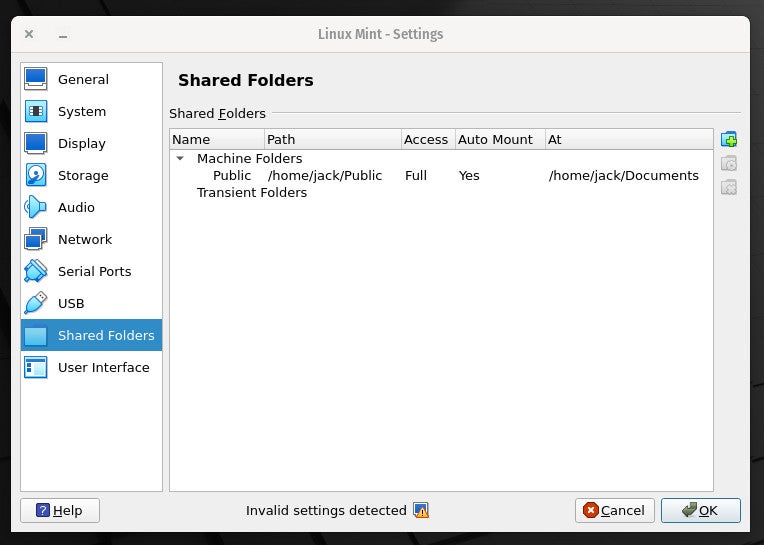
With your guest running, click Devices | Shared Folders | Shared Folder Settings. In the resulting window (Figure A), click + near the top right corner.
Figure A
In the next pop-up (Figure B), you’ll configure your shared folder.
Figure B
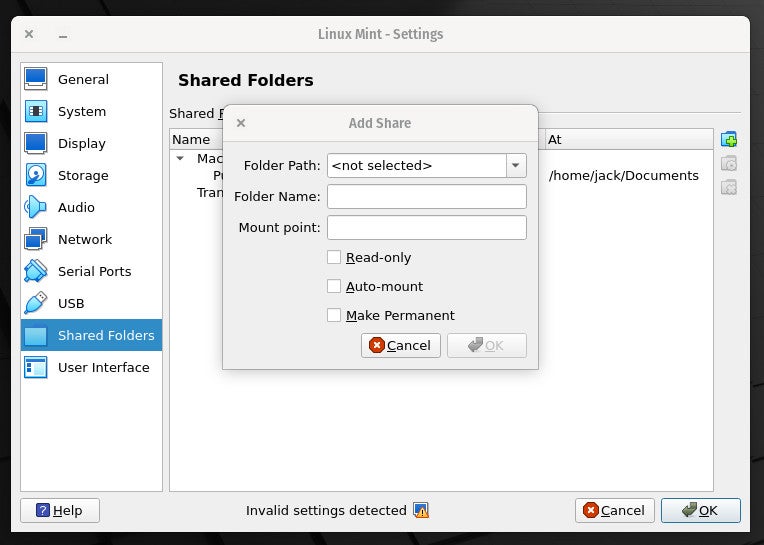
Here are the configuration options:
- Folder Path: The folder you want to share on the host.
- Folder Name: A name you’ll give the share.
- Mount Point: Where you want the shared folder to appear on the guest file system.
- Read-Only: If you want the shared folder to be mounted as read-only.
- Auto-Mount: If you want the shared folder to mount immediately.
- Make Permanent: If you want the shared folder to be automatically mounted, even after a reboot.
After configuring the share, click OK.
How to access Shared Folders
To access Shared Folders, open the file manager on your guest and navigate to the directory you chose as the Mount Point for the Shared Folder. Double-click that directory and, when prompted, type your user’s sudo password. The file manager should open to the Shared Folder, displaying the contents found on the host.
Simplify your virtual machine workflow
If you use VirtualBox to deploy virtual machines, you should take advantage of this feature. This is especially true if you use these VMs for production or development purposes and need to share folders between guest and host.
Subscribe to TechRepublic’s How To Make Tech Work on YouTube for all the latest tech advice for business pros from Jack Wallen.
For all the latest Technology News Click Here
For the latest news and updates, follow us on Google News.