Kanbanier is a great entry-level kanban app for managing projects and tasks on macOS | ZDNet
I’m a big fan of kanban boards. If you’ve never used or been introduced to kanban boards, they are a way to easily visualize all the tasks related to a project and allow you to drag and drop tasks along a timeline so you can see exactly how close that task is to being completed.
Here’s a great example of how you can use kanban boards. With my fiction writing, I break everything down into the following lanes:
- Idea
- First Draft
- Beta
- Edits
- Proof
- Published
Each lane gets its own column. When I come up with a new idea for a book, I’ll add a card to the Idea lane. When I start writing that book, I drag the card for that book from Idea to First Draft. When the first draft is complete and I’ve sent it off to beta readers, I drag the card to the next lane. This action continues until the card is in the Published lane and I know it’s complete.
This system comes in very handy when I have numerous books in the works, as it gives me an at-a-glance as to where each book is in the process.
You can use a similar system for any type of project and having the right software to make it easy is key. On macOS, there’s the free Kanbanier application which is a very basic kanban board anyone can use. Kanbanier can be used on both macOS and iOS and fits in seamlessly to the look and feel of both environments. This application is completely localized, so you don’t have to worry that your data is being shared with a server or a service. You can also share your boards via email messages, AirDrop, or Notes. And, if the free version doesn’t offer you enough in the feature department, you can upgrade ($14.00 one time fee) and add the likes of:
- Multiple horizontal swimlanes (rows).
- Hierarchical lanes.
- Lane and background colors.
- List card view.
- Card archiving.
- Analytics.
- Print support.
- Zooming.
- Text format.
- More tag types.
- Export to several formats.
- Dark theme.
If this is your first time with a kanban board, I suggest going with the free version and then, should you need, upgrading using the in-app purchase.
Installing Kanbanier
Installing Kanbanier is quite simple. Open the App Store and search for kanbanier. When the app listing appears (Figure 1), click GET.
Figure 1
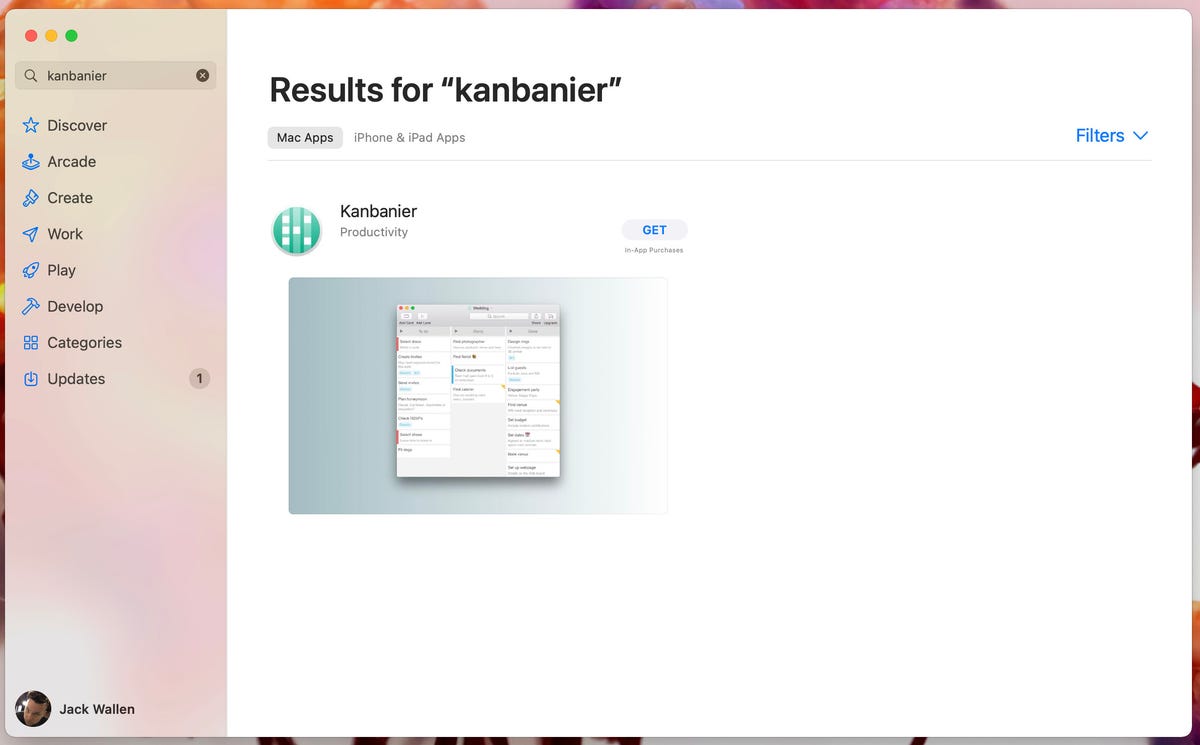
The Kanbanier listing in the Apple App Store.
Next, click INSTALL and then (when prompted) authenticate with either your user password or fingerprint scan. When the installation completes, you’ll find the Kanbanier application in Launchpad. Open the app and you can start adding new lanes and cards.
Adding Lanes
By default, you’ll only find a couple of Lanes added. As you can see (in Figure 2), I’ve already added my lanes and some cards to Kanbanier.
Figure 2
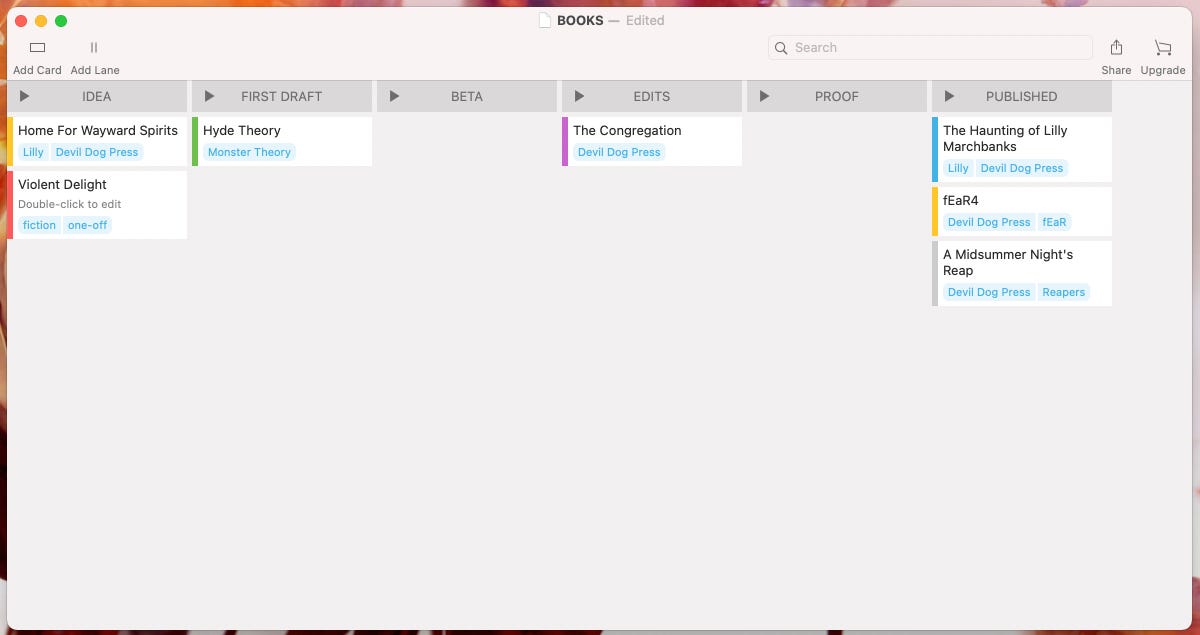
My current Kanbanier kanban board for books.
To add a new Lane, click Add Lane. You will be prompted to give the lane a name (Figure 3).
Figure 3
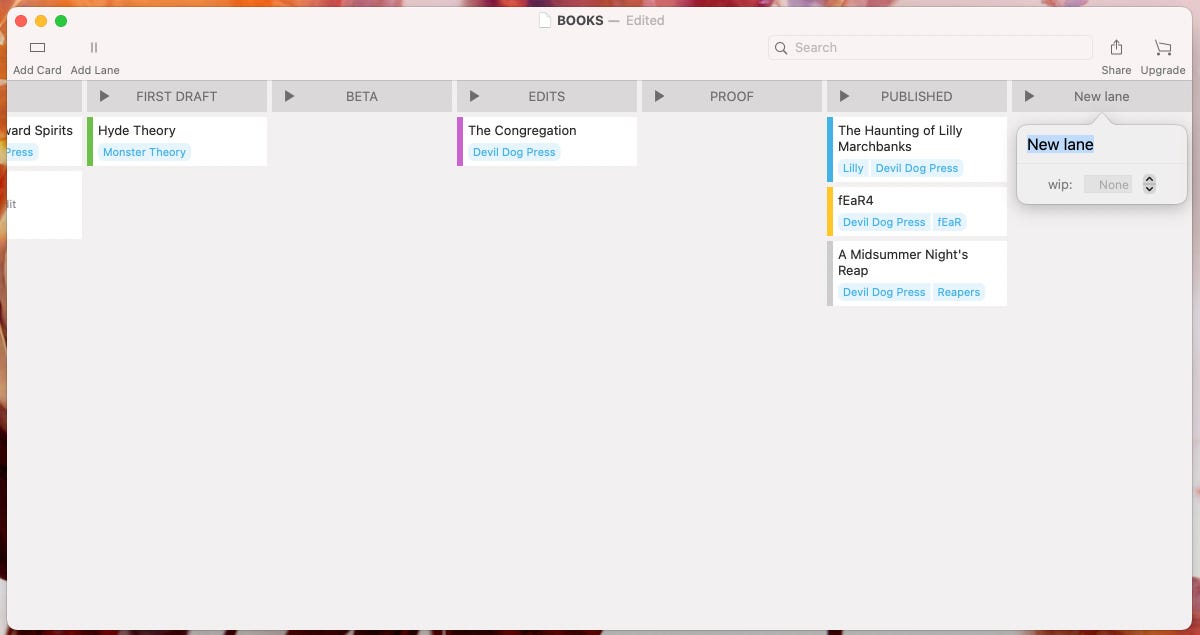
Adding a new Lane to my Kanbanier kanban board.
You will also notice the wip option in the Lane creation popup. This stands for Work In Progress and allows you to define a limit to how many Cards can be added to a Lane. If you want unlimited Cards in your Lanes, leave this option blank.
Adding Cards
Once you have all of your Lanes added, you can then start adding Cards. This is just as easy. Click Add Card and then, in the resulting popup (Figure 4), give the card a name and, if necessary, a description.
Figure 4
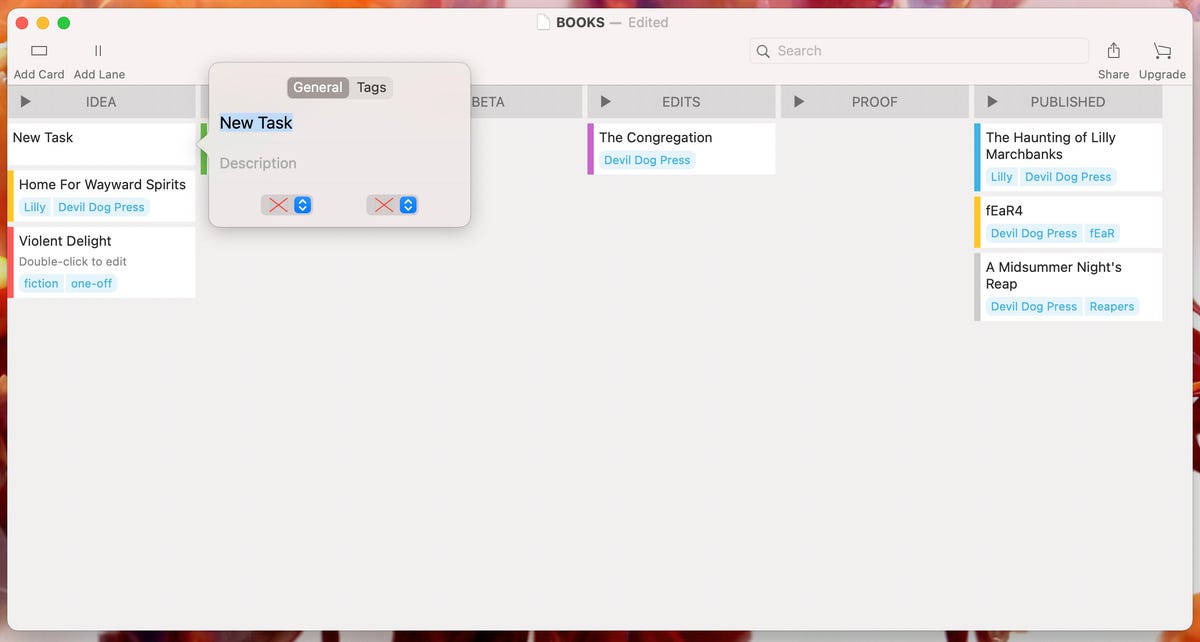
Adding a new card to a lane in Kanbanier.
You can also add a color to the card to coordinate tasks. For instance, you could color code for priority. As well, you can add tags to each card. To add a tag, click the Tags tab in the card creation popup and, in the resulting window (Figure 5), type the tags you want to be associated with the card.
Figure 5
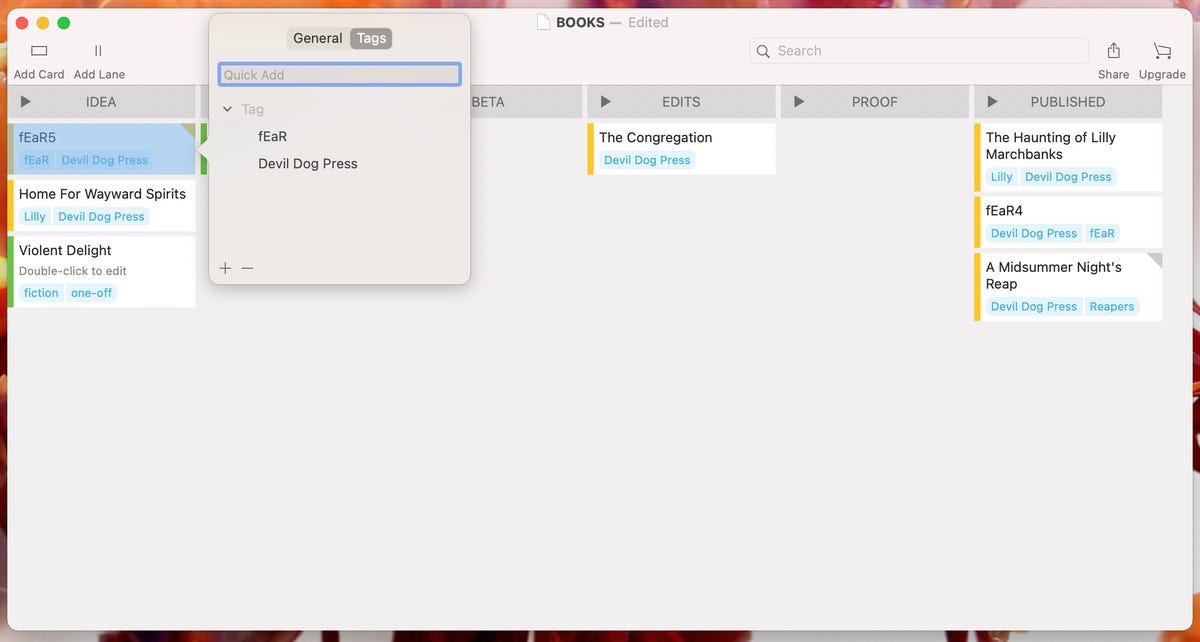
Add tags to a card for easier searching.
As a task is completed, click and drag it to the next lane. Continue doing this until the task is completed.
And that’s all there is to creating a handy kanban board with this brilliant little macOS app. Once you get the hang of using kanban, you’ll wonder how you ever managed without it.
For all the latest Technology News Click Here
For the latest news and updates, follow us on Google News.

