
For reasons known only to the company, Microsoft has chosen to exclude Desktop Stickers from personalization features in Windows 11. We will correct that oversight.
Despite whatever appeal such whimsical personalization features users may have in general, Microsoft has chosen to limit certain extracurricular and fun elements like Stickers to the educational audience. However, users of Home, Pro and Enterprise versions of Windows 11 22H2 can change this oversight with a tweak to the Windows Registry File.
SEE: Checklist: Securing Windows 11 systems (TechRepublic Premium)
How to edit the Windows 11 registry file
Disclaimer: Editing the Windows Registry file is a serious undertaking. A corrupted Windows Registry file could render your computer inoperable, requiring a reinstallation of the Windows operating system and potential loss of data. Back up the Windows Registry file and create a valid restore point before you proceed.
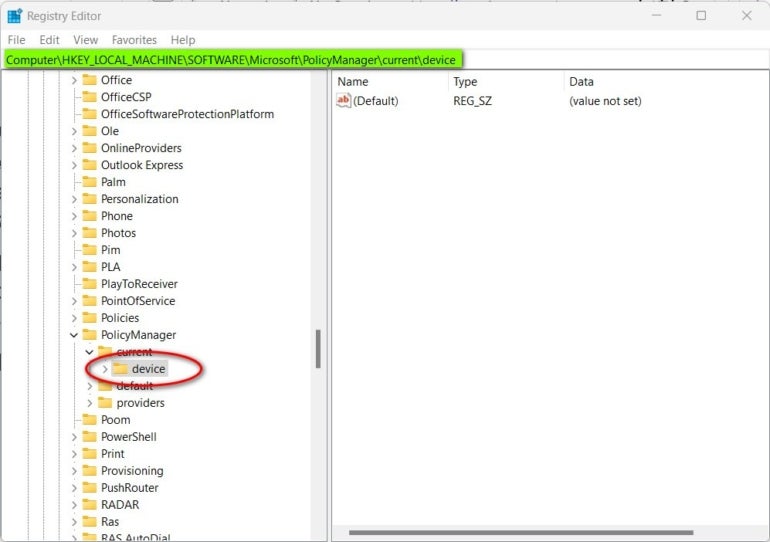
To make our edits in the Windows 11 Registry File, we will type “regedit” into the Windows 11 search tool. From the results, choose the Regedit app and then use the left-hand window to navigate to this key, as shown in Figure A: HKEY_LOCAL_MACHINE\SOFTWARE\Microsoft\PolicyManager\current\device.
Figure A
How to enable stickers after editing the registry file
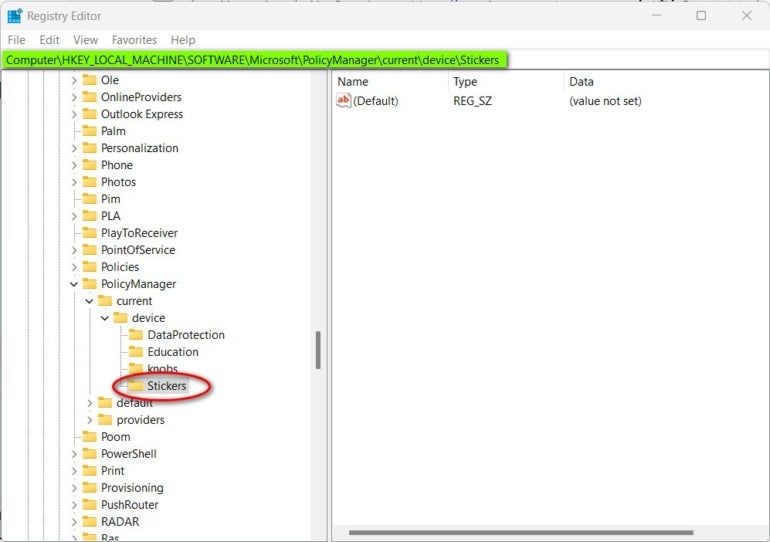
To enable stickers, we must create two new keys. First, right click the device key and select New | Key from the context menu. Name the new key Stickers, as shown in Figure B.
Figure B
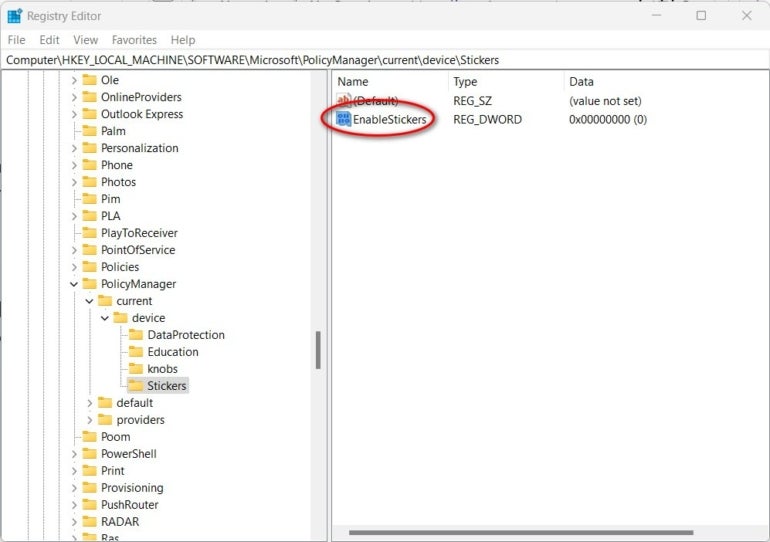
Now, right click the Stickers key you just created and select New | DWORD (32-bit) Value from the context menu. Name the new key EnableStickers, as shown in Figure C.
Figure C
Double click the new EnableStickers key you just created and change the Value data to 1, as shown in Figure D. Click OK and then exit the Registry Editor to complete the process.
Figure D

To see the results of your Registry File hack, open the Windows 11 Settings app and navigate to the Personalization screen. Click the Background item and scroll down to reveal a new item labeled Choose Stickers For Your Wallpaper in the list, as shown in Figure E.
Figure E

Click the Add Stickers button and you will be presented with a list of dozens of whimsical images. Pick as many as you want, arrange them on your desktop, and resize them to suit your current mood or particular fancy (Figure F).
Figure F

To disable Stickers for your Desktop in Windows 11, reopen the Registry File Editor and navigate back to the EnableStickers key and change the Value data to 0 (zero) or delete the key completely.
With a fairly simple and straightforward edit of the Windows 11 Registry File, any user can add Desktop Stickers to their set of personalization features. Such whimsy should not be confined to only the Windows Education marketplace.
For all the latest Technology News Click Here
For the latest news and updates, follow us on Google News.